Cloudera Manager安装之时间服务器和时间客户端(二)
福利 => 每天都推送
前期博客
Cloudera Manager安装之Cloudera Manager安装前准备(CentOS6.5)(一)
带大家手把手读cloudera官网
https://www.cloudera.com/documentation/enterprise/5-3-x.html
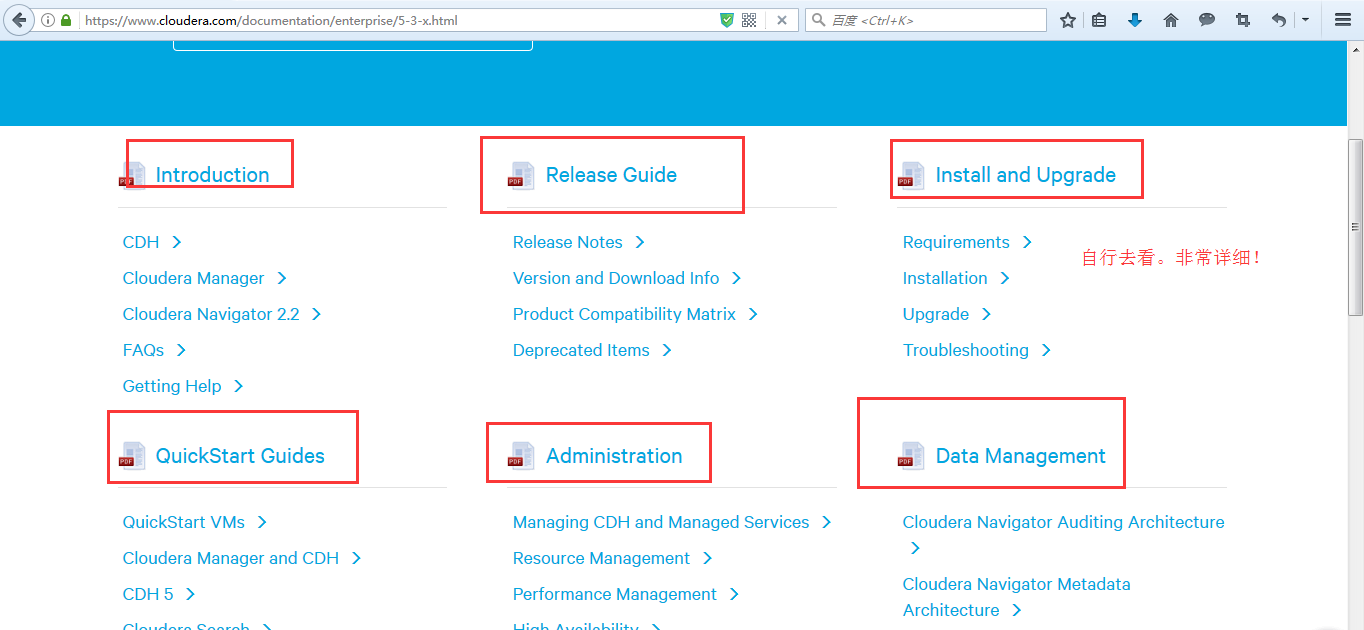
说明:这些是可以点击进入,就直接可以下载得到电子档了。我这里不多赘述。
(1) 找一台机器作为时间服务器
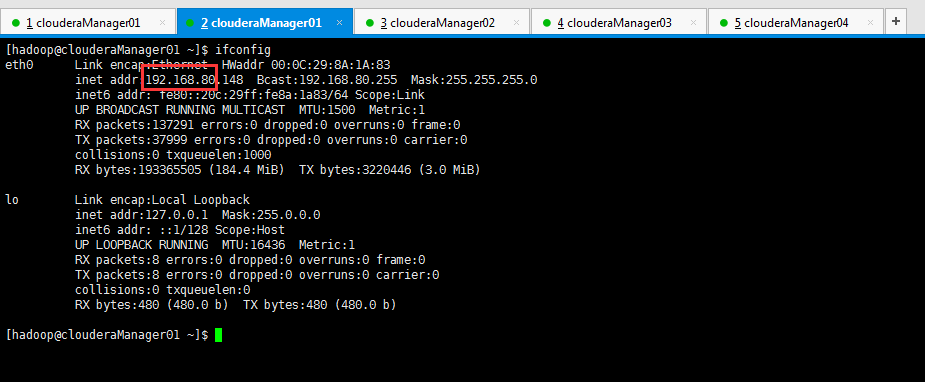
我这里,放到clouderaManager01这台机器!
注意,之前是已经做了集群时间同步了。

[hadoop@clouderaManager01 ~]$ sudo rpm -qa|grep ntp

fontpackages-filesystem-1.41-1.1.el6.noarch

ntp-4.2.6p5-.el6.centos..x86_64

ntpdate-4.2.6p5-.el6.centos..x86_64

[hadoop@clouderaManager01 ~]$ sudo vim /etc/ntp.conf
默认是如下
# For more information about this file, see the man pages

# ntp.conf(), ntp_acc(), ntp_auth(), ntp_clock(), ntp_misc(), ntp_mon().

driftfile /var/lib/ntp/drift

# Permit time synchronization with our time source, but do not

# permit the source to query or modify the service on this system.

restrict default kod nomodify notrap nopeer noquery

restrict - default kod nomodify notrap nopeer noquery

# Permit all access over the loopback interface.  This could

# be tightened as well, but to do so would effect some of

# the administrative functions.

restrict 127.0.0.1

restrict - ::

# Hosts on local network are less restricted.

#restrict 192.168.1.0 mask 255.255.255.0 nomodify notrap

# Use public servers from the pool.ntp.org project.

# Please consider joining the pool (http://www.pool.ntp.org/join.html).

server .centos.pool.ntp.org iburst

server .centos.pool.ntp.org iburst

server .centos.pool.ntp.org iburst

server .centos.pool.ntp.org iburst

#broadcast 192.168.1.255 autokey        # broadcast server

#broadcastclient                        # broadcast client

#broadcast 224.0.1.1 autokey            # multicast server

#multicastclient 224.0.1.1              # multicast client

#manycastserver 239.255.254.254         # manycast server

#manycastclient 239.255.254.254 autokey # manycast client

# Enable public key cryptography.
#crypto

includefile /etc/ntp/crypto/pw

# Key file containing the keys and key identifiers used when operating
# with symmetric key cryptography.
keys /etc/ntp/keys

# Specify the key identifiers which are trusted.
#trustedkey 4 8 42

# Specify the key identifier to use with the ntpdc utility.
#requestkey 8

# Specify the key identifier to use with the ntpq utility.
#controlkey 8

# Enable writing of statistics records.
#statistics clockstats cryptostats loopstats peerstats
注意,这里有2处地方需要我们进行修改,如下
因为,
所以,修改地方1:

restrict 192.168.80.0 mask 255.255.255.0 nomodify notrap
所以,修改地方2:
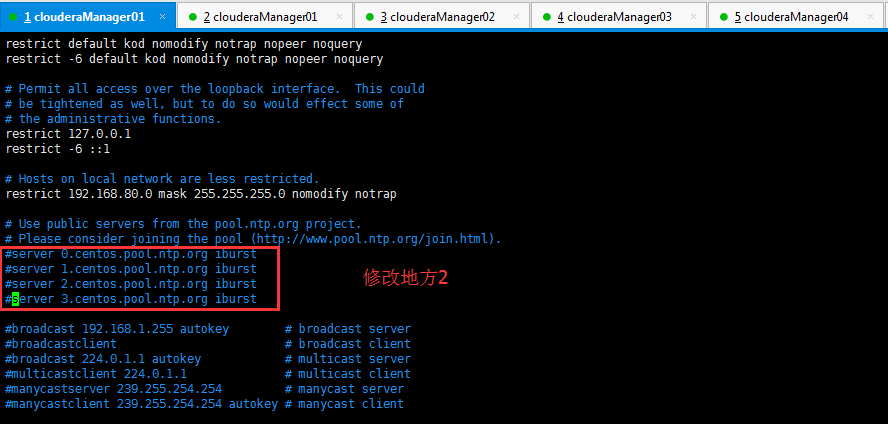
#server .centos.pool.ntp.org iburst

#server .centos.pool.ntp.org iburst

#server .centos.pool.ntp.org iburst

#server .centos.pool.ntp.org iburst
有些人的机器上,如果有,需要如下去掉注释。(我的这里是没有的)
server 127.127.1.0    #local  clock

fudge   127.127.1.0   stratum
(2)找一台机器与,保持boss与时间同步
我这里,放到clouderaManager01这台机器!

[hadoop@clouderaManager01 ~]$ sudo vi /etc/sysconfig/ntpd
默认是

# Drop root to id 'ntp:ntp' by default.

OPTIONS="-u ntp:ntp -p /var/run/ntpd.pid -g"
我们,需要进行修改

# Drop root to id 'ntp:ntp' by default.

SYNC_HWCLOCK=yes

OPTIONS="-u ntp:ntp -p /var/run/ntpd.pid -g"
只需,增加如上的一行即可。
然后,我们需设置clouderaManager01这台机器的时间服务器,为开机就启动,方便呗!
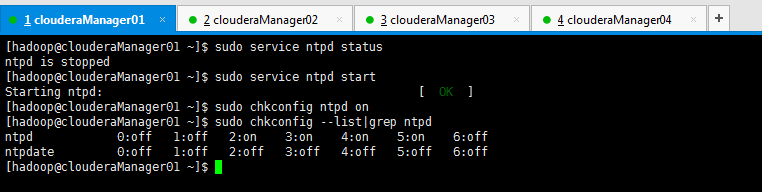
[hadoop@clouderaManager01 ~]$ sudo service ntpd status

ntpd is stopped

[hadoop@clouderaManager01 ~]$ sudo service ntpd start

Starting ntpd:                                             [  OK  ]

[hadoop@clouderaManager01 ~]$ sudo chkconfig ntpd on

[hadoop@clouderaManager01 ~]$ sudo chkconfig --list|grep ntpd

ntpd               :off    :off    :on    :on    :on    :on    :off

ntpdate            :off    :off    :off    :off    :off    :off    :off

[hadoop@clouderaManager01 ~]$
(2) 找三台机器作为时间客户端
我这里,放到clouderaManager02和clouderaManager03这三台机器!
注意,这里使用的是Linux的定时任务,即Linux Crontab,必须得root用户来操作啊!我这里是每10分钟同步一次!

[root@clouderaManager02 hadoop]# pwd

/home/hadoop

[root@clouderaManager02 hadoop]# crontab -l

no crontab for root

[root@clouderaManager02 hadoop]# crontab -e
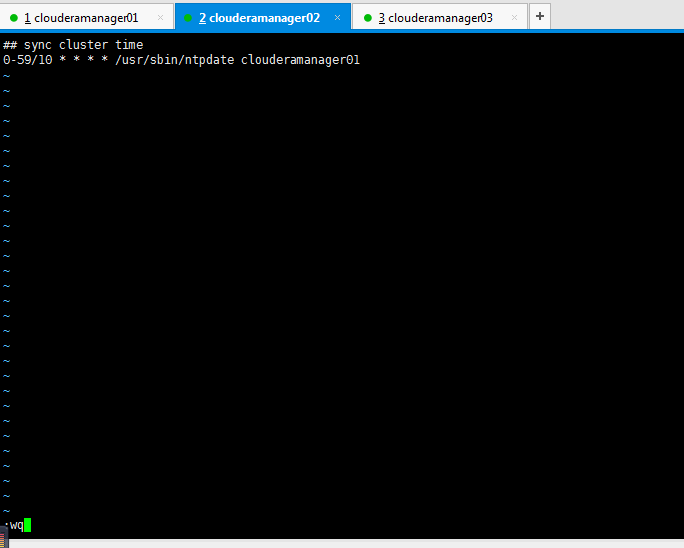
## sync cluster time

-/ * * * * /usr/sbin/ntpdate clouderamanager01
其实啊,这里的写法很多种,我这里不多赘述,我喜欢用这种。
第一个*是分
第二个*是时
第三个*是天
第四个*是月
clouderamanager01指的是,时间同步服务器是在哪台机器上。
10是每10分钟一次,比如,你也设置为5,即每5分钟一次。
clouderamanager03这台机器也是一样!这里不多赘述了。


***************************************************************
扩展:
若是在工作中以后,需要手动来时间同步,则分别在时间客户端(louderaManager02、clouderaManager03和clouderaManager04)上,执行
sudo /usr/sbin/ntpdate clouderaManager01
即可,我这里不多说。
***************************************************************
接下来,我们进入,CM的安装!
Cloudera Manager安装之Cloudera Manager 5.3.X安装(三)(tar方式、rpm方式和yum方式)
同时,大家可以关注我的个人博客:
http://www.cnblogs.com/zlslch/ 和 http://www.cnblogs.com/lchzls/ http://www.cnblogs.com/sunnyDream/
详情请见:http://www.cnblogs.com/zlslch/p/7473861.html
人生苦短,我愿分享。本公众号将秉持活到老学到老学习无休止的交流分享开源精神,汇聚于互联网和个人学习工作的精华干货知识,一切来于互联网,反馈回互联网。
目前研究领域:大数据、机器学习、深度学习、人工智能、数据挖掘、数据分析。 语言涉及:Java、Scala、Python、Shell、Linux等 。同时还涉及平常所使用的手机、电脑和互联网上的使用技巧、问题和实用软件。 只要你一直关注和呆在群里,每天必须有收获
对应本平台的讨论和答疑QQ群:大数据和人工智能躺过的坑(总群)(161156071)![]()
![]()
![]()
![]()
![]()


打开百度App,扫码,精彩文章每天更新!欢迎关注我的百家号: 九月哥快讯
Cloudera Manager安装之时间服务器和时间客户端(二)的更多相关文章
- Cloudera Manager安装之时间服务器和时间客户端(Ubuntu14.04)(二)
第二步: Cloudera Manager安装之时间服务器和时间客户端(二) 找一台机器作为时间服务器 我这里,放到ubuntucmbigdata1这台机器! 注意,之前是已经做了集群时间同步了. 在 ...
- Cloudera Manager安装_搭建CDH集群
2017年2月22日, 星期三 Cloudera Manager安装_搭建CDH集群 cpu 内存16G 内存12G 内存8G 默认单核单线 CDH1_node9 Server || Agent ...
- Cloudera Manager安装之Cloudera Manager 5.3.X安装(三)(tar方式、rpm方式和yum方式)
不多说,直接上干货! 福利每天都有 => =>=>=>=> 欢迎大家,关注微信扫码并加入我的4个微信公众号: 大数据躺过的坑 Java从入门到架构师 ...
- Cloudera Manager安装之Cloudera Manager安装前准备(CentOS6.5)(一)
Cloudera Manager安装前准备 (一)机器准备 192.168.80.148 clouderamanager01 (部署ClouderaManager-server和Mirror se ...
- Cloudera Manager安装之利用parcels方式安装3或4节点集群(包含最新稳定版本或指定版本的安装)(添加服务)(CentOS6.5)(五)
参考博客 Cloudera Manager安装之利用parcels方式安装单节点集群 Cloudera Manager安装之Cloudera Manager 5.3.X安装(三)(tar方式.rpm ...
- Cloudera Manager安装之利用parcels方式安装单节点集群(包含最新稳定版本或指定版本的安装)(添加服务)(CentOS6.5)(四)
不多说,直接上干货! 福利 => 每天都推送 欢迎大家,关注微信扫码并加入我的4个微信公众号: 大数据躺过的坑 Java从入门到架构师 人工智能躺过的坑 ...
- Cloudera Manager安装之利用parcels方式(在线或离线)安装3或4节点集群(包含最新稳定版本或指定版本的安装)(添加服务)(Ubuntu14.04)(五)
前期博客 Cloudera Manager安装之Cloudera Manager 5.6.X安装(tar方式.rpm方式和yum方式) (Ubuntu14.04) (三) 如果大家,在启动的时候,比如 ...
- Cloudera Manager 安装集群遇到的坑
Cloudera Manager 安装集群遇到的坑 多次安装集群,但每次都不能顺利,都会遇到很多很多的坑,今天就过去踩过的坑简单的总结一下,希望已经踩了的和正在踩的童鞋能够借鉴一下,希望对你们能有所帮 ...
- Cloudera Manager安装之Cloudera Manager安装前准备(Ubuntu14.04)(一)
其实,基本思路跟如下差不多,我就不多详细说了,贴出主要图. 博主,我是直接借鉴下面这位博主,来进行安装的!(灰常感谢他们!) 在线和离线安装Cloudera CDH 5.6.0 Cloudera M ...
随机推荐
- m2014_c:C 工具库1:list
转自:http://www.cnblogs.com/sniperHW/archive/2012/04/02/2429607.html 近来考虑将项目基础框架的开发语言从C++换成C,免不了要编写一大堆 ...
- 【BZOJ4254】Aerial Tramway 树形DP
[BZOJ4254]Aerial Tramway 题意:给你一座山上n点的坐标,让你在山里建m条缆车,要求缆车两端的高度必须相等,且中间经过的点的高度都小于缆车的高度.并且不能存在一个点位于至少k条缆 ...
- PHP HTTP协议:防盗链
test.html:主界面 <html> <head> <meta http-equiv="content-type" content="t ...
- 回车(CR)换行(LF)的来历及区别
转自https://blog.csdn.net/lw370481/article/details/8229344 一.回车”(Carriage Return)和“换行”(Line Feed)起源 回车 ...
- Linux Shell 文本处理工具集锦--Awk―sed―cut(row-based, column-based),find、grep、xargs、sort、uniq、tr、cut、paste、wc
本文将介绍Linux下使用Shell处理文本时最常用的工具:find.grep.xargs.sort.uniq.tr.cut.paste.wc.sed.awk:提供的例子和参数都是最常用和最为实用的: ...
- ui-router 视图嵌套时指定二级视图显示默认页面
当跳转到user页面时,右边的uiview是为空的,要点击了左侧的导航才能插入模板,如何在路由中设置二级视图的默认显示页面呢? app.config(function($stateProvider, ...
- mysql数据类型字段插入空字符串自动填充为0报错
有一条这样的sql语句, insert into a(id,user_name) values('','abc'); 表示插入字段的时候ID插入是空字符串.这样的情况在mysql5.6版本上执行报错. ...
- 机房断电导致MySQL同步1594错误
1.错误信息 Last_IO_Error: Got fatal error from master when reading data from binary log: ' at 208645951. ...
- 基于Django的乐观锁与悲观锁解决订单并发问题的一点浅见
订单并发这个问题我想大家都是有一定认识的,这里我说一下我的一些浅见,我会尽可能的让大家了解如何解决这类问题. 在解释如何解决订单并发问题之前,需要先了解一下什么是数据库的事务.(我用的是mysql数据 ...
- Websocket - Websocket原理(握手、解密、加密)、基于Python实现简单示例
一.Websocket原理(握手.解密.加密) WebSocket协议是基于TCP的一种新的协议.WebSocket最初在HTML5规范中被引用为TCP连接,作为基于TCP的套接字API的占位符.它实 ...