CentOS7配置httpd虚拟主机
本实验旨在CentOS7系统中,httpd-2.4配置两台虚拟主机,主要有以下要求:
(1) 提供两个基于名称的虚拟主机:
www1.stuX.com,页面文件目录为/web/vhosts/www1;错误日志为/var/log/httpd/www1/error_log,访问日志为/var/log/httpd/www1/access_log;
www2.stuX.com,页面文件目录为/web/vhosts/www2;错误日志为/var/log/httpd/www2/error_log,访问日志为/var/log/httpd/www2/access_log;
(2) 通过www1.stuX.com/server-status输出其状态信息,且要求只允许提供账号的用户访问;
(3) www1不允许192.168.1.0/24网络中的主机访问;
查看系统版本和httpd版本
[root@host ~]$httpd -v

Server version: Apache/2.4. (CentOS)

Server built:   Nov   ::

[root@host ~]$cat /etc/centos-release

CentOS Linux release 7.3. (Core)
启动httpd,测试能否正常运行
[root@host ~]$systemctl start httpd.service

[root@host ~]$systemctl status httpd.service

● httpd.service - The Apache HTTP Server

   Loaded: loaded (/usr/lib/systemd/system/httpd.service; enabled; vendor preset: disabled)

   Active: active (running) since Thu -- :: CST; 5s ago                      #   active 表示正常运行

     Docs: man:httpd()

           man:apachectl()

  Process:  ExecStop=/bin/kill -WINCH ${MAINPID} (code=exited, status=/SUCCESS)

 Main PID:  (httpd)

   Status: "Processing requests..."

   CGroup: /system.slice/httpd.service

           ├─ /usr/sbin/httpd -DFOREGROUND

           ├─ /usr/sbin/httpd -DFOREGROUND

           ├─ /usr/sbin/httpd -DFOREGROUND

           ├─ /usr/sbin/httpd -DFOREGROUND

           ├─ /usr/sbin/httpd -DFOREGROUND

           └─ /usr/sbin/httpd -DFOREGROUND

Jun  :: host systemd[]: Starting The Apache HTTP Server...

Jun  :: host systemd[]: Started The Apache HTTP Server.
使用curl命令访问
[root@host ~]$ip a show ens38    # 查看ip

: ens38: <BROADCAST,MULTICAST,UP,LOWER_UP> mtu  qdisc pfifo_fast state UP qlen

    link/ether :0c::dc::5f brd ff:ff:ff:ff:ff:ff

    inet 192.168.55.128/ brd 192.168.55.255 scope global dynamic ens38

       valid_lft 1752sec preferred_lft 1752sec

    inet6 fe80::20c:29ff:fedc:185f/ scope link

       valid_lft forever preferred_lft forever

[root@host ~]$curl http://192.168.55.128       # 访问

<!DOCTYPE>

<h1>

    CentOS 7.3

</h1>
创建指定文件目录
[root@host conf.d]$mkdir -pv /web/vhosts/www1

[root@host conf.d]$mkdir -pv /web/vhosts/www2
[root@host conf.d]$mkdir -pv /var/log/httpd/www2
[root@host conf.d]$mkdir -pv /var/log/httpd/www1
根据要求填写虚拟主机配置信息
# path /etc/httpd/conf.d/vir.conf      # 配置文件全路径

#virtual host 1     # 虚拟主机1的配置

<VirtualHost 192.168.55.128:>

    ErrorLog "/var/log/httpd/www1/error_log"

    CustomLog "/var/log/httpd/www1/access_log" combined

    <Location /server-status>

        SetHandler server-status

    </Location>

    <Directory /web/vhosts/www1>

        <RequireAll>

        Require all granted

        Require not ip 192.168.

        </RequireAll>

    </Directory>

</VirtualHost>

# virtual host 2     # 虚拟主机2的配置

<VirtualHost 192.168.55.128:>

    ServerName www2.stuX.com

    DocumentRoot "/web/vhosts/www2"

    ErrorLog "/var/log/httpd/www2/error_log"

    CustomLog "/var/log/httpd/www2/access_log" combined

    <Directory /web/vhosts/www2>

        <RequireAll>

          Require all granted

        </RequireAll>

    </Directory>

</VirtualHost>
创建www1和www2的index页面
[root@host conf.d]$cat /web/vhosts/www1/index.html

welcome to www1

thank you

[root@host conf.d]$cat  /web/vhosts/www2/index.html

welcome to www2

thank you
重载httpd配置文件
[root@host conf.d]$httpd -t

Syntax OK

[root@host conf.d]$systemctl reload httpd.service
修改客户端主机的hosts文件,以便能解析域名
hosts在windows环境下的路径为C:\Windows\System32\drivers\etc。在该文件中添加两行
192.168.55.128 www1.stuX.com

192.168.55.128 www2.stuX.com
访问结果
图1 访问www1站点
图2 访问www2站点
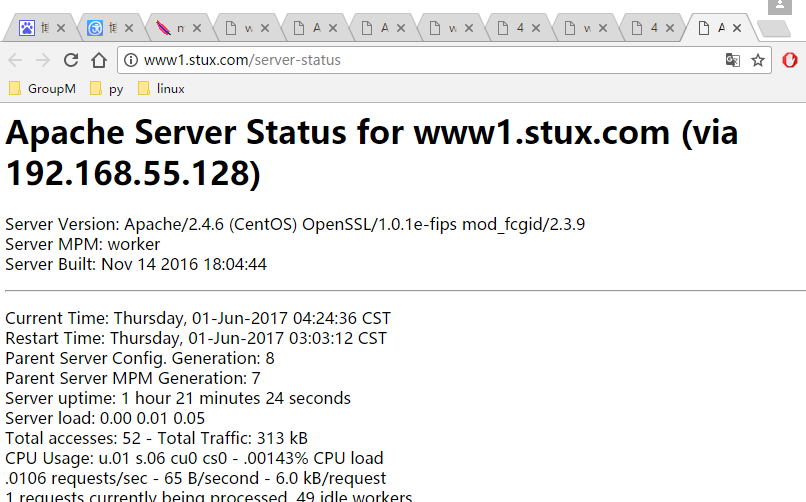
图3 查看www1站点的访问状态——正常

图4 查看www2站点的访问状态错误
CentOS7配置httpd虚拟主机的更多相关文章
- 配置httpd虚拟主机
轻松配置httpd的虚拟主机 httpd使用VirtualHost指令进行虚拟主机的定义.支持三种虚拟主机:基于ip,基于端口和基于名称.其中基于端口的虚拟主机在httpd的术语上(例如官方手册)也属 ...
- Centos7 nginx配置多虚拟主机过程
一.前提准备 1.已经安装好了的Centos7服务器 2.ip 为192.168.1.209 [本次的配置ip] 3.确定防火墙等已经关闭 二.nignx配置文件参数详解 要配置多台虚拟主机,就需 ...
- apache 多端口配置和虚拟主机配置
1 打开httpd.conf文件 2 添加端口监听 (找到Lisen 80 在后面添加 Listen 端口号 如Listen 1112) port =>你的端口 project_name=> ...
- PHP中级篇 Apache配置httpd-vhosts虚拟主机总结及注意事项[OK]
经常使用Apache虚拟主机进行开发和测试,但每次需要配置虚拟主机时都习惯性的ctrl+c和ctrl+v,这次由于重装系统,需要配置一个新的PHP开发环境虚拟主机,于是总结一下Apaceh配置http ...
- 配置Apache虚拟主机
实验环境 一台最小化安装的CentOS 7.3虚拟机 配置基础环境 1. 安装apache yum install -y httpd 2. 建立虚拟主机的根目录 mkdir /var/wwwroot ...
- WIN10 vagrant和virtualbox虚拟机和一键搭建lnmp环境配置thinkphp虚拟主机
版本:win10系统 virtualbox:5.1.26 vagrant :1.9.7 centos 7.0 xshell/git 首先下载好对应版本的软件 配置vagrant和virtualbox ...
- wamp开发环境配置之配置Apache虚拟主机
网站建设人员在本地测试时,常常不是一个网站,那怎么能像输入域名一样在地址栏上面输入“域名”就能本地访问该网站呢?这里就要配置Apache虚拟主机了! 1.找到apache\conf\httpd.con ...
- httpd虚拟主机起不来!!
前几天在公司,练习负载均衡配置.在配置虚拟主机的web服务(apache) ,创建好虚拟主机的配置文件 ss -tnl 查看监控端口80已起来,通过本地浏览器访问一直显示默认的欢迎页... 一个下午 ...
- 配置LANMP环境(7)-- 配置nginx反向代理,与配置apache虚拟主机
一.配置nginx反向代理 1.修改配置文件 vim /etc/nginx/nginx.conf 在35行http下添加一下内容: include /data/nginx/vhosts/*.conf; ...
随机推荐
- 关于for循环
1.普通for循环 (遍历数组的索引值(下标),边界可以自己划定) var arr = [10, 20, 30];for(var i=0; i<arr.length; i++) console. ...
- .net 调用python 实例
如标题 ,python属于解释型语言,所以直接将python的文件copy到项目中 新建.net控制台应用程序,直接nuget IronPython 安装成功后 在项目内新建Sum文件夹,将py.p ...
- 安装Linux系统,学习Linux操作基础
20189230杨静怡 2018-2019-2 <移动平台开发实践>第1周学习总结 安装Linux系统内容总结 一.学习"基于VirtualBox虚拟机安装Ubuntu图文教程& ...
- pandas的Panel类型dtype
panel = pd.Panel(dataframe_dict) 把一个多列类型不相同(里面有int,float)的dataframe字典直接赋值给Panel,从Panel中解析出来的datafram ...
- Tomcat不加项目名称访问设置
一.Tomcat不加项目名称访问设置 一.方法一:修改配置文件server.xml 1.修改配置文件server.xml <Host appBase="webapps" au ...
- Cocos Creator - 入门教程项目 - 博客频道 - CSDN.NET
3457 教程司令部 [20160418] | Cocos Creator - CocoaChina CocoaChina_让移动开发更简单cocoachina.com 2033 Cocos Crea ...
- Vue系列之 => ref获取DOM元素和组件
可以获取DOM元素,和组件中的数据,方法 <!DOCTYPE html> <html lang="en"> <head> <meta ch ...
- https://scrapingclub.com/exercise/basic_login/
遇到的问题:csrftoken cfduid 是在request.headers里面的,一直在找怎么在scrapy里get request.header,从scrapy shell ,then fet ...
- JS设计模式(6)命令模式
什么是命令模式? 定义:将一个请求封装成一个对象,从而使您可以用不同的请求对客户进行参数化. 主要解决:在软件系统中,行为请求者与行为实现者通常是一种紧耦合的关系,但某些场合,比如需要对行为进行记录. ...
- Python文档记录
Beautiful Soup 4.2.0 文档 Python3网络爬虫开发实战 Python库-requests 文档 Selenium with Python中文翻译文档 http://www.te ...