AppBar中自定义顶部导航
在上一篇里总结AppBar的一些简单用法,但是AppBar除了有前面那些样式属性外,还能实现类似底部的Tab切换。
首先下载并运行前面的项目:
然后在此基础上实现Tab切换。
常见属性
TabBar有一下常见的属性:
- tabs :显示的标签内容,一般使用 Tab 对象,也可以是其他的 Widget
- controller :TabController 对象
- isScrollable :是否可滚动
- indicatorColor :指示器颜色
- indicatorWeight :指示器高度
- indicatorPadding :底部指示器的 Padding
- indicator :指示器 decoration,例如边框等
- indicatorSize :指示器大小计算方式,TabBarIndicatorSize.label 跟文字等宽,TabBarIndicatorSize.tab 跟每个 tab 等宽
- labelColor :选中 label 颜色
- labelStyle :选中 label 的 Style
- labelPadding :每个 label 的 padding 值
- unselectedLabelColor :未选中 label 颜色
- unselectedLabelStyle :未选中 label 的 Style
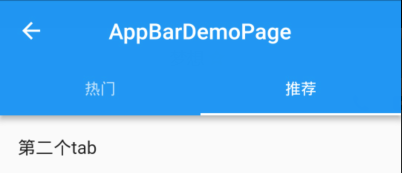
基本实现
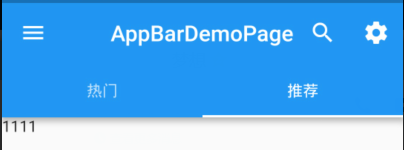
为了实现顶部的Tabs切换,首先需要在Scaffold的外层定义一个DefaultTabController组件,然后组件里面定义tab的个数,最后将TabBar定义在AppBar里面的bottom属性中。根据这些,我们来修改前面的
import 'package:flutter/material.dart';

class AppBarDemoPage extends StatelessWidget {

  const AppBarDemoPage({Key key}) : super(key: key);

  @override

  Widget build(BuildContext context) {

    return DefaultTabController(

      length:2 ,

      child: Scaffold(

        appBar: AppBar(

          title:Text("AppBarDemoPage"),

          // backgroundColor: Colors.red,

          centerTitle:true,

          leading: IconButton(

            icon: Icon(Icons.menu),

            onPressed: (){

              print('menu');

            },

          ),

          actions: <Widget>[

            IconButton(

              icon: Icon(Icons.search),

              onPressed: (){

                print('search');

              },

            ),

            IconButton(

              icon: Icon(Icons.settings),

              onPressed: (){

                print('settings');

              },

            )

          ],

          bottom: TabBar(

            tabs: <Widget>[

              Tab(text: "热门"),

              Tab(text: "推荐")

            ],

          ),

        ),

        body: Text('1111'),

      ),

    );

  }

}
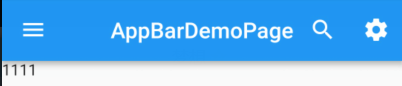
为了简化代码,删掉前面关于AppBar的属性设置:
AppBarDemo.dart
import 'package:flutter/material.dart';

class AppBarDemoPage extends StatelessWidget {

  const AppBarDemoPage({Key key}) : super(key: key);

  @override

  Widget build(BuildContext context) {

    return DefaultTabController(

      length:2 ,

      child: Scaffold(

        appBar: AppBar(

          title:Text("AppBarDemoPage"),

          centerTitle:true,

          bottom: TabBar(

            tabs: <Widget>[

              Tab(text: "热门"),

              Tab(text: "推荐")

            ],

          ),

        ),

        body: Text('1111'),

      ),

    );

  }

}
现在,只有跳转的按钮,却没有对应的页面组件,所以,还需要在body里面添加tabs切换的页面。
目前,是在一个新的页面添加了顶部Tabs切换,那么,如果需要在底部TabBar页面基础上添加Tabs切换,又该如何操作呢?
TabBar中添加顶部Tab切换
按照前面说的,在Scaffold的外层定义一个DefaultTabController组件,先这样修改Category.dart页面:
import 'package:flutter/material.dart';
class CategoryPage extends StatefulWidget {
CategoryPage({Key key}) : super(key: key);
_CategoryPageState createState() => _CategoryPageState();
}
class _CategoryPageState extends State<CategoryPage> {
@override
Widget build(BuildContext context) {
return DefaultTabController(
length: 4,
child: Scaffold(
appBar: AppBar(
bottom:TabBar(
tabs: <Widget>[
Tab(text: "热销"),
Tab(text: "推荐"),
Tab(text: "推荐"),
Tab(text: "推荐")
],
) ,
),
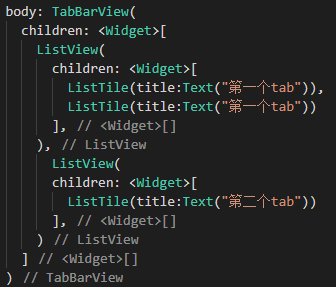
body:TabBarView(
children: <Widget>[
ListView(
children: <Widget>[
ListTile(title:Text("第一个tab")),
],
),
ListView(
children: <Widget>[
ListTile(title:Text("第二个tab")),
],
),
ListView(
children: <Widget>[
ListTile(title:Text("第三个tab")),
],
),
ListView(
children: <Widget>[
ListTile(title:Text("第四个tab")),
],
)
],
)
),
);
}
}
因为Category.dart是挂载到Tabs.dart中的,而在Tabs.dart中,已经有一个Scaffold组件和AppBar组件了,所以,继续添加顶部Tabs以后,就会有两个Scaffold组件和AppBar组件。

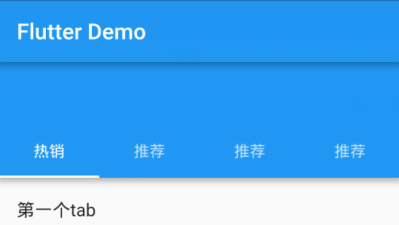
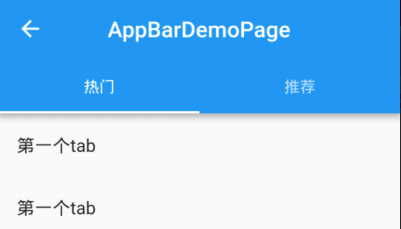
为了解决上面的问题,只需要将Tabs切换换个位置,移动到title所在的位置就可以了:
import 'package:flutter/material.dart';

class CategoryPage extends StatefulWidget {

  CategoryPage({Key key}) : super(key: key);

  _CategoryPageState createState() => _CategoryPageState();

}

class _CategoryPageState extends State<CategoryPage> {

  @override

  Widget build(BuildContext context) {

    return DefaultTabController(

      length: 4,

      child: Scaffold(

        appBar: AppBar(

          backgroundColor: Colors.black26,

          title: Row(

            mainAxisAlignment: MainAxisAlignment.center,

            children: <Widget>[

              Expanded(

                child:TabBar(
                  indicatorColor:Colors.blue,

                  labelColor:Colors.blue,

                  unselectedLabelColor: Colors.white,

                  indicatorSize:TabBarIndicatorSize.label ,

                  tabs: <Widget>[

                    Tab(text: "热销"),

                    Tab(text: "推荐"),

                    Tab(text: "推荐"),

                    Tab(text: "推荐")

                  ],

                ) ,

              )

            ],

          ),

        ),

        body:TabBarView(

          children: <Widget>[

            ListView(

                children: <Widget>[

                  ListTile(title:Text("第一个tab")),

                ],

              ),

            ListView(

                children: <Widget>[

                  ListTile(title:Text("第二个tab")),

                ],

              ),

              ListView(

                children: <Widget>[

                  ListTile(title:Text("第三个tab")),

                ],

              ),

            ListView(

                children: <Widget>[

                  ListTile(title:Text("第四个tab")),

                ],

              )

          ],

        )

      ),

    );

  }

}

AppBar中自定义顶部导航的更多相关文章
- Flutter AppBar 自定义顶部导航按钮 图标、颜色 以及 TabBar 定义顶部 Tab 切换
Flutter AppBar 自定义顶部按钮图 标.颜色 属性 描述 leading 在标题前面显示的一个控件,在首页通常显示应用 的 logo;在其他界面通常显示为返回按钮 title 标题,通常显 ...
- AppBar 自定义顶部导航按钮 图标、颜色 以及 TabBar 定义顶部 Tab 切换
一.Flutter AppBar 自定义顶部按钮图标.颜色 leading 在标题前面显示的一个控件,在首页通常显示应用的 logo:在其他界面通常显示为返回按钮 title 标题,通常显示为当 ...
- 微信小程序自定义顶部导航
注释:自定义导航需要自备相应图片 一.设置自定义顶部导航 Navigation是小程序的顶部导航组件,当页面配置navigationStyle设置为custom的时候可以使用此组件替代原生导航栏. 1 ...
- Flutter——AppBar组件(顶部导航组件)
AppBar组件的常用属性如下: 属性 描述 leading 在标题前面显示的一个控件,在首页通常显示应用的 logo:在其他界面通常显示为返回按钮 title 标题,通常显示为当前界面的标题文字,可 ...
- ionic3.0 中带顶部导航的下拉刷新列表的实现
1.最终实现效果 2.html代码布局: 3.css样式控制(注:下面这两个css类名需在浏览器解析后才可看到)
- [置顶]
xamarin Tablayout+Viewpager+Fragment顶部导航栏
最近几天不忙,所以把项目中的顶部导航栏的实现归集一下.android中使用TabLayout+ViewPager+Fragment制作顶部导航非常常见,代码实现也比较简单.当然我这个导航栏是基于xam ...
- yii2顶部导航使用
yii2中使用顶部导航的具体方法: 1.视图中调用两个类: use yii\bootstrap\Nav;use yii\bootstrap\NavBar; 2. <?php ...
- uni-app自定义导航栏按钮|uniapp仿微信顶部导航条
最近一直在学习uni-app开发,由于uniapp是基于vue.js技术开发的,只要你熟悉vue,基本上很快就能上手了. 在开发中发现uni-app原生导航栏也能实现一些顶部自定义按钮+搜索框,只需在 ...
- TabTopLayout【自定义顶部选项卡区域(固定宽度且居中)】
版权声明:本文为HaiyuKing原创文章,转载请注明出处! 前言 自定义顶部选项卡并居中显示.结合显示/隐藏view的方式实现切换功能(正常情况下可能是切换fragment). 效果图 代码分析 T ...
随机推荐
- 阶段1 语言基础+高级_1-3-Java语言高级_06-File类与IO流_04 IO字节流_11_字节输入流一次读取多个字节
参数带字节数组的 把字节数组转换为字符串 文件里面有ABCDE 再来读取一次 再来读取一次.读取的结果是ED 再来读取,-1到时输出了.但是还是把ED读取出来了. 原理 第一步创建流对象 第二部创建数 ...
- WPF与DevExpress之——实现类似于安装程序下一步下一步的样式窗体
话不多说先上图 点击下一步 跳转到第二页 项目准备: 1.DevExpress 19/18/17(三个版本都可以) 2.Vs2019 3..Net framework>4.0 项目结构: ...
- MIUI8改MAC
1.手机Root 2.RE文件管理器复制:/data/nvram/APCFG/APRDEB/WIFI 到电脑上 3.如下图用UltraEdit打开WIFI文件修改MAC 4.拷贝修改后的WIFI文件到 ...
- redis 设置密码 和 redis.config文件
- LeetCode——160 Intersection of Two Linked Lists
题目 Input: intersectVal = 8, listA = [4,1,8,4,5], listB = [5,0,1,8,4,5], skipA = 2, skipB = 3 Output: ...
- spring包
下载的spring包中文件及各种包众多,在项目中往往只有部分是我们必须的,如果不清楚什么时候需要什么包的话,看看下面就知道了. aspectj目录 下是在Spring框架下使用aspectj的源代码和 ...
- Ecshop二次开发必备基础
EcShop二次开发学习方法 近年来,随着互联网的发展,电子商务也跟着一起成长,B2B,C2C,B2C的电子商务模式也不断的成熟.这时催生出了众多电子商务相关的PHP开源产品.B2C方面有Ecshop ...
- RocketMQ安装部署及整合Springboot
消息中间件的功能: 通过学习ActiveMq,kafka,rabbitMq这些消息中间件,我们大致能为消息中间件的功能做一下以下定义:可以先从基本的需求开始思考 最基本的是要能支持消息的发送和接收,需 ...
- 当系统开启safe_mode和 open_basedir
当系统开启safe_mode和 open_basedir,在程序中使用以下语句curl_setopt($curl, CURLOPT_FOLLOWLOCATION, 1);并且遇到301,302状态吗时 ...
- Neo4j 修改关系类型 type
没有直接修改的函数,也不需要,下面代码就可以: MATCH (n:User {name:"foo"})-[r:REL]->(m:User {name:"bar&qu ...