Windows 8.1 应用再出发 - 几种新增控件(2)
本篇我们接着来介绍Windows 8.1 的新增控件,分别是:Flyout、MenuFlyout、SettingsFlyout、Hub 和 Hyperlink。
1. Flyout
Flyout被称为浮出控件,能起到提示或者简单交互作用。我们可以利用它来要求用户确认操作、收集用户输入信息或显示提示信息等。只有当用户点击时才显示Flyout,当点击外部任意点时,Flyout消失。
Flyout通常会附加到Button上,所以Button拥有Flyout属性来简化附加和使用的过程。
            <Button Content="Delete it">

                <Button.Flyout>

                    <Flyout>

                        <StackPanel>

                            <TextBlock>This item will be deleted. Do you want to continue ?</TextBlock>

                            <Button Click="DeleteConfirmation_Click">Yes, delete it.</Button>

                        </StackPanel>

                    </Flyout>

                </Button.Flyout>

            </Button>
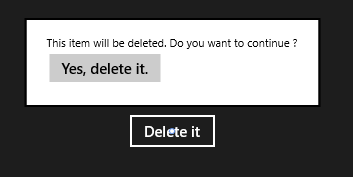
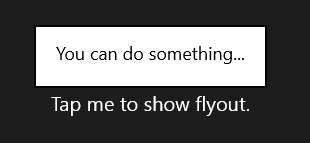
如上图所示,我们为Button附加了Flyout控件,当Button点击时,Flyout出现。当点击外部任意点时,Flyout消失。当然其他控件也能使用Flyout控件,这就需要使用FlyoutBase.AttachedFlyout附加属性。这时我们必须响应控件的交互操作,并在代码中控制打开Flyout。
            <TextBlock Text="Tap me to show flyout." Tapped="TextBlock_Tapped" FontSize="20">

                <FlyoutBase.AttachedFlyout>

                    <Flyout>

                        <TextBlock FontSize="18" Text="You can do something..."/>

                    </Flyout>

                </FlyoutBase.AttachedFlyout>

            </TextBlock>
下面是TextBlock的Tapped事件处理
        private void TextBlock_Tapped(object sender, TappedRoutedEventArgs e)

        {

            TextBlock tb = sender as TextBlock;

            if (tb != null)

            {

                FlyoutBase.ShowAttachedFlyout(tb);

            }

        }
2. MenuFlyout
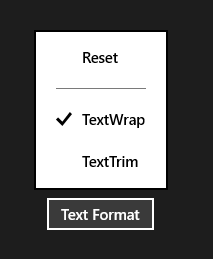
MenuFlyout被称为菜单浮出控件,能够浮出显示菜单。大家看名字就能猜出,MenuFlyout 和 Flyout的用法很相似,可参照我们刚刚介绍的Flyout例子。而不同就在于MenuFlyout可以通过MenuFlyoutItem、ToggleMenuFlyoutItem 和 MenuFlyoutSeparator轻松定义菜单内容。
- MenuFlyoutItem —— 执行即时操作
- ToggleMenuFlyoutItem —— 打开或关闭选项
- MenuFlyoutSeparator —— 菜单项之间的分隔符
我们下面以Button为例来演示MenuFlyout的用法
            <Button Content="Text Format">

                <Button.Flyout>

                    <MenuFlyout>

                        <MenuFlyoutItem Text="Reset" Click="Reset_Click"/>

                        <MenuFlyoutSeparator/>

                        <ToggleMenuFlyoutItem Text="TextWrap" IsChecked="True"/>

                        <ToggleMenuFlyoutItem Text="TextTrim" IsChecked="False"/>

                    </MenuFlyout>

                </Button.Flyout>

            </Button>
3. SettingsFlyout
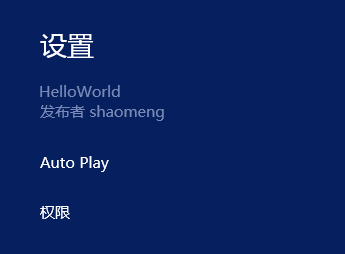
SettingsFlyout被称为设置浮出控件,利用它我们可以更轻松的创建应用设置的浮出控件。用户可以通过“设置”超级按钮来访问设置浮出控件,或触发我们定义的事件来访问。下面我们来演示如何通过触发事件的方式来访问SettingsFlyout。
首先,新建一个SettingsFlyout控件,步骤是:添加新建项 -> 在对话框中,选择““设置”浮出控件” -> 设置名称为 AutoplaySettingsFlyout。
<SettingsFlyout

    x:Class="HelloWorld.AutoplaySettingsFlyout"

    xmlns="http://schemas.microsoft.com/winfx/2006/xaml/presentation"

    xmlns:x="http://schemas.microsoft.com/winfx/2006/xaml"

    xmlns:local="using:HelloWorld"

    xmlns:d="http://schemas.microsoft.com/expression/blend/2008"

    xmlns:mc="http://schemas.openxmlformats.org/markup-compatibility/2006"

    mc:Ignorable="d"

    IconSource="Assets/SmallLogo.png"

    Title="Autoplay"

    d:DesignWidth="346" Width="346">

    <!-- 此 StackPanel 充当内容部分的垂直布局的根面板-->

    <StackPanel VerticalAlignment="Stretch" HorizontalAlignment="Stretch" >

        <!-- 下列 StackPanel 定义个别内容部分-->

        <!-- 第 1 部分内容-->

        <StackPanel Style="{StaticResource SettingsFlyoutSectionStyle}">

            <!-- 第 1 部分标题-->

            <TextBlock Style="{StaticResource TitleTextBlockStyle}" Text="Automatic plays" />

            <!-- 第 1 部分正文-->

            <TextBlock Style="{StaticResource BodyTextBlockStyle}" Margin="0,0,0,25" TextWrapping="Wrap">

                <TextBlock.Text>

                    Turn automatic playing on or off.

                </TextBlock.Text>

            </TextBlock>

            <ToggleSwitch Header="play automatically" />

        </StackPanel>

        <!-- 根据需要在下面定义更多内容部分-->

    </StackPanel>

</SettingsFlyout>
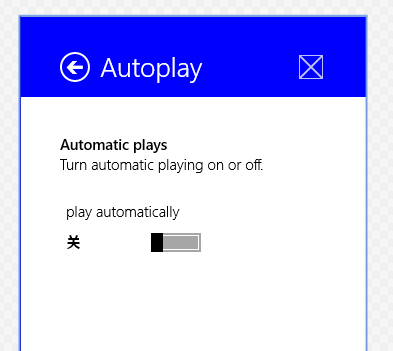
如上面代码和效果图所示,SettingsFlyout控件可以调整宽度和背景色,但高度一般是应用的高度。头部中包括了标题,回退按钮和应用图标。内容部分采用的是StackPanel流式布局。下面我们看看怎么把它添加到“设置”的窗体中。
        public MainPage()

        {

            this.InitializeComponent();

            Windows.UI.ApplicationSettings.SettingsPane.GetForCurrentView().CommandsRequested += MainPage_CommandsRequested;

        }

        void MainPage_CommandsRequested(Windows.UI.ApplicationSettings.SettingsPane sender, Windows.UI.ApplicationSettings.SettingsPaneCommandsRequestedEventArgs args)

        {

            Windows.UI.ApplicationSettings.SettingsCommand updateSetting =

                new Windows.UI.ApplicationSettings.SettingsCommand("AppUpdateSettings", "Auto Play", (handler) =>

                {

                    AutoplaySettingsFlyout autoplayFlyout = new AutoplaySettingsFlyout();

                    autoplayFlyout.Show();

                });

            args.Request.ApplicationCommands.Add(updateSetting);

        }
这样我们就把SettingsFlyout控件添加到“设置”中了,名字是'Auto Play',下面我们看看怎么通过按钮点击的方式来访问它。
<Button Content="App update settings" Click="AutoplaySettingsButton_Click"/>
        private void AutoplaySettingsButton_Click(object sender, RoutedEventArgs e)

        {

            AutoplaySettingsFlyout autoplayFlyout = new AutoplaySettingsFlyout();

            autoplayFlyout.Show();

        }
通过按钮点击事件,我们调用了SettingsFlyout控件的Show方法,这样控件就可以访问了。当控件中的回退按钮点击后,浮出控件关闭并重新打开设置窗体。
如果我们调用的是ShowIndependent方法,回退按钮点击后,浮出控件关闭并回到应用中。同时我们也可以通过调用控件的Hide方法来关闭浮出控件,效果和回退按钮点击类似。
需要注意的是,一次只能显示一个浮出控件,调用Show/ShowIndependent 方法显示会关闭当前其他浮出控件。
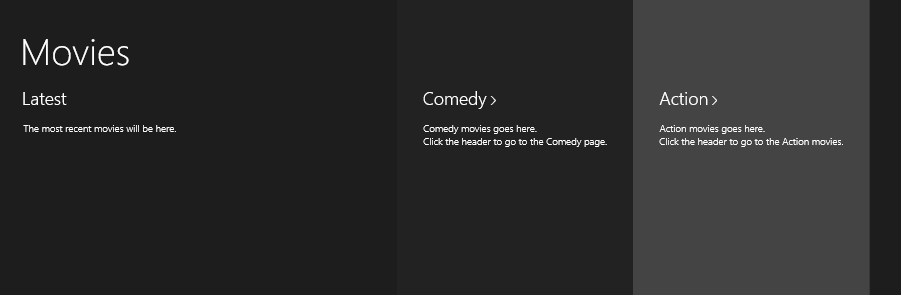
4. Hub
中心控件,帮助我们更好的实现“中心”设计模式,中心页是用户进入应用的入口点,比如说应用商城。用户进入应用商城后,看到的类别分类就是中心的实现,它可以在横向或纵向的滚动视图中显示丰富而有序的内容。
Hub的Header属性可以设置中心的标题,可以设置Header或HeaderTemplate来实现。
Hub可以分区显示,通过将不同的内容放入不同的HubSection来实现。HubSection也可以设置标题,做法与Hub一致。如果HubSection的IsHeaderInteractive属性为true,那么标题默认包含 '>' 字型,以及悬停和按下状态。我们来看看代码实现
        <Hub Header="Movies">

            <HubSection MinWidth="600" Header="Latest">

                <DataTemplate>

                    <Grid>

                        <TextBlock Text="The most recent movies will be here."

                           Style="{ThemeResource BodyTextBlockStyle}" />

                    </Grid>

                </DataTemplate>

            </HubSection>

            <HubSection Header="Comedy" IsHeaderInteractive="True"

                Background="#222222" MinWidth="250">

                <DataTemplate>

                    <StackPanel>

                        <TextBlock Text="Comedy movies goes here."

                           Style="{ThemeResource BodyTextBlockStyle}" />

                        <TextBlock Text="Click the header to go to the Comedy page."

                           Style="{ThemeResource BodyTextBlockStyle}" />

                    </StackPanel>

                </DataTemplate>

            </HubSection>

            <HubSection Header="Action" IsHeaderInteractive="True"

                Background="#444444" MinWidth="250">

                <DataTemplate>

                    <StackPanel>

                        <TextBlock Text="Action movies goes here."

                           Style="{ThemeResource BodyTextBlockStyle}" />

                        <TextBlock Text="Click the header to go to the Action movies."

                           Style="{ThemeResource BodyTextBlockStyle}" />

                    </StackPanel>

                </DataTemplate>

            </HubSection>

        </Hub>
5. Hyperlink
超链接,我们可以把它添加到文本上,它和文本具有相同的处理方式,换行、截断等。当文本被标记为超链接后,文本会显示为特定的颜色,点击文本会转到指定的URI,这个URI由NavigateUri属性来指定。
            <RichTextBlock Width="400" FontSize="20">

                <Paragraph>Hyperlinks let you give readers a visual hint that certain text links to other content.

                    <Hyperlink NavigateUri="http://dev.windows.com">Read more on the Windows Dev Center</Hyperlink>

                    ... Text in a Hyperlink element is treated like the rest of the text and participates in line breaking.

                </Paragraph>

            </RichTextBlock>
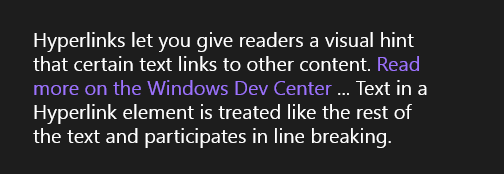
如上图所示,紫色文字部分为超链接,点击后会跳转到我们指定的NavigateUri。
这样我们就把Windows 8.1 的新增控件介绍完了,希望对大家有所帮助,谢谢。
Windows 8.1 应用再出发 - 几种新增控件(2)的更多相关文章
- Windows 8.1 应用再出发 - 几种新增控件(1)
Windows 8.1 新增的一些控件,分别是:AppBar.CommandBar.DatePicker.TimePicker.Flyout.MenuFlyout.SettingsFlyout.Hub ...
- Windows 8.1 应用再出发 - 几种布局控件
本篇为大家介绍Windows 商店应用中几种布局控件的用法.分别是Canvas.Grid.StackPanel 和 VariableSizedWrapGrid. 1. Canvas Canvas使用绝 ...
- Windows 8.1 应用再出发 - 几种常用控件
本篇为大家简单介绍Windows 商店应用中控件的用法,为方便讲解,我们在文本控件和按钮控件这两类中分别挑选有代表性的控件进行详细说明. 1. 文本控件 (1) TextBlock TextBlock ...
- Windows 8.1 应用再出发 (WinJS) - 几种新增控件(1)
Windows 8.1 和 WinJS 引入了以下新控件和功能,分别是:AppBarCommand.BackButton.Hub.ItemContainer.NavBar.Repeater.WebVi ...
- Windows 8.1 应用再出发 - 几种更新的控件
Windows 8.1 除了新增了很多很有用的控件外,还对一些控件做出了更新.接下来我们一起对这些更新的控件一一做出讲解. 1. FlipView 更新 翻转视图控件,在应用中常用作图片等内容的翻页/ ...
- Windows 8.1 应用再出发 (WinJS) - 几种新增控件(2)
上篇我们介绍了Windows 8.1 和 WinJS 中新增控件中的 AppBarCommand.BackButton.Hub.ItemContainer,本篇我们接着来介绍 NavBar.Repea ...
- Windows 8.1 应用再出发 (WinJS) - 创建一个简单项目
前面几篇我们介绍了如何利用 C# + XAML 完成Windows Store App 功能的实现,接下来的几篇我们来看看如何利用 Html + WinJS 来完成这些功能. 本篇我们使用WinJS ...
- Windows Phone中的几种集合控件
前言 Windows Phone开发过程中不可避免的就是和集合数据打交道,如果之前做过WP App的开发的话,相信你已经看过了各种集合控件的使用.扩展和自定义.这些个内容在这篇博客里都没有,那么我们今 ...
- Delphi一共封装(超类化)了8种Windows基础控件和17种复杂控件
超类化源码: procedure TWinControl.CreateSubClass(var Params: TCreateParams; ControlClassName: PChar); con ...
随机推荐
- 使用虚幻引擎中的C++导论(二-UE4基类)
使用虚幻引擎中的C++导论(二) 第一,这篇是我翻译的虚幻4官网的新手编程教程,原文传送门,有的翻译不太好,但大体意思差不多,请支持我O(∩_∩)O谢谢. 第二,某些细节操作,这篇文章省略了,如果有不 ...
- 使用Form Builder创建Form具体步骤
使用Oracle Form Builder创建Form具体步骤 (Data Source为Table) 说明:当Block使用的Data Source为Table时,Form会自动Insert,Upd ...
- gsons
java 处理 json格式字符串,目前只使用过Google的Gson库. pom: <dependency> <groupId>com.google.code.gson< ...
- 配置zabbix当内存剩余不足10%的时候触发报警
配置zabbix当内存剩余不足10%的时候触发报警 zabbix默认的剩余内存报警: Average Lack of available memory on server {HOST.NAME}{Te ...
- mysql的从头到脚优化之数据库引擎的选择(转载)
一. Mysql常用的存储引擎包括Innodb和Myisam以及memory引擎,但是最常用的莫过于Innodb引擎和MyISAM引擎,下边分别做下记录和比较: 下面思考下这几个问题: 你的数据库需要 ...
- linux进程及进程控制
Linux进程控制 程序是一组可执行的静态指令集,而进程(process)是一个执行中的程序实例.利用分时技术,在Linux操作系统上同时可以运行多个进程.分时技术的基本原理是把CPU的运行时间划 ...
- 内置对象(Session、Application、ViewState)
内置对象:为了跨页面传值和状态保持.→HTTP的无状态性 [4.]Session:每一台电脑访问服务器,都会是独立的一套session,key值都一样,但是内容都是不一样的 以上所有内容,都跟cook ...
- 8.9 CSS知识点2
4.关系选择符 包含选择符(Descendant combinator) E F 选择所有被E元素包含的F元素 <style type="text/css"> h1 ...
- 一个前辈对FPGA的理解
接下来对比一下我原来和现在对于FPG A的认识:原来从单片机转型到FPG A时,并没有摸清这趟河水的深浅,而在不知深浅的情况下,我已经开始下水了.当时我认为FPG A和单片机一样,它是由一个超级经典的 ...
- hibernate学习(设计多对多 关系 映射)
// package org.crazy.app.domain; import java.util.HashSet; import java.util.Set; import javax.persis ...