Visual Studio Code——Angular2 Hello World 之 2.0
最近看到一篇用Visual Studio Code开发Angular2的文章,也是一篇入门教程,地址为:使用Visual Studio Code開發Angular 2專案。这里按部就班的做了一遍,感觉很方便,并且没有遇到楼主的一些问题,应该是安装环境有些不同。这里只为记录一下。再次感谢!
一、随便新建一个目录,这里为:F:\Visual Studio Code\angular2_1,并用Visual Studio Code
二、依次新建如下四个文件,参考https://angular.cn/docs/ts/latest/quickstart.html
package.json 用来标记出本项目所需的 npm 依赖包。
tsconfig.json 定义了 TypeScript 编译器如何从项目源文件生成 JavaScript 代码。
typings.json 为那些 TypeScript 编译器无法识别的库提供了别的定义文件。
systemjs.config.js 为模块加载器提供了该到哪里查找应用模块的信息,并注册了所有必备的依赖包。 它还包括文档中后面的例子需要用到的包。
 {

   "name": "angular-quickstart",

   "version": "1.0.0",

   "scripts": {

     "start": "tsc && concurrently \"tsc -w\" \"lite-server\" ",

     "lite": "lite-server",

     "postinstall": "typings install",

     "tsc": "tsc",

     "tsc:w": "tsc -w",

     "typings": "typings"

   },

   "license": "ISC",

   "dependencies": {

     "@angular/common": "~2.0.1",

     "@angular/compiler": "~2.0.1",

     "@angular/core": "~2.0.1",

     "@angular/forms": "~2.0.1",

     "@angular/http": "~2.0.1",

     "@angular/platform-browser": "~2.0.1",

     "@angular/platform-browser-dynamic": "~2.0.1",

     "@angular/router": "~3.0.1",

     "@angular/upgrade": "~2.0.1",

     "angular-in-memory-web-api": "~0.1.1",

     "bootstrap": "^3.3.7",

     "core-js": "^2.4.1",

     "reflect-metadata": "^0.1.8",

     "rxjs": "5.0.0-beta.12",

     "systemjs": "0.19.39",

     "zone.js": "^0.6.25"

   },

   "devDependencies": {

     "concurrently": "^3.0.0",

     "lite-server": "^2.2.2",

     "typescript": "^2.0.3",

     "typings":"^1.4.0"

   }

 }
package.json
 {

   "compilerOptions": {

     "target": "es5",

     "module": "commonjs",

     "moduleResolution": "node",

     "sourceMap": true,

     "emitDecoratorMetadata": true,

     "experimentalDecorators": true,

     "removeComments": false,

     "noImplicitAny": false

   }

 }
tsconfig.json
 {

   "globalDependencies": {

     "core-js": "registry:dt/core-js#0.0.0+20160725163759",

     "jasmine": "registry:dt/jasmine#2.2.0+20160621224255",

     "node": "registry:dt/node#6.0.0+20160909174046"

   }

 }
typings.json
 /**

  * System configuration for Angular samples

  * Adjust as necessary for your application needs.

  */

 (function (global) {

   System.config({

     paths: {

       // paths serve as alias

       'npm:': 'node_modules/'

     },

     // map tells the System loader where to look for things

     map: {

       // our app is within the app folder

       app: 'app',

       // angular bundles

       '@angular/core': 'npm:@angular/core/bundles/core.umd.js',

       '@angular/common': 'npm:@angular/common/bundles/common.umd.js',

       '@angular/compiler': 'npm:@angular/compiler/bundles/compiler.umd.js',

       '@angular/platform-browser': 'npm:@angular/platform-browser/bundles/platform-browser.umd.js',

       '@angular/platform-browser-dynamic': 'npm:@angular/platform-browser-dynamic/bundles/platform-browser-dynamic.umd.js',

       '@angular/http': 'npm:@angular/http/bundles/http.umd.js',

       '@angular/router': 'npm:@angular/router/bundles/router.umd.js',

       '@angular/forms': 'npm:@angular/forms/bundles/forms.umd.js',

       // other libraries

       'rxjs':                      'npm:rxjs',

       'angular-in-memory-web-api': 'npm:angular-in-memory-web-api',

     },

     // packages tells the System loader how to load when no filename and/or no extension

     packages: {

       app: {

         main: './main.js',

         defaultExtension: 'js'

       },

       rxjs: {

         defaultExtension: 'js'

       },

       'angular-in-memory-web-api': {

         main: './index.js',

         defaultExtension: 'js'

       }

     }

   });

 })(this);
systemjs.config.js
三、按着“shift”键,右键项目文件夹,选择“在此处打开命令窗口(W)”,键入DOS命令窗口,键入”npm install“,截图如下:

下载了好多文件,依赖的类库可真多,之后的文件夹目录如下:

四、在根目录下新建app文件夹,并依次创建下面三个文件app.module.ts、app.component.ts、main.ts;并在根目录下新建html页面——index.html
 import { NgModule }      from '@angular/core';

 import { BrowserModule } from '@angular/platform-browser';

 import { AppComponent }   from './app.component';

 @NgModule({

   imports:      [ BrowserModule ],

   declarations: [ AppComponent ],

   bootstrap:    [ AppComponent ]

 })

 export class AppModule { }
app.module.ts
 import { Component } from '@angular/core';

 @Component({

   selector: 'my-app',

   template: '<h1>My First Angular App</h1>'

 })

 export class AppComponent { }
app.component.ts
 import { platformBrowserDynamic } from '@angular/platform-browser-dynamic';

 import { AppModule } from './app.module';

 const platform = platformBrowserDynamic();

 platform.bootstrapModule(AppModule);
main.ts
 <html>

   <head>

     <title>Angular QuickStart</title>

     <meta charset="UTF-8">

     <meta name="viewport" content="width=device-width, initial-scale=1">

     <link rel="stylesheet" href="styles.css">

     <!-- 1. Load libraries -->

      <!-- Polyfill(s) for older browsers -->

     <script src="node_modules/core-js/client/shim.min.js"></script>

     <script src="node_modules/zone.js/dist/zone.js"></script>

     <script src="node_modules/reflect-metadata/Reflect.js"></script>

     <script src="node_modules/systemjs/dist/system.src.js"></script>

     <!-- 2. Configure SystemJS -->

     <script src="systemjs.config.js"></script>

     <script>

       System.import('app').catch(function(err){ console.error(err); });

     </script>

   </head>

   <!-- 3. Display the application -->

   <body>

     <my-app>Loading...</my-app>

   </body>

 </html>
index.html
五、按照如下截图,设定启动作业:


设置成功之后,在启动文件launch.json中做如上图修改:${workspaceRoot}/node_modules/lite-server/bin/lite-server
六、在菜单栏中,点击”查看“/”命令面板“或者快捷键”cltr+shift+p“,键入”configure“,选择”任务:配置任务运行程序“,之后选择”TypeScript-tsconfig.json 创建TypeScript项目“,如下图:


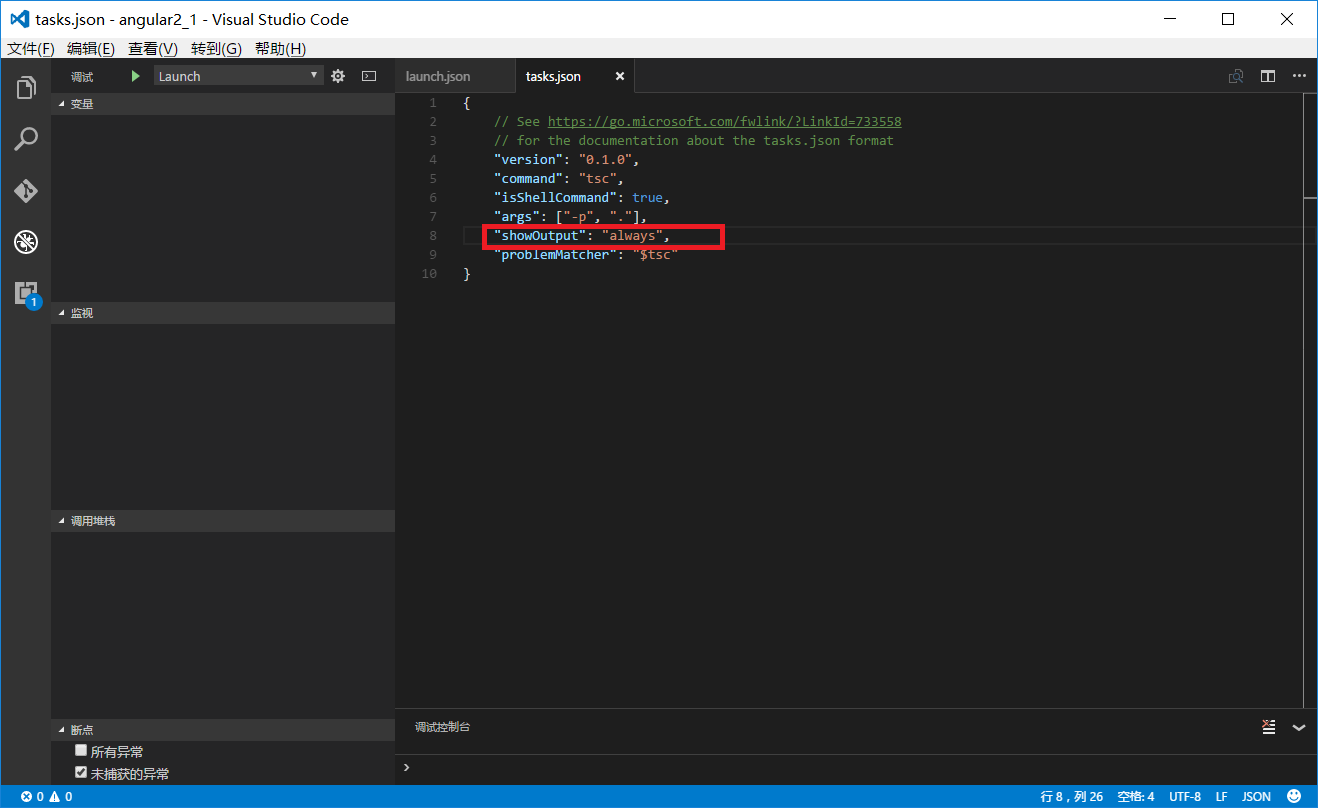
按照教程博客所说,要task.json做如上图修改,否则下面调试时如果出现错误没有任何提示。
七、以上已经完成了所有的工作,开始调试。按下”ctrl+shift+b“,执行编译,会将ts文件编译为js文件,如下图:

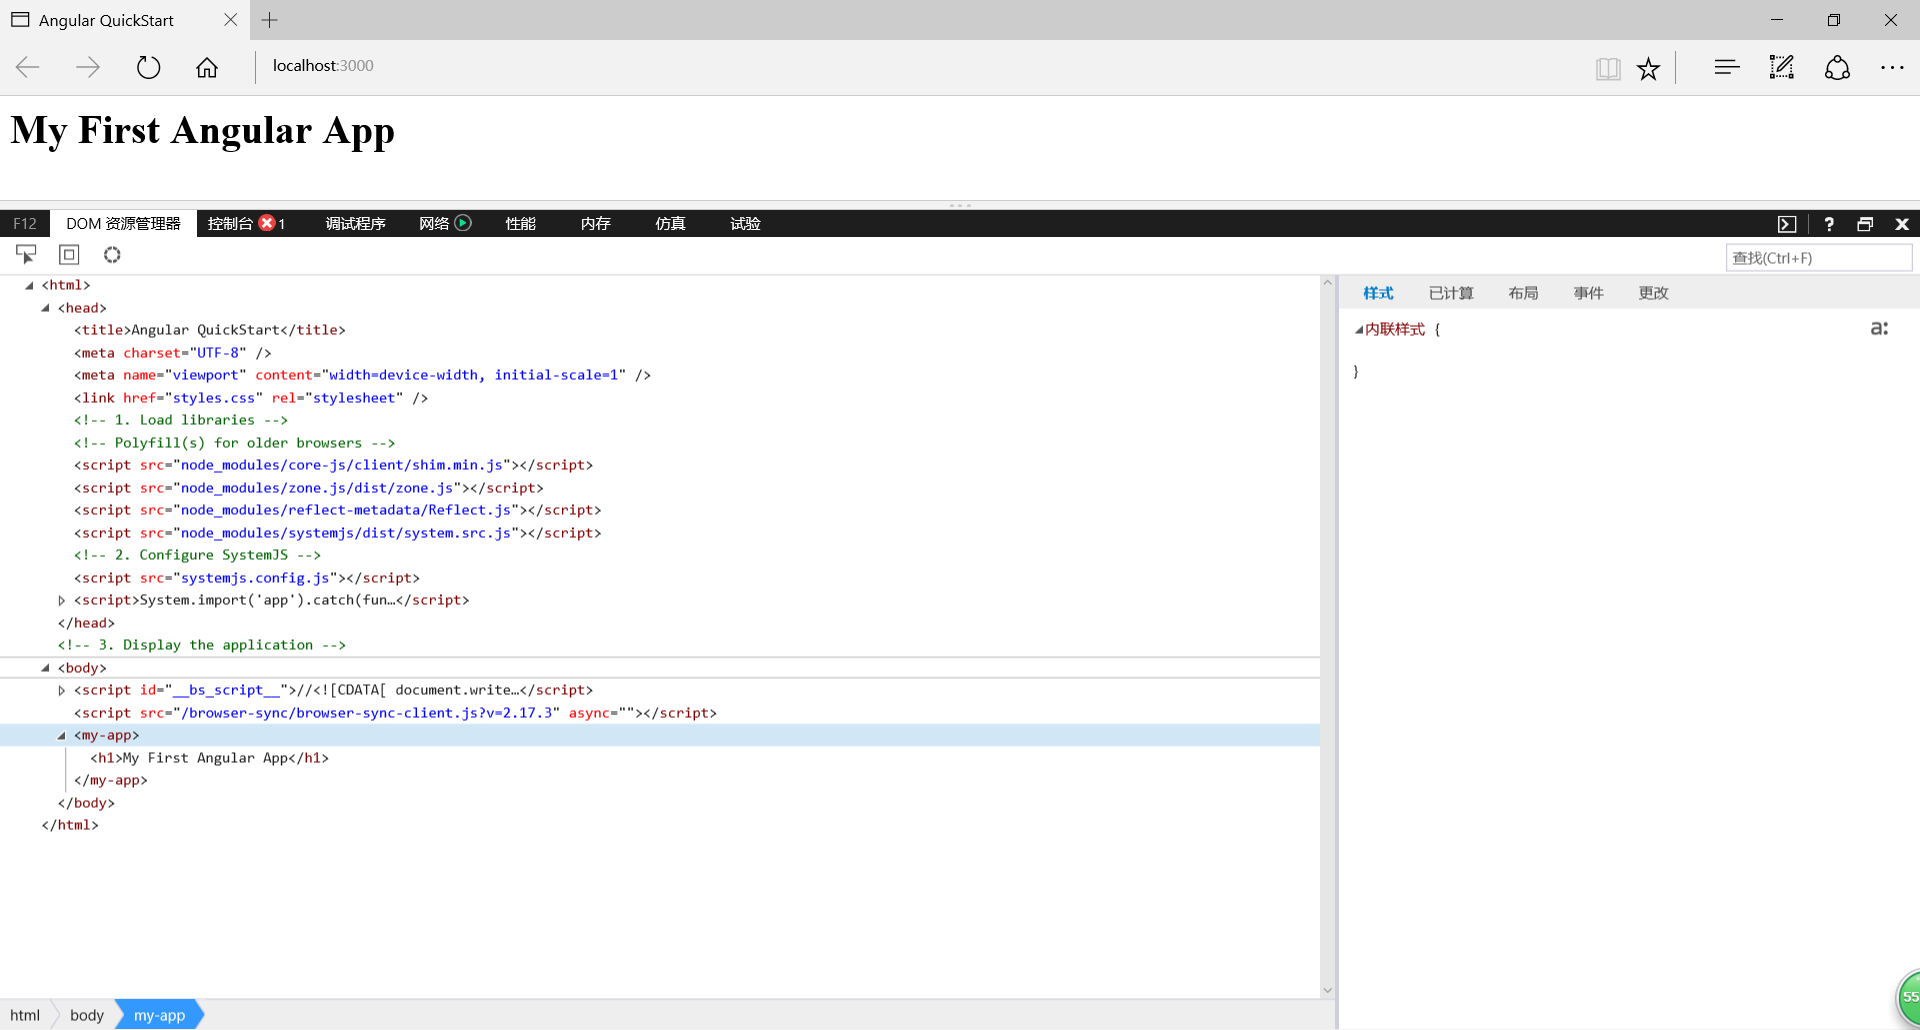
如果编译成功(如上图),就可以按”F5“了,如下图:
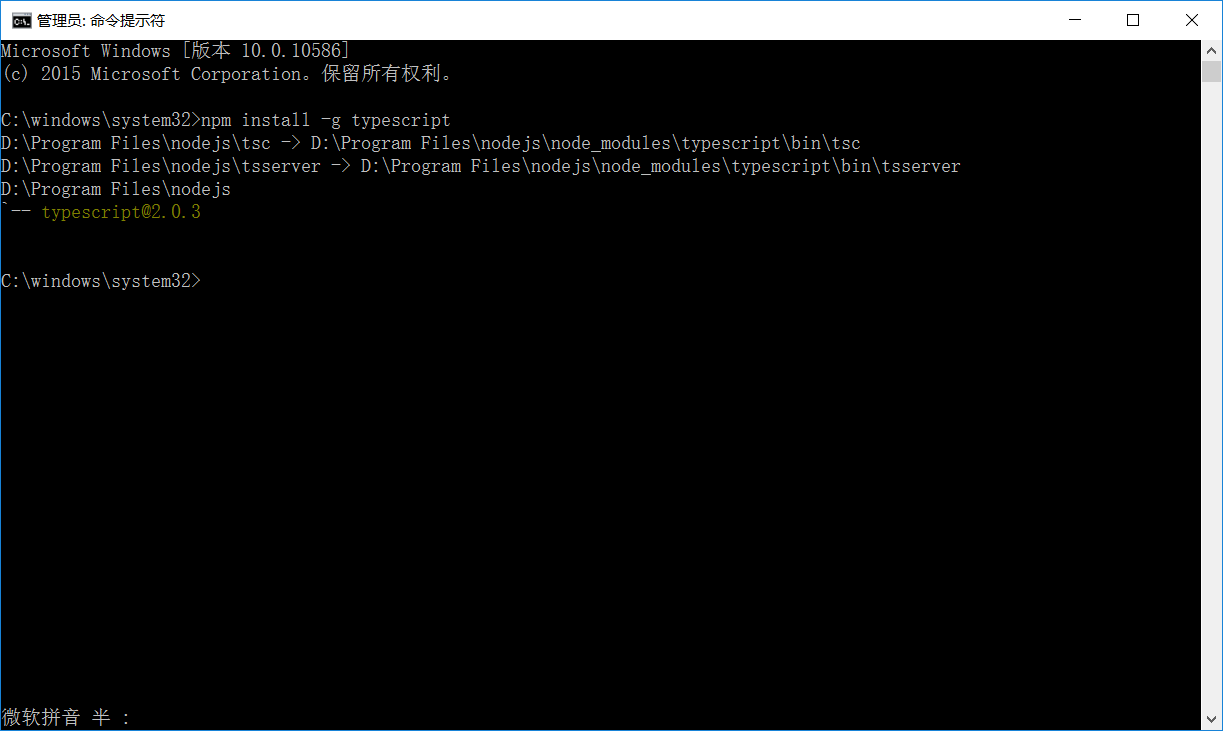
但是如果编译不成功,应该是没有安装tsc,使用命令”npm install -g typescript“安装一下,之后再编译就没问题了,如下图:
这里完全是按着上面的教程来的,有点不好意思,只作为练习记录,再次感谢!
Visual Studio Code——Angular2 Hello World 之 2.0的更多相关文章
- Visual Studio Code升级到0.5,提供对ES6的更好支持
(此文章同时发表在本人微信公众号"dotNET每日精华文章",欢迎右边二维码来关注.) 题记:题目即题记. 自从Visual Studio Code发布之后(最初是0.1),微软就 ...
- Visual Studio Code 配置指南
Visual Studio Code (简称 VS Code)是由微软研发的一款免费.开源的跨平台文本(代码)编辑器.在我看来它是「一款完美的编辑器」. 本文是有关 VS Code 的特性介绍与配置指 ...
- Visual Studio Code 代理设置
Visual Studio Code (简称 VS Code)是由微软研发的一款免费.开源的跨平台文本(代码)编辑器,在十多年的编程经历中,我使用过非常多的的代码编辑器(包括 IDE),例如 Fron ...
- 在Visual Studio Code中配置GO开发环境
一.GO语言安装 详情查看:GO语言下载.安装.配置 二.GoLang插件介绍 对于Visual Studio Code开发工具,有一款优秀的GoLang插件,它的主页为:https://github ...
- docker4dotnet #3 在macOS上使用Visual Studio Code和Docker开发asp.net core和mysql应用
.net猿遇到了小鲸鱼,觉得越来越兴奋.本来.net猿只是在透过家里那田子窗看外面的世界,但是看着海峡对岸的苹果园越来越茂盛,实在不想再去做一只宅猿了.于是,.net猿决定搭上小鲸鱼的渡轮到苹果园去看 ...
- Visual Studio Code v0.9.1 发布
微软的跨平台编辑器 Visual Studio Code v0.9.1 已经发布,官方博客上发布文章Visual Studio Code – October Update (0.9.1):http:/ ...
- 微软Visual Studio Code 0.8.0发布,新增多种主题
月30日,Build 开发者大会上,正式宣布了 Visual Studio Code 项目;并将其定义为:一个运行于 Mac OS X.Windows和 Linux 之上的,针对于编写现代 Web 和 ...
- Visual Studio Code,完美的编辑器
今日凌晨,微软的文本(代码)编辑器 Visual Studio Code(简称 VS Code),发布了首个正式版,距离首个 beta 版上线时间刚好一年. 在十多年的编程经历中,我使用过非常多的的代 ...
- 打造TypeScript的Visual Studio Code开发环境
打造TypeScript的Visual Studio Code开发环境 本文转自:https://zhuanlan.zhihu.com/p/21611724 作者: 2gua TypeScript是由 ...
随机推荐
- 发布:.NET开发人员必备的可视化调试工具(你值的拥有)
1:如何使用 1:点击下载:.NET可视化调试工具 (更新于2016-12-29 19:11:00) (终于彻底兼容了部分VS环境下无法使用的问题) 2:解压RAR后执行:CYQ.VisualierS ...
- Azure Service Fabric 开发环境搭建
微服务体系结构是一种将服务器应用程序构建为一组小型服务的方法,每个服务都按自己的进程运行,并通过 HTTP 和 WebSocket 等协议相互通信.每个微服务都在特定的界定上下文(每服务)中实现特定的 ...
- ASP.NET Web API 跨域访问(CORS)
一.客户端用JSONP请求数据 如果你想用JSONP来获得跨域的数据,WebAPI本身是不支持javascript的callback的,它返回的JSON是这样的: {"YourSignatu ...
- jsp前端实现分页代码
前端需要订一page类包装,其参数为 private Integer pageSize=10; //每页记录条数=10 private Integer totalCount; //总记录条数 priv ...
- junit4进行单元测试
一.前言 提供服务的时候,为了保证服务的正确性,有时候需要编写测试类验证其正确性和可用性.以前的做法都是自己简单写一个控制层,然后在控制层里调用服务并测试,这样做虽然能够达到测试的目的,但是太不专业了 ...
- 关于font-family
在设置页面字体的时候,你会发现在 font-family 属性中会设置好多个字体,想看懂它们都是什么字体吗?不好意思,我不是搞设计的,我也不知道.那么,现在写的东西,只是对于一个前端人员来说,要了解的 ...
- SharePoint 2013: A feature with ID has already been installed in this farm
使用Visual Studio 2013创建一个可视web 部件,当右击项目选择"部署"时报错: "Error occurred in deployment step ' ...
- Android 扫描条形码(Zxing插件)
使用Android Studio 一.在build.gradle(Module:app)添加代码 下载,调用插件 1 apply plugin: 'com.android.application' ...
- Atitit.项目修改补丁打包工具 使用说明
Atitit.项目修改补丁打包工具 使用说明 1.1. 打包工具已经在群里面.打包工具.bat1 1.2. 使用方法:放在项目主目录下,执行即可1 1.3. 打包工具的原理以及要打包的项目列表1 1. ...
- 酷酷的CSS3三角形运用
概述 在早期的前端Web设计开发年代,完成一些页面元素时,我们必须要有专业的PS美工爸爸,由PS美工爸爸来切图,做一些圆角.阴影.锯齿或者一些小图标. 在CSS3出现后,借助一些具有魔力的CSS3属性 ...