springBoot与Swagger2的整合
1、在项目pom文件中引入swagger2的jar包
<!-- swagger2开始 -->

<dependency>

	<groupId>io.springfox</groupId>

	<artifactId>springfox-swagger2</artifactId>

	<version>2.4.0</version>

</dependency>

<dependency>

	<groupId>io.springfox</groupId>

	<artifactId>springfox-swagger-ui</artifactId>

	<version>2.4.0</version>

</dependency>

<!-- swagger2结束 -->
2、编写用于配置swagger2的类 Swagger2.java(名字可任意取)
package com.example.demo; import org.springframework.context.annotation.Bean;
import org.springframework.context.annotation.Configuration;
import springfox.documentation.builders.ApiInfoBuilder;
import springfox.documentation.builders.PathSelectors;
import springfox.documentation.builders.RequestHandlerSelectors;
import springfox.documentation.service.ApiInfo;
import springfox.documentation.service.Contact;
import springfox.documentation.spi.DocumentationType;
import springfox.documentation.spring.web.plugins.Docket;
import springfox.documentation.swagger2.annotations.EnableSwagger2; @Configuration
@EnableSwagger2
public class Swagger2 {
//swagger2的配置文件,这里可以配置swagger2的一些基本的内容,比如扫描的包等等
@Bean
public Docket createRestApi(){
return new Docket(DocumentationType.SWAGGER_2)
.apiInfo(apiInfo())
.select()
//为当前需要扫描到的包的路径
.apis(RequestHandlerSelectors.basePackage("com.example.demo"))
.paths(PathSelectors.any())
.build();
}
//构建 api文档的详细信息函数,注意这里的注解引用的是哪个
private ApiInfo apiInfo() {
return new ApiInfoBuilder()
//页面标题
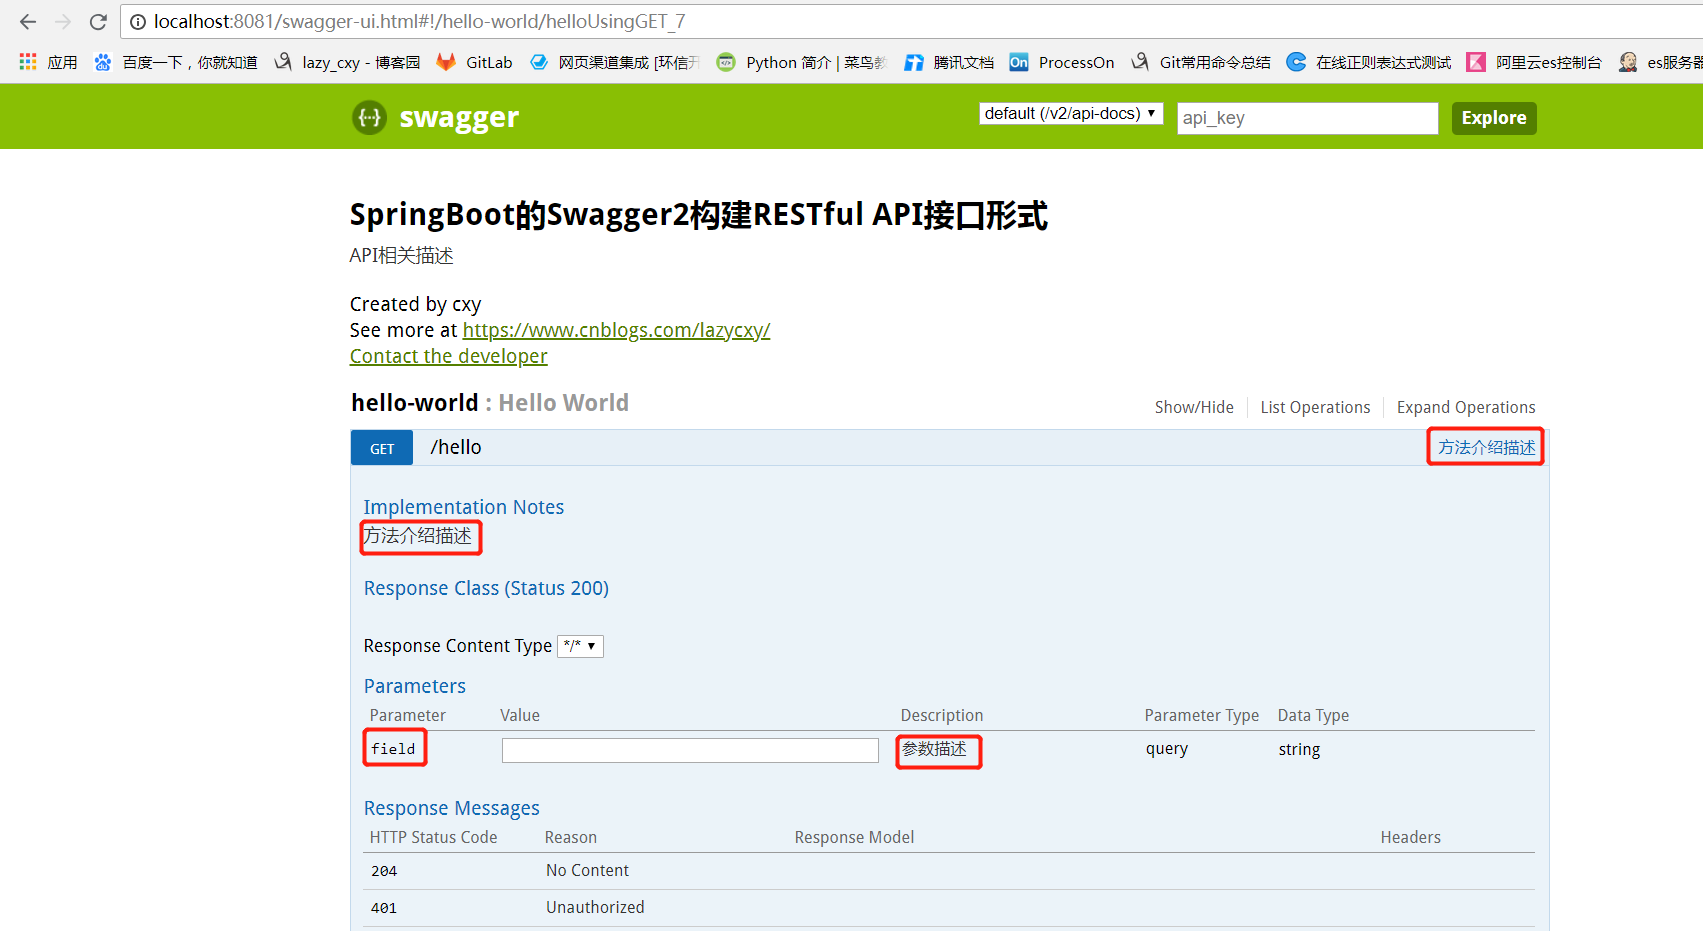
.title("SpringBoot的Swagger2构建RESTful API接口形式")
//创建人
.contact(new Contact("cxy", "https://www.cnblogs.com/lazycxy/", "cxymasters@163.com"))
//版本号
.version("1.0")
//描述
.description("API相关描述")
.build();
}
}
3、在你的接口类中添加如下注释
@RestController

@Api("测试接口描述")

public class HelloWorld {

    @RequestMapping("/hello")

    @ApiOperation(value = "方法介绍描述", httpMethod = "GET", response = String.class, notes = "方法介绍描述")

    public String hello(

            @RequestParam(value = "field", required = false)@ApiParam("参数描述") String field

    ){

        return "hello world~~~";

    }

}
4、启动你的项目,输入localhost:8081/swagger-ui.html 进行访问swagger页面 ps:这个swagger-ui.html 是封装到swagger的jar包里的
整合完毕
springBoot与Swagger2的整合的更多相关文章
- (办公)SpringBoot和swagger2的整合.
因为开发项目的接口需要给app,小程序测试,所以用swagger. 1.pom.xml: <dependency><!--添加Swagger依赖 --> <groupId ...
- springboot+jpa+mysql+swagger整合
Springboot+jpa+MySQL+swagger整合 创建一个springboot web项目 <dependencies> <dependency> < ...
- SpringBoot使用Swagger2实现Restful API
很多时候,我们需要创建一个接口项目用来数据调转,其中不包含任何业务逻辑,比如我们公司.这时我们就需要实现一个具有Restful API的接口项目. 本文介绍springboot使用swagger2实现 ...
- SpringBoot之Swagger2文档生成
SpringBoot之Swagger2文档生成 1.Swagger2介绍 编写和维护接口文档是每个程序员的职责,前面我们已经写好的接口现在需要提供一份文档,这样才能方便调用者使用.考虑到编写接口文档是 ...
- [转] spring-boot集成swagger2
经测,spring-boot版本使用1.5.2+时需使用springfox-swagger2版本2.5+(spring-boot 1.2 + springfox-swagger2 2.2 在未扫描ja ...
- (九) SpringBoot起飞之路-整合/集成Swagger 2 And 3
兴趣的朋友可以去了解一下其他几篇,你的赞就是对我最大的支持,感谢大家! (一) SpringBoot起飞之路-HelloWorld (二) SpringBoot起飞之路-入门原理分析 (三) Spri ...
- SpringBoot集成Swagger2并配置多个包路径扫描
1. 简介 随着现在主流的前后端分离模式开发越来越成熟,接口文档的编写和规范是一件非常重要的事.简单的项目来说,对应的controller在一个包路径下,因此在Swagger配置参数时只需要配置一 ...
- SpringBoot之Swagger2
SpringBoot利用Swagger2只需配置少量的注解信息便能方便地构建强大的API文档. 1.添加maven依赖 2.创建Swagger2配置类 3.在API添加文档内容 4.访问http:// ...
- 【转载】SpringBoot系列——Swagger2
微服务学习二:springboot与swagger2的集成:https://www.cnblogs.com/fengli9998/p/7522973.html 注:需要在启动类加 @EnableSwa ...
随机推荐
- 【Gym - 100923A】Por Costel and Azerah(思维水题)
Por Costel and Azerah Descriptions 给你n个数 问你,有多少个子序列 的和是偶数 Example Input 233 10 124 2 Output 33 题目链接 ...
- [leetcode] 234. Palindrome Linked List (easy)
原题 回文 水题 function ListNode(val) { this.val = val; this.next = null; } /** * @param {ListNode} head * ...
- HTML --- <a href=”#”>与 <a href=”javascript:void(0)” 的区别
<a href=”#”>中的“#”其实是锚点的意思,默认为#top,所以当页面比较长的时候,使用这种方式会让页面刷新到页首(页面的最上部) javascript:void(0)其实是一个死 ...
- django第一次(转自刘江大佬)
下面的模型定义了一个“人”,它具有first_name和last_name字段: from django.db import models class Person(models.Model): fi ...
- Swagger UI使用指南
1:认识Swagger Swagger 是一个规范和完整的框架,用于生成.描述.调用和可视化 RESTful 风格的 Web 服务.总体目标是使客户端和文件系统作为服务器以同样的速度来更新.文件的方法 ...
- shiro创建配置对象
在执行 Factory<org.apache.shiro.mgt.SecurityManager> factory = new IniSecurityManagerFactory(&quo ...
- Docker 容器基本操作[Docker 系列-2]
Docker 入门及安装[Docker 系列-1] 镜像就像是一个安装程序,而容器则是程序运行时的一个状态. 查看容器 查看容器 启动 docker 后,使用 docker ps 命令可以查看当前正 ...
- Nginx搭建详细
Linux 安装Nginx搭建详细内容 进入:/usr/java/nginx位置下载nginx: wget et http://nginx.org/download/nginx-1.8.0.tar.g ...
- C++实现反射
之前碰到过一个问题,C++中如何通过一个字符串生成一个类. C++是不支持通过类名称字符串”ClassXX”来生成对象的,也就是说我们可以使用 new ClassXX 来生成对象,但是不能通过 new ...
- 干货来了!python学习之重难点整理合辑1
关于装饰器.lambda.鸭子类型.魔法函数的理解仍存有困惑之处,趁周末有时间温故,赶紧去自学了解下相关知识. 1.装饰器是什么: 很多初学者在接触装饰器的时候只做到了肤浅的了解它的概念.组成形态.实 ...