微信小程序-----自定义验证码实现
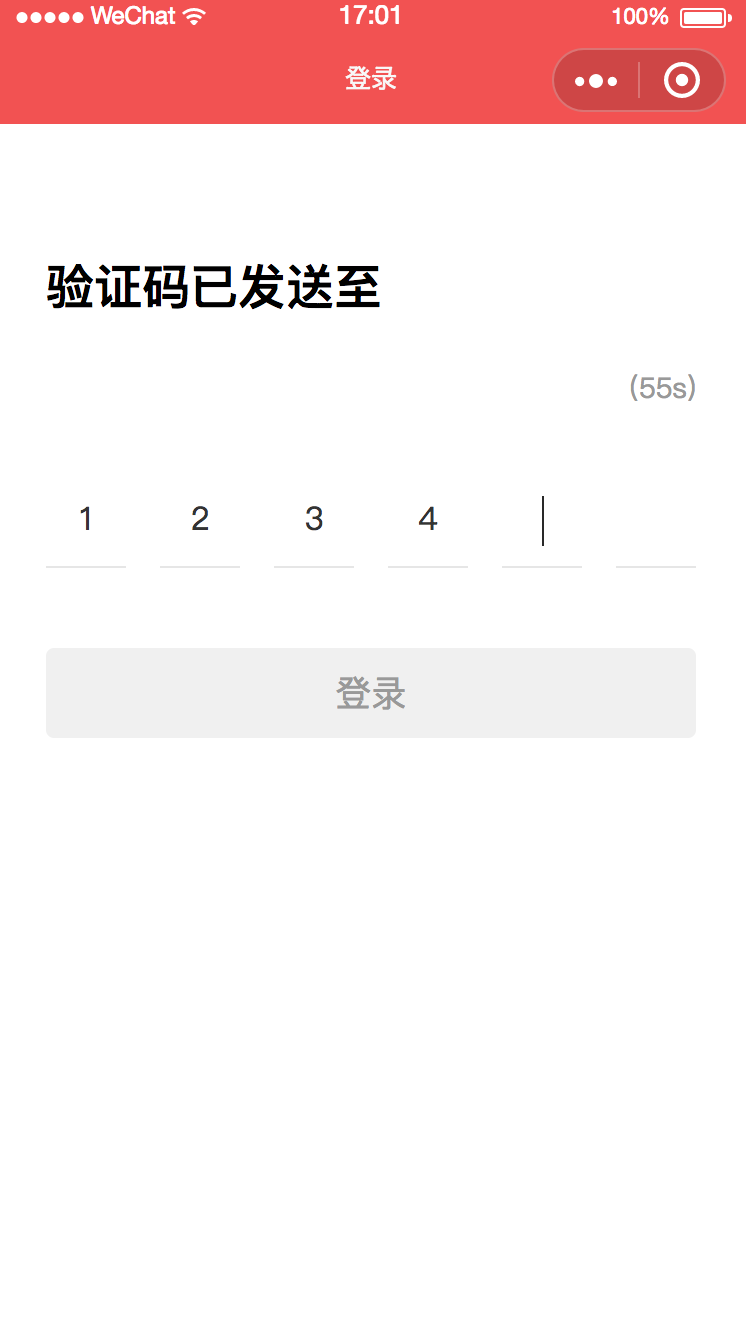
这一段时间做小程序项目,使用的是mpvue的框架,需要自己实现验证码输入,模拟input的光标,上一个框输入后后一个框自动获取焦点,删除时从后往前依次删除。下图是整体效果:
 <template>

   <div class="validate-code">

     <h3>验证码已发送至</h3>

     <div class="middle">

       <div class="tel">{{telPhone}}</div>

       <div class="right">

         <div class="timer" v-if="timer">({{count}}s)</div>

         <div class="txt-btn" v-else @click="getCode">重新获取验证码</div>

       </div>

     </div>

     <div class="code-wrap">

       <input type="number"

              placeholder="输入短信验证码"

              :maxlength="6"

              placeholder-style="color: #ccc;"

              @focus="handleFocus"

              @blur="handleBlur"

              v-model="validateCode">

       <div class="front-wrap" @click="getFocus">

         <div class="block">

           <i :class="{'active': validateCode.length === 0 && hasFocused}"></i>

           {{validateArray[0]}}

         </div>

         <div class="block">

           <i :class="{'active': validateCode.length === 1 && hasFocused}"></i>

           {{validateArray[1]}}

         </div>

         <div class="block">

           <i :class="{'active': validateCode.length === 2 && hasFocused}"></i>

           {{validateArray[2]}}

         </div>

         <div class="block">

           <i :class="{'active': validateCode.length === 3 && hasFocused}"></i>

           {{validateArray[3]}}

         </div>

         <div class="block">

           <i :class="{'active': validateCode.length === 4 && hasFocused}"></i>

           {{validateArray[4]}}

         </div>

         <div class="block">

           <i :class="{'active': validateCode.length === 5 && hasFocused}"></i>

           {{validateArray[5]}}

         </div>

       </div>

       <div class="tips" v-if="errMsg">{{errMsg}}</div>

     </div>

     <div class="btn" :class="{'effective': validateCode.length === 6}" @click="bindPhone">登录</div>

   </div>

 </template>

 <script>

   import fly from '@/http/config'

   export default {

     components: {},

     data () {

       return {

         telPhone: '',

         validateCode: '',

         errMsg: '',

         count: 60,

         timer: null,

         hasFocused: false

       }

     },

     computed: {

       validateArray () {

         return Array.from(this.validateCode);

       }

     },

     onShow () {

       this.errMsg = '';

       this.validateCode = '';

     },

     onReady () {

       this.telPhone = this.$root.$mp.query.telPhone;

       this.initTimer();

     },

     created () {

       //

     },

     methods: {

       handleFocus () {

         this.hasFocused = true;

         this.errMsg = '';

       },

       handleBlur() {

         this.hasFocused = false;

       },

       getCode () {

         if (!this.timer) {

           this.getBindingVerifyCode()

         }

       },

       getBindingVerifyCode () {

         let _this = this

         fly.get('/2c/*********/*******', {

           phoneNum: this.telPhone

         }).then((data) => {

           wx.showToast({

             title: data.message

           })

           _this.initTimer()

         }, err => {

           console.log(err)

         })

       },

       bindPhone () {

         let _this = this;

         if (this.validateArray.length < 6) {

           return

         }

         fly.get('/2c/*****/*******', {

           phoneNum: this.telPhone,

           verifyCode: this.validateCode

         }).then((data) => {

           wx.showToast({

             title: data.message

           })

           wx.setStorage({

             key: 'phoneNum',

             data: _this.telPhone

           });

           setTimeout(() => {

             wx.reLaunch({

               url: '/pages/index/main'

             });

           }, 1000);

         }, err => {

           console.log(err);

           _this.errMsg = err.message;

           wx.showToast({

             icon: 'none',

             title: err.message

           });

         })

       },

       initTimer () {

         let _this = this

         this.timer = setInterval(() => {

           if (_this.count <= 0) {

             _this.count = 60

             clearInterval(_this.timer)

             _this.timer = null

           }

           _this.$set({

             'count': _this.count

           })

           _this.count--

         }, 1000)

       }

     }

   }

 </script>

 <style lang="scss" src="./index.scss">

 </style>
CSS文件
 .profile{

   width: 100%;

   height: 100%;

   background: #f6f6f6;

   .get-user-info {

     width: 200px;

     height: 50px;

   }

   .herder{

     padding: 25px 10px;

     background: #f25252;

     display: flex;

     justify-content: flex-start;

     align-items: center;

     .avatar-wrap{

       width: 60px;

       height: 60px;

       overflow: hidden;

       border-radius: 50%;

       img{

         width: 60px;

         height: 60px;

       }

     }

     .user-info{

       color: #fff;

       margin-left: 10px;

       display: flex;

       flex-direction: column;

       justify-content: center;

       h5{

         font-size: 16px;

         line-height: 16px;

         margin-bottom: 10px;

       }

       p{

         text-indent: 13px;

         font-size: 14px;

         line-height: 14px;

         background: url("../../assets/images/profile/icon_phone.png") 0 50%/9px 14px no-repeat;

       }

     }

   }

   .content{

     .main{

       margin: 10px 0;

       .content-item{

         height: 50px;

         padding: 0 10px;

         display: flex;

         background: #fff;

         justify-content: space-between;

         align-items: center;

         border-bottom: 1px solid #f6f6f6;

         .left{

           display: flex;

           align-items: center;

           img{

             width: 15px;

             height: 15px;

             margin-right: 9px;

           }

           .title{

             font-size: 15px;

             color: #333;

           }

         }

         .arrow{

           display: flex;

           justify-content: center;

           align-items: center;

           .phone{

             font-size: 15px;

             color: #399fda;

             margin-right: 8px;

           }

           img{

             width: 6px;

             height: 9px;

           }

         }

       }

     }

     .card-wrap{

       background: #fff;

       padding: 12px 10px;

       .card{

         height: 50px;

         border-radius: 4px;

         background: #ffdc69;

         display: flex;

         justify-content: space-between;

         align-items: center;

         position: relative;

         .left{

           span{

             font-size: 15px;

             color: #884600;

             line-height: 50px;

           }

           img{

             width: 34px;

             height: 31px;

             margin: 0 5px 0 10px;

             vertical-align: middle;

           }

         }

         .arrow{

           display: flex;

           justify-content: flex-start;

           align-items: center;

           img{

             width: 4px;

             height: 6px;

             margin: 0 10px 0 3px;

           }

           span{

             font-size: 13px;

             color: #884600;

           }

         }

         .icon-fixed{

           position: absolute;

           top:;

           right:;

           width: 27px;

           height: 27px;

         }

       }

     }

   }

 }
微信小程序-----自定义验证码实现的更多相关文章
- 微信小程序——自定义导航栏
微信头部导航栏可能通过json配置: 但是有时候我们项目需求可能需要自定义头部导航栏,如下图所示: 现在具体说一下实现步骤及方法: 步骤: 1.在 app.json 里面把 "navigat ...
- 微信小程序自定义弹窗wcPop插件|仿微信弹窗样式
微信小程序自定义组件弹窗wcPop|小程序消息提示框|toast自定义模板弹窗 平时在开发小程序的时候,弹窗应用场景还是蛮广泛的,但是微信官方提供的弹窗比较有局限性,不能自定义修改.这个时候首先想到的 ...
- 微信小程序自定义 tabbar
一定的需求情况下,无法使用小程序原生的 tabbar 的时候,需要自行实现一个和 tabbar 功能一模一样的自制组件. 查阅了海量的博客和文档之后,亲自踩坑.总结了三种在不使用微信小程序原生 tab ...
- 微信小程序-自定义底部导航
代码地址如下:http://www.demodashi.com/demo/14258.html 一.前期准备工作 软件环境:微信开发者工具 官方下载地址:https://mp.weixin.qq.co ...
- 微信小程序自定义tabbar的实现
微信小程序自定义tabbar的实现 目的:当采用微信的自定义tabbar组件的时候,切换的时候会出现闪屏的效果:当使用微信默认的tabbar的时候,限制了tabbar的数量以及灵活配置. 方案:自己动 ...
- 微信小程序 自定义导航组件 nav头部 全面屏设计
nav-dynamic 微信小程序自定义nav头部组件:适配全面屏设计: 实现功能 初始进入页面时,展示初始状态下的nav样式: 页面滚动时,监听页面滚动事件,展示滚动状态下的nav样式: 根据配置字 ...
- 微信小程序自定义组件,提示组件
微信小程序自定义组件,这里列举了一个常用的提示自定义组件,调用自定义组件中的方法和字段.仅供参考和学习. 编写组件: 在根目录下添加“components”目录,然后像添加Page页面一样添加自定义组 ...
- 微信小程序自定义Tabber,附详细源码
目录 1,前言 2,说明 3,核心代码 1,前言 分享一个完整的微信小程序自定义Tabber,tabber按钮可以设置为跳转页面,也可以设置为功能按钮.懒得看文字的可以直接去底部,博主分享了小程序代码 ...
- 微信小程序自定义导航栏
微信小程序需要自定义导航栏,特别是左上角的自定义设置,可以设置返回按钮,菜单按钮,配置如下: 1.在app.json的window属性中增加: navigationStyle:custom 顶部导航栏 ...
随机推荐
- Java Activiti6.0 spring5 SSM 工作流引擎 审批流程 java项目框架
1.模型管理 :web在线流程设计器.预览流程xml.导出xml.部署流程 2.流程管理 :导入导出流程资源文件.查看流程图.根据流程实例反射出流程模型.激活挂起 3.运行中流程:查看流程信息.当前任 ...
- Oracle11g 行列转换函数PIVOT and UNPIVOT
作为Oracle开发工程师,推荐大伙看看 PIVOT and UNPIVOT Operators in Oracle Database 11g Release 1 This article shows ...
- C#多个if与if+多个else if有何不同?
int a=1; if(a==1){System.out.println("1");} if(a==2){System.out.println("2");} i ...
- c# Reverse()的两点用法
Rervese的基本用途是:反转数组中元素的顺序,常见的两种用法如下: 1.void Array.Reverse(Array array) static void Main(string[] args ...
- MySQL----MySQL数据库入门----第五章 多表操作
5.1 外键 比如说有两个数据表,分别是学生信息表student和年级表grade.在student表中有存储学生年级的字段gid(外键),在grade表也有存储学生年级的字段id(主键),stude ...
- 对类Vue的MVVM前端库的实现
关于实现MVVM,网上实在是太多了,本文为个人总结,结合源码以及一些别人的实现 关于双向绑定 vue 数据劫持 + 订阅 - 发布 ng 脏值检查 backbone.js 订阅-发布(这个没有使用过, ...
- 一图看懂JVM,JRE,JDK的关系
- 03.搭建Spark集群(CentOS7+Spark2.1.1+Hadoop2.8.0)
接上一篇:https://www.cnblogs.com/yjm0330/p/10077076.html 一.下载安装scala 1.官网下载 2.spar01和02都建立/opt/scala目录,解 ...
- leetcode-746-Min Cost Climbing Stairs(动态规划)
题目描述: On a staircase, the i-th step has some non-negative cost cost[i] assigned (0 indexed). Once yo ...
- Springboot启动报Multiple Dockets with the same group name are not supported. The following duplicate groups were discovered.
解决方法: 属于bean重复,根据错误提示剔除多于的Bean引用!