2013 duilib入门简明教程 -- 复杂控件介绍 (13)
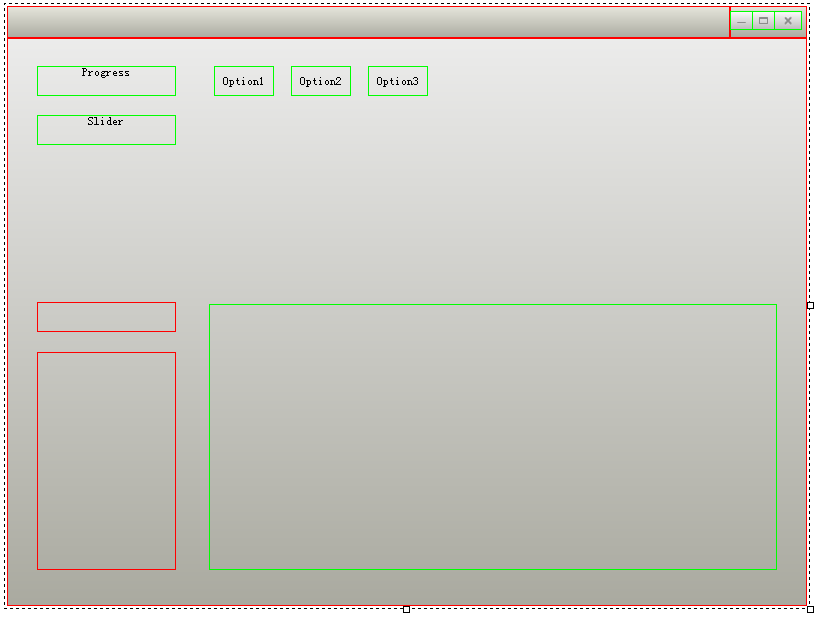


<?xml version="1.0" encoding="utf-8" standalone="yes" ?>

<Window size="800,600" sizebox="4,4,4,4" caption="0,0,0,32" mininfo="600,400">

    <VerticalLayout bkcolor="#FFF0F0F0" bkcolor2="#FFAAAAA0">

        <HorizontalLayout>

            <Progress name="ProgressDemo1" text="Progress" float="true" pos="30,28,0,0" width="139" height="30" />

            <Slider name="SliderDemo1" text="Slider" float="true" pos="30,77,0,0" width="139" height="30" />

            <Combo name="ComboDemo1" float="true" pos="30,264,0,0" width="139" height="30" />

            <List name="ListDemo1" float="true" pos="30,314,0,0" width="139" height="218" >

                <ListHeader />

            </List>

            <ActiveX name="ActiveXDemo1" float="true" pos="202,265,0,0" width="568" height="266" />

            <Option name="OptionDemo1" text="Option1" float="true" pos="207,28,0,0" width="60" height="30" />

            <Option name="OptionDemo2" text="Option2" float="true" pos="284,28,0,0" width="60" height="30" />

            <Option name="OptionDemo3" text="Option3" float="true" pos="361,28,0,0" width="60" height="30" />

        </HorizontalLayout>

    </VerticalLayout>

</Window>
各种控件的图片资源请点击这里下载(这是整个工程的地址,资源都在Release目录下),也是解压到exe目录即可。
class CDuiFrameWnd : public WindowImplBase
{
public:
virtual LPCTSTR GetWindowClassName() const { return _T("DUIMainFrame"); }
virtual CDuiString GetSkinFile() { return _T("duilib.xml"); }
virtual CDuiString GetSkinFolder() { return _T(""); } virtual void InitWindow()
{
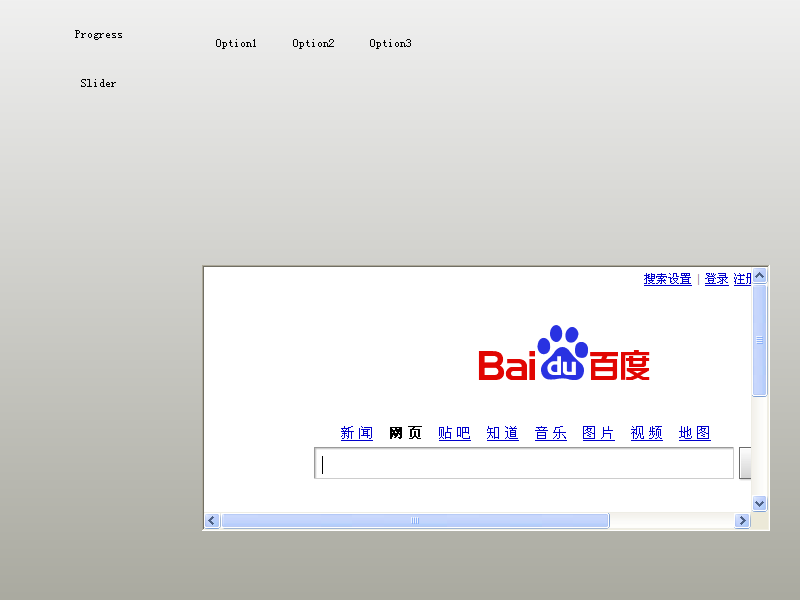
CActiveXUI* pActiveXUI = static_cast<CActiveXUI*>(m_PaintManager.FindControl(_T("ActiveXDemo1"))); if( pActiveXUI )
{
IWebBrowser2* pWebBrowser = NULL; pActiveXUI->SetDelayCreate(false); // 相当于界面设计器里的DelayCreate属性改为FALSE,在duilib自带的FlashDemo里可以看到此属性为TRUE
pActiveXUI->CreateControl(CLSID_WebBrowser); // 相当于界面设计器里的Clsid属性里填入{8856F961-340A-11D0-A96B-00C04FD705A2},建议用CLSID_WebBrowser,如果想看相应的值,请见<ExDisp.h>
pActiveXUI->GetControl(IID_IWebBrowser2, (void**)&pWebBrowser); if( pWebBrowser != NULL )
{
//pWebBrowser->Navigate(L"https://code.google.com/p/duilib/",NULL,NULL,NULL,NULL);
pWebBrowser->Navigate(L"http://www.baidu.com/",NULL,NULL,NULL,NULL); // 由于谷歌时不时被墙,所以换成反应快的网站
pWebBrowser->Release();
}
}
}
}; int APIENTRY _tWinMain(HINSTANCE hInstance, HINSTANCE hPrevInstance, LPTSTR lpCmdLine, int nCmdShow)
{
CPaintManagerUI::SetInstance(hInstance);
HRESULT Hr = ::CoInitialize(NULL);
if( FAILED(Hr) ) return ; CDuiFrameWnd duiFrame;
duiFrame.Create(NULL, _T("DUIWnd"), UI_WNDSTYLE_FRAME, WS_EX_WINDOWEDGE);
duiFrame.CenterWindow();
duiFrame.ShowModal(); ::CoUninitialize();
return ;
}
int APIENTRY _tWinMain(HINSTANCE hInstance, HINSTANCE hPrevInstance, LPTSTR lpCmdLine, int nCmdShow)

{

    CPaintManagerUI::SetInstance(hInstance);

    HRESULT Hr = ::CoInitialize(NULL);

    if( FAILED(Hr) ) return ;

    CDuiFrameWnd *pFrame = new CDuiFrameWnd;

    pFrame->Create(NULL, _T("DUIWnd"), UI_WNDSTYLE_FRAME, WS_EX_WINDOWEDGE);

    pFrame->CenterWindow();

    pFrame->ShowModal();

    delete pFrame;

    ::CoUninitialize();

    return ;

}
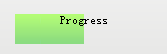
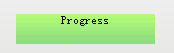
<Progress name="ProgressDemo1" text="Progress" float="true" pos="30,28,0,0" width="139" height="30" foreimage="Progress/progress_fore.png" min="0" max="100" value="50" hor="true" align="center" />
如果要改变进度条的位置,则调用以下代码即可:
    CProgressUI* pProgress = static_cast<CProgressUI*>(m_PaintManager.FindControl(_T("ProgressDemo1")));

    pProgress->SetValue();
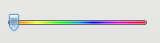
<Slider name="SliderDemo1" float="true" pos="30,77,0,0" width="139" height="18" thumbsize="12,20" bkimage="file='Slider/slider_fore.bmp' mask='0xffff00ff'" thumbimage="file='Slider/SliderBar.png' mask='0xffffffff'"/>
其他的操作和进度条类似~
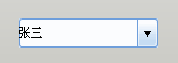
            <Combo name="ComboDemo1" float="true" pos="30,264,0,0" width="139" height="30" normalimage="file='ComboBox/Combo_nor.bmp'" hotimage="file='ComboBox/Combo_over.bmp' " pushedimage="file='ComboBox/Combo_over.bmp' " >

                <ListLabelElement text="张三" selected="true" />

                <ListLabelElement text="李四" />

            </Combo>
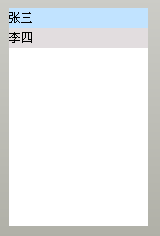
            <List name="ListDemo1" float="true" pos="30,314,0,0" width="139" height="218" header="hidden" bkcolor="#FFFFFFFF" itemtextcolor="#FF000000" itembkcolor="#FFE2DDDF" itemselectedtextcolor="#FF000000" itemselectedbkcolor="#FFC1E3FF" itemhottextcolor="#FF000000" itemhotbkcolor="#FFE9F5FF" itemdisabledtextcolor="#FFCCCCCC" itemdisabledbkcolor="#FFFFFFFF" >

                <ListLabelElement text="张三" selected="true" />

                <ListLabelElement text="李四" />

            </List>
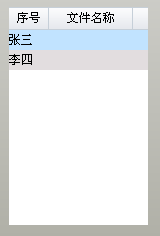
            <List name="ListDemo1" float="true" pos="30,314,0,0" width="139" height="218" bkcolor="#FFFFFFFF" itemtextcolor="#FF000000" itembkcolor="#FFE2DDDF" itemselectedtextcolor="#FF000000" itemselectedbkcolor="#FFC1E3FF" itemhottextcolor="#FF000000" itemhotbkcolor="#FFE9F5FF" itemdisabledtextcolor="#FFCCCCCC" itemdisabledbkcolor="#FFFFFFFF" >

                <ListHeader name="domain" bkimage="List/list_header_bg.png">

                    <ListHeaderItem text="序号" width="40" height="23" minwidth="16"  sepwidth="1" align="center" hotimage="List/list_header_hot.png" pushedimage="List/list_header_pushed.png" sepimage="List/list_header_sep.png" />

                    <ListHeaderItem text="文件名称" width="84" height="23" minwidth="16"  sepwidth="1" align="center" hotimage="List/list_header_hot.png" pushedimage="List/list_header_pushed.png" sepimage="List/list_header_sep.png" />

                </ListHeader>

                <ListLabelElement text="张三" selected="true" />

                <ListLabelElement text="李四" />

            </List>
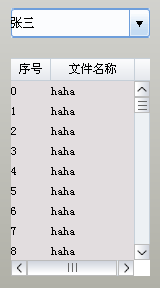
            <List name="ListDemo1" float="true" pos="30,314,0,0" width="139" height="218" vscrollbar="true" hscrollbar="true" bkcolor="#FFFFFFFF" itemtextcolor="#FF000000" itembkcolor="#FFE2DDDF" itemselectedtextcolor="#FF000000" itemselectedbkcolor="#FFC1E3FF" itemhottextcolor="#FF000000" itemhotbkcolor="#FFE9F5FF" itemdisabledtextcolor="#FFCCCCCC" itemdisabledbkcolor="#FFFFFFFF" >

                <ListHeader name="domain" bkimage="List/list_header_bg.png">

                    <ListHeaderItem text="序号" width="40" height="23" minwidth="16"  sepwidth="1" align="center" hotimage="List/list_header_hot.png" pushedimage="List/list_header_pushed.png" sepimage="List/list_header_sep.png" />

                    <ListHeaderItem text="文件名称" width="84" height="23" minwidth="16"  sepwidth="1" align="center" hotimage="List/list_header_hot.png" pushedimage="List/list_header_pushed.png" sepimage="List/list_header_sep.png" />

                </ListHeader>

            </List>
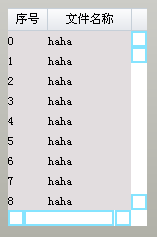
然后在main.cpp的InitWindow里添加如下代码:
        CDuiString str;

        CListUI* pList = static_cast<CListUI*>(m_PaintManager.FindControl(_T("ListDemo1")));

        // 添加List列表内容,必须先Add(pListElement),再SetText

        for (int i = ; i < ; i++)

        {

            CListTextElementUI* pListElement = new CListTextElementUI;

            pListElement->SetTag(i);

            pList->Add(pListElement);

            str.Format(_T("%d"), i);

            pListElement->SetText(, str);

            pListElement->SetText(, _T("haha"));

        }
即可生成如下效果:
<Default name="VScrollBar" value="button1normalimage="file='ScrollBar/scroll.png' source='0,0,16,16'" button1hotimage="file='ScrollBar/scroll.png' source='0,0,16,16' mask='#FFFF00FF'" button1pushedimage="file='ScrollBar/scroll.png' source='0,16,16,32' mask='#FFFF00FF'" button1disabledimage="file='ScrollBar/scroll.png' source='0,0,16,16' mask='#FFFF00FF'" button2normalimage="file='ScrollBar/scroll.png' source='0,32,16,48' mask='#FFFF00FF'" button2hotimage="file='ScrollBar/scroll.png' source='0,32,16,48' mask='#FFFF00FF'" button2pushedimage="file='ScrollBar/scroll.png' source='0,48,16,64' mask='#FFFF00FF'" button2disabledimage="file='ScrollBar/scroll.png' source='0,32,16,48' mask='#FFFF00FF'" thumbnormalimage="file='ScrollBar/scroll.png' source='0,64,16,80' corner='2,2,2,2' mask='#FFFF00FF'" thumbhotimage="file='ScrollBar/scroll.png' source='0,64,16,80' corner='2,2,2,2' mask='#FFFF00FF'" thumbpushedimage="ffile='ScrollBar/scroll.png' source='0,64,16,80' corner='2,2,2,2' mask='#FFFF00FF'" thumbdisabledimage="file='ScrollBar/scroll.png' source='0,64,16,80' corner='2,2,2,2' mask='#FFFF00FF'" railnormalimage="file='ScrollBar/scroll.png' source='0,80,16,96' corner='2,2,2,2' mask='#FFFF00FF'" railhotimage="file='ScrollBar/scroll.png' source='0,80,16,96' corner='2,2,2,2' mask='#FFFF00FF'" railpushedimage="file='ScrollBar/scroll.png' source='0,96,16,112' corner='2,2,2,2' mask='#FFFF00FF'" raildisabledimage="file='ScrollBar/scroll.png' source='0,80,16,96' corner='2,2,2,2' mask='#FFFF00FF'" bknormalimage="file='ScrollBar/scroll.png' source='0,128,16,146' corner='2,2,2,2' mask='#FFFF00FF'" bkhotimage="file='ScrollBar/scroll.png' source='0,128,16,146' corner='2,2,2,2' mask='#FFFF00FF'" bkpushedimage="file='ScrollBar/scroll.png' source='0,128,16,146' corner='2,2,2,2' mask='#FFFF00FF'" bkdisabledimage="file='ScrollBar/scroll.png' source='0,128,16,146' corner='2,2,2,2' mask='#FFFF00FF'" " />
<Default name="HScrollBar" value="button1normalimage="file='ScrollBar/scrollH.png' source='0,0,16,16'" button1hotimage="file='ScrollBar/scrollH.png' source='0,0,16,16' mask='#FFFF00FF'" button1pushedimage="file='ScrollBar/scrollH.png' source='16,0,32,16' mask='#FFFF00FF'" button1disabledimage="file='ScrollBar/scrollH.png' source='0,0,16,16' mask='#FFFF00FF'" button2normalimage="file='ScrollBar/scrollH.png' source='32,0,48,16' mask='#FFFF00FF'" button2hotimage="file='ScrollBar/scrollH.png' source='32,0,48,16' mask='#FFFF00FF'" button2pushedimage="file='ScrollBar/scrollH.png' source='48,0,64,16' mask='#FFFF00FF'" button2disabledimage="file='ScrollBar/scrollH.png' source='32,0,48,16' mask='#FFFF00FF'" thumbnormalimage="file='ScrollBar/scrollH.png' source='64,0,80,16' corner='2,2,2,2' mask='#FFFF00FF'" thumbhotimage="file='ScrollBar/scrollH.png' source='64,0,80,16' corner='2,2,2,2' mask='#FFFF00FF'" thumbpushedimage="ffile='ScrollBar/scrollH.png' source='64,0,80,16' corner='2,2,2,2' mask='#FFFF00FF'" thumbdisabledimage="file='ScrollBar/scrollH.png' source='64,0,80,16' corner='2,2,2,2' mask='#FFFF00FF'" railnormalimage="file='ScrollBar/scrollH.png' source='80,0,96,16' corner='2,2,2,2' mask='#FFFF00FF'" railhotimage="file='ScrollBar/scrollH.png' source='80,0,96,16' corner='2,2,2,2' mask='#FFFF00FF'" railpushedimage="file='ScrollBar/scrollH.png' source='96,0,112,16' corner='2,2,2,2' mask='#FFFF00FF'" raildisabledimage="file='ScrollBar/scrollH.png' source='80,0,96,16' corner='2,2,2,2' mask='#FFFF00FF'" bknormalimage="file='ScrollBar/scrollH.png' source='128,0,146,16' corner='2,2,2,2' mask='#FFFF00FF'" bkhotimage="file='ScrollBar/scrollH.png' source='128,0,146,16' corner='2,2,2,2' mask='#FFFF00FF'" bkpushedimage="file='ScrollBar/scrollH.png' source='128,0,146,16' corner='2,2,2,2' mask='#FFFF00FF'" bkdisabledimage="file='ScrollBar/scrollH.png' source='128,0,146,16' corner='2,2,2,2' mask='#FFFF00FF'" " />
XML好乱,复制到XML编辑器上慢慢看吧~(*^__^*)
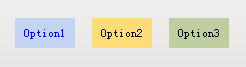
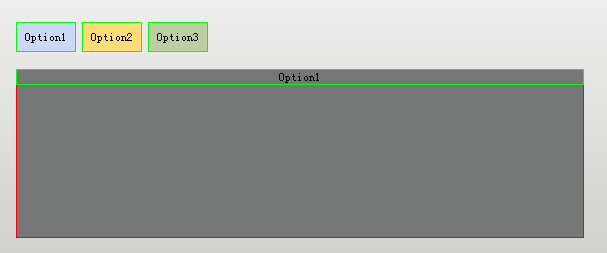
            <Option name="OptionDemo1" text="Option1" float="true" pos="207,28,0,0" width="60" height="30" bkcolor="#FFC5D4F2" selectedtextcolor="#FF0000FF" selectedbkcolor="#FFC5D4F2" group="tabDemo" selected="true" />

            <Option name="OptionDemo2" text="Option2" float="true" pos="284,28,0,0" width="60" height="30" bkcolor="#FFFFDC78" group="tabDemo" />

            <Option name="OptionDemo3" text="Option3" float="true" pos="361,28,0,0" width="60" height="30" bkcolor="#FFBECEA1" group="tabDemo" />
            <TabLayout name="tabTest" bkcolor="#FF757676">

                <Label text="Option1" bkcolor="#FFC5D4F2" align="center" />

                <Text  text="Option2" bkcolor="#FFFFDC78" align="centerwrap" />

                <Text  text="Option3" bkcolor="#FFBECEA1" align="center" />

            </TabLayout>

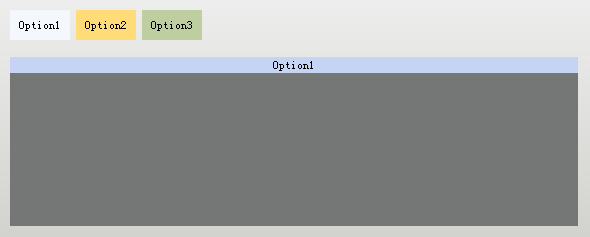
            <TabLayout name="tabTest" float="true" pos="202,75,0,0" width="568" height="169" bkcolor="#FF757676">

                <Label text="Option1" bkcolor="#FFC5D4F2" align="center" />

                <Text  text="Option2" bkcolor="#FFFFDC78" align="centerwrap" />

                <Text  text="Option3" bkcolor="#FFBECEA1" align="center" />

            </TabLayout>
    virtual void Notify( TNotifyUI& msg )

    {

        if(msg.sType == _T("selectchanged"))

        {

            CDuiString    strName     = msg.pSender->GetName();

            CTabLayoutUI* pControl = static_cast<CTabLayoutUI*>(m_PaintManager.FindControl(_T("tabTest")));

            if(strName == _T("OptionDemo1"))

                pControl->SelectItem();

            else if(strName == _T("OptionDemo2"))

                pControl->SelectItem();

            else if(strName == _T("OptionDemo3"))

                pControl->SelectItem();

        }

        __super::Notify(msg);

    }
注释:Notify函数是消息通知函数,所有的控件消息(比如点击、切换)都会经过这里。
            <TabLayout name="tabTest" float="true" pos="202,75,0,0" width="568" height="169" bkcolor="#FF757676">

                <HorizontalLayout>

                    <Label text="Option1" bkcolor="#FFC5D4F2" align="center" />

                </HorizontalLayout>

                <Text   text="Option2" bkcolor="#FFFFDC78" align="centerwrap" height="160"/>

                <Button text="Option3" bkcolor="#FFBECEA1" align="centerwrap" width="300"/>

            </TabLayout>
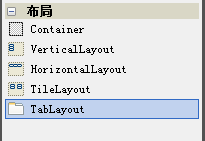
到现在为止,DuiDesigner上面除了Container、TileLayout这两个控件,其他控件都介绍完毕啦,由于Alberl学习duilib的时间非常有限,还没看到这两个控件,并且现在已能实现绝大部分界面,所以这两个控件将排到Alberl的下一轮学习中,如果有大神愿意贡献一下教程就太感谢啦~O(∩_∩)O~
全家福:
2013 duilib入门简明教程 -- 复杂控件介绍 (13)的更多相关文章
- 2013 duilib入门简明教程 -- 简单控件介绍 (12)
前面的教程应该让大家对duilib的整体有所映像了,下面就来介绍下duilib具体控件的使用. 由于官方没有提供默认的控件样式,所以我就尽量使用win7或者XP自带的按钮样式了,虽然界 ...
- 2013 duilib入门简明教程 -- 自绘控件 (15)
在[2013 duilib入门简明教程 -- 复杂控件介绍 (13)]中虽然介绍了界面设计器上的所有控件,但是还有一些控件并没有被放到界面设计器上,还有一些常用控件duilib并没有提供(比如 ...
- 2013 duilib入门简明教程 -- 总结 (20)
duilib的入门系列就到尾声了,再次提醒下,Alberl用的duilib版本是SVN上第个版本,时间是2013.08.15~ 这里给出Alberl最后汇总的一个工程,戳我下载,效 ...
- 2013 duilib入门简明教程 -- 部分bug 2 (14)
上一个教程中提到了ActiveX的Bug,即如果主窗口直接用变量生成,则关闭窗口时会产生崩溃 如果用new的方式生成,则不会崩溃,所以给出一个临时的快速解决方案,即主窗口 ...
- 2013 duilib入门简明教程 -- 事件处理和消息响应 (17)
界面的显示方面就都讲完啦,下面来介绍下控件的响应. 前面的教程只讲了按钮和Tab的响应,即在Notify函数里处理.其实duilib还提供了另外一种响应的方法,即消息映射DUI_BEG ...
- 2013 duilib入门简明教程 -- FAQ (19)
虽然前面的教程几乎把所有的知识点都罗列了,但是有很多问题经常在群里出现,所以这里再次整理一下. 需要注意的是,在下面的问题中,除了加上XML属性外,主窗口必须继承自WindowImpl ...
- 2013 duilib入门简明教程 -- 第一个程序 Hello World(3)
小伙伴们有点迫不及待了么,来看一看Hello World吧: 新建一个空的win32项目,新建一个main.cpp文件,将以下代码复制进去: #include <windows.h> #i ...
- 2013 duilib入门简明教程 -- 部分bug (11)
一.WindowImplBase的bug 在第8个教程[2013 duilib入门简明教程 -- 完整的自绘标题栏(8)]中,可以发现窗口最大化之后有两个问题, 1.最大化按钮的样式 ...
- 2013 duilib入门简明教程 -- 界面布局(9)
上一个教程实现的标题栏代码中,并没有看到处理自适应窗口大小的代码,但是窗口大小变化后,按钮的位置会跟着变化,这是因为我们将按钮放到了HorizontalLayout.VerticalLayou ...
随机推荐
- Fragment滑动切换简单案例
Fragment的产生与介绍Android运行在各种各样的设备中,有小屏幕的手机,超大屏的平板甚至电视.针对屏幕尺寸的差距,很多情况下,都是先针对手机开发一套App,然后拷贝一份,修改布局以适应平板神 ...
- Maven的配置和使用(二)
Maven仓库 使用Maven带给我们一个比较直接的好处是管理jar包,这些jar包默认地址是在C:\Users\用户名.m2 目录下,我们来修改下这个地址: 现在自己想建立的仓库地址的路径下新建文件 ...
- c:out标签和el表达式与跨域攻击XSS
很多时候,在JSP中我们喜欢用EL表达式输出信息,但是最近发现这个确实存在个问题:XSS即跨域攻击. 下面看个例子: <c:out value="${student.name}&quo ...
- MsSQLserver中修改字段值系统自动生成的脚本
主要参考一下脚本的实现思路: ①创建临时表 ②创建临时表 ③向临时表插入数据 ④删除原表 ⑤临时表改名 /* 为了防止任何可能出现的数据丢失问题,您应该先仔细检查此脚本,然后再在数据库设计器的上下文之 ...
- Asp.Net WebApi开发注意
1.Api的版本控制 2.Api的异常处理 设置全局异常处理 3.Api的权限控制 4.Api的请求处理 get:查询 post:创建 put:修改 delete:删除 5.Api的文档说明
- IDE-Sublime【3】-配置Node.js开发环境
一.下载Nodejs插件,下载地址为https://github.com/tanepiper/SublimeText-Nodejs,解压到当前文件夹,改名为Nodejs 二.打开Sublime Tex ...
- appium过程中的问题
1.在eclipse中点击Genymotion Virtual Device Manager ,选择虚拟设备,点击start后,无反应. 解决方法:Help/Install New Softwa ...
- python小程序
使用python实现在crt中捕捉出现的异常信息,并统计出现的次数: #$language = "Python" #$interface = "1.0" def ...
- SPRING SECURITY JAVA配置:Web Security
在前一篇,我已经介绍了Spring Security Java配置,也概括的介绍了一下这个项目方方面面.在这篇文章中,我们来看一看一个简单的基于web security配置的例子.之后我们再来作更多的 ...
- js中的navigator对象
Navigator 对象包含有关浏览器的信息.所有浏览器都支持该对象 在控制台中输出相关信息的代码 <script> console.log(navigator); </script ...