Django快速开发投票系统
使用Django搭建简单的投票系统:这个是官网的教程:https://docs.djangoproject.com/en/2.0/intro/tutorial01/
在Run manage.py Task中新建app:startapp polls
为了管理方便,我们新建apps文件夹,并将polls文件夹拖到apps中
第1部分:构建模型
新建polls的model
from django.db import models

# Create your models here.

class Question(models.Model):

question_text =models.CharField(max_length=200,verbose_name=u"问题内容")

pub_date = models.DateTimeField(verbose_name=u"发表时间")

class Meta:

verbose_name = "问题"

verbose_name_plural = verbose_name

def __str__(self):

return self.question_text

class Choice(models.Model):

question = models.ForeignKey(Question,verbose_name=u"问题内容")

choice_text = models.CharField(max_length=200,verbose_name=u"选项内容")

votes = models.IntegerField(default=0,verbose_name=u"投票")

class Meta:

verbose_name = "选择"

verbose_name_plural = verbose_name

def __str__(self):

return self.choice_text
然后通过命令python manage.py makemigrations python manage.py migrate进行迁移
我们也可以通过python manage.py sqlmigrate查看迁移过程中执行的原始sql语句
BEGIN;

--

-- Create model Choice

--

CREATE TABLE `polls_choice` (`id` integer AUTO_INCREMENT NOT NULL PRIMARY KEY, `choice_text` varchar(200) NOT NULL, `votes` integer NOT NULL);

--

-- Create model Question

--

CREATE TABLE `polls_question` (`id` integer AUTO_INCREMENT NOT NULL PRIMARY KEY, `question_text` varchar(200) NOT NULL, `pub_date` datetime(6) NOT NULL);

--

-- Add field question to choice

--

ALTER TABLE `polls_choice` ADD COLUMN `question_id` integer NOT NULL;

ALTER TABLE `polls_choice` ALTER COLUMN `question_id` DROP DEFAULT;

CREATE INDEX `polls_choice_7aa0f6ee` ON `polls_choice` (`question_id`);

ALTER TABLE `polls_choice` ADD CONSTRAINT `polls_choice_question_id_c5b4b260_fk_polls_question_id` FOREIGN KEY (`question_id`) REFERENCES `polls_question` (`id`);

COMMIT;

Following files were affected
请注意几点:
1:表名是自动生成的,由app的名字(polls)和模型名字的小写字母组合而成 —— question和choice
2:主键(id)是自动添加的。(你也可以重写这个行为。)
3:按照惯例,Django会在外键的字段名后面添加 "_id"。(是的,你依然可以重写这个行为。)
第二部分:使用xadmin搭建后台系统
在polls中新建adminx.py文件
import xadmin

from xadmin import views

from xadmin.plugins.auth import UserAdmin

from .models import Question,Choice

class ChoiceInline(object):

model = Choice

extra = 0

class QuestionAdmin(object):

list_display = ['question_text', 'pub_date'] #自定义显示这两个字段

search_fields = ['question_text', 'pub_date'] #可以搜索的字段

list_filter = ['question_text', 'pub_date']

ordering = ['-pub_date',] ##按照倒序排列

inlines = [ChoiceInline]

xadmin.site.register(Question,QuestionAdmin) #向Xadmin注册Question
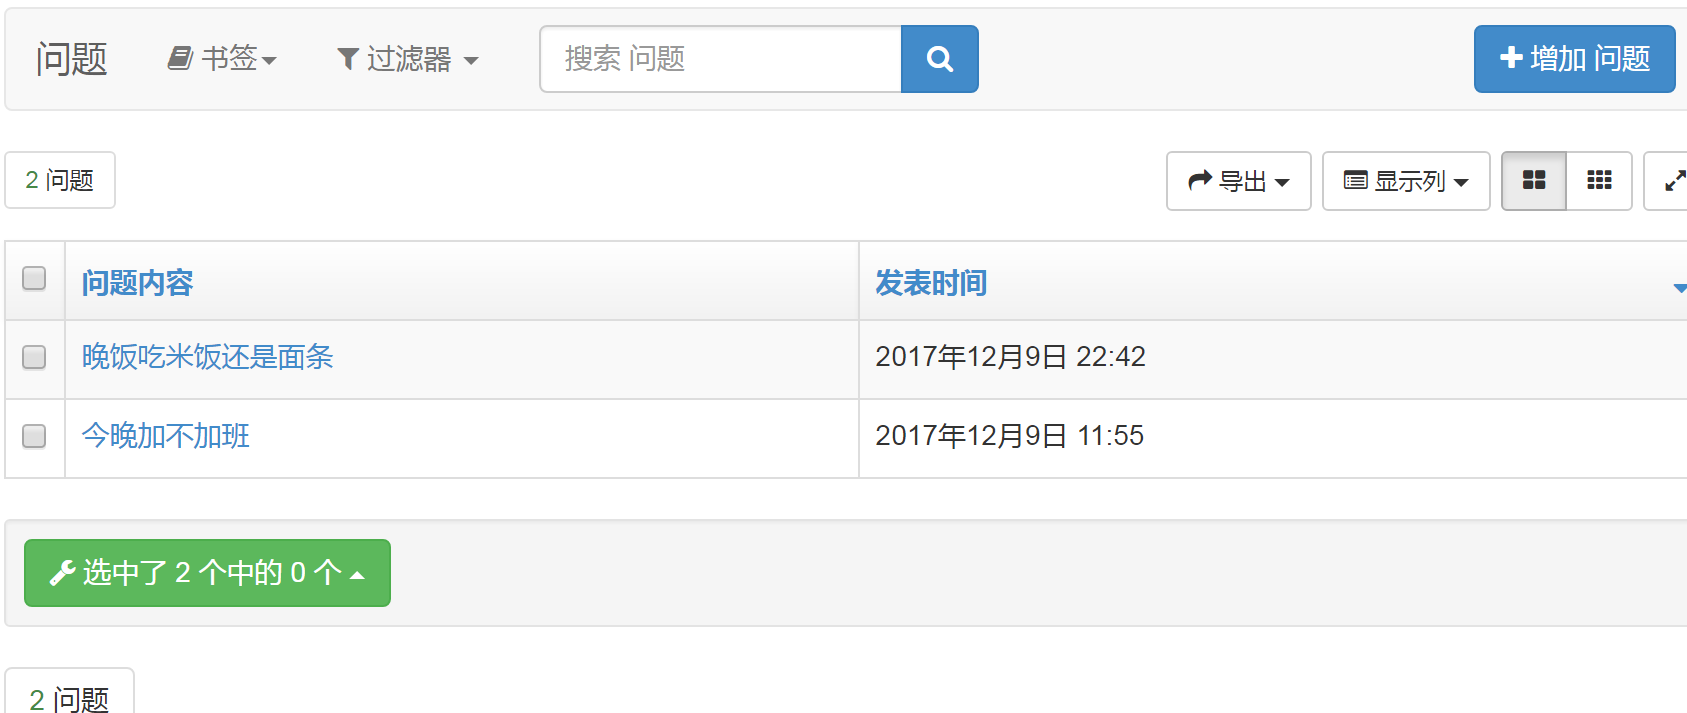
图1:管理系统图

图2:问题与选项图
在图1中,后台系统中显示了投票问题,包括问题内容和发表时间。右上角可以新增内容,上面还有搜索框和过滤器
在图2中,在每个问题中可以选择选项内容
第三部分:视图和模板
from django.shortcuts import render

from django.http import HttpResponse,Http404

from .models import Question,Choice

# Create your views here.

from django.shortcuts import get_object_or_404, render

from django.http import HttpResponseRedirect

from django.core.urlresolvers import reverse

from django.views import generic

from .models import Choice, Question

class IndexView(generic.ListView):

template_name = 'polls/index.html'

context_object_name = 'latest_question_list'

def get_queryset(self):

"""Return the last five published questions."""

return Question.objects.order_by('-pub_date')[:5] #按照时间从小到大排序,取前5个

class DetailView(generic.DetailView):

model = Question

template_name = 'polls/detail.html'

class ResultsView(generic.DetailView):

model = Question

template_name = 'polls/results.html'

def vote(request, question_id):

p = get_object_or_404(Question, pk=question_id)

try:

selected_choice = p.choice_set.get(pk=request.POST['choice'])

except (KeyError, Choice.DoesNotExist):

# Redisplay the question voting form.

return render(request, 'polls/detail.html', {

'question': p,

'error_message': "You didn't select a choice.",

})

else:

selected_choice.votes += 1

selected_choice.save()

# Always return an HttpResponseRedirect after successfully dealing

# with POST data. This prevents data from being posted twice if a

# user hits the Back button.

return HttpResponseRedirect(reverse('polls:results', args=(p.id,)))

urlpatterns = [

url(r'^$', views.IndexView.as_view(), name='index'),

url(r'^(?P<pk>[0-9]+)/$', views.DetailView.as_view(), name='detail'),

url(r'^(?P<pk>[0-9]+)/results/$', views.ResultsView.as_view(), name='results'),

url(r'^(?P<question_id>[0-9]+)/vote/$', views.vote, name='vote'),

]
第四部分:表单
1:index.html ---> 显示全部问题
{% if latest_question_list %}

    <ul>

    {% for question in latest_question_list %}

        <li><a href="/polls/{{ question.id }}/">{{ question.question_text }}</a></li>

    {% endfor %}

    </ul>

{% else %}

    <p>No polls are available.</p>

{% endif %}
2:detail.html ---> 问题详情页
<h1>{{ question.question_text }}</h1>

{% if error_message %}<p><strong>{{ error_message }}</strong></p>{% endif %}

<form action="{% url 'polls:vote' question.id %}" method="post">

{% csrf_token %}

{% for choice in question.choice_set.all %}

    <input type="radio" name="choice" id="choice{{ forloop.counter }}" value="{{ choice.id }}" />

    <label for="choice{{ forloop.counter }}">{{ choice.choice_text }}</label><br />

{% endfor %}

<input type="submit" value="Vote" />

</form>
3:results.html ---> 投票结果页
<h1>{{ question.question_text }}</h1>

<ul>

{% for choice in question.choice_set.all %}

    <li>{{ choice.choice_text }} -- {{ choice.votes }} vote{{ choice.votes|pluralize }}</li>

{% endfor %}

</ul>

<a href="{% url 'polls:detail' question.id %}">Vote again?</a>
第五部分:结果展示
最终工程截图:

结果展示:
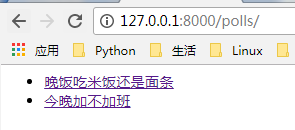
图3:投票问题

图4:问题选项

图5:投票结果
Django快速开发投票系统的更多相关文章
- 基于django快速开发一个网站(一)
基于django快速开发一个网站(一) * 创建虚拟环境.基于虚拟环境创建django==2.0.0和图片加载库和mysql数据库驱动 1. 创建目录并创建虚拟环境 ╰$ mkdir Cornuco ...
- Django快速开发之投票系统
https://docs.djangoproject.com/en/1.8/intro/tutorial01/ 参考官网文档,创建投票系统. ================ Windows 7/1 ...
- Django写的投票系统2(转)
在上一篇中 django实例:创建你的第一个应用投票系统(一) 已经介绍基本的功能,并已经启动服务了.这一节介绍数据库相关的东东. 首页打开mysite/settings.py配置文件, 设置数据库打 ...
- Django写的投票系统1(转)
当然主要是从django的帮助文档里面来的,权当是翻译吧 这个投票系统的主要功能有 1.一个前台页面,可以让用户来投票 2.一个管理员页面,可以用来添加.修改.删除投票 首页第一步要确定你已经安装了D ...
- Django快速开发实践:Drf框架和xadmin配置指北
步骤 既然是快速开发,那废话不多说,直接说步骤: 安装Djagno 安装Django Rest Framework 定义models 定义Rest framework的serializers 定义Re ...
- 三、利用EnterpriseFrameWork快速开发Winform系统(C/S)
EnterpriseFrameWork框架实例源代码下载: 实例下载 上一章讲解了开发Web系统的详细步骤,以书籍的管理作实例实现对书籍的增.删.改.查功能,本章接着上面的实例继续补充用Winform ...
- Django 开发投票系统
主要参考官方文档 Windows 10 Python 23.5 Django 1.9 1.创建项目(mysite)与应用(polls) D:\python>django-admin.py st ...
- Django博客开发教程,Django快速开发个人blog
学DjangoWEB框架,估计大部分的朋友都是从Blog开发开始入门的,Django中文网发布了一个Django开发教程,这个教程简单易懂,能让你快速的使用Django开发一个漂亮的个人blog,是D ...
- Django写的投票系统4(转)
原文地址:http://www.cnblogs.com/djangochina/archive/2013/06/04/3114269.html 现在已经可以在后台管理投票了,现在就差怎么在前台显示和如 ...
随机推荐
- 移除script标签引起的兼容性问题
一.应用场景: 有时候我们需要动态创建script标签实现脚本的按需加载,我们会为script标签绑定onload或者onreadystatechange事件,用于检测动态脚本是否加载并执行完毕,在事 ...
- WinSock WSAEventSelect 模型
在前面我们说了WSAAsyncSelect 模型,它相比于select模型来说提供了这样一种机制:当发生对应的IO通知时会立即通知操作系统,并调用对应的处理函数,它解决了调用send和 recv的时机 ...
- JS多级树结构写法
效果: 一.布局: <div class="three_tree"> <div class="tree_title_cut"> < ...
- webstorm上传vue代码至git
Git在push时候,提示:push to origin/master was rejected 解决方案如下: 提交代码顺序 webstorm右键项目名称==>Git==>Commit ...
- java实现链表结构详细代码
一.数据准备 1. 定义节点 2. 定义链表 1.数据部分 2.节点部分 class DATA //数据节点类型 { String key; String name; int age; } cla ...
- 向jsp页面传值时出现乱码
在一个html页面中用表单向jsp页面传值: 这是html页面 <html> <head> <title>MyBeans.html</title> &l ...
- pcharm激活
服务器搭建命令:(一直默认即可) wget http://home.ustc.edu.cn/~mmmwhy/jetbrain.sh && sh ./jetbrain.sh 我搭建的服务 ...
- 导致SharePoint发生Timeout的几处门槛设置
IIS connection time-out setting =========================== 如何修改? Click Start, point to All Programs ...
- winform DataGridView 通用初始化
void DGV_Init() { //名称 类型 设备数 累计转发次数 累计转发数据数 状态 ; i < ; i++) { DataGridViewTextBoxColumn dc = new ...
- Nginx+Tomcat+Session 高性能群集搭建
随着IT行业的发展,linux服务器在企业中应用广泛,人们对linux上的应用服务要求也越来越高,早先的apache服务器.apache有优点也 有不足,apache渐渐不能满足人们的要求,目前ngi ...