SpringMVC框架二:SpringMVC与MyBatis整合
下面整合SpringMVC和MyBatis框架,并做一个小案例
创建数据库springmvc,并创建两张表,加入一些数据:
两张表:商品表,用户表
CREATE DATABASE springmvc;

CREATE TABLE `items` (

  `id` int(11) NOT NULL AUTO_INCREMENT,

  `name` varchar(32) NOT NULL COMMENT '商品名称',

  `price` float(10,1) NOT NULL COMMENT '商品定价',

  `detail` text COMMENT '商品描述',

  `pic` varchar(64) DEFAULT NULL COMMENT '商品图片',

  `createtime` datetime NOT NULL COMMENT '生产日期',

  PRIMARY KEY (`id`)

) ENGINE=InnoDB AUTO_INCREMENT=4 DEFAULT CHARSET=utf8;

INSERT INTO `items` VALUES ('', '台式机', '3000.0', '该电脑质量非常好!!!!', null, '2016-02-03 13:22:53');

INSERT INTO `items` VALUES ('', '笔记本', '6000.0', '笔记本性能好,质量好!!!!!', null, '2015-02-09 13:22:57');

INSERT INTO `items` VALUES ('', '背包', '200.0', '名牌背包,容量大质量好!!!!', null, '2015-02-06 13:23:02');

CREATE TABLE `user` (

  `id` int(11) NOT NULL AUTO_INCREMENT,

  `username` varchar(32) NOT NULL COMMENT '用户名称',

  `birthday` date DEFAULT NULL COMMENT '生日',

  `sex` char(1) DEFAULT NULL COMMENT '性别',

  `address` varchar(256) DEFAULT NULL COMMENT '地址',

  PRIMARY KEY (`id`)

) ENGINE=InnoDB AUTO_INCREMENT=27 DEFAULT CHARSET=utf8;

INSERT INTO `user` VALUES ('', '王五', null, '', null);

INSERT INTO `user` VALUES ('', '张三', '2014-07-10', '', '北京市');

INSERT INTO `user` VALUES ('', '张小明', null, '', '河南郑州');

INSERT INTO `user` VALUES ('', '陈小明', null, '', '河南郑州');

INSERT INTO `user` VALUES ('', '张三丰', null, '', '河南郑州');

INSERT INTO `user` VALUES ('', '陈小明', null, '', '河南郑州');

INSERT INTO `user` VALUES ('', '王五', null, null, null);
新建Dynamic Web Project:
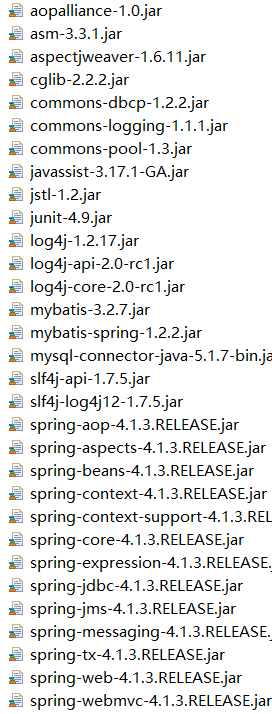
导包:
先把简单的数据库配置完成:
db.properties:
jdbc.driver=com.mysql.jdbc.Driver

jdbc.url=jdbc:mysql://localhost:3306/springmvc?characterEncoding=utf-8

jdbc.username=root

jdbc.password=12345
MyBatis的配置文件sqlMapConfig.xml:
<?xml version="1.0" encoding="UTF-8" ?>

<!DOCTYPE configuration

PUBLIC "-//mybatis.org//DTD Config 3.0//EN"

"http://mybatis.org/dtd/mybatis-3-config.dtd">

<configuration>

    <typeAliases>

        <package name="org.dreamtech.springmvc.pojo" />

    </typeAliases>

</configuration>
applicationContext.xml:
<?xml version="1.0" encoding="UTF-8"?>

<beans xmlns="http://www.springframework.org/schema/beans"

    xmlns:context="http://www.springframework.org/schema/context" xmlns:p="http://www.springframework.org/schema/p"

    xmlns:aop="http://www.springframework.org/schema/aop" xmlns:tx="http://www.springframework.org/schema/tx"

    xmlns:xsi="http://www.w3.org/2001/XMLSchema-instance"

    xsi:schemaLocation="http://www.springframework.org/schema/beans http://www.springframework.org/schema/beans/spring-beans-4.0.xsd

    http://www.springframework.org/schema/context http://www.springframework.org/schema/context/spring-context-4.0.xsd

    http://www.springframework.org/schema/aop http://www.springframework.org/schema/aop/spring-aop-4.0.xsd http://www.springframework.org/schema/tx http://www.springframework.org/schema/tx/spring-tx-4.0.xsd

    http://www.springframework.org/schema/util http://www.springframework.org/schema/util/spring-util-4.0.xsd">

    <context:property-placeholder location="classpath:db.properties" />

    <bean id="dataSource" class="org.apache.commons.dbcp.BasicDataSource"

        destroy-method="close">

        <property name="driverClassName" value="${jdbc.driver}" />

        <property name="url" value="${jdbc.url}" />

        <property name="username" value="${jdbc.username}" />

        <property name="password" value="${jdbc.password}" />

        <property name="maxActive" value="10" />

        <property name="maxIdle" value="5" />

    </bean>

    <bean id="sqlSessionFactoryBean" class="org.mybatis.spring.SqlSessionFactoryBean">

        <property name="dataSource" ref="dataSource" />

        <property name="configLocation" value="classpath:sqlMapConfig.xml" />

    </bean>

    <bean class="org.mybatis.spring.mapper.MapperScannerConfigurer">

        <property name="basePackage" value="org.dreamtech.mybatis.springmvc.dao" />

    </bean>

    <!-- 注解事务 -->

    <bean id="transactionManager"

        class="org.springframework.jdbc.datasource.DataSourceTransactionManager">

        <property name="dataSource" ref="dataSource" />

    </bean>

    <!-- 开启注解 -->

    <tx:annotation-driven transaction-manager="transactionManager" />

</beans>
web.xml配置如下:
<?xml version="1.0" encoding="UTF-8"?>

<web-app xmlns:xsi="http://www.w3.org/2001/XMLSchema-instance"

    xmlns="http://java.sun.com/xml/ns/javaee"

    xsi:schemaLocation="http://java.sun.com/xml/ns/javaee http://java.sun.com/xml/ns/javaee/web-app_2_5.xsd"

    id="WebApp_ID" version="2.5">

    <display-name>springmvc-mybatis</display-name>

    <welcome-file-list>

        <welcome-file>index.html</welcome-file>

        <welcome-file>index.htm</welcome-file>

        <welcome-file>index.jsp</welcome-file>

        <welcome-file>default.html</welcome-file>

        <welcome-file>default.htm</welcome-file>

        <welcome-file>default.jsp</welcome-file>

    </welcome-file-list>

    <context-param>

        <param-name>contextConfigLocation</param-name>

        <param-value>classpath:applicationContext.xml</param-value>

    </context-param>

    <listener>

        <listener-class>org.springframework.web.context.ContextLoaderListener</listener-class>

    </listener>

    <servlet>

        <servlet-name>springmvc</servlet-name>

        <servlet-class>org.springframework.web.servlet.DispatcherServlet</servlet-class>

        <init-param>

            <param-name>contextConfigLocation</param-name>

            <param-value>classpath:springmvc.xml</param-value>

        </init-param>

    </servlet>

    <servlet-mapping>

        <servlet-name>springmvc</servlet-name>

        <url-pattern>*.action</url-pattern>

    </servlet-mapping>

</web-app>
sprIngmvc.xml配置如下:
<?xml version="1.0" encoding="UTF-8"?>

<beans xmlns="http://www.springframework.org/schema/beans"

    xmlns:xsi="http://www.w3.org/2001/XMLSchema-instance" xmlns:p="http://www.springframework.org/schema/p"

    xmlns:context="http://www.springframework.org/schema/context"

    xmlns:mvc="http://www.springframework.org/schema/mvc"

    xsi:schemaLocation="http://www.springframework.org/schema/beans http://www.springframework.org/schema/beans/spring-beans-4.0.xsd

        http://www.springframework.org/schema/mvc http://www.springframework.org/schema/mvc/spring-mvc-4.0.xsd

        http://www.springframework.org/schema/context http://www.springframework.org/schema/context/spring-context-4.0.xsd">

    <context:component-scan base-package="org.dreamtech"/>

    <mvc:annotation-driven />

    <bean

        class="org.springframework.web.servlet.view.InternalResourceViewResolver">

        <property name="prefix" value="/WEB-INF/jsp/" />

        <property name="suffix" value=".jsp" />

    </bean>

</beans>
Controller:
package org.dreamtech.springmvc.controller;

import java.util.List;

import org.springframework.beans.factory.annotation.Autowired;

import org.springframework.stereotype.Controller;

import org.springframework.web.bind.annotation.RequestMapping;

import org.springframework.web.servlet.ModelAndView;

import org.dreamtech.springmvc.pojo.Items;

import org.dreamtech.springmvc.service.ItemService;

/**

 * 商品管理

 */

@Controller

public class ItemController {

    @Autowired

    private ItemService itemService;

    @RequestMapping(value = "/item/itemlist.action")

    public ModelAndView itemList(){

        List<Items> list = itemService.selectItemsList();

        ModelAndView mav = new ModelAndView();

        mav.addObject("itemList", list);

        mav.setViewName("itemList");

        return mav;

    }

}
另外:RequestMapping注解的使用:
限定Get或Post方法:
    @RequestMapping(value = "/deletes.action",method=RequestMethod.GET)

    public ModelAndView deletes(Integer[] ids) {

        ModelAndView mav = new ModelAndView();

        mav.setViewName("success");

        return mav;

    }
如果要想两项都支持:
    @RequestMapping(value = "/deletes.action", method = { RequestMethod.GET, RequestMethod.POST })

    public ModelAndView deletes(Integer[] ids) {

        ModelAndView mav = new ModelAndView();

        mav.setViewName("success");

        return mav;

    }
当然,如果不写的话:支持八大请求方式
如果当前Controller之下的所有URL都是同一个目录下:
可以将它提出,给当前类一个RequestMapping(value="/xxx")注解
另外:RequestMapping的value是一个String[]类型,意味着可以多个URL交到一起处理
至于Service层的接口和实现类,Dao层MyBatis的Mapper动态代理,POJO类,页面简单的JSP代码......
这些与SpringMVC无关,于是省略了,现在启动项目
访问:
http://localhost:8080/springmvc-mybatis1/item/itemlist.action
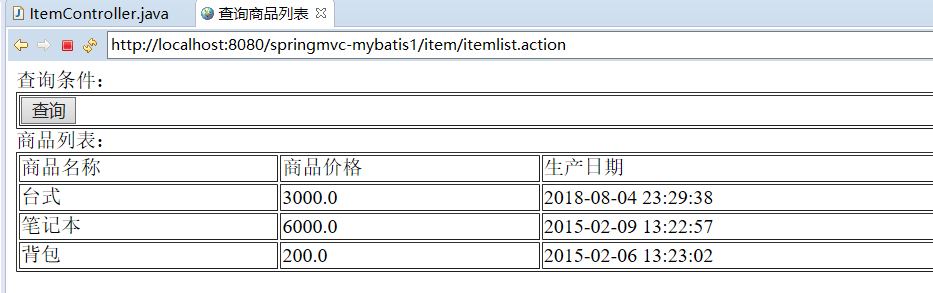
成功从数据库读出数据,完成了SpringMVC和MyBatis的整合
SpringMVC框架二:SpringMVC与MyBatis整合的更多相关文章
- (转)MyBatis框架的学习(六)——MyBatis整合Spring
http://blog.csdn.net/yerenyuan_pku/article/details/71904315 本文将手把手教你如何使用MyBatis整合Spring,这儿,我本人使用的MyB ...
- springmvc框架(Spring SpringMVC, Hibernate整合)
直接干货 model 考虑给用户展示什么.关注支撑业务的信息构成.构建成模型. control 调用业务逻辑产生合适的数据以及传递数据给视图用于呈献: view怎样对数据进行布局,以一种优美的方式展示 ...
- SpringMVC框架02——SpringMVC的Controller详解
1.基于注解的控制器 1.1.@Controller 注解类型 在SpringMVC中使用org.springframework.stereotype.Controller注解类型声明某类的实例是一个 ...
- (转)SpringMVC学习(二)——SpringMVC架构及组件
http://blog.csdn.net/yerenyuan_pku/article/details/72231385 相信大家通过前文的学习,已经对SpringMVC这个框架多少有些理解了.还记得上 ...
- SpringMVC学习(二)——SpringMVC架构及组件(及其运行原理)-转载
相信大家通过前文的学习,已经对SpringMVC这个框架多少有些理解了.还记得上一篇文章中SpringMVC的处理流程吗? 这个图大致描述了SpringMVC的整个处理流程,这个流程图还是相对来说比 ...
- JavaWeb_(SpringMVC框架)测试SpringMVC&Spring&MyBatis三大整合
搭建 SpringMVC&Spring&MyBatis三大整合 传送门 1.准备 测试搭建S pringMVC&Spring&MyBatis三大整合 用例 a)准备 ...
- Struts2框架07 Struts2 + Spring + Mybatis 整合
1 导包 <project xmlns="http://maven.apache.org/POM/4.0.0" xmlns:xsi="http://www.w3.o ...
- SpringBoot入门二:与Mybatis整合
一.编程步骤 1.引入依赖 springboot相关依赖(略).mybatis-spring-boot-starter.mysql.druid.lombook <dependency> & ...
- JavaWeb_(SpringMVC框架)SpringMVC&Spring&MyBatis整合
JavaWeb_(SpringMVC框架)测试SpringMVC&Spring&MyBatis三大整合 传送门 1.整合ssm 3大框架 过程 a)导包 -> spring_Ja ...
随机推荐
- Servlet之监听器(Listener)
一.监听器(Listener)概述 1.概念 JavaWeb中的监听器是Servlet规范中定义的一种特殊类,它用于监听web应用程序中的ServletContext, HttpSession和 Se ...
- github分支规范
转自:https://www.cnblogs.com/xuld 一.目的 我们制定分支规范,意在实现以下目标: 减少沟通成本:开发者可以很清晰地知道需要修改的代码位于哪个分支. 减少 bug 隐患:避 ...
- linux学习第十九天 (Linux就该这么学) 结课了
今天最后一天课程了,结课了,还有点舍不得那,在些也祝 李老师 事业蒸蒸日上,超来超好, 今天内容是部署了 LNMP 部署动态网站环境(linux +nginx+mysql+php) 安装文件挺别多, ...
- Jython 在 Eclipse 控制台报错 console: Failed to install '': java.nio.charset.UnsupportedCharsetException: cp0.
在 Eclipse 中使用 Jython 时报错 解决办法 右键 --> Run As --> Run Configurations --> Arguments --> 设置 ...
- Solved: RDP Disconnected – Error Code 2825 mremote
- 使用nginx反向代理实现隐藏端口号
使用nginx反向代理实现隐藏端口号 在服务器上下载安装nginx,主要是修改配置nginx.conf. 用proxy_pass里面配置要转发的域名+端口,相当于这一部分是被域名替换的部分,在http ...
- 【机器学习】随机森林 Random Forest 得到模型后,评估参数重要性
在得出random forest 模型后,评估参数重要性 importance() 示例如下 特征重要性评价标准 %IncMSE 是 increase in MSE.就是对每一个变量 比如 X1 随机 ...
- ELK的文档搭建
一.安装elasticsearch 官网:https://www.elastic.co/guide/index.html https://www.elastic.co/guide/en/elastic ...
- MySQL远程连接失败(错误码:2003)
一 环境信息 服务器系统:Ubuntu 18.04 服务器MySQL版本:14.14 Distrib 5.7.25 本地系统:Kali Linux 本地客户端:python3交互模式 本地开发环境:p ...
- Nginx服务器中配置非80端口的端口转发方法详解
这篇文章主要介绍了Nginx服务器中配置非80端口的端口转发方法详解,文中使用到了Nginx中的proxy_pass配置项,需要的朋友可以参考下 nginx可以很方便的配置成反向代理服务器: 1 2 ...