
springmvc与swagger2
首先呢我们导入相关的jar包文件
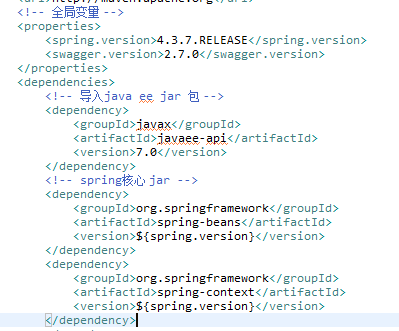

为了方便copy我copy一份
<!-- 导入java ee jar 包 -->
<dependency>
<groupId>javax</groupId>
<artifactId>javaee-api</artifactId>
<version>7.0</version>
</dependency>
<!-- spring核心 jar -->
<dependency>
<groupId>org.springframework</groupId>
<artifactId>spring-beans</artifactId>
<version>${spring.version}</version>
</dependency>
<dependency>
<groupId>org.springframework</groupId>
<artifactId>spring-context</artifactId>
<version>${spring.version}</version>
</dependency>
<dependency>
<groupId>org.springframework</groupId>
<artifactId>spring-web</artifactId>
<version>${spring.version}</version>
</dependency>
<dependency>
<groupId>org.springframework</groupId>
<artifactId>spring-webmvc</artifactId>
<version>${spring.version}</version>
</dependency>
<!-- swagger -->
<dependency>
<groupId>io.springfox</groupId>
<artifactId>springfox-swagger2</artifactId>
<version>${swagger.version}</version>
</dependency>
<dependency>
<groupId>io.springfox</groupId>
<artifactId>springfox-swagger-ui</artifactId>
<version>${swagger.version}</version>
</dependency>
<!-- jacksion -->
<dependency>
<groupId>com.fasterxml.jackson.core</groupId>
<artifactId>jackson-core</artifactId>
<version>${swagger.version}</version>
</dependency>
<dependency>
<groupId>com.fasterxml.jackson.core</groupId>
<artifactId>jackson-databind</artifactId>
<version>${swagger.version}</version>
</dependency>
<dependency>
<groupId>com.fasterxml.jackson.core</groupId>
<artifactId>jackson-annotations</artifactId>
<version>${swagger.version}</version>
</dependency>
以上jar包有 spring的ioc的bean 上下文的context 还有springmvc的web 以集webmc swagger2的整合還有swagger2返回的json数据用到的jar包
接下来我们分层编写

我嫩以User用户为案例 编写实体类
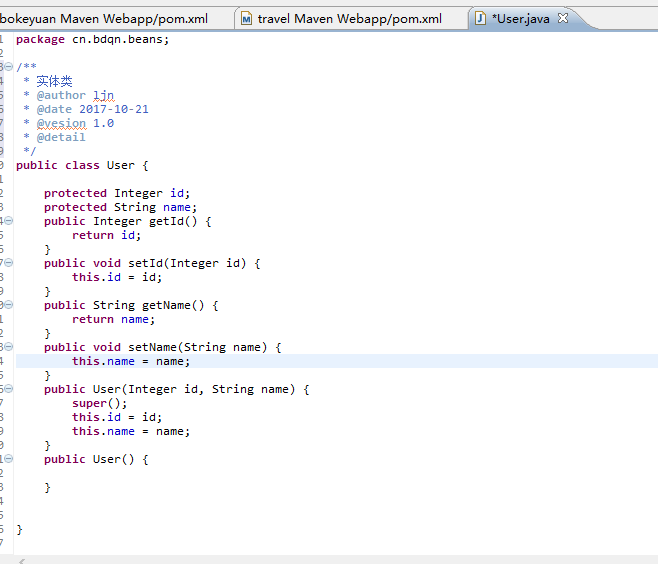
package cn.bdqn.beans;
/**
* 实体类
* @author ljn
* @date 2017-10-21
* @vesion 1.0
* @detail
*/
public class User {
protected Integer id;
protected String name;
public Integer getId() {
return id;
}
public void setId(Integer id) {
this.id = id;
}
public String getName() {
return name;
}
public void setName(String name) {
this.name = name;
}
public User(Integer id, String name) {
super();
this.id = id;
this.name = name;
}
public User() {
}
}
接下来我们编写 SwaggerConfig类文件
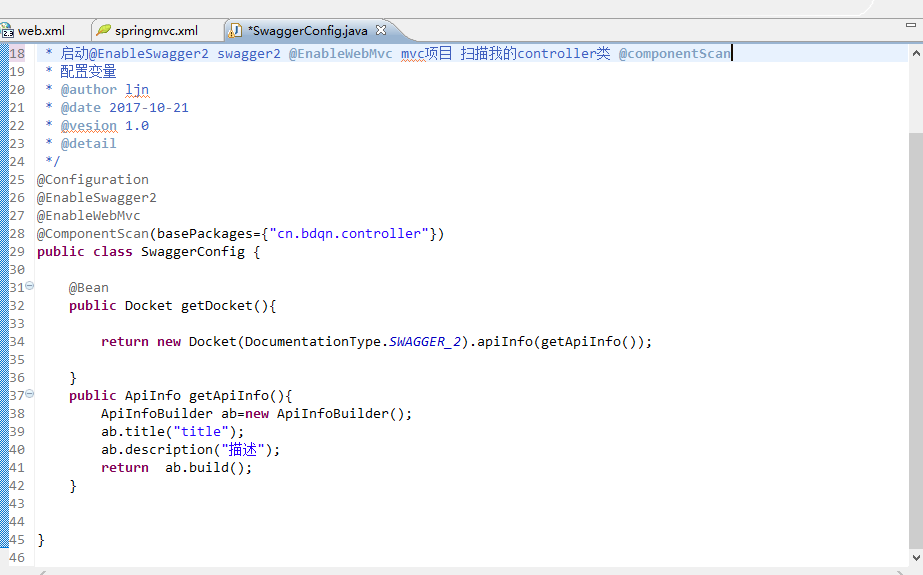
copy 如下:
package cn.bdqn.swagger;
import io.swagger.annotations.BasicAuthDefinition;
import io.swagger.annotations.SwaggerDefinition;
import org.springframework.context.annotation.Bean;
import org.springframework.context.annotation.ComponentScan;
import org.springframework.context.annotation.Configuration;
import org.springframework.web.servlet.config.annotation.EnableWebMvc;
import springfox.documentation.builders.ApiInfoBuilder;
import springfox.documentation.service.ApiInfo;
import springfox.documentation.spi.DocumentationType;
import springfox.documentation.spring.web.plugins.Docket;
import springfox.documentation.swagger2.annotations.EnableSwagger2;
/**
* 启动@EnableSwagger2 swagger2 @EnableWebMvc mvc项目 扫描我的controller类 @componentScan
* 配置变量
* @author ljn
* @date 2017-10-21
* @vesion 1.0
* @detail
*/
@Configuration
@EnableSwagger2
@EnableWebMvc
@ComponentScan(basePackages={"cn.bdqn.controller"})
public class SwaggerConfig {
@Bean
public Docket getDocket(){
return new Docket(DocumentationType.SWAGGER_2).apiInfo(getApiInfo());
}
public ApiInfo getApiInfo(){
ApiInfoBuilder ab=new ApiInfoBuilder();
ab.title("title");
ab.description("描述");
return ab.build();
}
}
最后我们编写controller
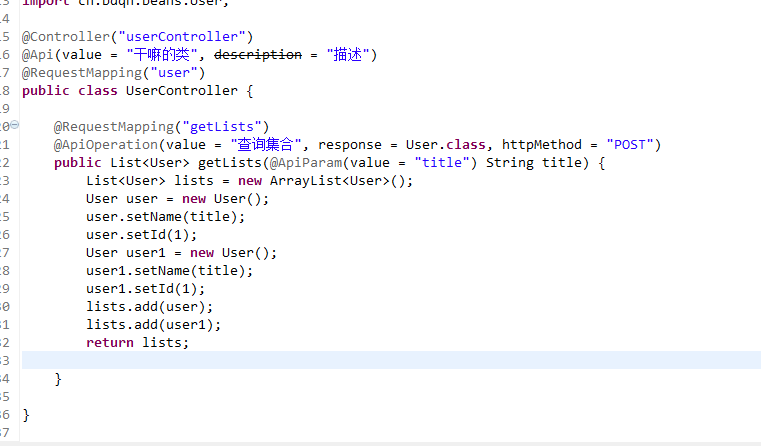
以下是代码
@Controller("userController")
@Api(value = "干嘛的类", description = "描述")
@RequestMapping("user")
public class UserController {
@RequestMapping("getLists")
@ApiOperation(value = "查询集合", response = User.class, httpMethod = "POST")
public List<User> getLists(@ApiParam(value = "title") String title) {
List<User> lists = new ArrayList<User>();
User user = new User();
user.setName(title);
user.setId(1);
User user1 = new User();
user1.setName(title);
user1.setId(1);
lists.add(user);
lists.add(user1);
return lists;
}
}
还有编写 springmvc.xml 文件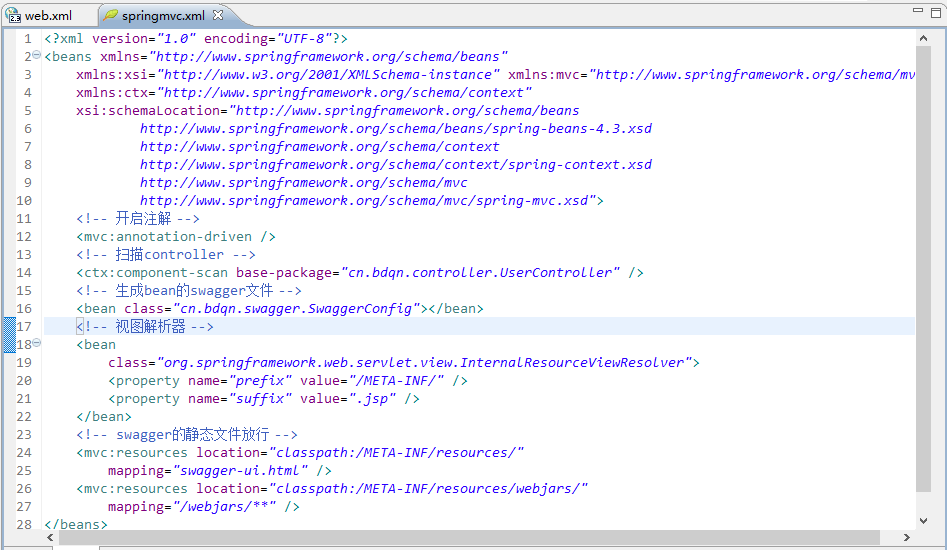
copy 过来 如下:
<?xml version="1.0" encoding="UTF-8"?>
<beans xmlns="http://www.springframework.org/schema/beans"
xmlns:xsi="http://www.w3.org/2001/XMLSchema-instance" xmlns:mvc="http://www.springframework.org/schema/mvc"
xmlns:ctx="http://www.springframework.org/schema/context"
xsi:schemaLocation="http://www.springframework.org/schema/beans
http://www.springframework.org/schema/beans/spring-beans-4.3.xsd
http://www.springframework.org/schema/context
http://www.springframework.org/schema/context/spring-context.xsd
http://www.springframework.org/schema/mvc
http://www.springframework.org/schema/mvc/spring-mvc.xsd">
<!-- 开启注解 -->
<mvc:annotation-driven />
<!-- 扫描controller -->
<ctx:component-scan base-package="cn.bdqn.controller.UserController" />
<!-- 生成bean的swagger文件 -->
<bean class="cn.bdqn.swagger.SwaggerConfig"></bean>
<!-- 视图解析器 -->
<bean
class="org.springframework.web.servlet.view.InternalResourceViewResolver">
<property name="prefix" value="/META-INF/" />
<property name="suffix" value=".jsp" />
</bean>
<!-- swagger的静态文件放行 -->
<mvc:resources location="classpath:/META-INF/resources/"
mapping="swagger-ui.html" />
<mvc:resources location="classpath:/META-INF/resources/webjars/"
mapping="/webjars/**" />
</beans>
最后编写 web.xml文件
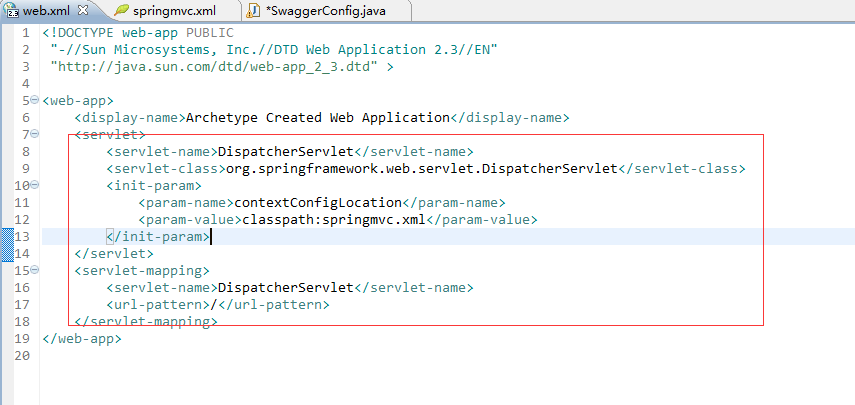
然后我们启动服务器tomcat 访问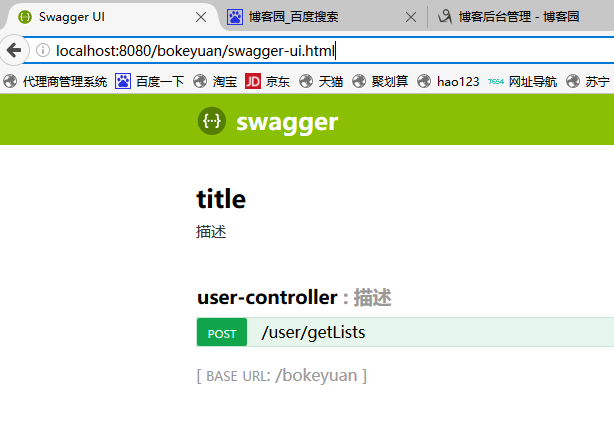
localhost:8080/bokeyuan/swagger-ui.html 这是swagger api的路径
springmvc与swagger2的更多相关文章
- 快速构建springmvc+spring+swagger2环境
快速构建springmvc+spring+swagger2环境 开发工具:Intellij idea jdk: 1.8 开发步骤: 1.创建maven工程,如图建立工程结构 ...
- 利用Swagger2自动生成对外接口的文档
一直以来做对外的接口文档都比较原始,基本上都是手写的文档传来传去,最近发现了一个新玩具,可以在接口上省去不少麻烦. swagger是一款方便展示的API文档框架.它可以将接口的类型最全面的展示给对方开 ...
- SpringMVC+JWT+Swagger UI+RestFul
前言: 其实很早就想写这篇文章了,因为我觉得这会对很多新手有指引作用,当初自己也是瞎子过河的摸索着过来的.目前后台开发比较流行的MVC框架中使用Spring MVC还是比较多的,当然还有Spring ...
- SpringMVC中使用Swagger2整合
Swagger2是什么 Swagger 是一款RESTFUL接口的文档在线自动生成+功能测试功能软件. Swagger 是一个规范和完整的框架,用于生成.描述.调用和可视化 RESTful 风格的 W ...
- MP实战系列(十)之SpringMVC集成SpringFox+Swagger2
该示例基于之前的实战系列,如果公司框架是使用JDK7以上及其Spring+MyBatis+SpringMVC/Spring+MyBatis Plus+SpringMVC可直接参考该实例. 不过建议最好 ...
- springmvc+swagger2
一.swagger2依赖 <!--swagger--> <dependency> <groupId>io.springfox</groupId> < ...
- 03、Swagger2和Springmvc整合详细记录(爬坑记录)
时间 内容 备注 2018年6月18日 基本使用 spirngmvc整合swagger2 开始之前这个系列博文基本是,在项目的使用中一些模块的内容记录,但是后期逐渐优化,不单单是整合内容. swagg ...
- 使用Swagger2构建SpringMVC项目中的Restful API文档
使用Swagger自动生成API文档,不仅增加了项目的可维护性,还提高了API的透明度更利于快速测试等工作,便于更快地发现和解决问题. 本篇文章只记录整合过程,关于Security Configura ...
- 基于Maven的Springboot+Mybatis+Druid+Swagger2+mybatis-generator框架环境搭建
基于Maven的Springboot+Mybatis+Druid+Swagger2+mybatis-generator框架环境搭建 前言 最近做回后台开发,重新抓起以前学过的SSM(Spring+Sp ...
随机推荐
- SpringBoot开发二十-Redis入门以及Spring整合Redis
安装 Redis,熟悉 Redis 的命令以及整合Redis,在Spring 中使用Redis. 代码实现 Redis 内置了 16 个库,索引是 0-15 ,默认选择第 0 个 Redis 的常用命 ...
- POJ3264 Balanced Lineup [RMQ模板]
题意:有n头牛,输入他们的身高,求某区间身高的极值的差(max-min), 用RMQ模板,同时构造求极大值和极小值的两个数组. //poj3264 #include <iostream> ...
- Java反射的应用 --- 内省
一.基础概念 内省(Introspector) 是Java 语言对 JavaBean 类属性.事件的一种缺省处理方法.Java JDK中提供了一套 API 用来访问某个属性的 getter/sette ...
- vuex-cart 介绍
使用vue2 + vuex + vue-cli + localStorage + less,实现本地储存的购物车. 安装 1 git clone https: 1 cd sls-vuex 1 npm ...
- MAYA安装未完成,某些产品无法安装的解决方法
MAYA提示安装未完成,某些产品无法安装该怎样解决呢?,一些朋友在win7或者win10系统下安装MAYA失败提示MAYA安装未完成,某些产品无法安装,也有时候想重新安装MAYA的时候会出现本电脑wi ...
- Spring+Struts2+Mybatis整合
1. 创建项目 2. 添加Spring能力 使用MyEclipse自动加载Struts2和Spring的jar包和配置文件,并在web.xml文件中添加上下文和监听器 web.xml文件如下: < ...
- javasc-正则表达式
匹配中文字符的正则表达式: [\u4e00-\u9fa5]评注:匹配中文还真是个头疼的事,有了这个表达式就好办了 匹配双字节字符(包括汉字在内):[^\x00-\xff]评注:可以用来计算字符串的长度 ...
- 转:get value from agent failed: ZBX_TCP_READ() failed;[104] connection reset by peer
get value from agent failed: ZBX_TCP_READ() failed;[104] connection reset by peer zabbix都搭建好了,进行一下测试 ...
- Java Random函数
Java中存在着两种Random函数: 1.java.lang.Math.Random: 调用这个Math.Random()函数能够返回带正号的double值,该值大于等于0.0且小于1.0,即取值范 ...
- Mysql简单总结
基于Mac OS X系统 MySQL的安装和配置 首先进入 MySQL 官网,选择免费的Community版:MySQL Community Server.MySQL 官网提供了tar.gz和dmg两 ...