3、Struts2的API访问和数据封装
一、API的访问
在使用Struts2的框架的过程中,发现Struts2和Servlet的API是解耦合的。在实际开发中,经常使用到Servlet的API,比如进行登录,将用户的信息保存到Session中,
有的时候需要向页面输出一些内容,用到response对象。涉及到Servlet的API的访问。
1、完全解耦合的方式,通过ActionContext类访问[推荐]
Struts2框架提供了ActionContext类来访问Servlet API,ActionContext是Action执行的上下文对象。在ActionContext中保存了Action执行所需要的所有对象,
包括parameters,request,session,application等。
// 将key-value键值对放入ActionContext中,模拟Servlet API中的HTTPServletRequest

的setAttribute()方法

void put(String key,Object value)

// 通过参数Key来查找当前ActionContext中的值

Object get(String key)

// 返回一个Application级的对象

Map<String,Object> getApplication()

// 获取当前线程的ActionContext对象

static ActionContext getContext()

// 返回一个包含所有HttpServletRequest参数信息

Map<String,Object> getParameters()

// 返回一个Map类型的HttpSession对象

Map<String,Object> getSession()

// 设置Application上下文

void SetApplication(Map<String,Object> application)

// 设置一个Map类型的Session值

void setSession(Map<String,Object> session)
注意:这种方式只能获得代表request、session、application的数据的Map集合,不能操作这些对象的本身的方法。
案例:
Action类
package com.turtle.demo4.action;

import com.opensymphony.xwork2.ActionContext;

import com.opensymphony.xwork2.ActionSupport;

import java.util.Map;

public class Demo4Action extends ActionSupport {

    public String save(){

        // 从前端返回来的参数中取值

        // 通过ActionContext来取得ActionContext对象

        ActionContext actionContext = ActionContext.getContext();

        // actionContext.getParameters()可以取到map值的对象

        Map<String, Object> contextParameters = actionContext.getParameters();

        // 遍历输出值

        for (Map.Entry<String,Object> entry : contextParameters.entrySet()){

            String key = entry.getKey();

            String value = entry.getValue().toString();

        }

        // 向返回前端的参数中设置值

        // 把值设置到session中

        actionContext.getSession().put("name1","session");

        // request.setAttribute("","")

        actionContext.put("name2","request");

        // application.setAttribute("","")

        actionContext.getApplication().put("name3", "application");

        return SUCCESS;

    }

}
Jsp页面
<%--
Created by IntelliJ IDEA.
User: 22274
Date: 2019/10/27
Time: 23:52
To change this template use File | Settings | File Templates.
--%>
<%@ page contentType="text/html;charset=UTF-8" language="java" %>
<html>
<head>
<title>Servlet</title>
</head>
<body>
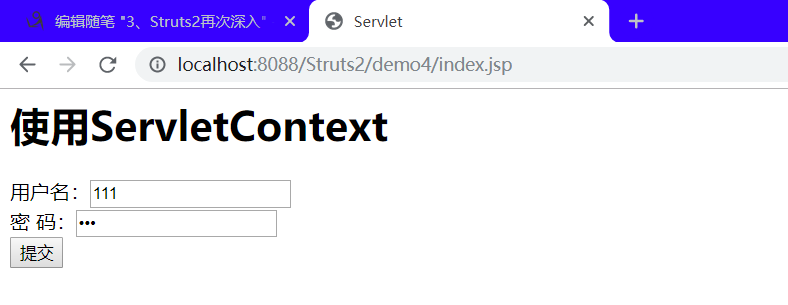
<h1>使用ServletContext</h1>
<form action="${pageContext.request.contextPath}/demo4Action.action" method="post">
用户名:<input type="text" name="name" value=""/><br/>
密 码:<input type="password" name="password" value=""/><br/>
<input type="submit" value="提交">
</form>
</body>
</html>
<%--
Created by IntelliJ IDEA.
User: 22274
Date: 2019/10/27
Time: 23:52
To change this template use File | Settings | File Templates.
--%>
<%@ page contentType="text/html;charset=UTF-8" language="java" %>
<%@ taglib uri="http://java.sun.com/jsp/jstl/core" prefix="c"%>
<html>
<head>
<title>Servlet</title>
</head>
<body>
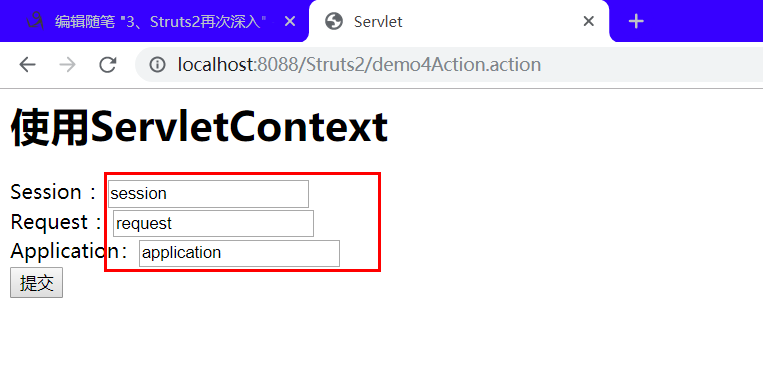
<h1>使用ServletContext</h1>
<form action="${pageContext.request.contextPath}/demo4Action.action" method="post">
Session :<input type="text" name="name1" value="${name1}"/><br/>
Request :<input type="text" name="name2" value="${name2}"/><br/>
Application:<input type="text" name="name3" value="${name3}"/><br/>
<input type="submit" value="提交">
</form>
</body>
</html>
配置文件
<?xml version="1.0" encoding="UTF-8"?>

<!DOCTYPE struts PUBLIC

                "-//Apache Software Foundation//DTD Struts Configuration 2.0//EN"

                "http://struts.apache.org/dtds/struts-2.0.dtd">

<struts>

        <package name="demo4" extends="struts-default" namespace="/">

                <action name="demo4Action" class="com.turtle.demo4.action.Demo4Action" method="save">

                        <result name="success">/demo4/success.jsp</result>

                </action>

        </package>

</struts>
结果:
2、使用Servlet的API的原生方式
该方法可以直接访问Servle API,提供了ServletActionContext类,该类包含了我么所需要的几个方法
// 获取web应用中的HttpServletRequest对象

static HttpServletRequest()

// 获取web应用中的HttpServletResponse对象

static HttpServletResponse getResponse()

// 获取web应用中的ServletContext对象

static ServletContext getServletContext()

// 获取WEb应用中的PageContext对象

static PageContext getPageContext()
Action类:
package com.turtle.demo4.action;

import com.opensymphony.xwork2.ActionSupport;

import org.apache.struts2.ServletActionContext;

import javax.servlet.http.HttpServletRequest;

import java.util.Map;

public class Demo4Action extends ActionSupport {

    public String save(){

        // 取从前端页面带过来的数据

        HttpServletRequest request = ServletActionContext.getRequest();

        Map<String, String[]> parameterMap = request.getParameterMap();

        for(Map.Entry<String,String[]> entry : parameterMap.entrySet()){

            String key = entry.getKey();

            String[] value = entry.getValue();

        }

        // 往前端传的数据

        request.setAttribute("name1","request");

        request.getSession().setAttribute ("name2","session");

        ServletActionContext.getServletContext().setAttribute("name3","servletContext");

        return SUCCESS;

    }

}
JSP页面和配置文件不做改变,显示的结果也是一样的。
3、接口注入的方式
// 实现该接口可以直接访问WEb应用中的HttpServletRequest实例

ServletRequestAware

// 实现该接口可以直接访问WEb应用中的HttpServletResponse实例

ServletResponseAware

// 实现该接口可以直接访问WEb应用中的HttpSession实例

SessionAware

// 实现该接口可以直接访问WEb应用中的ServletContexte实例

ServletContextAware
Action:
package com.turtle.demo4.action;

import com.opensymphony.xwork2.ActionSupport;

import org.apache.struts2.ServletActionContext;

import org.apache.struts2.interceptor.ServletRequestAware;

import javax.servlet.http.HttpServletRequest;

import java.util.Map;

public class Demo4Action extends ActionSupport implements ServletRequestAware {

    private HttpServletRequest request;

    @Override

    public void setServletRequest(HttpServletRequest httpServletRequest) {

        this.request = httpServletRequest;

    }

    public String save(){

        // 取从前端页面带过来的数据

        Map<String, String[]> parameterMap = request.getParameterMap();

        for(Map.Entry<String,String[]> entry : parameterMap.entrySet()){

            String key = entry.getKey();

            String[] value = entry.getValue();

        }

        // 往前端传的数据

        request.setAttribute("name1","request");

        request.getSession().setAttribute ("name2","session");

        ServletActionContext.getServletContext().setAttribute("name3","servletContext");

        return SUCCESS;

    }

}
配置文件和结果显示页面与上面的一致。
Servlet是单例的,多个程序访问同一个Servlet只会创建一个Servlet的实例。Action是多例的,一次请求,创建一个Action的实例(不会出现线程安全的问题)。
二、结果页面的配置
1、局部结果页面的配置:
局部结果页面指的是,只能在当前的action中的配置有效。
<?xml version="1.0" encoding="UTF-8"?>

<!DOCTYPE struts PUBLIC

                "-//Apache Software Foundation//DTD Struts Configuration 2.0//EN"

                "http://struts.apache.org/dtds/struts-2.0.dtd">

<struts>

        <package name="demo4" extends="struts-default" namespace="/">

                <action name="demo4Action" class="com.turtle.demo4.action.Demo4Action" method="save">

                        <result name="success">/demo4/success.jsp</result>

                </action>

        </package>

</struts>
2、全局结果页面的配置:
全局结果页面:全局结果页面指的是,在包中配置一次,其他的在这个包中的所有的action只要返回了这个值,都可以跳转到这个页面。
<?xml version="1.0" encoding="UTF-8"?>

<!DOCTYPE struts PUBLIC

                "-//Apache Software Foundation//DTD Struts Configuration 2.0//EN"

                "http://struts.apache.org/dtds/struts-2.0.dtd">

<struts>

        <package name="demo4" extends="struts-default" namespace="/">

                <global-results>

                        <result name="success">/demo4/success.jsp</result>

                </global-results>

                <action name="demo4Action" class="com.turtle.demo4.action.Demo4Action" method="save">

                        <!--<result name="success">/demo4/success.jsp</result>-->

                </action>

        </package>

</struts>
3、result标签的配置
result标签用于配置页面的跳转。在result标签上有两个属性:
name属性 :逻辑视图的名称。默认值:success
type属性 :页面跳转的类型。
dispatcher :默认值,请求转发。(Action转发JSP)
redirect :重定向。(Action重定向JSP)
chain :转发。(Action转发Action)
redirectAction :重定向。(Action重定向Action)
stream :Struts2中提供文件下载的功能。
三、数据封装:
1、属性驱动:提供属性set方法的方式(不常用)
Action类:
package com.turtle.demo5;

import com.opensymphony.xwork2.ActionSupport;

public class Demo5Action extends ActionSupport {

    // 用户名

    private String name;

    // 密码

    private String password;

    public String getName() {

        return name;

    }

    public void setName(String name) {

        this.name = name;

    }

    public String getPassword() {

        return password;

    }

    public void setPassword(String password) {

        this.password = password;

    }

    public String save() {

        System.out.println("用户名"+name);

        System.out.println("密码"+password);

        return null;

    }

}
前端页面:
<%--

  Created by IntelliJ IDEA.

  User: 22274

  Date: 2019/10/27

  Time: 23:52

  To change this template use File | Settings | File Templates.

--%>

<%@ page contentType="text/html;charset=UTF-8" language="java" %>

<html>

<head>

    <title>Servlet</title>

</head>

<body>

<h1>属性驱动第一种方法</h1>

<form action="${pageContext.request.contextPath}/demo5Action.action" method="post">

    用户名:<input type="text" name="name" /><br/>

    密  码:<input type="password" name="password"/><br/>

    <input type="submit" value="提交">

</form>

</body>

</html>
2、属性驱动:页面中提供表达式方式
封装的对象
package com.turtle.demo5;

public class User {

    // 名字

    private String name;

    // 密码

    private String password;

    public String getName() {

        return name;

    }

    public void setName(String name) {

        this.name = name;

    }

    public String getPassword() {

        return password;

    }

    public void setPassword(String password) {

        this.password = password;

    }

}
Action类
package com.turtle.demo5;

import com.opensymphony.xwork2.ActionSupport;

public class Demo5Action extends ActionSupport {

    // 用户对象

    private User user;

    public String save() {

        System.out.println("用户名"+user.getName());

        System.out.println("密码"+user.getPassword());

        return null;

    }

    public User getUser() {

        return user;

    }

    public void setUser(User user) {

        this.user = user;

    }

}
Jsp页面:
<%--

  Created by IntelliJ IDEA.

  User: 22274

  Date: 2019/10/27

  Time: 23:52

  To change this template use File | Settings | File Templates.

--%>

<%@ page contentType="text/html;charset=UTF-8" language="java" %>

<html>

<head>

    <title>Servlet</title>

</head>

<body>

<h1>属性驱动第一种方法</h1>

<form action="${pageContext.request.contextPath}/demo5Action.action" method="post">

    用户名:<input type="text" name="user.name" /><br/>

    密  码:<input type="password" name="user.password"/><br/>

    <input type="submit" value="提交">

</form>

</body>

</html>
3、模型驱动,采用模型驱动方式(最常用)
通过实现ModelDriven接口来接收参数,Action类必须实现ModelDerven接口,并且要重写getModel方法,这个方法返回的是Action类所要使用的数据模型对象。
Action类
package com.turtle.demo5;

import com.opensymphony.xwork2.ActionSupport;

import com.opensymphony.xwork2.ModelDriven;

public class Demo5Action extends ActionSupport implements ModelDriven<User> {

    // 用户对象,需要手动进行实例化

    private User user = new User();

    /**

     * 主要就是这个方法

     * @return

     */

    @Override

    public User getModel() {

        return user;

    }

    public String save() {

        System.out.println("用户名"+user.getName());

        System.out.println("密码"+user.getPassword());

        return null;

    }

    public User getUser() {

        return user;

    }

    public void setUser(User user) {

        this.user = user;

    }

}
jsp页面
<%--

  Created by IntelliJ IDEA.

  User: 22274

  Date: 2019/10/27

  Time: 23:52

  To change this template use File | Settings | File Templates.

--%>

<%@ page contentType="text/html;charset=UTF-8" language="java" %>

<html>

<head>

    <title>Servlet</title>

</head>

<body>

<h1>属性驱动第一种方法</h1>

<form action="${pageContext.request.contextPath}/demo5Action.action" method="post">

    用户名:<input type="text" name="name" /><br/>

    密  码:<input type="password" name="password"/><br/>

    <input type="submit" value="提交">

</form>

</body>

</html>
汇总:大部分我们会优先使用模型驱动的方式,因为Struts2内部有很多结果都是围绕模型驱动设计的。但如果页面中向
多个对象中封装,那么就要使用属性驱动的方式二了。
4、封装到List集合中
Action类
package com.turtle.demo5;

import com.opensymphony.xwork2.ActionSupport;

import com.opensymphony.xwork2.ModelDriven;

import java.util.List;

public class Demo5Action extends ActionSupport {

    // 用户对象,需要手动进行实例化

    // 该变量和jsp中使用的list名字要一致,而且get/set方法也要一致

    private List<User> userList;

    public String save() {

        for(User user : userList){

            System.out.println("用户名"+user.getName());

            System.out.println("密码"+user.getPassword());

        }

        return null;

    }

    public List<User> getUserList() {

        return userList;

    }

    public void setUserList(List<User> userList) {

        this.userList = userList;

    }

}
JSp页面:
<%--

  Created by IntelliJ IDEA.

  User: 22274

  Date: 2019/10/27

  Time: 23:52

  To change this template use File | Settings | File Templates.

--%>

<%@ page contentType="text/html;charset=UTF-8" language="java" %>

<html>

<head>

    <title>Servlet</title>

</head>

<body>

<h1>属性驱动第一种方法</h1>

<form action="${pageContext.request.contextPath}/demo5Action.action" method="post">

    用户名:<input type="text" name="userList[0].name" /><br/>

    密  码:<input type="password" name="userList[0].password"/><br/>

    <hr/>

    用户名:<input type="text" name="userList[1].name" /><br/>

    密  码:<input type="password" name="userList[1].password"/><br/>

    <input type="submit" value="提交">

</form>

</body>

</html>
5、封装到Map集合中
Action类
package com.turtle.demo5;

import com.opensymphony.xwork2.ActionSupport;

import com.opensymphony.xwork2.ModelDriven;

import java.util.List;

import java.util.Map;

public class Demo5Action extends ActionSupport {

    private Map<String,User> userMap;

    public String save() {

        for(Map.Entry<String,User> user : userMap.entrySet()){

            System.out.println("用户名"+user.getValue().getName());

            System.out.println("密码"+user.getValue().getPassword());

        }

        return null;

    }

    public Map<String, User> getUserMap() {

        return userMap;

    }

    public void setUserMap(Map<String, User> userMap) {

        this.userMap = userMap;

    }

}
Jsp页面
<%--

  Created by IntelliJ IDEA.

  User: 22274

  Date: 2019/10/27

  Time: 23:52

  To change this template use File | Settings | File Templates.

--%>

<%@ page contentType="text/html;charset=UTF-8" language="java" %>

<html>

<head>

    <title>Servlet</title>

</head>

<body>

<h1>属性驱动第一种方法</h1>

<form action="${pageContext.request.contextPath}/demo5Action.action" method="post">

    用户名:<input type="text" name="userMap['0'].name" /><br/>

    密  码:<input type="password" name="userMap['0'].password"/><br/>

    <hr/>

    用户名:<input type="text" name="userMap['1'].name" /><br/>

    密  码:<input type="password" name="userMap['1'].password"/><br/>

    <input type="submit" value="提交">

</form>

</body>

</html>
四、总结
3、Struts2的API访问和数据封装的更多相关文章
- struts2 servlet api 访问方式
Action中访问ServletAPI. 主要就是接收表单参数及向域对象中存取值. 关于SevletAPI的方法在Action中有三种方式: 1.完全解耦合的形式: * 使用一个类:ActionCon ...
- struts2的action访问servlet API的三种方法
学IT技术,就是要学习... 今天无聊看看struts2,发现struts2的action访问servlet API的三种方法: 1.Struts2提供的ActionContext类 Object g ...
- 5 weekend01、02、03、04、05、06、07的分布式集群的HA测试 + hdfs--动态增加节点和副本数量管理 + HA的java api访问要点
weekend01.02.03.04.05.06.07的分布式集群的HA测试 1) weekend01.02的hdfs的HA测试 2) weekend03.04的yarn的HA测试 1) wee ...
- API访问客户端
API访问客户端(WebApiClient适用于MVC/WebForms/WinForm) 这几天没更新主要是因为没有一款合适的后端框架来支持我们的Web API项目Demo, 所以耽误了几天, 目前 ...
- asp.net core系列 57 IS4 使用混合流(OIDC+OAuth2.0)添加API访问
一.概述 在上篇中,探讨了交互式用户身份验证,使用的是OIDC协议. 在之前篇中对API访问使用的是OAuth2.0协议.这篇把这两个部分放在一起,OpenID Connect和OAuth 2.0组合 ...
- 第13章 切换到混合流并添加API访问 - Identity Server 4 中文文档(v1.0.0)
在之前的快速入门中,我们探讨了API访问和用户身份验证.现在我们想把这两个部分放在一起. OpenID Connect和OAuth 2.0组合的优点在于,您可以使用单个协议和使用令牌服务进行单次交换来 ...
- 大数据实操2 - hadoop集群访问——Hadoop客户端访问、Java API访问
上一篇中介绍了hadoop集群搭建方式,本文介绍集群的访问.集群的访问方式有两种:hadoop客户端访问,Java API访问. 一.集群客户端访问 Hadoop采用C/S架构,可以通过客户端对集群进 ...
- IdentityServer4 中文文档 -13- (快速入门)切换到混合流并添加 API 访问
IdentityServer4 中文文档 -13- (快速入门)切换到混合流并添加 API 访问 原文:http://docs.identityserver.io/en/release/quickst ...
- IdentityServer4【QuickStart】之切换到混合流并且添加API访问
切换到混合流并且添加API访问 前面的示例中我们开发了API访问和用户认证,现在我们要将两个合并到一起. OpenID Connect&OAuth 2.0组合的美妙之处是,你可以使用单一协议和 ...
随机推荐
- 采用WPF技术,开发OFD电子文档阅读器
前言 OFD是国家标准版式文档格式,于2016年生效.OFD文档国家标准参见<电子文件存储与交换格式版式文档>.既然是国家标准,OFD随后肯定会首先在政务系统使用,并逐步推向社会各个方面. ...
- Java中创建对象的5种方法
将会列举5种方法去创建 Java 对象,以及他们如何与构造函数交互,并且会有介绍如何去使用这些方法的示例. 作为一个 Java 开发人员,我们每天都会创建大量的 Java 对象,但是我们通常会使用依赖 ...
- spring使用ehcache实现页面缓存
ehcache缓存最后一篇,介绍页面缓存: 如果将应用的结构分为"page-filter-action-service-dao-db",那page层就是最接近用户的一层,一些特定的 ...
- 一篇文章了解Redis数据库
文章原创于公众号:程序猿周先森.本平台不定时更新,喜欢我的文章,欢迎关注我的微信公众号. redis是一个key-value存储系统.它支持存储的value类型相对更多,包括string(字符串).l ...
- 抓住那只牛!Catch That Cow POJ-3278 BFS
题目链接:Catch That Cow 题目大意 FJ丢了一头牛,FJ在数轴上位置为n的点,牛在数轴上位置为k的点.FJ一分钟能进行以下三种操作:前进一个单位,后退一个单位,或者传送到坐标为当前位置两 ...
- hadoop之mapreduce详解(进阶篇)
上篇文章hadoop之mapreduce详解(基础篇)我们了解了mapreduce的执行过程和shuffle过程,本篇文章主要从mapreduce的组件和输入输出方面进行阐述. 一.mapreduce ...
- 高效解决「SQLite」数据库并发访问安全问题,只这一篇就够了
Concurrent database access 本文译自:https://dmytrodanylyk.com/articles/concurrent-database/ 对于 Android D ...
- 一个网站完整的SEO优化方案,方法,怎么做seo优化?
SEO优化主要分为站内优化,站外优化.如果非得说一套完整的SEO优化方案,那就是需要4名专业人员:前端人员,内容编辑,网络推广人员,和数据分析人员.那以下就详细介绍这四个岗位各自负责的工作有哪些: 一 ...
- Python selenium+phantomjs的js动态爬取
Selenium是一个用于Web应用程序测试的工具.Selenium测试直接运行在浏览器中,就像真正的用户在操作一样.支持的浏览器包括IE.Mozilla Firefox.Chrome等.Phanto ...
- css 添加手状样式,鼠标移上去变小手
cursor:pointer, 简单实用. 前端工作一年多,竟然没有博客.说出来别人都要笑话,这是一个新的开始.