Qt5教程: (9) Qt多线程
0. 创建工程
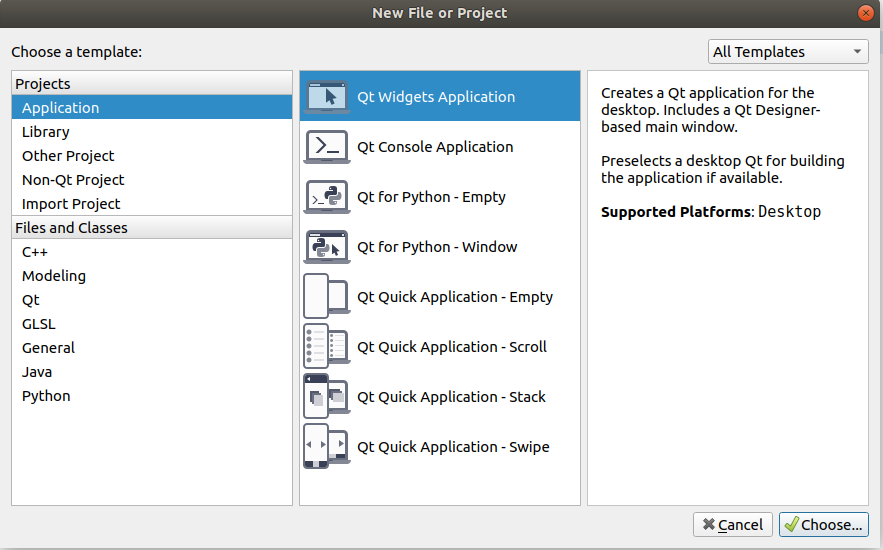
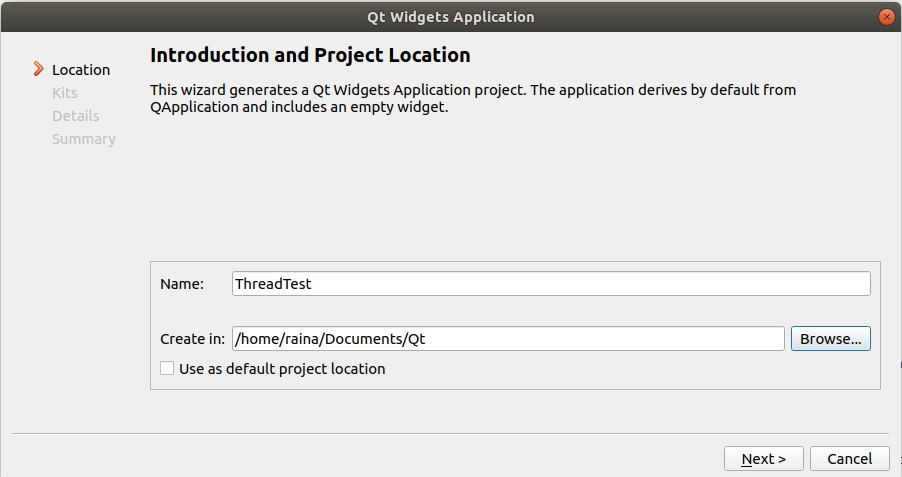
先创建一个工程吧, 具体步骤前面讲过很多次了, 就不再细说了。

然后在Header文件夹下创建添加一个头文件, 右键Headers -> Add New... -> C++ -> C++ Header File -> Choose
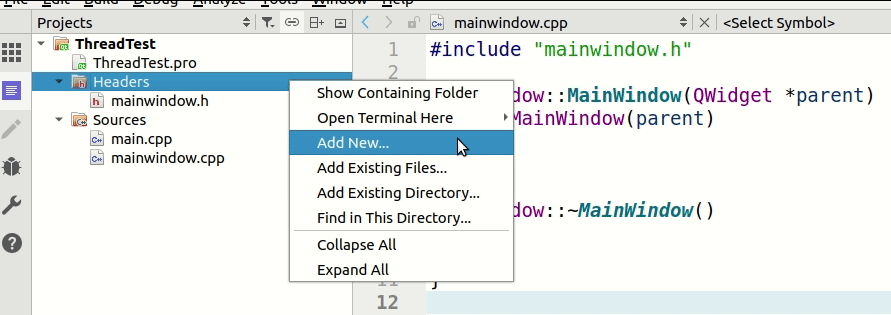

随便起个名字, 比如mythread, 然后点Next->Finish。

1. QThread 源码一览
在mythread.h中包含QThread头文件:

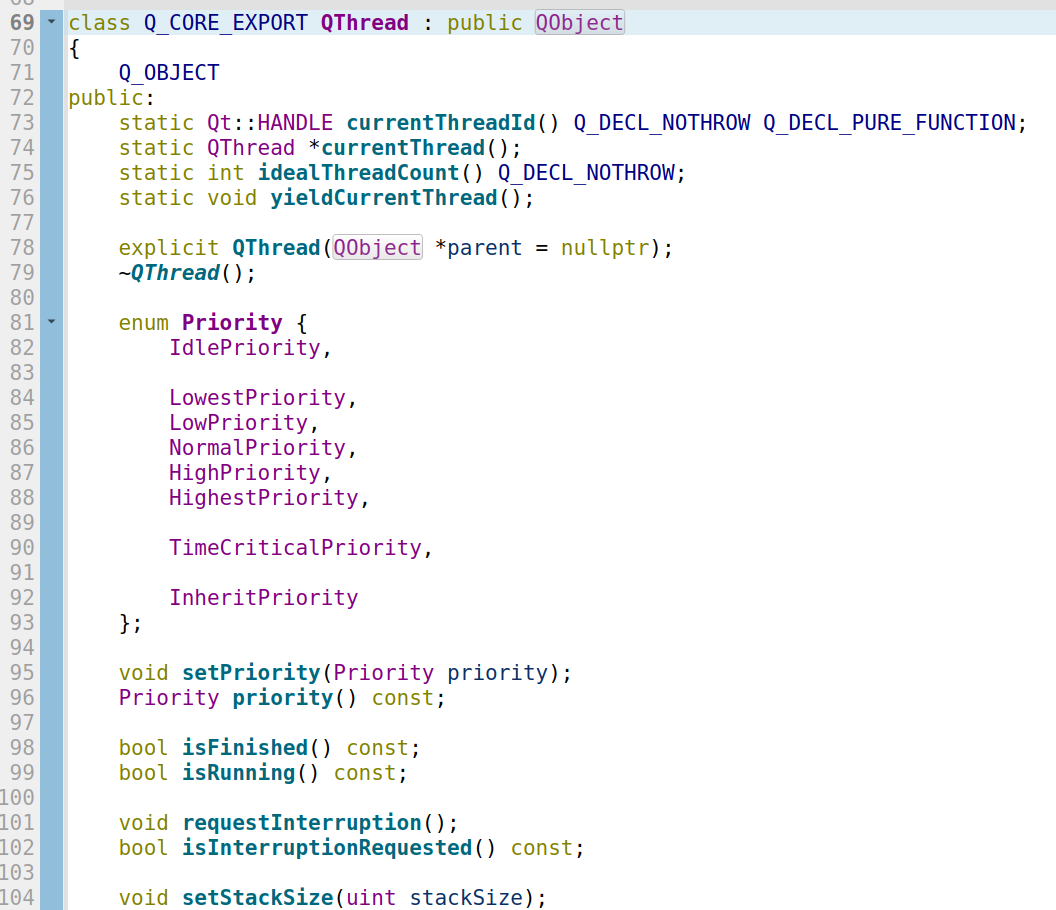
按住Ctrl键, 点击QThread, 再按住Ctrl键点击qthread.h进入到qthread.h文件, 源码就在这里了, 随便看看就好。哪里不懂就鼠标点一下不懂的地方, 然后按F1, 会跳转到相应的帮助文档,里面讲得很详细, 里面的英文也比较简单。
2. QThread相关方法介绍
2.1 启动线程
void start(Priority = InheritPriority);通过调用
start()方法来启动线程,该方法会调用run()函数(可以看到QThread中run()为虚函数, 需要我们来重载)。
run()函数可调用exec()让该线程进入事件循环。Priority为线程优先级(下面会讲)。
2.2 关闭线程
void exit(int retcode = 0);- 使线程退出事件循环, 如果该线程没有事件循环, 不做任何操作。
- retcode默认为0, 表示正常返回。而非0值表示异常退出。
void quit();- 相当于exit(0)
void terminate();- 由操作系统强行终止该线程, 可能会导致无法完成一些清理工作, 不推荐使用。
void requestInterruption();+bool isInterruptionRequested();- Qt5的新接口,
requestInterruption用于请求线程进行中断。isInterruptionRequested返回true/false, 用于判断是否有终止线程的请求。
- Qt5的新接口,
2.3 阻塞线程
bool wait(unsigned long time = ULONG_MAX);- 阻塞线程time毫秒, 默认永久阻塞;
- 只有当线程结束(从run函数返回), 或阻塞超时才会返回;
- 线程结束或还未启动, wait返回值为true, 超时的返回值为false。
static void sleep(unsigned long);- 阻塞xx秒, 无返回值。
static void msleep(unsigned long);- 阻塞xx毫秒, 无返回值。
static void usleep(unsigned long);- 阻塞xx微秒, 无返回值。
2.4线程状态判断
bool isFinished() const;- 如果线程结束返回true, 否则返回false。
bool isRunning() const;- 如果线程正在运行返回true, 否则返回false。
bool isInterruptionRequested() const;- 如果有终止线程的请求返回true, 否则返回false; 请求可由
requestInterruption()发出。
- 如果有终止线程的请求返回true, 否则返回false; 请求可由
2.5 设置优先级
void setPriority(Priority priority);用于设置正在运行的线程的优先级, 如果线程未运行, 则该返回不会执行任何操作并立刻返回。可用
start(priority)启动带优先级的线程。指定的优先级是否生效取决于操作系统的调度, 如果是不支持线程优先级的系统上, 优先级的设置将被忽略。
优先级可以设置为QThread::Priority内除InheritPriortyd的任何值:
QThread::Priority枚举元素 值 描述 QThread::IdlePriority 0 没有其它线程运行时才调度 QThread::LowestPriority 1 比LowPriority调度频率低 QThread::LowPriority 2 比NormalPriority调度频率低 QThread::NormalPriority 3 操作系统的默认优先级 QThread::HighPriority 4 比NormalPriority调度频繁 QThread::HighestPriority 5 比HighPriority调度频繁 QThread::TimeCriticalPriority 6 尽可能频繁的调度 QThread::InheritPriority 7 使用和创建线程同样的优先级(这是默认值)
2.6 信号
void started(QPrivateSignal);- 在线程
start后, 执行run前发出该信号。
- 在线程
void finished(QPrivateSignal);- 在线程结束, 完全退出前发送此信号。
3. 创建线程
3.1 继承QThread方式
a. 定义MyThread类
在mythread.h中定义MyThread类, 并继承QThread, 然后把框架写好:
#ifndef MYTHREAD_H

#define MYTHREAD_H

#include <QThread>

class MyThread : public QThread

{

    Q_OBJECT

public:

    MyThread();

private:

protected:

    void run();

signals:

public slots:

};

#endif // MYTHREAD_H
b. 重载run()
新建一个C++ Source File, 命名为mythread.cpp

mythread.cpp代码如下, run()函数中我们让它每隔1秒打印一次字符串:
#include "mythread.h"

// 构造函数

MyThread::MyThread()

{

}

void MyThread::run()

{

    while (!isInterruptionRequested())

    {

        qDebug() << "Running...";

        sleep(1);

    }

    qDebug() << "Get Interruption Request, I'll exit.";

}
因为用到了qDebug(), 别忘了在mythread.h中添加<QDebug>头文件:
#include <QDebug>
c. 开始和结束线程
在mainwindow.h中添加头文件和声明变量:
#ifndef MAINWINDOW_H

#define MAINWINDOW_H

#include <QMainWindow>

#include "mythread.h"  // 添加头文件

class MainWindow : public QMainWindow

{

    Q_OBJECT

public:

    MainWindow(QWidget *parent = 0);

    ~MainWindow();

private:

    MyThread *my_thread;  // 声明变量

};

#endif // MAINWINDOW_H
在mainwindow.cpp中开启和结束线程:
#include "mainwindow.h"

MainWindow::MainWindow(QWidget *parent)

    : QMainWindow(parent)

{

    my_thread = new MyThread;  // 实例化

    my_thread->start();  // 开启线程

    // 主线程阻塞5秒

    QDateTime start = QDateTime::currentDateTime();

    QDateTime now;

    do {

        now = QDateTime::currentDateTime();

    } while(start.secsTo(now) < 5);

    // 关闭线程

    my_thread->requestInterruption();

    my_thread->wait();

}

MainWindow::~MainWindow()

{

}
因为用到了<QDateTime>, 别忘了在mainwindow.h中添加头文件:
#include <QDateTime>
运行结果:

可以看到主线程被阻塞了5秒, 之后才弹出窗口。但是在主线程阻塞期间, 我们的my_thread线程仍在运行, 直到线程被关闭。
附: Qt4适用写法
上面我们结束线程使用的是requestInterruption()和 isInterruptionRequested(), 这是Qt5新增的, 那么Qt4要如何结束线程呢?
- 首先需要使用一个flag来标识线程的状态(执行还是停止), 比如定义一个变量
bool is_stopped初值赋为false; - 然后自己写一个结束线程的函数, 比如
stop(), 当调用my_thread->stop();时将is_stopped改为true; - 在
run()中判断, 如果is_stopped为false线程继续执行, 如果为true线程退出; 别忘了退出前再将is_stopped改为false, 不然线程没法再次开启了。
代码如下:
mythread.h
#ifndef MYTHREAD_H

#define MYTHREAD_H

#include <QThread>

#include <QDebug>

class MyThread : public QThread

{

    Q_OBJECT

public:

    MyThread();

    void stop();  // 添加stop()方法

private:

    volatile bool is_stopped;  // 添加标识变量

protected:

    void run();

signals:

public slots:

};

#endif // MYTHREAD_H
mythread.cpp
#include "mythread.h"

// 构造函数

MyThread::MyThread()

{

	is_stopped = false;  // 初始化标识变量

}

void MyThread::run()

{

    while (!is_stopped)  // 更改判断条件

    {

        qDebug() << "Running...";

        sleep(1);

    }

    qDebug() << "is_stopped is true, I'll exit.";

    is_stopped = false;  // 重置变量值

}

// 关闭线程

void MyThread::stop()

{

    is_stopped = true;

}
mainwindow.cpp
#include "mainwindow.h"

MainWindow::MainWindow(QWidget *parent)

    : QMainWindow(parent)

{

    my_thread = new MyThread;  // 实例化

    my_thread->start();  // 开启线程

    // 主线程阻塞5秒

    QDateTime start = QDateTime::currentDateTime();

    QDateTime now;

    do {

        now = QDateTime::currentDateTime();

    } while(start.secsTo(now) < 5);

    // 关闭线程

    my_thread->stop();  // 用自己定义的方法关闭线程

    my_thread->wait();

}

MainWindow::~MainWindow()

{

}
附: exit()和requestInterruption()区别
看例子, 我们修改一下run()函数和关闭线程部分的代码:
mythread.cpp
void MyThread::run()

{

    while (!isInterruptionRequested())

    {

        qDebug() << "Running...";

        sleep(1);

    }

    qDebug() << "子线程: 我只退出了while循环, 没有真正结束";

    exec();  // 事件循环

    qDebug() << "子线程: 我真的要结束了";

}
mainwindow.cpp
	// 关闭线程

    my_thread->requestInterruption();

    qDebug() << "主线程: 发起中断请求";

    my_thread->wait(3000);

    my_thread->quit();

    qDebug() << "主线程: 请求退出线程的事件循环";

    my_thread->wait();  // 等待线程结束
运行结果:
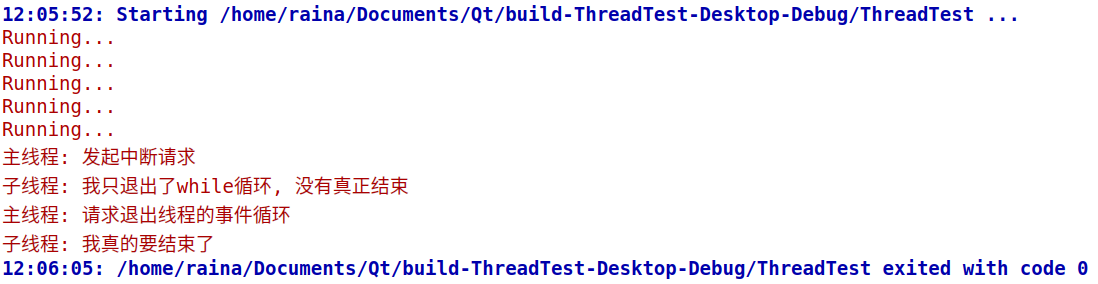
在主进程requestInterruption()后, 只是使得isInterruptionRequested()变为true, 退出了while循环, 在主线程中调用wait(3000), 并没有立刻返回, 而是3秒超时后才返回, 说明子线程没有真正结束, 而是执行到了exec()处进行事件循环。通过调用quit()或exit()来结束子线程的事件循环, 子线程才真的结束了。
3.2 moveToThread方式(Qt5新增 官方推荐)
a. 定义一个继承QObject的类
- 首先, 创建一个类并继承
QObject, 把要在线程中执行的工作作为类的槽函数:
dowork.h
#ifndef DOWORK_H

#define DOWORK_H

#include <QObject>

#include <QDateTime>

#include <QDebug>

class DoWork : public QObject

{

    Q_OBJECT

public:

    explicit DoWork(QObject *parent = nullptr);

public slots:

    void do_something();

};

#endif // DOWORK_H
dowork.cpp
#include "dowork.h"

DoWork::DoWork(QObject *parent) : QObject(parent)

{

}

void DoWork::do_something()

{

    int a = 5;

    while(a--)

    {

        qDebug() << "Doing something ...";

        QDateTime start = QDateTime::currentDateTime();

        QDateTime now;

        do {

            now = QDateTime::currentDateTime();

        } while(start.secsTo(now) < 1);

    }

    qDebug() << "Done";

}
b. moveToThread
- 然后, 创建一个线程对象, 把
work1对象移到新线程下:
mainwindow.h
#ifndef MAINWINDOW_H

#define MAINWINDOW_H

#include <QMainWindow>

#include <QThread>

#include "dowork.h"

class MainWindow : public QMainWindow

{

    Q_OBJECT

public:

    MainWindow(QWidget *parent = 0);

    ~MainWindow();

private:

    DoWork *work1;  // 自定义的类

    QThread *new_thread;  // 新线程

};

#endif // MAINWINDOW_H
mainwindow.cpp
MainWindow::MainWindow(QWidget *parent)

    : QMainWindow(parent)

{

    // 实例化

    work1 = new DoWork;

    new_thread = new QThread;

    work1->moveToThread(new_thread);  // 搬到线程下

}
c. 启动线程
绑定线程启动后要做的工作:
connect(new_thread, &QThread::started, work1, &DoWork::do_something);
使用
moveToThread的方法非常灵活, 你不一定要用&QThread::started来触发do_something, 也可以使用自定义的信号, 为了例程简单明了, 这里不举例了。启动线程
new_thread->start();
d. 结束后的清理工作
为了更安全, 线程结束后别忘了释放资源:
connect(new_thread, &QThread::finished, work1, &QObject::deleteLater);
MainWindow::~MainWindow()

{

    new_thread->requestInterruption();

    new_thread->quit();

    new_thread->wait();

}
附: mainwindow.cpp 完整代码
mainwindow.cpp
#include "mainwindow.h"

MainWindow::MainWindow(QWidget *parent)

    : QMainWindow(parent)

{

    // 实例化

    work1 = new DoWork;

    new_thread = new QThread;

    work1->moveToThread(new_thread);  // 搬到线程下

    connect(new_thread, &QThread::started, work1, &DoWork::do_something);

    connect(new_thread, &QThread::finished, work1, &QObject::deleteLater);

    new_thread->start();

}

MainWindow::~MainWindow()

{

    new_thread->requestInterruption();

    new_thread->quit();

    new_thread->wait();

}
运行结果如下:

此文原创禁止转载,转载文章请联系博主并注明来源和出处,谢谢!
作者: Raina_RLN https://www.cnblogs.com/raina/
Qt5教程: (9) Qt多线程的更多相关文章
- Qt多线程-QtConcurrent并行运算高级API
版权声明:若无来源注明,Techie亮博客文章均为原创. 转载请以链接形式标明本文标题和地址: 本文标题:Qt多线程-QtConcurrent并行运算高级API 本文地址:http://tec ...
- Qt多线程-QThreadPool线程池与QRunnable
版权声明:若无来源注明,Techie亮博客文章均为原创. 转载请以链接形式标明本文标题和地址: 本文标题:Qt多线程-QThreadPool线程池与QRunnable 本文地址:https:/ ...
- SeetaFaceQt:Qt多线程
为什么要做多线程,说个最简单的道理就是我们不希望在软件处理数据的时候界面处于无法响应的假死状态.有些处理是灰常花时间的,如果把这样的处理放到主线程中执行,就会导致软件一条路走到底,要等到处理完才能接收 ...
- 【QT】 Qt多线程的“那些事”
目录 一.前言 二.QThread源码浅析 2.1 QThread类的定义源码 2.2 QThread::start()源码 2.3 QThreadPrivate::start()源码 2.4 QTh ...
- Qt 多线程和网络编程学习
一,Qt多线程类学习 QThread类,开始一个新的线程就是开始执行重新实现QThread::run(),run()是默认现实调用exec(),QThread::start()开始线程的执行,run( ...
- [转] Qt 多线程学习
Qt 多线程学习 转自:http://www.cnblogs.com/IT-BOY/p/3544220.html 最近的项目上用到了关于多线程的知识,自己也比较感兴趣,所以就拿了那本<C++ G ...
- QT多线程笔记
1.QT多线程涉及到主线程和子线程之间交互大量数据的时候,使用QThread并不方便,因为run()函数本身不能接受任何参数,因此只能通过信号和槽的交互来获取数据,如果只是单方面简单交互数据还过得去, ...
- qt学习教程1.qt开发环境搭建
qt学习教程1.qt开发环境搭建 首先下载qt 下载地址:http://download.qt.io/archive/qt/ 此教程使用的版本为5.1.1 下载好后,打开安装包,然后点下一步 选择一个 ...
- Qt多线程-总结QThread-QThreadPool-QtConcurrent
版权声明:若无来源注明,Techie亮博客文章均为原创. 转载请以链接形式标明本文标题和地址: 本文标题:Qt多线程-总结QThread-QThreadPool-QtConcurrent 本文 ...
随机推荐
- virtualBox里Ubuntu设置静态IP
1.先将网络设置为桥接模式 2.打开虚拟机,进入界面,点击编辑 3.设置IP,ipconfig/all查看物理机IP,虚拟机要与本机在同一网段 然后断开重新连接就可以上网了
- 使用Spring安全表达式控制系统功能访问权限
一.SPEL表达式权限控制 从spring security 3.0开始已经可以使用spring Expression表达式来控制授权,允许在表达式中使用复杂的布尔逻辑来控制访问的权限.Spring ...
- nyoj 305 表达式求值 (递归)
表达式求值 时间限制:3000 ms | 内存限制:65535 KB 难度:3 描述 Dr.Kong设计的机器人卡多掌握了加减法运算以后,最近又学会了一些简单的函数求值,比如,它知道函数min ...
- deepin 、 windows10,双系统安装
deepin . windows10,双系统安装: 首先,最好专门分一个盘用来存放deepin操作系统的安装位置(我这里分给它60个G). 1.在 http://rsync.deepin.com/de ...
- 反汇编objc分析__block
"You can specify that an imported variable be mutable—that is, read-write— by applying the __bl ...
- scrapy介绍及使用
scrapy的流程 其流程可以描述如下: 调度器把requests-->引擎-->下载中间件--->下载器 下载器发送请求,获取响应---->下载中间件---->引擎-- ...
- PL真有意思(二):程序设计语言语法
前言 虽然标题是程序语言的语法,但是讲的是对词法和语法的解析,其实关于这个前面那个写编译器系列的描述会更清楚,有关语言语法的部分应该是穿插在整个设计当中的,也看语言设计者的心情了 和英语汉语这些自然语 ...
- 【原创】(十一)Linux内存管理slub分配器
背景 Read the fucking source code! --By 鲁迅 A picture is worth a thousand words. --By 高尔基 说明: Kernel版本: ...
- 实现自定义的参数解析器——HandlerMethodArgumentResolver
1.为什么需要自己实现参数解析器 我们都知道在有注解的接口方法中加上@RequestBody等注解,springMVC会自动的将消息体等地方的里面参数解析映射到请求的方法参数中. 如果我们想要的信息不 ...
- 虚拟机配置net模式
在cmd中输入ipconfig -all查看 更改网络适配器 进入虚拟机左上角编辑----虚拟机网络编辑器查看VMnet8,虚拟机会为我们分配的固定ip段:如下图: ip段是128---254,所以设 ...