
[React] 06 - Route: koa makes your life easier
听说koa比express更傻瓜化,真的?
本身代码只有1000多行,所有功能都通过插件实现,很符合 Unix 哲学。
搭建简单服务器
- Koa, 架设一个简单的服务器
// demos/01.js

const Koa = require('koa');

const app = new Koa();

app.listen(3000);
访问 http://127.0.0.1:3000,显示:

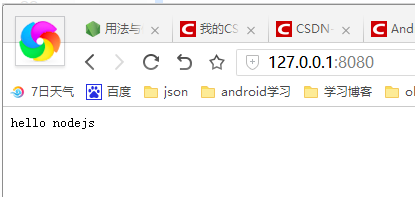
- Express呢?
From: nodejs搭建web服务器就是这么简单!
//引入http模块

var http = require("http");

//设置主机名

var hostName = '127.0.0.1';

//设置端口

var port = 8080;

//创建服务

var server = http.createServer(function(req,res){

    res.setHeader('Content-Type','text/plain');

    res.end("hello nodejs");  // ----> (1)

});

server.listen(port,hostName,function(){

    console.log(`服务器运行在http://${hostName}:${port}`);

});
However, koa省略的步骤,如果使用时,还是要补回来的。
返回的内容
// demos/02.js

const Koa = require('koa');

const app = new Koa();

const main = ctx => {

  ctx.response.body = 'Hello World';  // ----> (1)

};

app.use(main);

app.listen(3000);
返回的类型
根据用户想要的类型,返回对应类型的内容。
// demos/03.js

const main = ctx => {

  if (ctx.request.accepts('xml')) {

    ctx.response.type = 'xml';                         // the type that client wants to get.

    ctx.response.body = '<data>Hello World</data>';     // we will respond what they would like.

  } else if (ctx.request.accepts('json')) {

    ctx.response.type = 'json';

    ctx.response.body = { data: 'Hello World' };

  } else if (ctx.request.accepts('html')) {

    ctx.response.type = 'html';

    ctx.response.body = '<p>Hello World</p>';

  } else {

    ctx.response.type = 'text';

    ctx.response.body = 'Hello World';

  }

};
网页模板
让 Koa 先读取模板文件,然后将这个模板返回给用户。
const fs = require('fs');

const Koa = require('koa');

const app = new Koa();

const main = ctx => {

  ctx.response.type = 'html';

  ctx.response.body = fs.createReadStream('./demos/template.html');  // 先加载模板

};

app.use(main);

app.listen(3000);
路由设置
- 原生路由
// demos/05.js

const main = ctx => {

  if (ctx.request.path !== '/') {

    ctx.response.type = 'html';

    ctx.response.body = '<a href="/">Index Page</a>';

  } else {

    ctx.response.body = 'Hello World';

  }

};
- koa-route 模块
一个路径 ----> 函数调用
// demos/06.js

const route = require('koa-route');

----------------------------------------------------

const about = ctx => {

  ctx.response.type = 'html';

  ctx.response.body = '<a href="/">Index Page</a>';

};

const main = ctx => {

  ctx.response.body = 'Hello World';

};

----------------------------------------------------

app.use(route.get('/', main));

app.use(route.get('/about', about));
- 静态资源
指定某文件夹,通过路径直接获得文件夹内的静态文件。
const Koa = require('koa');

const app = new Koa();

const path  = require('path');

const serve = require('koa-static');

const main = serve(path.join(__dirname));

app.use(main);

app.listen(3000);
访问 http://127.0.0.1:3000/12.js,在浏览器里就可以看到这个脚本的内容。
- 重定向
重定向(redirect)访问请求。比如,用户登陆以后,将他重定向到登陆前的页面。
如下,访问 http://127.0.0.1:3000/redirect ,浏览器会将用户导向根路由。
const Koa   = require('koa');

const route = require('koa-route');

const app   = new Koa();

const redirect = ctx => {

  ctx.response.redirect('/');    // <---- (1)

};

const main = ctx => {

  ctx.response.body = 'Hello World';

};

app.use(route.get('/', main));

app.use(route.get('/redirect', redirect));  // ----> (1) 如上

app.use(main);

app.listen(3000);
中间件 - middleware
处在 HTTP Request 和 HTTP Response 中间,用来实现某种中间功能。
基本上,Koa 所有的功能都是通过中间件实现的。
// demos/08.js

const logger = (ctx, next) => {

  console.log(`${Date.now()} ${ctx.request.method} ${ctx.request.url}`);

  next();

}

app.use(logger);
每个中间件默认接受两个参数:
第一个参数,是 Context 对象;
第二个参数,是next函数。(只要调用next函数,就可以把执行权转交给下一个中间件)
next函数示例:访问 http://127.0.0.1:3000 ,命令行窗口会有如下输出。
const Koa = require('koa');

const app = new Koa();

const one = (ctx, next) => {

  console.log('>> one');      // step 1

  next();

  console.log('<< one');      // step 6

}

const two = (ctx, next) => {

  console.log('>> two');      // step 2

  next();

  console.log('<< two');      // step 5

}

const three = (ctx, next) => {

  console.log('>> three');     // step 3

  next();

  console.log('<< three');       // step 4

}

--------------------------------------------

app.use(one);  // <----导入中间件

app.use(two);

app.use(three);
异步中间件
const fs  = require('fs.promised');

const Koa = require('koa');

const app = new Koa();

const main = async function (ctx, next) {

  ctx.response.type = 'html';

  ctx.response.body = await fs.readFile('./demos/template.html', 'utf8');

};

app.use(main);

app.listen(3000);
Goto: [JS] ECMAScript 6 - Async : compare with c#
中间件的合并
// demos/11.js

const compose = require('koa-compose');

const logger = (ctx, next) => {

  console.log(`${Date.now()} ${ctx.request.method} ${ctx.request.url}`);

  next();

}

const main = ctx => {

  ctx.response.body = 'Hello World';

};

const middlewares = compose([logger, main]);

app.use(middlewares);
暂时用不到,什么时候才能发挥其优势,不清楚。
错误处理
- 两个错误编号
500 错误
// demos/14.js

const main = ctx => {

  ctx.throw(500);

};
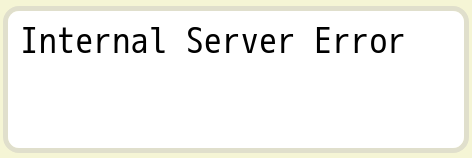
访问 http://127.0.0.1:3000,你会看到一个500错误页"Internal Server Error"。
404错误
// demos/15.js

const main = ctx => {

  ctx.response.status = 404;

  ctx.response.body = 'Page Not Found';

};
访问 http://127.0.0.1:3000 ,你就看到一个404页面"Page Not Found"。

- 处理错误的中间件
让最外层的中间件,负责所有中间件的错误处理。
const Koa = require('koa');

const app = new Koa();

const handler = async (ctx, next) => {

  try {

    await next();

  } catch (err) {

    ctx.response.status = err.statusCode || err.status || 500;

    ctx.response.body = {

      message: err.message

    };

  }

};

const main = ctx => {

  ctx.throw(500);

};

app.use(handler);  // 先放后出

app.use(main);      // 处于最外层

app.listen(3000);
- error 事件的监听
// demos/17.js

const main = ctx => {

  ctx.throw(500);

};

app.on('error', (err, ctx) =>

  console.error('server error', err);  // 触发监听事件

);
如果错误被try...catch捕获,就不会触发error事件
// demos/18.js`

const handler = async (ctx, next) => {

  try {

    await next();

  } catch (err) {    // step 2, 截获错误

    ctx.response.status = err.statusCode || err.status || 500;

    ctx.response.type = 'html';

    ctx.response.body = '<p>Something wrong, please contact administrator.</p>';

    ctx.app.emit('error', err, ctx);  // step 3, 补发一个新错误信号

  }

};

const main = ctx => {

  ctx.throw(500);    // step 1, 抛出错误

};

app.on('error', function(err) {    // step 4, 监听到错误,执行“错误处理”

  console.log('logging error ', err.message);

  console.log(err);

});
Web App 的功能
- Cookies
// demos/19.js

const main = function(ctx) {

  const n = Number(ctx.cookies.get('view') || 0) + 1;

  ctx.cookies.set('view', n);

  ctx.response.body = n + ' views';

}
访问 http://127.0.0.1:3000 ,你会看到1 views。刷新一次页面,就变成了2 views。再刷新,每次都会计数增加1。
表单
表单就是 POST 方法发送到服务器的键值对。
const Koa     = require('koa');

const koaBody = require('koa-body');

const app     = new Koa();

const main = async function(ctx) {

  const body = ctx.request.body;

  if (!body.name) ctx.throw(400, '.name required');

  ctx.body = { name: body.name };

};

app.use(koaBody());

app.use(main);

app.listen(3000);
打开另一个命令行窗口,运行下面的命令。
$ curl -X POST --data "name=Jack" 127.0.0.1:3000

{"name":"Jack"}

$ curl -X POST --data "name" 127.0.0.1:3000

name required
上面代码使用 POST 方法向服务器发送一个键值对,会被正确解析。如果发送的数据不正确,就会收到错误提示。
- 文件上传
const os   = require('os');

const path = require('path');

const Koa  = require('koa');

const fs   = require('fs');

const koaBody = require('koa-body');

const app = new Koa();

const main = async function(ctx) {

  const tmpdir    = os.tmpdir();

  const filePaths = [];

  const files     = ctx.request.body.files || {};

  for (let key in files) {

    const file     = files[key];

    const filePath = path.join(tmpdir, file.name);

    const reader   = fs.createReadStream(file.path);

    const writer   = fs.createWriteStream(filePath);

    reader.pipe(writer);

    filePaths.push(filePath);

  }

  ctx.body = filePaths;

};

app.use(koaBody({ multipart: true }));

app.use(main);

app.listen(3000);
打开另一个命令行窗口,运行下面的命令,上传一个文件。注意,/path/to/file要更换为真实的文件路径。
$ curl --form upload=@/path/to/file http://127.0.0.1:3000

["/tmp/file"]
[React] 06 - Route: koa makes your life easier的更多相关文章
- [React] React Router: Route Parameters
A router library is no good if we have to hardcode every single route in our application. In this le ...
- [React] 05 - Route: connect with ExpressJS
基础: 初步理解:Node.js Express 框架 参见:[Node.js] 08 - Web Server and REST API 进阶: Ref: 如何系统地学习 Express?[该网页有 ...
- [Full-stack] 快速上手开发 - React
故事背景 [1] 博客笔记结合<React快速上手开发>再次系统地.全面地走一遍. [2] React JS Tutorials:包含了JS --> React --> Red ...
- [React] 08 - Tutorial: evolution of code-behind
有了七篇基础学习,了解相关的知识体系,之后便是系统地再来一次. [React] 01 - Intro: javaScript library for building user interfaces ...
- [React] 10 - Tutorial: router
Ref: REACT JS TUTORIAL #6 - React Router & Intro to Single Page Apps with React JS Ref: REACT JS ...
- [Code::Blocks] Install wxWidgets & openCV
The open source, cross platform, free C++ IDE. Code::Blocks is a free C++ IDE built to meet the most ...
- 本人SW知识体系导航 - Programming menu
将感悟心得记于此,重启程序员模式. js, py, c++, java, php 融汇之全栈系列 [Full-stack] 快速上手开发 - React [Full-stack] 状态管理技巧 - R ...
- React Route
有幸你能看来我的这篇文章,这篇文章是继React后面写的Reactroute,所以你需要看看我前面整理的React笔记再来看Reactroute可能更容易 All the work we've don ...
- [转] React Native Navigator — Navigating Like A Pro in React Native
There is a lot you can do with the React Native Navigator. Here, I will try to go over a few example ...
随机推荐
- C memset
//#include "stdafx.h" #include <iostream> #include <memory.h> using namespace ...
- linux下自定义域名访问本机部署的应用
在linux系统下,用weblogic部署了两套应用,创建了两个虚拟主机,一个主机指向www.test1.com, 另一个虚拟主机指向www.test2.com. 一套应用指定一台虚拟主机. 修改/e ...
- spyder 安装
https://www.cnblogs.com/pcat/p/5398997.html
- Python中多进程的使用
进程:程序的一次执行(程序载入内存,系统分配资源运行).每个进程有自己的内存空间,数据栈等,进程之间可以进行通讯,但是不能共享信息. 线程:所有的线程运行在同一个进程中,共享相同的运行环境.每个独立的 ...
- zeromq学习笔记1——centos下安装 zeromq-4.1.2
1.前言 MQ(message queue)是消息队列的简称,可在多个线程.内核和主机盒之间弹性伸缩.ZMQ的明确目标是“成为标准网络协议栈的一部分,之后进入Linux内核”.现在还未看到它们的成功. ...
- p中不能包含div
一句话:有些块元素不可以包含另一些块元素 ,DTD中规定了块级元素是不能放在P里;P标签内包含块元素时,它会先结束自己,比如:<*p><*div>测试p包含div<*/d ...
- Nginx——使用 Nginx 提升网站访问速度【转载+整理】
原文地址 本文是写于 2008 年,文中提到 Nginx 不支持 Windows 操作系统,但是现在它已经支持了,此外还支持 FreeBSD,Solaris,MacOS X~ Nginx(" ...
- [Python设计模式] 第6章 衣服搭配系统——装饰模式
github地址:https://github.com/cheesezh/python_design_patterns 题目 设计一个控制台程序,可以给人搭配嘻哈风格(T恤,垮裤,运动鞋)或白领风格( ...
- hustoj升级
sudo su svn up hustoj-read-only cd hustoj-read-only cd core sudo ./make.sh 有冲突 全部回答r http://www.hu ...
- 〖Linux〗Ubuntu用户重命名、组重命名,机器重命名~
有时候得到的一台机器名字并不是自己熟悉的,或许是你只是想希望修改一下用户名等等-- 步入正题,其实很简单的,重启机器之后不要进入桌面,按下Ctrl+Alt+F1,使用Root登录,执行以下命令: # ...