
ELK学习实验014:Nginx日志JSON格式收集
1 Kibana的显示配置
https://demo.elastic.co/app/kibana#/dashboard/welcome_dashboard
环境先处理干净

安装nginx和httpd-tools
2 使用压测工具产生日志
[root@node4 ~]# ab -n 100 -c 100 http://192.168.132.134/
This is ApacheBench, Version 2.3 <$Revision: 1430300 $>

Copyright 1996 Adam Twiss, Zeus Technology Ltd, http://www.zeustech.net/

Licensed to The Apache Software Foundation, http://www.apache.org/

Benchmarking 192.168.132.134 (be patient).....done

Server Software:        nginx/1.16.1

Server Hostname:        192.168.132.134

Server Port:            80

Document Path:          /

Document Length:        612 bytes

Concurrency Level:      100

Time taken for tests:   0.011 seconds

Complete requests:      100

Failed requests:        0

Write errors:           0

Total transferred:      84500 bytes

HTML transferred:       61200 bytes

Requests per second:    9071.12 [#/sec] (mean)

Time per request:       11.024 [ms] (mean)

Time per request:       0.110 [ms] (mean, across all concurrent requests)

Transfer rate:          7485.44 [Kbytes/sec] received

Connection Times (ms)

              min  mean[+/-sd] median   max

Connect:        0    3   0.5      3       3

Processing:     2    3   1.1      2       5

Waiting:        0    3   1.2      2       5

Total:          4    6   0.7      5       7

WARNING: The median and mean for the total time are not within a normal deviation

        These results are probably not that reliable.

Percentage of the requests served within a certain time (ms)

  50%      5

  66%      6

  75%      6

  80%      7

  90%      7

  95%      7

  98%      7

  99%      7

 100%      7 (longest request)
[root@node4 ~]# tail -f /usr/local/nginx/logs/access.log
192.168.132.181 - - [18/Jan/2020:21:47:23 -0500] "GET / HTTP/1.0" 200 612 "-" "ApacheBench/2.3"

192.168.132.181 - - [18/Jan/2020:21:47:23 -0500] "GET / HTTP/1.0" 200 612 "-" "ApacheBench/2.3"

192.168.132.181 - - [18/Jan/2020:21:47:23 -0500] "GET / HTTP/1.0" 200 612 "-" "ApacheBench/2.3"
3 安装filebeat
[root@node4 src]# wget https://artifacts.elastic.co/downloads/beats/filebeat/filebeat-7.5.1-x86_64.rpm
[root@node4 src]# rpm -ivh filebeat-7.5.1-x86_64.rpm
[root@node4 src]# rpm -qc filebeat

[root@node4 src]# cd /etc/filebeat/
[root@node4 filebeat]# cp filebeat.yml /opt/
[root@node4 filebeat]# grep -Ev "^$|[#;]" filebeat.yml
filebeat.inputs:

- type: log

  enabled: true

  paths:

    - /usr/local/nginx/logs/access.log

filebeat.config.modules:

  path: ${path.config}/modules.d/*.yml

  reload.enabled: false

setup.template.settings:

  index.number_of_shards: 1

setup.kibana:

output.elasticsearch:

  hosts: ["192.168.132.131:9200","192.168.132.132:9200","192.168.132.133:9200"]

processors:

  - add_host_metadata: ~

  - add_cloud_metadata: ~

  - add_docker_metadata: ~

  - add_kubernetes_metadata: ~
[root@node4 filebeat]# systemctl restart filebeat

使用kibana查看
访问:http://192.168.132.131:5601/app/kibana
对于一些基本的操作,再前面的学习中已经演示,参看前面的学习实验
4 配置nginx的日志改为json格式
log_format access_json '{"@timestamp":"$time_iso8601",'

                           '"host":"$server_addr",'

                           '"clientip":"$remote_addr",'

                           '"size":$body_bytes_sent,'

                           '"responsetime":$request_time,'

                           '"upstreamtime":"$upstream_response_time",'

                           '"upstreamhost":"$upstream_addr",'

                           '"http_host":"$host",'

                           '"url":"$uri",'

                           '"domain":"$host",'

                           '"xff":"$http_x_forwarded_for",'

                           '"referer":"$http_referer",'

                           '"status":"$status"}';
添加日志格式
访问后
{"@timestamp":"2020-01-18T23:33:57-05:00","host":"192.168.132.134","clientip":"192.168.132.1","size":0,"responsetime":0.000,"upstreamtime":"-","upstreamhost":"-","http_host":"192.168.132.134","url":"/index.html","domain":"192.168.132.134","xff":"-","referer":"-","status":"304"}
安装jq工具
[root@node4 filebeat]# yum -y install jq
[root@node4 ~]# tail -f /usr/local/nginx/logs/access.log |jq .

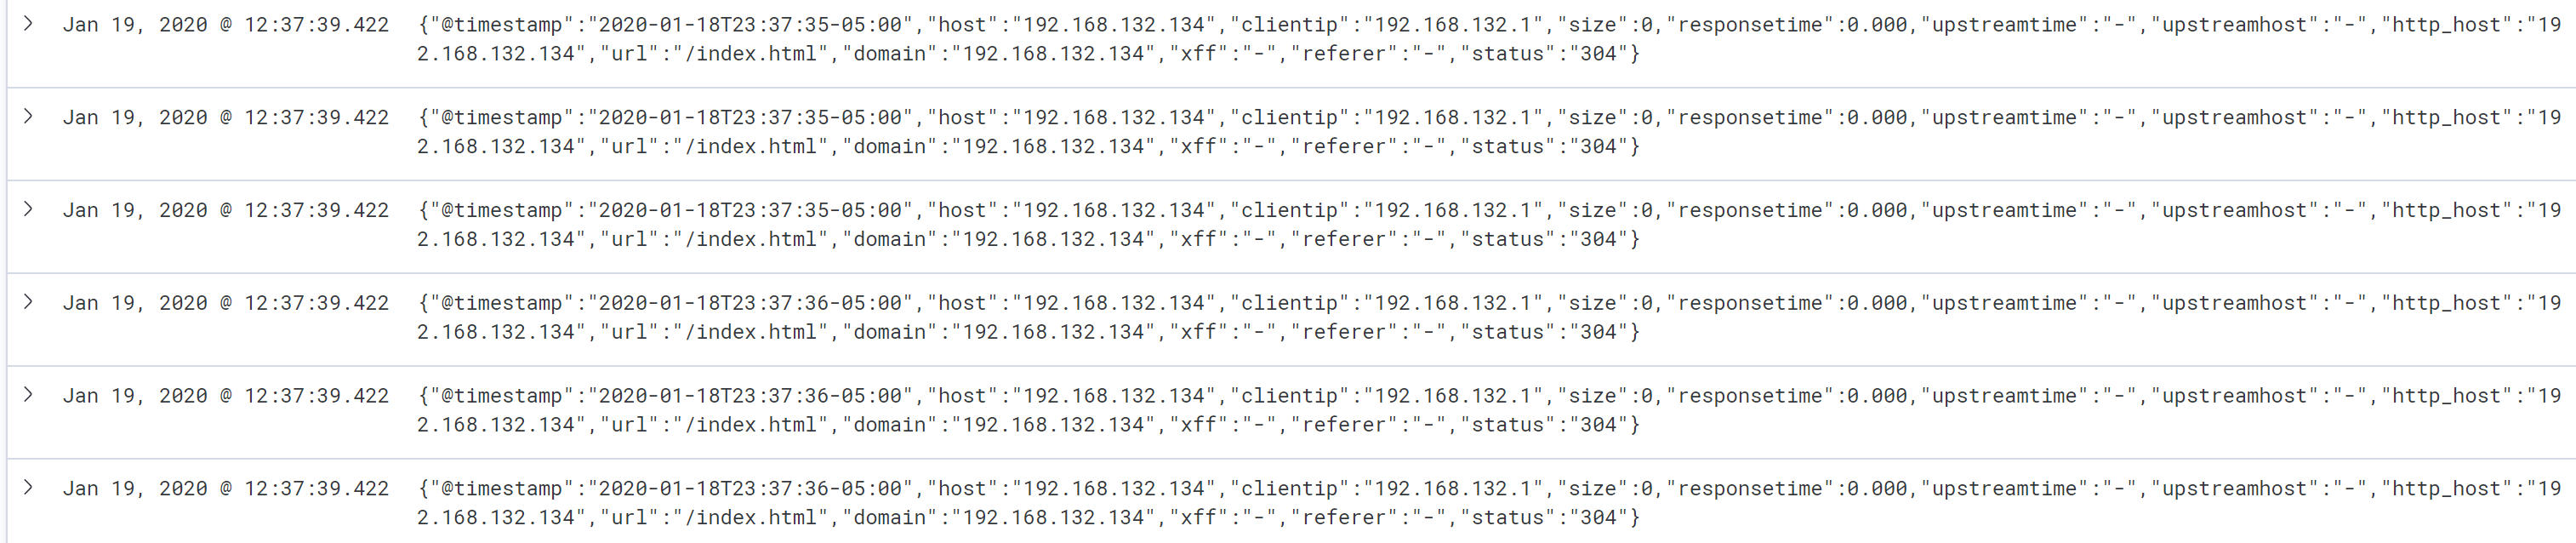
但是读取的依然是整个的message日志
5 filebeat解析成json格式
[root@node4 ~]# grep -Ev "^$|[#;]" /etc/filebeat/filebeat.yml
filebeat.inputs:

- type: log

  enabled: true

  paths:

    - /usr/local/nginx/logs/access.log

  json.key_under_root: true

  json.overwrite_keys: true

filebeat.config.modules:

  path: ${path.config}/modules.d/*.yml

  reload.enabled: false

setup.template.settings:

  index.number_of_shards: 1

setup.kibana:

output.elasticsearch:

  hosts: ["192.168.132.131:9200","192.168.132.132:9200","192.168.132.133:9200"]

processors:

  - add_host_metadata: ~

  - add_cloud_metadata: ~

  - add_docker_metadata: ~

  - add_kubernetes_metadata: ~
[root@node4 ~]# systemctl restart filebeat
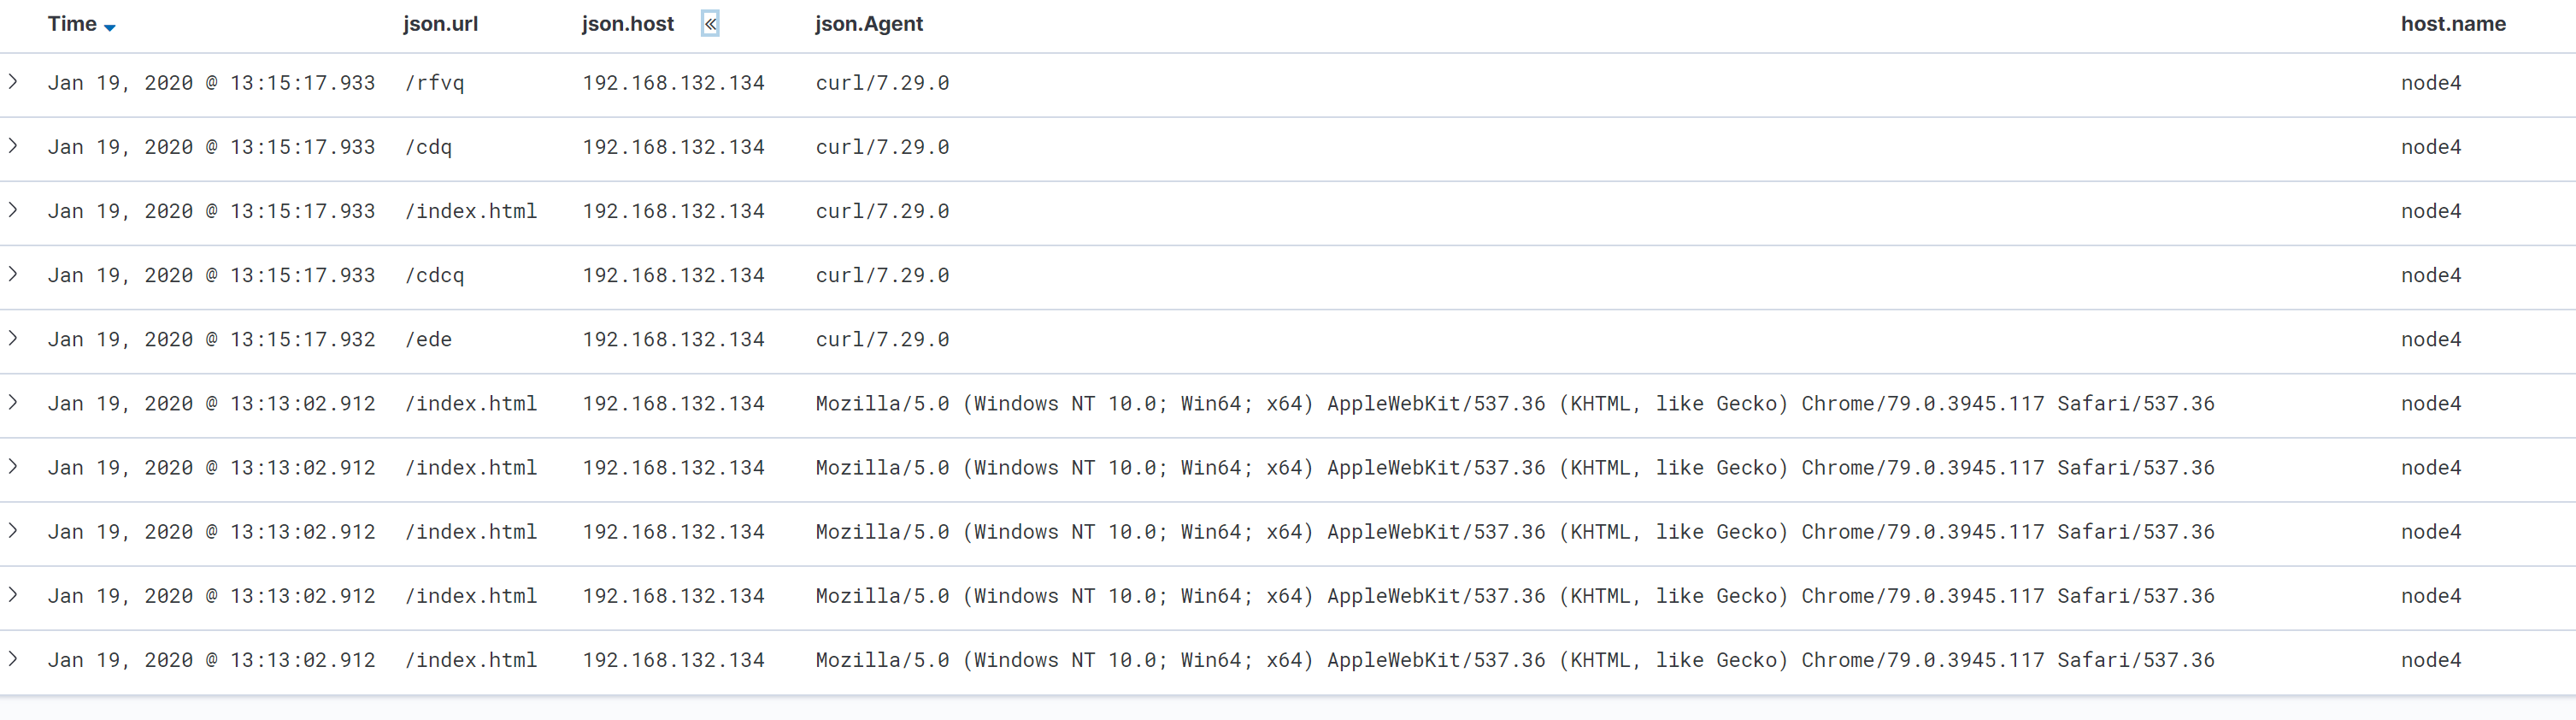
得到格式的日志
ES原始数据
{

"_index": "filebeat-7.5.1",

"_type": "_doc",

"_id": "oq03vG8BcnOPLK2r_2wa",

"_version": 1,

"_score": 1,

"_source": {

"@timestamp": "2020-01-19T05:13:02.912Z",

"json": {

"upstreamtime": "-",

"host": "192.168.132.134",

"@timestamp": "2020-01-19T00:13:01-05:00",

"Agent": "Mozilla/5.0 (Windows NT 10.0; Win64; x64) AppleWebKit/537.36 (KHTML, like Gecko) Chrome/79.0.3945.117 Safari/537.36",

"clientip": "192.168.132.1",

"domain": "192.168.132.134",

"http_host": "192.168.132.134",

"status": "304",

"referer": "-",

"xff": "-",

"responsetime": 0,

"url": "/index.html",

"size": 0,

"upstreamhost": "-"

},

"input": {

"type": "log"

},

"ecs": {

"version": "1.1.0"

},

"host": {

"name": "node4",

"hostname": "node4",

"architecture": "x86_64",

"os": {

"platform": "centos",

"version": "7 (Core)",

"family": "redhat",

"name": "CentOS Linux",

"kernel": "3.10.0-957.27.2.el7.x86_64",

"codename": "Core"

},

"id": "a833bbe7e3634c75ab1b427c4049d056",

"containerized": false

},

"agent": {

"ephemeral_id": "bab448ec-726f-48bf-aa62-0b8fe39c2684",

"hostname": "node4",

"id": "3d856c84-4859-4b20-a25f-4b6c1a8a8108",

"version": "7.5.1",

"type": "filebeat"

},

"log": {

"file": {

"path": "/usr/local/nginx/logs/access.log"

},

"offset": 15601

}

}

}
Kibana显示
使用json格式收集nginx的日志介绍到这里
ELK学习实验014:Nginx日志JSON格式收集的更多相关文章
- ELK学习实验015:日志的自定义index配置
前面使用json格式收集了nginx的日志,但是再index的显示是filebeat-*,现在使用自定义的index进行配置 但是再使用filebeat的7.4版本以后,有一个巨坑,就是按照网络的很多 ...
- ElastAlert监控日志告警Web攻击行为---tomcat和nginx日志json格式
一.ELK安装 1.2 elk配置 logstash自定义配置文件,取名为filebeat_log.conf : input { beats { port => 5044 client_inac ...
- elk 入门 - 分析nginx日志 + json格式 + 有调试的意识 + elk7.2.0
1.本次采用的一台主机,将所有的软件安装一台上进行测试工作. 2.安装部署:https://blog.51cto.com/hwg1227/2299995 3.简单调试 输出rubydebug inpu ...
- filebeat收集nginx的json格式日志
一.在nginx主机上安装filebeat组件 [root@zabbix_server nginx]# cd /usr/local/src/ [root@zabbix_server src]# wge ...
- ELK 6安装配置 nginx日志收集 kabana汉化
#ELK 6安装配置 nginx日志收集 kabana汉化 #环境 centos 7.4 ,ELK 6 ,单节点 #服务端 Logstash 收集,过滤 Elasticsearch 存储,索引日志 K ...
- Spring MVC 学习笔记11 —— 后端返回json格式数据
Spring MVC 学习笔记11 -- 后端返回json格式数据 我们常常听说json数据,首先,什么是json数据,总结起来,有以下几点: 1. JSON的全称是"JavaScript ...
- 收集Nginx的json格式日志(五)
一.配置nginx [root@linux-node1 ~]# vim /etc/nginx/nginx.conf #修改日志格式为json格式,并创建一个nginxweb的网站目录 log_form ...
- ELK学习实验018:filebeat收集docker日志
Filebeat收集Docker日志 1 安装docker [root@node4 ~]# yum install -y yum-utils device-mapper-persistent-data ...
- ELK学习实验017:filebeat收集java日志
收集JAVA格式日志 1 查看Java格式日志 elasticsearch属于Java日志,可以收集elasticsearch作为Java日志范本 [root@node3 ~]# tail -f /u ...
随机推荐
- 如何快速搭建自己的ERP系统,4步源码快速安装odoo教程
上一篇内容:了解什么是Odoo,为二次开发做准备 1.下载odoo源码 Github地址:https://github.com/odoo/odoo Gitee地址:https://gitee.com/ ...
- PBFT共识算法详解
PBFT(Practical Byzantine Fault Tolerance,实用拜占庭容错) 一.概述 拜占庭将军问题最早是由 Leslie Lamport 在 1982 年发表的论文<T ...
- YARP实现Dapr服务调用的反向代理
楔子 公司即将新开项目,打算用点时髦的技术,需要探探路.之前没做过微服务项目,没有技术栈方面的积(负)累(债), 干脆就上微软的分布式运行时Dapr......嗯......用来服务发现,然后等测试用 ...
- 1. Mybatis 参数传递
方法1:顺序传参法 public User selectUser(String name, int deptId); <select id="selectUser" resu ...
- Day07_38_集合中的remove()方法
集合中的remove()方法 remove() 移除集合中的一个指定对象 代码实例 package com.shige.Collection; import java.util.ArrayList; ...
- src/众测篇:oracle注入过滤-- , + - * /,case when ,select,from,decode等函数如何证明是注入?
(1)nullif: NULLIF:如果exp1和exp2相等则返回空(NULL),否则返回第一个值 真: 假: (2)nvl/nvl2 测试失败无法实现:)记录 (3)如果是oracle报错注入 ...
- D - 下个也是签到题 FZU - 2221(博弈)
ZB loves watching RunningMan! There's a game in RunningMan called 100 vs 100. There are two teams, e ...
- c++ 第三方库收集
1.boost 这个使用的人多不多说了 2.pthread windows下的posix线程实现 3.libcurl 一个有名的开源网络爬虫库 阿里旺旺中使用到了 4.libeay32 OpenSSL ...
- 编译android4.4刷到nexus 5
操作系统:ubuntu14.4tls android源码版本:4.4 手机:nexus5 1 获得手机的驱动程序(跟硬件平台有关):Binaries for Nexus Device 查到nexus ...
- 逆向 ctype.h 函数库 isalnum、iscntrl、islower、isxdigit、tolower 函数
0x01 isalnum 函数 函数原型:int isalnum(int c); 函数功能:检查所传的字符是否是字母和数字 动态链接库:ucrtbase.dll C\C++ 实现: #define _ ...