
Material使用03 MdCardModule模块、MdInputModule模块
需求:先需要增加一个登录模块
1 创建登录模块
ng g m testLogin
1.1 将共享模块导入到登录模块中
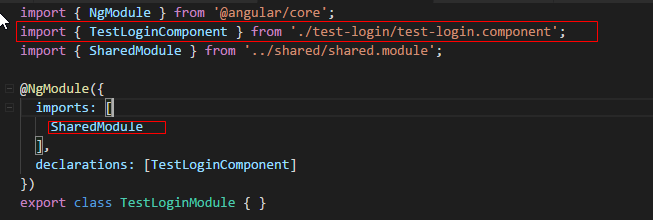
import { NgModule } from '@angular/core';

import { TestLoginComponent } from './test-login/test-login.component';

import { SharedModule } from '../shared/shared.module';

@NgModule({

  imports: [

    SharedModule

  ],

  declarations: [TestLoginComponent]

})

export class TestLoginModule { }
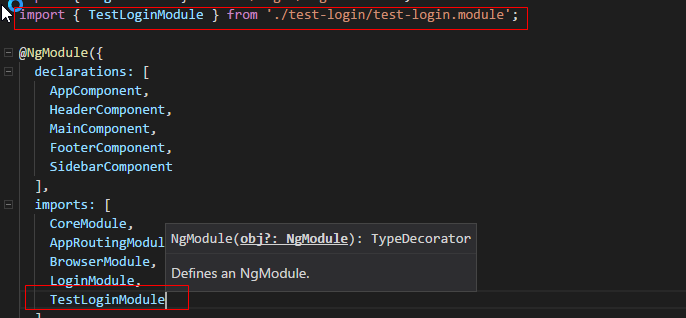
1.2 将创建好的登录模块导入到主模块中
2 创建登录组件
ng g c testLogin/testLogin
3 给登录模块添加路由文件test-login-routing.module.ts
3.1 进入到路由文件输入 ngroute 然后选择 ng-router-featuremodule
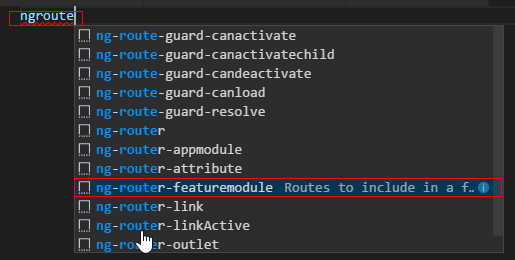
原理:我们已经在编辑其中安装了一个快捷插件Snippets

3.2 对路由文件进行重构
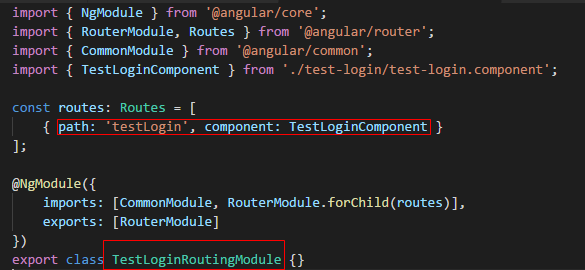
import { NgModule } from '@angular/core';

import { RouterModule, Routes } from '@angular/router';

import { CommonModule } from '@angular/common';

import { TestLoginComponent } from './test-login/test-login.component';

const routes: Routes = [

    { path: 'testLogin', component: TestLoginComponent }

];

@NgModule({

    imports: [CommonModule, RouterModule.forChild(routes)],

    exports: [RouterModule]

})

export class TestLoginRoutingModule {}
3.3 将登录模块的路由导入到登录模块中
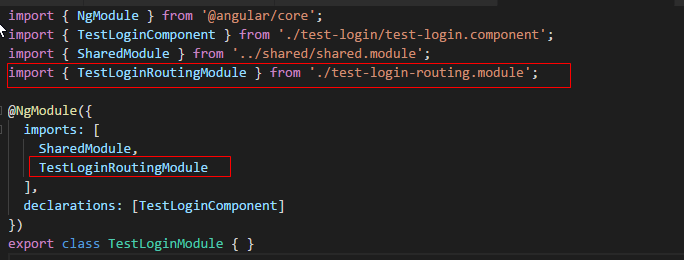
import { NgModule } from '@angular/core';

import { TestLoginComponent } from './test-login/test-login.component';

import { SharedModule } from '../shared/shared.module';

import { TestLoginRoutingModule } from './test-login-routing.module';

@NgModule({

  imports: [

    SharedModule,

    TestLoginRoutingModule

  ],

  declarations: [TestLoginComponent]

})

export class TestLoginModule { }
3.4 技巧:对每个模块都单独添加一个路由文件
4 给主模块创建路由文件app-routing.module.ts
4.1 进入到路由文件利用快捷键生成路由文件模板
4.2 对路由文件进行重构
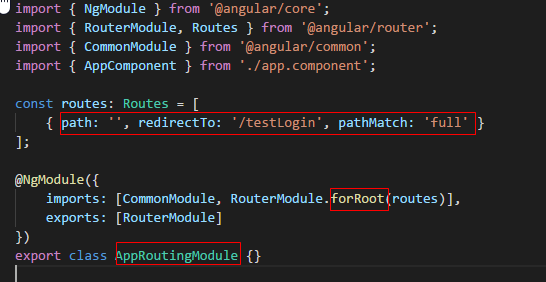
import { NgModule } from '@angular/core';

import { RouterModule, Routes } from '@angular/router';

import { CommonModule } from '@angular/common';

import { AppComponent } from './app.component';

const routes: Routes = [

    { path: '', redirectTo: '/testLogin', pathMatch: 'full' }

];

@NgModule({

    imports: [CommonModule, RouterModule.forRoot(routes)],

    exports: [RouterModule]

})

export class AppRoutingModule {}
4.3 将主路由文件导入到主模块中
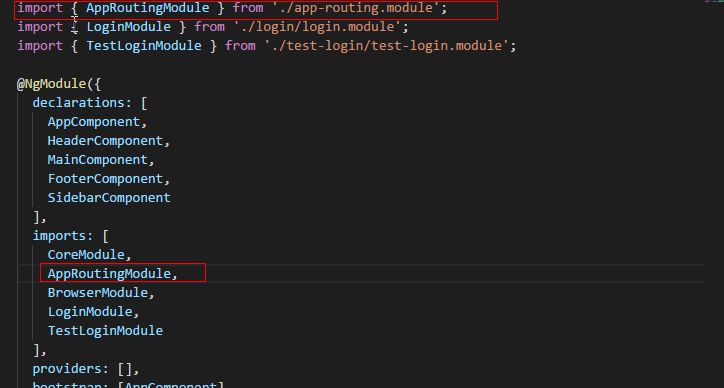
import { BrowserModule } from '@angular/platform-browser';

import { NgModule } from '@angular/core';

import { AppComponent } from './app.component';

import { HeaderComponent } from './frame/header/header.component';

import { MainComponent } from './frame/main/main.component';

import { FooterComponent } from './frame/footer/footer.component';

import { SidebarComponent } from './frame/sidebar/sidebar.component';

import { CoreModule } from './core/core.module';

import { AppRoutingModule } from './app-routing.module';

import { LoginModule } from './login/login.module';

import { TestLoginModule } from './test-login/test-login.module';

@NgModule({

  declarations: [

    AppComponent,

    HeaderComponent,

    MainComponent,

    FooterComponent,

    SidebarComponent

  ],

  imports: [

    CoreModule,

    AppRoutingModule,

    BrowserModule,

    LoginModule,

    TestLoginModule

  ],

  providers: [],

  bootstrap: [AppComponent]

})

export class AppModule { }
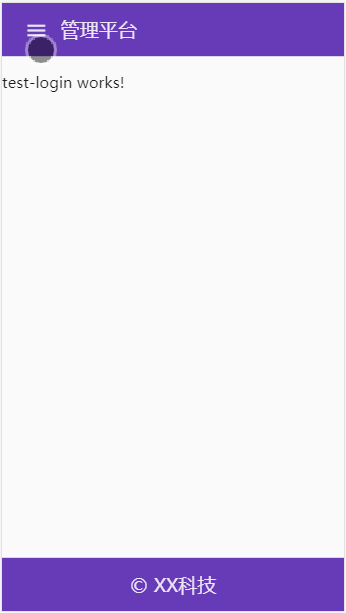
4.4 浏览器访问 http://127.0.0.1:4200 后会自动重定向到 http://127.0.0.1:4200/testLogin
5 在登录组件中使用MdCardModule模块提供的组件
5.1 在共享模块中导入MdCardModule模块
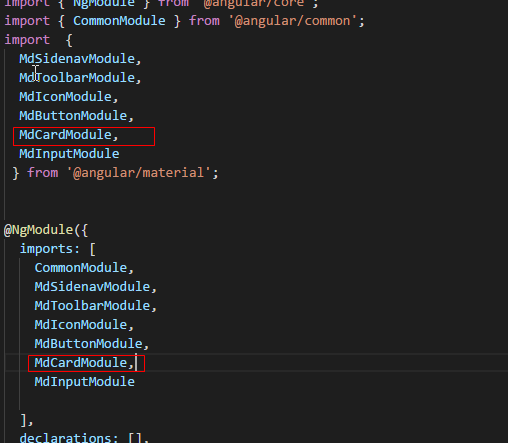
import { NgModule } from '@angular/core';

import { CommonModule } from '@angular/common';

import  {

  MdSidenavModule,

  MdToolbarModule,

  MdIconModule,

  MdButtonModule,

  MdCardModule,

  MdInputModule

 } from '@angular/material';

@NgModule({

  imports: [

    CommonModule,

    MdSidenavModule,

    MdToolbarModule,

    MdIconModule,

    MdButtonModule,

    MdCardModule,

    MdInputModule

  ],

  declarations: [],

  exports: [

    CommonModule,

    MdSidenavModule,

    MdToolbarModule,

    MdIconModule,

    MdButtonModule,

    MdCardModule,

    MdInputModule

  ]

})

export class SharedModule { }
5.2 在登录模块中使用 md-card 组件
技巧01:由于md-card组件是有动画的,需要导入一个动画依赖;并将这个动画模块导入到核心模块中去
cnpm install --save @angular/animation
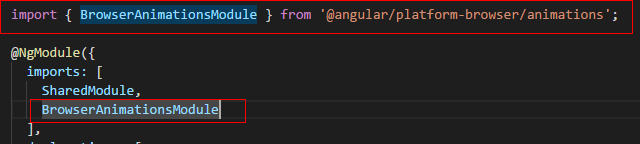
import { NgModule, Optional, SkipSelf } from '@angular/core';

import { SharedModule } from '../shared/shared.module';

import { HeaderComponent } from './header/header.component';

import { FooterComponent } from './footer/footer.component';

import { SidenavComponent } from './sidenav/sidenav.component';

import { DomSanitizer } from '@angular/platform-browser';

import { MdIconRegistry } from '@angular/material';

import { loadSvgResources } from '../utils/loadSvgResources'

import { BrowserAnimationsModule } from '@angular/platform-browser/animations';

@NgModule({

  imports: [

    SharedModule,

    BrowserAnimationsModule

  ],

  declarations: [

    HeaderComponent,

    FooterComponent,

    SidenavComponent

  ]

  ,

  exports: [

    HeaderComponent,

    FooterComponent,

    SidenavComponent

  ]

})

export class CoreModule {

  constructor(

    @Optional() @SkipSelf() parentModule: CoreModule,

    mdIconRegistry: MdIconRegistry,

    domSanitizer: DomSanitizer

  ) {

      if (parentModule) {

        throw new Error('CoreModule模块已经存在,请尽在主模块中进行引入。')

      }

      loadSvgResources(mdIconRegistry, domSanitizer);

  }

}
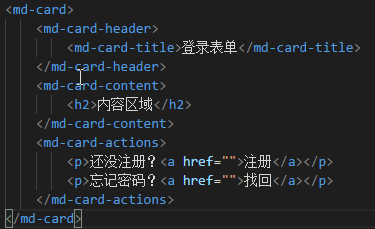
<md-card>

    <md-card-header>

        <md-card-title>登录表单</md-card-title>

    </md-card-header>

    <md-card-content>

        <h2>内容区域</h2>

    </md-card-content>

    <md-card-actions>

        <p>还没注册?<a href="">注册</a></p>

        <p>忘记密码?<a href="">找回</a></p>

    </md-card-actions>

</md-card>
5.3 效果图如下
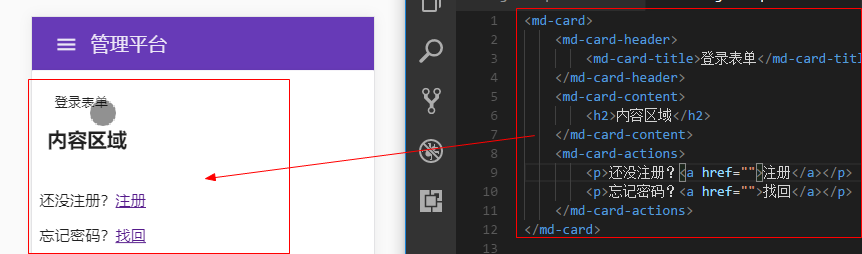
6 在登录组件中使用MdInputModule模块
6.1 在共享模块中导入MdInputModule模块
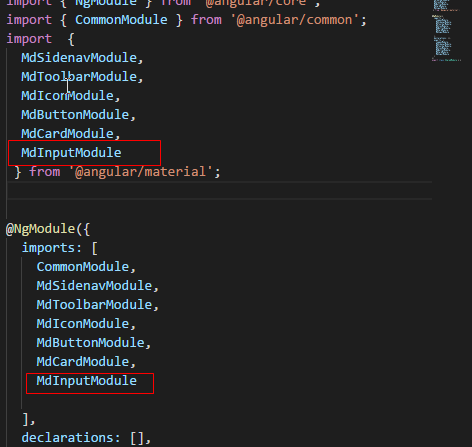
import { NgModule } from '@angular/core';

import { CommonModule } from '@angular/common';

import  {

  MdSidenavModule,

  MdToolbarModule,

  MdIconModule,

  MdButtonModule,

  MdCardModule,

  MdInputModule

 } from '@angular/material';

@NgModule({

  imports: [

    CommonModule,

    MdSidenavModule,

    MdToolbarModule,

    MdIconModule,

    MdButtonModule,

    MdCardModule,

    MdInputModule

  ],

  declarations: [],

  exports: [

    CommonModule,

    MdSidenavModule,

    MdToolbarModule,

    MdIconModule,

    MdButtonModule,

    MdCardModule,

    MdInputModule

  ]

})

export class SharedModule { }
6.2 在登录组件中使用md-input-container组件
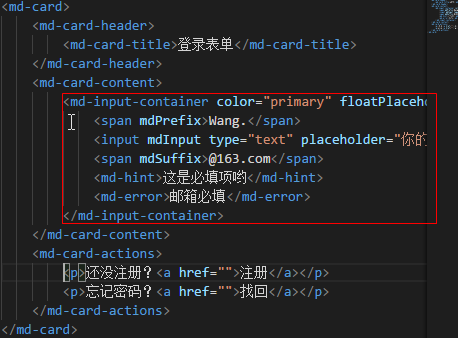
<md-card>

    <md-card-header>

        <md-card-title>登录表单</md-card-title>

    </md-card-header>

    <md-card-content>

        <md-input-container color="primary" floatPlaceholder="float" >

            <span mdPrefix>Wang.</span>

            <input mdInput type="text" placeholder="你的Email" />

            <span mdSuffix>@163.com</span>

            <md-hint>这是必填项哟</md-hint>

            <md-error>邮箱必填</md-error>

        </md-input-container>

    </md-card-content>

    <md-card-actions>

        <p>还没注册?<a href="">注册</a></p>

        <p>忘记密码?<a href="">找回</a></p>

    </md-card-actions>

</md-card>
6.3 效果图如下
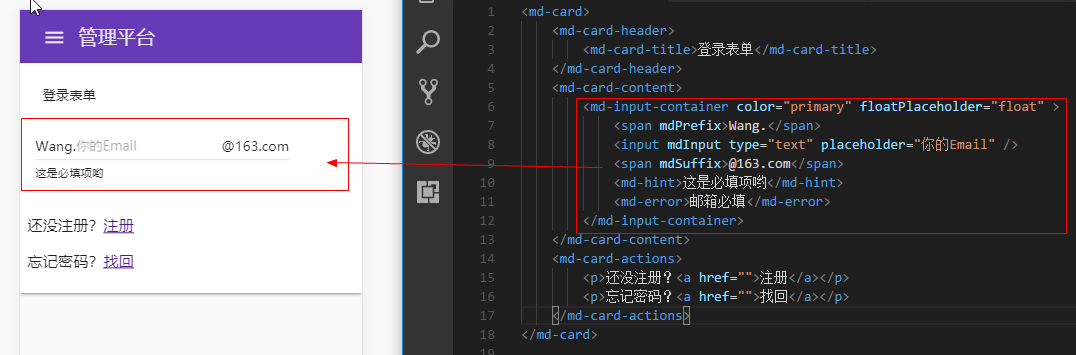
6.4 md-input-container高级用法
6.4.1 md-input-container拥有的一些属性
color : md-input-container组件的基调颜色
primary -> 主色
accent -> 副色
warn -> 警告
floatPlaceholder : 输入提示动画效果
float -> 浮动显示
always -> 浮动到上方
never -> 不进行浮动显示
hintLabel : 提示信息,显示在input标签下方
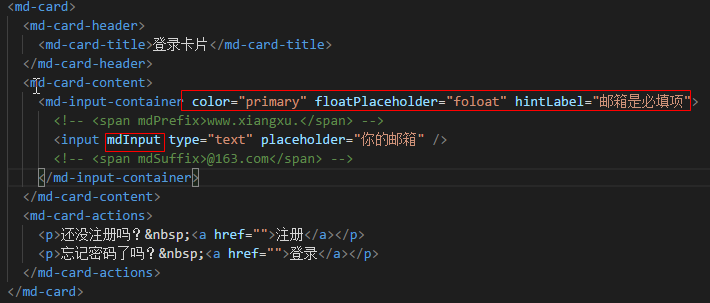
<md-card>
<md-card-header>
<md-card-title>登录卡片</md-card-title>
</md-card-header>
<md-card-content>
<md-input-container color="primary" floatPlaceholder="foloat" hintLabel="邮箱是必填项">
<!-- <span mdPrefix>www.xiangxu.</span> -->
<input mdInput type="text" placeholder="你的邮箱" />
<!-- <span mdSuffix>@163.com</span> -->
</md-input-container>
</md-card-content>
<md-card-actions>
<p>还没注册吗? <a href="">注册</a></p>
<p>忘记密码了吗? <a href="">登录</a></p>
</md-card-actions>
</md-card>
6.4.2 为md-input-container拥有的一些属性这是前缀和后缀
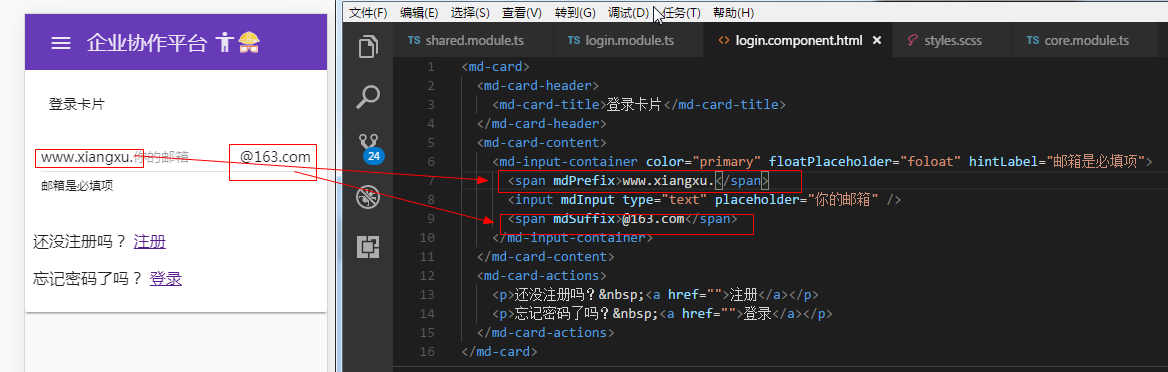
<md-card>
<md-card-header>
<md-card-title>登录卡片</md-card-title>
</md-card-header>
<md-card-content>
<md-input-container color="primary" floatPlaceholder="foloat" hintLabel="邮箱是必填项">
<span mdPrefix>www.xiangxu.</span>
<input mdInput type="text" placeholder="你的邮箱" />
<span mdSuffix>@163.com</span>
</md-input-container>
</md-card-content>
<md-card-actions>
<p>还没注册吗? <a href="">注册</a></p>
<p>忘记密码了吗? <a href="">登录</a></p>
</md-card-actions>
</md-card>
Material使用03 MdCardModule模块、MdInputModule模块的更多相关文章
- Yii 框架学习--03 多应用多模块
本文以YII 2.0.7为例. 概述 首先看看多应用和多模块的特点: 多应用的特点: 独立配置文件 独立域名 多模块的特点: 统一配置文件 统一域名 那么,实际该怎么决定使用多应用还是多模块呢? 对于 ...
- node(03)--利用 HTTP 模块 URl 模块 PATH 模块 FS 模块创建一个 WEB 服务器
Web 服务器一般指网站服务器,是指驻留于因特网上某种类型计算机的程序,可以向浏览器等 Web 客户端提供文档,也可以放置网站文件,让全世界浏览:可以放置数据文件,让全世界下载.目前最主流的三个 We ...
- Material使用04 MdCardModule和MdButtonModule综合运用
设计需求:设计一个登陆页面 1 模块导入 1.1 将MdCardModule和MdButtonModule模块导入到共享模块中 import { NgModule } from '@angular/c ...
- s14 第5天 时间模块 随机模块 String模块 shutil模块(文件操作) 文件压缩(zipfile和tarfile)shelve模块 XML模块 ConfigParser配置文件操作模块 hashlib散列模块 Subprocess模块(调用shell) logging模块 正则表达式模块 r字符串和转译
时间模块 time datatime time.clock(2.7) time.process_time(3.3) 测量处理器运算时间,不包括sleep时间 time.altzone 返回与UTC时间 ...
- Python第十三天 django 1.6 导入模板 定义数据模型 访问数据库 GET和POST方法 SimpleCMDB项目 urllib模块 urllib2模块 httplib模块 django和web服务器整合 wsgi模块 gunicorn模块
Python第十三天 django 1.6 导入模板 定义数据模型 访问数据库 GET和POST方法 SimpleCMDB项目 urllib模块 urllib2模块 ...
- Python常用模块-时间模块
在写代码的过程中,我们常常需要与时间打交道,在python中,与时间处理有关的模块有time,datetime和calendar.,这里主要介绍time和datetime模块 在python中,表示时 ...
- Python常用模块-时间模块(time&datetime)
Python常用模块-时间模块(time & datetime) 作者:尹正杰 版权声明:原创作品,谢绝转载!否则将追究法律责任. 一.初始time模块 #!/usr/bin/env pyth ...
- time模块/datetime模块/calendar模块
time模块时间的表示形式时间戳:以整型或浮点型表示⼀个时间,该时间以秒为单位,这个时间是以1970年1⽉1⽇0时0分0秒开始计算的. 导入time import time 1.返回当前的时间戳 no ...
- 【Python】[模块]使用模块,安装第三方模块
一个.py文件就称之为一个模块(Model)按目录来组织模块的方法,称为包(Package)每一个包目录下面都会有一个__init__.py的文件内置函数1.使用模块 导入模块 import sys ...
随机推荐
- 刘强1109 JavaScript基础二(分支与循环结构)
[if-else结构] 1.结构的写法: if(判断条件){ 条件为true时,执行if{} } else{ 条件为false时,执行else{} } 2.注意事项: ① else{}语句块,可以根据 ...
- CentOS6.8通过yum安装MySQL5.7
Centos6.8通过yum安装mysql5.7 1.安装mysql的yum源 a.下载配置mysql的yum源的rpm包 根据上面3张图片中的操作下载下来的rpm文件可以通过如下命令获取: wget ...
- 蓝桥杯-算法训练--ALGO-5 最短路
问题描述 给定一个n个顶点,m条边的有向图(其中某些边权可能为负,但保证没有负环).请你计算从1号点到其他点的最短路(顶点从1到n编号). 输入格式 第一行两个整数n, m. 接下来的m行,每行有三个 ...
- java 中 final 的用法
/* final可以修饰类,方法,变量 特点: final可以修饰类,该类不能被继承. final可以修饰方法,该方法不能被重写.(覆盖,复写) final可以修饰变量,该变量不能被重新赋值.因为这个 ...
- css 选择器和优先级
css样式是做网页时,页面 布局不可或缺的关键点.但是在做网页时,会遇到一些明明已经设置了样式的元素,缺无法达到想要的效果,这种情况比较常见.这就涉及到优先级的问题了 要说到css的优先级,先来看下c ...
- 从运维的角度分析使用阿里云数据库RDS的必要性--你不应该在阿里云上使用自建的MySQL/SQL Server/Oracle/PostgreSQL数据库
开宗明义,你不应该在阿里云上使用自建的MySQL or SQL Server数据库,对了,还有Oracle or PostgreSQL数据库. 云数据库 RDS(Relational Database ...
- Python——网络爬虫
此篇文章继续跟着小甲鱼的视频来初学网络爬虫,除了小甲鱼的网站上可下载视频,发现b站上也有全套的视频哦,会比下载来的更方便些. 网络爬虫,又称为网页蜘蛛(WebSpider),非常形象的一个名字.如果你 ...
- Java中Comparable和Comparator比较
1.Comparable 介绍 Comparable 是一个排序接口,如果一个类实现了该接口,说明该类本身是可以进行排序的.注意,除了基本数据类型(八大基本数据类型) 的数组或是List,其余类型的对 ...
- python基础(二)-------数据类型
python开发基础篇(二)数据类型 python数据类型有: 1.数字 1.只能存放一个值 2.一经定义,不可更改 3.直接访问 主要的分类为:整型,长整型,(python2有长整型的概念Pytho ...
- 利用可变参数模拟Printf()函数实现一个my_print()函数和调用可变参数注意的陷阱!
可变参数函数的实现与函数调用的栈结构密切相关,正常情况下C的函数参数入栈规则为__stdcall, 它是从右到左的,即函数中的最右边的参数最先入栈. 例如,对于函数: void test(char a ...