android ——可折叠式标题栏
CollapsingToolbarLayout是一个作用于Toolbar上的布局,可以让Toolbar的效果变得更加丰富:
但是CollapsingToolbarLayout是不能独立存在的,它这能作为AppBarLayout的直接子布局来用,而AppBarLayout又必须是CoordinatorLayout的子布局。
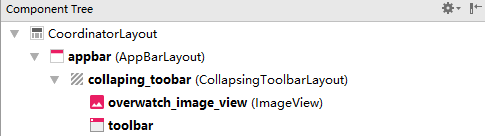
这是一个基本可折叠标题栏的布局,黑体加黑的是ID,ImageView就是标题栏的上展示的图片。
<android.support.design.widget.CoordinatorLayout xmlns:android="http://schemas.android.com/apk/res/android"

    xmlns:app="http://schemas.android.com/apk/res-auto"

    android:layout_width="match_parent"

    android:layout_height="match_parent">

   <android.support.design.widget.AppBarLayout

       android:id="@+id/appbar"

       android:layout_width="match_parent"

       android:layout_height="250dp">

       <android.support.design.widget.CollapsingToolbarLayout

           android:id="@+id/collaping_toobar"

           android:layout_width="match_parent"

           android:layout_height="match_parent"

           android:theme="@style/ThemeOverlay.AppCompat.Dark.ActionBar"

           app:contentScrim="?attr/colorPrimary"

           app:layout_scrollFlags="scroll|exitUntilCollapsed">

           <ImageView

               android:id="@+id/overwatch_image_view"

               android:layout_width="match_parent"

               android:layout_height="match_parent"

               android:scaleType="centerCrop"

               app:layout_collapseMode="parallax" />

           <android.support.v7.widget.Toolbar

               android:id="@+id/toolbar"

               android:layout_width="match_parent"

               android:layout_height="?attr/actionBarSize"

               app:layout_collapseMode="pin"/>

       </android.support.design.widget.CollapsingToolbarLayout>

   </android.support.design.widget.AppBarLayout>

</android.support.design.widget.CoordinatorLayout>
最外层的CoordinatorLayout没有什么特殊的属性,AppBarLayout同样只是高度为250dp只是一个我觉得比较好的效果,
CollapsingToolbarLayout是这次的新布局,其中重要的属性有:
android:theme指定了主题,
app:contentScrim指定了趋于折叠状态和折叠后的颜色。
layout_scrollFlags指定的是滚动的效果, scroll - 想滚动就必须设置这个。enterAlways-向上滑动的时候会折叠一直到消失,如果再继续向上滑动也不会出现,一旦向下滑动立即开始出现要结合scroll一起用。enterAlwaysCollapsed是enterAlways的补充,向上滑动的时候会折叠这个长度会被记下来,然后继续向上滑动也不会出现,如果改为此刻再向下滑动标题栏不会出现,要一直滑到刚才记下的那个长度才会出现。 exitUntilCollapsed向上滑动的时候会折叠到一个最小高度,也就是通过minimum height 设置的最小高度后,就固定不动了,再把滑动事件交给 scrollview 继续滑动,然后再向下滑的话一直到滑完标题栏才会开始展开。
然后是标题栏的图片ImageView和标题栏Toolbar,重要的是app:layout_collapseMode这个属性设为pin时表示折叠的过程中位置保持不变,parallax表示折叠过程中位置会产生一定的错位偏移。
然后还要弄一个用于滑动的正文,CollapsingToolbarLayout和ScrollView一起使用会有滑动bug,注意要使用NestedScrollView来替代ScrollView。
<android.support.design.widget.CoordinatorLayout xmlns:android="http://schemas.android.com/apk/res/android"

    xmlns:app="http://schemas.android.com/apk/res-auto"

    android:layout_width="match_parent"

    android:layout_height="match_parent"

    android:fitsSystemWindows="true">

   <android.support.design.widget.AppBarLayout

...

 </android.support.design.widget.AppBarLayout>

    <android.support.v4.widget.NestedScrollView

        android:layout_width="match_parent"

        android:layout_height="match_parent"

        app:layout_behavior="@string/appbar_scrolling_view_behavior">

        <LinearLayout

            android:orientation="vertical"

            android:layout_width="match_parent"

            android:layout_height="wrap_content">

            <android.support.v7.widget.CardView

                android:layout_width="match_parent"

                android:layout_height="wrap_content"

                android:layout_marginBottom="15dp"

                android:layout_marginLeft="15dp"

                android:layout_marginRight="15dp"

                android:layout_marginTop="35dp"

                app:cardCornerRadius="4dp">

                <TextView

                    android:id="@+id/overwatch_content_text"

                    android:layout_width="wrap_content"

                    android:layout_height="wrap_content"

                    android:layout_margin="10dp"/>

            </android.support.v7.widget.CardView>

        </LinearLayout>

    </android.support.v4.widget.NestedScrollView>

</android.support.design.widget.CoordinatorLayout>
NestedScrollView和AppBarLayout是同平级的所以需要 app:layout_behavior指定布局行为,指定为@string/appbar_scrolling_view_behavior将NestedScrollView放在下面不至于遮挡住标题栏。
然后NestedScrollView和ScrollView只允许存在一个直接子布局,所以嵌套了一个LinearLayout,然后里面是卡片式布局。
然后再额外加上一个悬浮按钮,其实这里的这个悬浮按钮我没设置什么功能,因为如果设置在标题栏上比较好看而已。
<android.support.design.widget.CoordinatorLayout xmlns:android="http://schemas.android.com/apk/res/android"

    xmlns:app="http://schemas.android.com/apk/res-auto"

    android:layout_width="match_parent"

    android:layout_height="match_parent"

    android:fitsSystemWindows="true">

   <android.support.design.widget.AppBarLayout

      ....

   </android.support.design.widget.AppBarLayout>

    <android.support.v4.widget.NestedScrollView

       ...

    </android.support.v4.widget.NestedScrollView>

    <android.support.design.widget.FloatingActionButton

        android:layout_width="wrap_content"

        android:layout_height="wrap_content"

        android:layout_margin="16dp"

        android:src="@drawable/ic_comment"

        app:layout_anchor="@id/appbar"

        app:layout_anchorGravity="bottom|end"/>

</android.support.design.widget.CoordinatorLayout>
这个悬浮按钮FloatingActionButton和NestedScrollView、AppBarLayout都是同级的,想要把它设置到标题栏上需要先设置一个锚点app:layout_anchor这里设置在AppBar上面,然后app:layout_anchorGravity="bottom|end"设置在右下角。
最后是java代码。
 public class Main2Activity extends AppCompatActivity {

     public static final String OVERWATCH_NAME = "overWatch_name";

     public static final String OVERWATCH_IMAGE_ID = "overWatch_image_id";

     @Override

     protected void onCreate(Bundle savedInstanceState) {

         super.onCreate(savedInstanceState);

         setContentView(R.layout.activity_main2);

         //获取图片的name和ID

         Intent intent = getIntent();

         String overWatchName = intent.getStringExtra(OVERWATCH_NAME);

         int overWatchId = intent.getIntExtra(OVERWATCH_IMAGE_ID, 0);

         //标题栏设定

         Toolbar toolbar = (Toolbar) findViewById(R.id.toolbar);

         CollapsingToolbarLayout collapsingToolbar = (CollapsingToolbarLayout) findViewById(R.id.collaping_toobar);

         ImageView overWatchImageView = (ImageView) findViewById(R.id.overwatch_image_view);

         Glide.with(Main2Activity.this).load(overWatchId).into(overWatchImageView);

         setSupportActionBar(toolbar);

         //正文设定

         TextView overWatchTextView = (TextView) findViewById(R.id.overwatch_content_text);

         collapsingToolbar.setTitle(overWatchName);

         String overWatchContent = makeContentText(overWatchName);

         overWatchTextView.setText(overWatchContent);

         //让返回图标显示出来

         ActionBar actionBar = getSupportActionBar();

         if(actionBar != null){

             actionBar.setDisplayHomeAsUpEnabled(true);

         }

     }

     private String  makeContentText(String overWatchName){

         StringBuilder ContentText = new StringBuilder();

         for(int i = 0; i < 500; i++){

             ContentText.append(overWatchName);

         }

         return ContentText.toString();

     }

     public boolean onOptionsItemSelected(MenuItem item){

         switch (item.getItemId()){

             case android.R.id.home:

                 finish();

                 return true;

         }

         return super.onOptionsItemSelected(item);

     }

 }
正文我就把图片的名字重复了五十遍。。然后重要的是接收上一个活动的数据,得知上个活动点击的是那一个图片,使用了Intent,不过也不是太重点。。。所以还需要在主活动加上发送数据的代码:
 public class OverWatchAdapter extends RecyclerView.Adapter<OverWatchAdapter.ViewHolder> {

 ....

     public ViewHolder onCreateViewHolder(ViewGroup parent, int viewType) {

         if(mContext == null){

             mContext = parent.getContext();

         }

         View view = LayoutInflater.from(mContext).inflate(R.layout.overwatch_item,parent,false);

         final ViewHolder holder = new ViewHolder(view);

         holder.cardView.setOnClickListener(new View.OnClickListener() {

             @Override

             public void onClick(View view) {

                 int position = holder.getAdapterPosition();

                 OverWatch overWatch = mOverWatch.get(position);

                 Intent intent = new Intent(mContext,Main2Activity.class);

                 intent.putExtra(Main2Activity.OVERWATCH_NAME, overWatch.getName());

                 intent.putExtra(Main2Activity.OVERWATCH_IMAGE_ID,overWatch.getImageID());

                 mContext.startActivity(intent);

             }

         });

         return  holder;

     }

 ....

 }
因为主活动的图片使用的是RecyclerView所以要识别点击的是那张图片需要的就是修改RecyclerView的适配器了代码如上。。。。
最后再加上一个使状态栏和标题栏融合也就是状态栏透明的效果
<android.support.design.widget.CoordinatorLayout xmlns:android="http://schemas.android.com/apk/res/android"

    xmlns:app="http://schemas.android.com/apk/res-auto"

    android:layout_width="match_parent"

    android:layout_height="match_parent"

    android:fitsSystemWindows="true">

   <android.support.design.widget.AppBarLayout

       android:id="@+id/appbar"

       android:layout_width="match_parent"

       android:layout_height="250dp"

       android:fitsSystemWindows="true">

       <android.support.design.widget.CollapsingToolbarLayout

           android:id="@+id/collaping_toobar"

           android:layout_width="match_parent"

           android:layout_height="match_parent"

           android:theme="@style/ThemeOverlay.AppCompat.Dark.ActionBar"

           app:contentScrim="?attr/colorPrimary"

           app:layout_scrollFlags="scroll|exitUntilCollapsed"

           android:fitsSystemWindows="true">

           <ImageView

               android:id="@+id/overwatch_image_view"

               android:layout_width="match_parent"

               android:layout_height="match_parent"

               android:scaleType="centerCrop"

               app:layout_collapseMode="parallax"

               android:fitsSystemWindows="true"/>

...

       </android.support.design.widget.CollapsingToolbarLayout>

   </android.support.design.widget.AppBarLayout>

...

</android.support.design.widget.CoordinatorLayout>
想要标题栏的图片和状态栏融合就需要给图片加上android:fitsSystemWindows="true"这个属性值,然后它的父布局都要加上。。再然后还要把状态栏的颜色设为透明,这个效果只能是API21以上,也就是android5.0开始的,所以这是一个系统差异型的功能。
需要在res目录新建一个values-v21目录,然后新建一个style.xml文件:
<resources>

    <style name="OverWatchTheme" parent="AppTheme">

        <item name="android:statusBarColor">@android:color/transparent</item>

    </style>

</resources>
这里设置了一个名为OverWatchTheme的主题,其parent主题是AppTheme,然后将状态栏的颜色设置为透明。
然后还要5.0以下的系统识别这个OverWatchTheme主题,所以在values目录下的style.xml文件需要加上:
<resources>

    <!-- Base application theme. -->

    <style name="AppTheme" parent="Theme.AppCompat.Light.NoActionBar">

        <!-- Customize your theme here. -->

        <item name="colorPrimary">@color/colorPrimary</item>

        <item name="colorPrimaryDark">@color/colorPrimaryDark</item>

        <item name="colorAccent">@color/colorAccent</item>

    </style>

    <style name="OverWatchTheme" parent="AppTheme">

        </style>

</resources>
倒数第二第三行的代码,因为是5.0以下的系统使用的所以空的就行单纯继承AppTheme就好了。
最后让相应的活动使用这个主题在AndroidManifest中
<manifest xmlns:android="http://schemas.android.com/apk/res/android"

    package="xbt.exp19">

....

        <activity android:name=".Main2Activity"

            android:theme="@style/OverWatchTheme"></activity>

    </application>

</manifest>
最终效果:
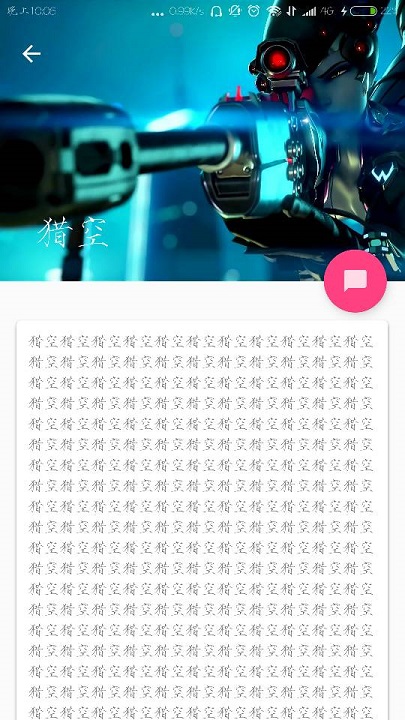
ImageView
android ——可折叠式标题栏的更多相关文章
- [置顶]
xamarin android自定义标题栏(自定义属性、回调事件)
自定义控件的基本要求 这篇文章就当是自定义控件入门,看了几篇android关于自定义控件的文章,了解了一下,android自定义控件主要有3种方式: 自绘控件:继承View类,所展示的内容在OnDra ...
- (转)Android 自定义标题栏(title栏)
转:http://blog.csdn.net/jamin0107/article/details/6715678 第一步,向实现自定义标题栏,需要在onCreate方法里这样写 requestWind ...
- Android—自定义标题栏的实现及遇见的问题解决
开发者设计界面时候往往不会使用系统自带的标题栏,因为不美观,所以需要自己设置标题栏. 1.根据需求在xml文件中设置标题布局 <?xml version="1.0" enco ...
- setFeatureInt、android 自定义标题栏
Android 自带的toolbar 往往不能很好的的满足我们的个性化要求.因此我们经常使用自定的的标题栏.而Android系统本身也允许我们自定以标题栏. 记录一下,自定义标题栏常遇到的问题.先上效 ...
- Android隐藏标题栏和状态栏
一.隐藏标题栏 //隐藏标题栏 this.requestWindowFeature(Window.FEATURE_NO_TITLE); 二.隐藏状态栏 //隐藏状态栏 this.getWindow() ...
- Android自定义标题栏
预览一下效果: 素材: 新建一个布局title_bar.xml,代码如下: <?xml version="1.0" encoding="utf-8"?&g ...
- android不要标题栏
去除标题栏title其实非常简单,他有两种方法,一种是在代码中添加,另一种是在AndroidManifest.xml中添加: 1.在代码中实现: 在此方法setContentView(R.layout ...
- android 自定义标题栏 titleBar自定义
在value文件夹下添加style.xml <?xml version="1.0" encoding="utf-8"?> <resources ...
- Android 自定义标题栏
开发 Android APP 经常会用到自定义标题栏,而有多级页面的情况下还需要给自定义标题栏传递数据. 本文要点: 自定义标题填充不完整 自定义标题栏返回按钮的点击事件 一.代码 这里先介绍一下流程 ...
随机推荐
- Maven打包成Jar文件时依赖包的问题
我们项目中使用到第三方的库文件,这些jar库文件并没有放到Maven中央库上,导致我们需要在项目中自己配置使用.我们的两三个开发人员对Java都是很熟,因此在使用中遇到了一些问题,表现在:在本地中引入 ...
- windows美化工具7+ Taskbar Tweaker
今天分享一个windows美化工具 7+ Taskbar Tweaker 调整工具专为 Windows 任务栏工作者量身定制,支持 Windows 7 以及更高版本的(非服务器版)微软操作系统平台. ...
- Bzoj 3165 [Heoi2013]Segment题解
3165: [Heoi2013]Segment Time Limit: 40 Sec Memory Limit: 256 MBSubmit: 668 Solved: 276[Submit][Sta ...
- I/O:ByteBuffer
ByteBuffer: static ByteBuffer allocate(int capacity) :分配一个新的字节缓冲区. static ByteBuffer allocateDirect( ...
- 双剑合璧——掌握 cURL 和 Dig 走天涯
如今随着大量的应用转移到网络,作为开发者,会经常做一些通讯测试,例如从网站获取信息.模拟用户向网站提交或者上传数据,查看应用通讯情况等等,现在变成了非常重要的任务. 一起来认识 cURL cURL 是 ...
- Java+eclipse技巧小总结
首先是打开Content Assistant,自动代码补全 Window -> Preferences -> Java -> Editor -> Content Assist, ...
- 个人永久性免费-Excel催化剂功能第84波-批量提取OUTLOOK邮件附件
批量操作的事情常常能让人感到十分畅快,区别于一次次的手工的操作,它真正实现了“人工智能”想要的效果,人指挥机器做事情,机器就可以按着人意去操作.此篇给大家再次送了批量操作一绝活,批量下载OUTLOOK ...
- 常用的re模块的正则匹配的表达式
07.01自我总结 常用的re模块的正则匹配的表达式 一.校验数字的表达式 1.数字 ^[0-9]\*$ 2.n位的数字 ^\d{n}$ 3.至少n位的数字 ^\d{n,}$ 4.m-n位的数字 ^\ ...
- 前端框架——树形结构Ztree的使用
地址 官网:http://ztree.me 码云:https://gitee.com/zTree/zTree_v3 可以实现效果 使用方式 下载资源文件,引入到自己的项目中 <head> ...
- Python_Day1_人人都爱列表
列表由一系列按特定顺序排列的元素组成.你可以创建包含字母表中所有字母.数字0~9或 所有家庭成员姓名的列表;也可以将任何东西加入列表中,其中的元素之间可以没有任何关系. 鉴于列表通常包含多个元素,给列 ...