Setting up multi nodes live migration in Openstack Juno with devstack
Setting up multi nodes live migration in Openstack Juno with devstack
Summary
Live migration overview
- Setup Openstack with devstack: one controller node, two compute nodes
- Configure migrations
- Live migration test
- Issue summary
Live migration Overview
Migration enables an administrator to move a virtual-machine instance from one compute host to another. This feature is useful when a compute host requires maintenance. Migration can also be useful to redistribute the load when many VM instances are running on a specific physical machine.
The migration types are:
Non-live migration (sometimes referred to simply as 'migration'). The instance is shut down for a period of time to be moved to another hypervisor. In this case, the instance recognizes that it was rebooted.
Live migration (or 'true live migration'). Almost no instance downtime. Useful when the instances must be kept running during the migration. The different types of live migration are:
Shared storage-based live migration. Both hypervisors have access to shared storage.
Block live migration. No shared storage is required. Incompatible with read-only devices such as CD-ROMs and Configuration Drive (config_drive).
Volume-backed live migration. Instances are backed by volumes rather than ephemeral disk, no shared storage is required, and migration is supported (currently only available for libvirt-based hypervisors
This page's live migration uses block live migration which does not need shared storage.
Setup Openstack with devstack: one controller node, two compute nodes
Prepare three servers with ubuntu installed. One server is worked as control node, the other two are compute nodes(Note: please named three servers with different hostnames.) and get updates and install git
sudo apt-get update
sudo apt-get install git
Configure controller node
- Git devstack Juno release: git clone https://github.com/openstack-dev/devstack.git -b stable/juno
Add localrc under devstack and add content to it as following
HOST_IP=your configured IP address

MULTI_HOST=

FIXED_RANGE=10.0.0.0/

FIXED_NETWORK_SIZE=

ADMIN_PASSWORD=

MYSQL_PASSWORD=

RABBIT_PASSWORD=

SERVICE_PASSWORD=

SERVICE_TOKEN=

SCREEN_LOGDIR=/home/stack/log/screen

LOGFILE=/home/stack/log/stack.log

LOGDAYS=

PUBLIC_INTERFACE=eth0 #actual name of your network interface

FLAT_INTERFACE=eth0- Run devstack to install openstack: ./stack.sh
Configure compute node
- Git devstack Juno release: git clone https://github.com/openstack-dev/devstack.git -b stable/juno
Add localrc under devstack and add content as done in controller node. and also add following to it.
SERVICE_HOST=your controller ip

HOST_IP=host ip

MULTI_HOST=

 FIXED_RANGE=10.0.0.0/

FIXED_NETWORK_SIZE=

 ADMIN_PASSWORD=

MYSQL_PASSWORD=

RABBIT_PASSWORD=

SERVICE_PASSWORD=

SERVICE_TOKEN=

SCREEN_LOGDIR=/home/stack/log/screen

LOGFILE=/home/stack/log/stack.log

LOGDAYS=

#PUBLIC_INTERFACE=eth0

FLAT_INTERFACE=eth0

DATABASE_TYPE=mysql

Q_HOST=$SERVICE_HOST

MYSQL_HOST=$SERVICE_HOST

RABBIT_HOST=$SERVICE_HOST

GLANCE_HOSTPORT=$SERVICE_HOST:

KEYSTONE_AUTH_HOST=$SERVICE_HOST

KEYSTONE_SERVICE_HOST=$SERVICE_HOST

ENABLED_SERVICES=n-cpu,n-net,n-api,c-sch,c-api,c-vol
Add some variables which would use during install openstack
Copy following info to a shell file:#!/bin/bash export OS_AUTH_URL=http://controller'ip:5000/v2.0
export OS_TENANT_ID=69eaaebc44174418956d4dd104f2be76
export OS_TENANT_NAME="admin" export OS_USERNAME="admin"
export OS_PASSWORD=
export OS_VOLUME_API_VERSION=Update the OS_AUTH_URL with your controller node ip. And use command:mysql -uroot -p123456 -e "select * from keystone.project;" to get OS_TENANT_ID and update it, then run this shell
- Run devstack to install openstack: ./stack.sh
Configure migrations
Host name configuration
Add three server's host names to /etc/hosts to be sure that every node can ping successful to othersserver's IP server's host name
Configure /etc/sysconfig/iptables file to allow libvirt listen on TCP port 16509 and add a record accepting KVM communication on TCP port within the range from 49152 to 49261
Note: ubuntu does not have sysconfig folder under etc, need create it manually.-A INPUT -p tcp -m multiport --ports -m comment --comment "libvirt" -j ACCEPT -A INPUT -p tcp -m multiport --ports : -m comment --comment "migration" -j ACCEPT
Configuration libvirt
Enable libvirt listen flag at /etc/sysconfig/libvirtd file: addLIBVIRTD_ARGS="-listen"
Configure /etc/libvirt/libvirtd.conf:
listen_tls =

listen_tcp =

auth_tcp = "none"
Configure /etc/init/libvirt-bin.conf, modify exec /usr/sbin/libvirtd to exec /usr/sbin/libvirtd -l
Configure /etc/libvirt/qemu.conf, modify security_driver="none"Restart libvirt, after executing the command, ensure that libvirt is successfully restarted: sudostop libvirt-bin && sudo start libvirt-bin
ps -ef |grep libvirt

Nova configuration
Modify:force_config_drive = None(value from always to None)Add:live_migration_flag=VIR_MIGRATE_UNDEFINE_SOURCE,VIR_MIGRATE_PEER2PEER,VIR_MIGRATE_LIVE (under default)
- Restart service on each node
screen -s stack -X quit
./rejoin-stack.sh
Live migration test
Before start live migration test, to be sure that the nova compute service are ready


- create instance and attach volume
nova boot --flavor=flavor_id --image=image_id instance_name
nova volume-attach vm_id volume_id auto+----------+--------------------------------------+
| Property | Value |
+----------+--------------------------------------+
| device | /dev/vdb |
| id | 3deb171f-8d61-4df9-8e6e-29d86575e78e |
| serverId | bb12f3b0-c17e-49f7-b482-255258931eb4 |
| volumeId | 3deb171f-8d61-4df9-8e6e-29d86575e78e |
+----------+--------------------------------------+ - How to mount the volume which attached to the instance
1> execute command to ssh to the instance, for example: ssh cirros@10.0.0.2
2> execute command to list the partition tables for the installed devices: sudo fdisk -l
see:Disk /dev/vdb......
3> create a filesystem on the device: sudo mkfs.ext4 /dev/vdb
4> create a dictionary and mount the volume:
sudo mkdir /data
sudo mount /dev/vdb /data/
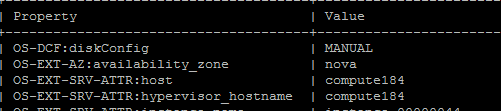
5> then we can create folder or file on it - nova show instance_id
- nova live-migration --block_migrate vm_id target_server_hostname
- check the host before and after migration

Issue summary
1. n-api could not start when install openstack with devstack
Solution: Restart controller node and rejoin the service, then run unstack and stack on compute node
2. Get error:libvirtError: operation failed: Failed to connect to remote libvirt URI qemu+tcp://computer247/system: Unable to resolve address 'computer247' service '16509': Name or service not known
Solution: check the iptables in configure migration step 2.
3. Live Migration failure: Invalid value '4-7,12-15' for 'cpuset.cpus': Invalid argument
Solution: Check the CPU info in your compute nodes, if there have different architecture of cpus, it would be fail to migrate
4. Compute node's nova-cpu service could not enable:

Solution: Check the libvirt settings in configure migration section, and restart libvirt-bin service, then run command in both compute node and controller node:
screen -s stack -X quit
./rejoin-stack.sh
5. Get error:

Solution: It's about nova configuration, check /etc/nova/nova.conf:
Modify:force_config_drive = None(value from always to None) Add:live_migration_flag=VIR_MIGRATE_UNDEFINE_SOURCE,VIR_MIGRATE_PEER2PEER,VIR_MIGRATE_LIVE (under default)
then rejoin stack in compute node
6. Getting error:screen-n-cpu.2015-06-02-184950.log:2015-06-04
00:16:45.797 ERROR nova.virt.libvirt.driver [-] [instance:
d1b56987-4691-4259-897f-ba4ce3e71260] Live Migration failure: Failed to
open file '/dev/disk/by-path/ip-9.115.246.45:3260-iscsi-iqn.1986-03.com.ibm:2145.v7k41.node1-lun-4': No such file or directory
Solution: No solution currently by me, it is a bug and would be fixed
7. Gettting
error when rejoin stack:2015-06-09 14:02:33.154 TRACE
cinder.openstack.common.threadgroup ArgumentError: Could not parse
rfc1738 URL from string ''"

Solution:
modify the node sql_connection in /etc/cinder/cinder.conf and
/etc/nova/nova.conf with( It has no value as default): take following as
example
/etc/cinder/cinder.conf: sql_connection = mysql://root:123456@9.115.246.185/cinder?charset=utf8
/etc/nova/nova.conf: sql_connection = mysql://root:123456@9.115.246.185/nova?charset=utf8
Setting up multi nodes live migration in Openstack Juno with devstack的更多相关文章
- Deploying Cloud Foundry on OpenStack Juno and XenServer (Part I)
link http://rabbitstack.github.io/deploying-cloud-foundry-on-openstack-juno-and-xenserver-part-i/ Cl ...
- 使用openshit在ubuntu14.04下一键部署openstack(juno版本)
一.基本介绍 本实验是在vmware workstation上虚拟机ubuntu14.04(64bit,desktop)上部署openstack(Juno版本).采用的工具是openshit.open ...
- openStack juno for ubuntu12-04
<一,preinstall basic conf,pre Env> 1,pwgen(openssl rand -hex 10) some Open-Stack services add a ...
- OpenStack Juno 版本发布——支持Spark和NFV[转]
作者:郑晨,OpenStack中国社区,转载请注明出处 美国时间2014年10月16日,OpenStack Juno版本正式发布,这是OpenStack开源云计算项目自2010年创立以来的第10个版本 ...
- 一键安装openstack juno 之controller node.
原文名称: OpenStack Juno Scripted Installation on CentOS 7 Step I: 本机信息配置 CONTROLLER_IP=192.168.173.133 ...
- [openStack]使用Fuel安装OpenStack juno的fuel_master
安装OpenStack是一件很复杂的事情,特别是在想目中,如果一个组件一个组件,一台一台的coding部署,估计太消耗时间,而且出错的概率很高,所以使用工具推送部署的效率就很高了,而且必须得可靠.mi ...
- vmware vms migration to openstack
Converting a VMware Workstation virtual machine to KVM Leave a commentPosted by rbgeek on August 13, ...
- VMware migration to openstack kvm
- Centos7 install Openstack Juno (RDO) (转载)
原文地址:http://www.hdume.com/centos-7-0%E5%AE%89%E8%A3%85openstack/ 1.安装系统,Centos7镜像采用CentOS-7.0-1406-x ...
随机推荐
- 【codeforces 787B】Not Afraid
[题目链接]:http://codeforces.com/contest/787/problem/B [题意] -水题..题目太吓人 [题解] 只要你在一组里面找到两个数字,它们的绝对值相同,但是正负 ...
- 在Windows中安装MinGW-w64(有图,一步一步)
在Windows中安装MinGW-w64 发表回复 如需配合Sublime Text 3编译C程序, 请参考本站文章: 使用Sublime Text 3与MinGW-w64编译C语言程序 MinGW, ...
- instsrv.exe用法
这个小工具是用以安装和卸载可执行的服务和指派服务名给这些可执行的服务的. 一:绑定程序和服务 这里我们设定要将F:\cpu.exe 以 abc 的名称显示作为服务的话,我们应当这样子做: 在开 ...
- 树莓派挂载移动硬盘开启samba
本文参考 [https://blog.csdn.net/u010906068/article/details/38455363],原文部分步骤在我的树莓派上,可能是版本不同吧,进行了修改后部署成功 一 ...
- jQuery中的Deferred和promise
promise:http://www.alloyteam.com/2014/05/javascript-promise-mode/ 1 jQuery 中的 Deferred 和 Promises : ...
- Net多线程编程
Net多线程编程—使用Visual Studio 2012进行调试 1 相关概念 1)栈帧 C语言中,每个栈帧对应着一个未运行完的函数.栈帧中保存了该函数的返回地址和局部变量. 栈帧也叫过程活动记录, ...
- hdu 1087 Super Jumping! Jumping! Jumping!(dp 最长上升子序列和)
题目链接:http://acm.hdu.edu.cn/showproblem.php?pid=1087 ------------------------------------------------ ...
- 并发-Java并发编程基础
Java并发编程基础 并发 在计算机科学中,并发是指将一个程序,算法划分为若干个逻辑组成部分,这些部分可以以任何顺序进行执行,但与最终顺序执行的结果一致.并发可以在多核操作系统上显著的提高程序运行速度 ...
- 《Linux Device Drivers》第十一章 核心数据类型——note
基本介绍 因为Linux多平台特性,不管是哪一个重要驱动力应该是便携 与内核代码相关的核心问题应该是访问的同时是数据项的已知长度.能力和利用不同的处理器 内核使用的数据类型主要分为三类 类似int这种 ...
- wpf Storyboard 不存在可解析名称“ ”的适用名称领域 No applicable name scope exists to resolve the name
原文:wpf Storyboard 不存在可解析名称“ ”的适用名称领域 No applicable name scope exists to resolve the name 写了一个 Storyb ...