滚动监听 after选择器
一、如何实现滚动到一定位置将内容固定在页面顶部
 window.onscroll=function(){

     //滚动的距离,距离顶部的距离

     var topScroll =document.body.scrollTop||document.documentElement.scrollTop;

     //获取到导航栏id

     var bignav  = document.getElementById("pop_title");

     //当滚动距离大于150px时执行 固定位置 距离

     if(topScroll > 150){

         bignav.style.position = 'fixed';

         bignav.style.top = -120+ 'px';

         bignav.style.left = 0 + 'px';

     }else{

         //当滚动距离小于150让导航栏恢复原状

         bignav.style.position = 'static';

     }

}
滚动监听
window.onscroll为滚轮监听,
document.body.scrollTop||document.documentElement.scrollTop 写两个是为了兼容不同浏览器。
固定位置的top要设为负值,原因不明,若为0则会跟上方有空隙。
左右位置虽然是0也要设,不然若为不是100%宽度的内容会出现左右跳动。
上面这种方法高度是自己定死的。
下面介绍获取元素高度的方法。
window.onload = function(){

    //获取导航框架

    var navContainer = document.getElementById("introductFra");

    //获取导航ul

    var navBox = document.getElementById("introBox");

    //获取导航下内容大框架

    var text = document.getElementById("contantFra");

    //获取li

    var navBoxChild = navBox.children;

    //获取内容里每个大块的框架

    var textChild = text.children;

    //获取导航距顶端距离

    var num = navContainer.offsetTop;

    //获取导航高度

    var a = navContainer.offsetHeight;

    window.onscroll = function(){

        var scrollTop = document.documentElement.scrollTop || window.pageYOffset || document.body.scrollTop;

        //滚动告诉超过导航位置

        if(scrollTop >= num){

            //导航增加fixed属性

            navContainer.className = "introductFra fixed";

            //下面板块内容向下空出一个导航的距离

            text.style.paddingTop = a +"px";

            navContainer.style.zIndex = "999";

        }else{

            //恢复原属性

            navContainer.className = "introductFra";

            text.style.paddingTop = "";

        }

        //当导航与相应文档接触的时候自动切换

        for(var i=0;i<navBoxChild.length;i++){

            if( scrollTop +100 >= textChild[i].offsetTop){

                //循环给每个li样式设为空

                for(var j=0;j<navBoxChild.length;j++){

                    navBoxChild[j].className = "";

                }

                //选中的设为带标志的

                navBoxChild[i].className = "introCur";

           }

        }

    };

}

        //当导航与相应文档接触的时候自动切换

        for(var i=0;i<navBoxChild.length;i++){

            if( scrollTop +100 >= textChild[i].offsetTop){

                for(var j=0;j<navBoxChild.length;j++){

                    navBoxChild[j].className = "";

                }

                navBoxChild[i].className = "introCur";

           }

        }

    };

}
效果如下
offsetTop 为元素距离页面最开始的距离。
offsetHeight为元素高度
这样省去了调整位置的麻烦。
并且设置fixed的属性为一个class,直接更改li的class名,增加这个属性。
这个代码下面展示了导航如何自动选中为哪个版块
先循环给每个li都设为不带选中的class
当滚动的高度加导航的高度大于版块内容距离上面的高度时,
也就是导航移动到版块上方时,这个版块对应的li的class名改为带选中的。
其中选中的class Css代码如下,用到了after选择器。
.introCur::after{

    content: '';

    display: block;

    width: 66px;

    height: 3px;

    position: absolute;

    bottom: 0;

    left: 50%;

    margin-left: -33px;

    background: #333;

}
选中的样式
二、after 和 before 伪类元素
必须跟content属性
::before和::after下特有的content,用于在css渲染中向元素逻辑上的头部或尾部添加内容。
这些添加不会出现在DOM中,不会改变文档内容,不可复制,仅仅是在css渲染层加入。
所以不要用:before或:after展示有实际意义的内容,尽量使用它们显示修饰性内容,例如图标,书名号。
三、介绍伪类和伪元素
css3为了区分伪类和伪元素,伪元素采用双冒号写法。
常见伪类——:hover,:link,:active,:target,:not(),:focus。
常见伪元素——::first-letter,::first-line,::before,::after,::selection。
伪类元素的display是默认值inline,可以通过设置display:block来改变其显示。
伪类元素必须加content属性,
1.其属性值可以写书名号content:“》”。
2.在后面显示路径
<style type="text/css">

a::after{

    content: "(" attr(href) ")";

}

</style>

<a href="http://www.cnblogs.com/starof">starof</a>
a标签后显示路径
效果

3.模拟实现float :center 效果
<!DOCTYPE html>

<html>

<head>

    <meta charset='UTF-8'>

    <title>Float Both</title>

    <style>

    * {

        margin: 0;

        padding: 0;

    }

    body {

        font: 14px/1.8 Georgia, serif;

    }

        #page-wrap { width: 60%; margin: 40px auto; position: relative; }

        #logo { position: absolute; top: 0; left: 50%; margin-left: -125px; }

        #l, #r { width: 49%; }

        #l { float: left; }

        #r { float: right; }

        #l:before, #r:before { content: ""; width: 125px; height: 250px; }

        #l:before { float: right; }

        #r:before { float: left; }

    </style>

</head>

<body>

    <div id="page-wrap">

        <img src="img/cat.jpg" id="logo">

        <div id="l">

            <p>

                Pellentesque habitant morbi tristique senectus et netus et malesuada fames ac turpis egestas. Vestibulum tortor quam, feugiat vitae, ultricies eget, tempor sit amet, ante. Donec eu libero sit amet quam egestas semper. Aenean ultricies mi vitae est. Mauris placerat eleifend leo. Quisque sit amet est et sapien ullamcorper pharetra. Vestibulum erat wisi, condimentum sed, commodo vitae, ornare sit amet, wisi. Aenean fermentum, elit eget tincidunt condimentum, eros ipsum rutrum orci, sagittis tempus lacus enim ac dui. Donec non enim in turpis pulvinar facilisis. Ut felis. Praesent dapibus, neque id cursus faucibus, tortor neque egestas augue, eu vulputate magna eros eu erat. Aliquam erat volutpat. Nam dui mi, tincidunt quis, accumsan porttitor, facilisis luctus, metus

            </p>

        </div>

        <div id="r">

            <p>

                Pellentesque habitant morbi tristique senectus et netus et malesuada fames ac turpis egestas. Vestibulum tortor quam, feugiat vitae, ultricies eget, tempor sit amet, ante. Donec eu libero sit amet quam egestas semper. Aenean ultricies mi vitae est. Mauris placerat eleifend leo. Quisque sit amet est et sapien ullamcorper pharetra. Vestibulum erat wisi, condimentum sed, commodo vitae, ornare sit amet, wisi. Aenean fermentum, elit eget tincidunt condimentum, eros ipsum rutrum orci, sagittis tempus lacus enim ac dui. Donec non enim in turpis pulvinar facilisis. Ut felis. Praesent dapibus, neque id cursus faucibus, tortor neque egestas augue, eu vulputate magna eros eu erat. Aliquam erat volutpat. Nam dui mi, tincidunt quis, accumsan porttitor, facilisis luctus, metus

            </p>

        </div>

    </div>

</body>

</html>
实现效果
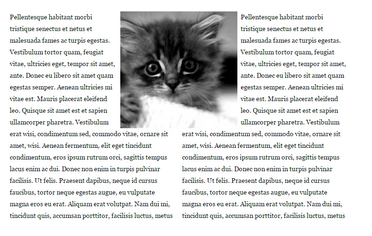
用before 和after 设置图片的高度,来空出图片的高度。
以上内容摘自https://www.cnblogs.com/starof/p/4459991.html
有大神用伪元素创建了84种小图标,具体可查看http://nicolasgallagher.com/pure-css-gui-icons/
滚动监听 after选择器的更多相关文章
- bootstrap课程12 滚动监听如何实现(bootstrap方式和自定义方式)
bootstrap课程12 滚动监听如何实现(bootstrap方式和自定义方式) 一.总结 一句话总结:通过监听滚动的高,判断滚动的高是否大于元素距离顶端的距离 1.如何知道屏幕滚动的高? st=$ ...
- 滚动监听(bootstrap)
1.05 腊八节 一直都想知道滚动监听是怎么做出来的,今天终于扒拉出来了,在使用的时候只要加上div定位就可以了... <head> <link rel="styles ...
- Bootstrap滚动监听
滚动监听(Scrollspy)插件,即自动更新导航插件,会根据滚动条的位置自动更新对应的导航目标.其基本的实现是随着您的滚动,基于滚动条的位置向导航栏添加 .active class. <!DO ...
- jQuery页面滚动监听事件及高级效果插件
jQuery页面滚动监听事件及高级效果插件 1. One Page scroll (只适用于上下焦点图)http://www.thepetedesign.com/demos/onepage_scrol ...
- Bootstrap 下拉菜单和滚动监听插件
一.下拉菜单 常规使用中,和组件方法一样,代码如下: //声明式用法 <div class="dropdown"> <button class="btn ...
- bootstrap的滚动监听
<!DOCTYPE html> <html lang="zh-cn"> <head> <meta charset="UTF-8& ...
- bootstap 滚动监听
---首先结合源代码介绍官网的说明 ---然后总结了使用滚动监听的几个步骤 ---最后给出一个简单的例子 ---关键的一点:整体有点零散和乱七八糟,辛苦你的思维和眼睛了,呵呵 ------------ ...
- Android对ScrollView滚动监听,实现美团、大众点评的购买悬浮效果
转帖请注明本文出自xiaanming的博客(http://blog.csdn.net/xiaanming/article/details/17761431),请尊重他人的辛勤劳动成果,谢谢! 我之前写 ...
- bootstrap-js(3)滚动监听
导航条实例 ScrollSpy插件根据滚动的位置自动更新导航条中相应的导航项. 拖动下面区域的滚动条,使其低于导航条的位置,注意观察active类的变化.下拉菜单中的子项也会跟着变为高亮状态. 1.调 ...
随机推荐
- [转]C# 位域[flags]
.NET中的枚举我们一般有两种用法,一是表示唯一的元素序列,例如一周里的各天:还有就是用来表示多种复合的状态.这个时候一般需要为枚举加上[Flags]特性标记为位域,例如: [Flags] enu ...
- C#---爬虫抓取系列
以前就尝试过研究了一些爬虫程序,也找过一些爬虫抓取软件,效果不是很好. 今天正好一个培训的网友给了我一个视频,正好研究下,收获颇丰.感谢那位哥们~ 1.首先讨论一下抓取一个页面 这里我写了模仿写了一个 ...
- c#可自定义码表的base64加密解密算法类
000 using System; using System.Collections.Generic; using System.Linq; using System.Text; using Syst ...
- SpringMVC视频
视频内容: 1.下载spring mvc以及spring mvc示例演示http://pan.baidu.com/s/1kTHRfDH 2.配置完善&初步探究控制器拦截http://pan.b ...
- hdu 2795 Billboard 【线段树】
给出一个高为h,宽为w的广告板,有n张广告需要贴,从第一行开始贴,尽量靠左,输出每个广告最后贴在哪一行的 先一直想不通这样建树是为什么 后来看到一篇题解里面的一句话“直到找到一个满足条件的叶子节点” ...
- Unity 退出游戏 方法
Application.Quit(); 嗯,没错,这篇就这么短.
- Pyhton学习——Day47
# 转载:http://www.cnblogs.com/yuanchenqi/articles/6357507.html# 外键:一种约束条件,与主键对应# 主表:被绑定的表:字表# 外键约束:# - ...
- Django Views Decorator
Django的试图函数的装饰器主要有: HTTP请求方法 条件视图处理 GZip压缩 改变页眉 缓存 官网文档 HTTP请求方法 该装饰器是设置允许访问HTTP协议的方法,装饰器在django.vie ...
- django.core.exceptions.ImproperlyConfigured: Application labels aren't unique, duplicates: admin
创建了一个Django项目,且包含一个admin的app,但是在启动Django的是时候抛出了以下异常: Unhandled exception in thread started by <fu ...
- composer install或者update 出错
composer install或者update 出错Your requirements could not be resolved to an installable set of package ...