
Java进阶知识12 Hibernate多对多双向关联(Annotation+XML实现)
1、Annotation 注解版
1.1、应用场景(Student-Teacher):当学生知道有哪些老师教,老师也知道自己教哪些学生时,可用双向关联
1.2、创建Teacher类和Student类
 package com.shore.model;

 import java.util.HashSet;

 import java.util.Set;

 import javax.persistence.Entity;

 import javax.persistence.GeneratedValue;

 import javax.persistence.GenerationType;

 import javax.persistence.Id;

 import javax.persistence.ManyToMany;

 import javax.persistence.Table;

 /**

  * @author DSHORE/2019-9-22

  * 多对多,双向关联(注解版)

  */

 @Entity

 @Table(name="anno_teacher")

 public class Teacher {

     private Integer id;

     private String name;

     private Integer age;

     private Set<Student> students = new HashSet<Student>();

     @Id

     @GeneratedValue(strategy=GenerationType.IDENTITY)

     public Integer getId() {

         return id;

     }

     public void setId(Integer id) {

         this.id = id;

     }

     public String getName() {

         return name;

     }

     public void setName(String name) {

         this.name = name;

     }

     public Integer getAge() {

         return age;

     }

     public void setAge(Integer age) {

         this.age = age;

     }

     @ManyToMany(mappedBy="teachers") //和单向的多对多,只多了这一步。 只要是双向关联,必须加上这句话:(mappedBy="xxxxxx")

     public Set<Student> getStudents() {

         return students;

     }

     public void setStudents(Set<Student> students) {

         this.students = students;

     }

 }
Student类
 package com.shore.model;

 import java.util.HashSet;

 import java.util.Set;

 import javax.persistence.Entity;

 import javax.persistence.GeneratedValue;

 import javax.persistence.GenerationType;

 import javax.persistence.Id;

 import javax.persistence.JoinColumn;

 import javax.persistence.JoinTable;

 import javax.persistence.ManyToMany;

 import javax.persistence.Table;

 /**

  * @author DSHORE/2019-9-22

  * 多对一,双向关联(注解版)

  */

 @Entity

 @Table(name="anno_student")

 public class Student {

     private Integer id;

     private String number;

     private Float sum;

     private Set<Teacher> teachers = new HashSet<Teacher>();

     @Id

     @GeneratedValue(strategy=GenerationType.IDENTITY)

     public Integer getId() {

         return id;

     }

     public void setId(Integer id) {

         this.id = id;

     }

     public String getNumber() {

         return number;

     }

     public void setNumber(String number) {

         this.number = number;

     }

     public Float getSum() {

         return sum;

     }

     public void setSum(Float sum) {

         this.sum = sum;

     }

     /**

      * name:中间表的表名

      * joinColumns:当前对象所对应的id

      * inverseJoinColumns:对方对象所对应的id

      */

     @ManyToMany

     @JoinTable(name="anno_student_teacher",

                joinColumns=@JoinColumn(name="student_id"),

                inverseJoinColumns=@JoinColumn(name="teacher_id"))

     public Set<Teacher> getTeachers() {

         return teachers;

     }

     public void setTeachers(Set<Teacher> teachers) {

         this.teachers = teachers;

     }

 }
1.3、创建hibernate.cfg.xml核心配置文件
 <?xml version='1.0' encoding='utf-8'?>

 <!DOCTYPE hibernate-configuration PUBLIC

         "-//Hibernate/Hibernate Configuration DTD 3.0//EN"

         "http://www.hibernate.org/dtd/hibernate-configuration-3.0.dtd">

 <hibernate-configuration>

     <session-factory>

         <!-- Database connection settings -->

         <property name="connection.driver_class">com.mysql.jdbc.Driver</property>

         <property name="connection.url">jdbc:mysql://localhost:3306/hibernate</property>

         <property name="connection.username">root</property>

         <property name="connection.password">123456</property>

         <property name="dialect">org.hibernate.dialect.MySQLDialect</property>

         <property name="cache.provider_class">org.hibernate.cache.NoCacheProvider</property>

         <property name="show_sql">true</property>

         <property name="hbm2ddl.auto">create</property>

         <mapping class="com.shore.model.Teacher" />

         <mapping class="com.shore.model.Student" />

     </session-factory>

 </hibernate-configuration>
1.4、开始测试
 package com.shore.test;

 import org.hibernate.cfg.AnnotationConfiguration;

 import org.hibernate.tool.hbm2ddl.SchemaExport;

 import org.junit.Test;

 /**

  * @author DSHORE/2019-9-22

  *

  */

 public class AnnotationTest {

     @Test

     public void test() {//简单测试,只创建表,不插入数据

                     //注解版,这里用AnnotationConfiguration()方法。

         new SchemaExport(new AnnotationConfiguration().configure()).create(

                 false, true);

     }

 }
测试结果图:
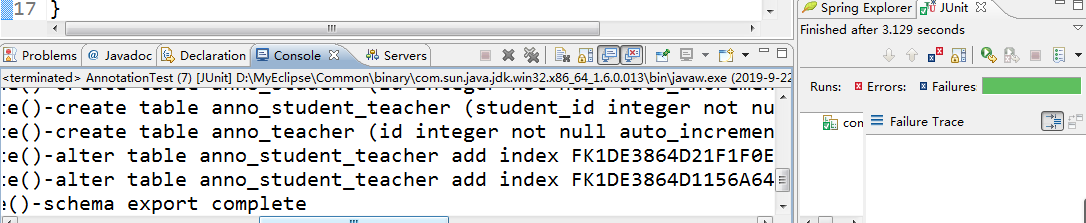
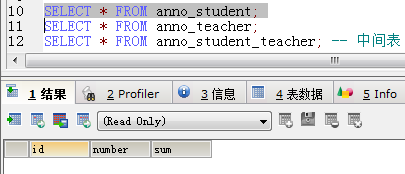
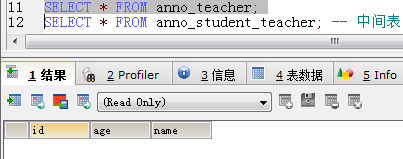
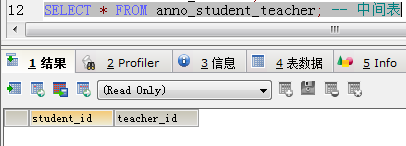
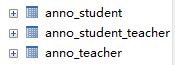
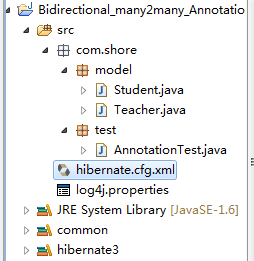 表结构虽然看起来和单向多对多关联的没什么区别,但进行CRUD操作时,就会发现他们的区别了,此处不做解析
2、XML版 的实现
2.1、创建Teacher类和Student类
 package com.shore.model;

 import java.util.HashSet;

 import java.util.Set;

 /**

  * @author DSHORE/2019-9-22

  * 多对多,双向关联(xml版)

  */

 public class Teacher {

     private Integer id;

     private String name;

     private Integer age;

     private Set<Student> students = new HashSet<Student>();

     public Integer getId() {

         return id;

     }

     public void setId(Integer id) {

         this.id = id;

     }

     public String getName() {

         return name;

     }

     public void setName(String name) {

         this.name = name;

     }

     public Integer getAge() {

         return age;

     }

     public void setAge(Integer age) {

         this.age = age;

     }

     public Set<Student> getStudents() {

         return students;

     }

     public void setStudents(Set<Student> students) {

         this.students = students;

     }

 }
Student类
 package com.shore.model;

 import java.util.HashSet;

 import java.util.Set;

 /**

  * @author DSHORE/2019-9-22

  * 多对多,双向关联(xml版)

  */

 public class Student {

     private Integer id;

     private String number;

     private Float sum;

     private Set<Teacher> teachers = new HashSet<Teacher>();

     public Integer getId() {

         return id;

     }

     public void setId(Integer id) {

         this.id = id;

     }

     public String getNumber() {

         return number;

     }

     public void setNumber(String number) {

         this.number = number;

     }

     public Float getSum() {

         return sum;

     }

     public void setSum(Float sum) {

         this.sum = sum;

     }

     public Set<Teacher> getTeachers() {

         return teachers;

     }

     public void setTeachers(Set<Teacher> teachers) {

         this.teachers = teachers;

     }

 }
2.2、创建 Teacher.hbm.xml 配置文件和 Student.hbm.xml 配置文件
 <?xml version="1.0"?>

 <!DOCTYPE hibernate-mapping PUBLIC

         "-//Hibernate/Hibernate Mapping DTD 3.0//EN"

         "http://www.hibernate.org/dtd/hibernate-mapping-3.0.dtd">

 <hibernate-mapping package="com.shore.model">

     <class name="Teacher" table="xml_teacher">

         <id name="id">

             <generator class="native"/>

         </id>

         <property name="name" type="java.lang.String"/>

         <property name="age" type="java.lang.Integer"/>

         <!-- 多对多 双向关联 -->

         <set name="students" table="xml_student_teacher">

             <key column="teacher_id"/> <!-- 当前对象所对应的id -->

             <many-to-many class="com.shore.model.Student" column="student_id"/> <!-- 对方对象所对应的id -->

         </set>

     </class>

 </hibernate-mapping>
Student.hbm.xml 配置文件
 <?xml version="1.0"?>

 <!DOCTYPE hibernate-mapping PUBLIC

         "-//Hibernate/Hibernate Mapping DTD 3.0//EN"

         "http://www.hibernate.org/dtd/hibernate-mapping-3.0.dtd">

 <hibernate-mapping package="com.shore.model">

     <class name="Student" table="xml_student">

         <id name="id">

             <generator class="native"/>

         </id>

         <property name="number" type="java.lang.String"/>

         <property name="sum" type="java.lang.Float"/>

         <!-- 多对多 双向关联 -->

         <set name="teachers" table="xml_student_teacher">

             <key column="student_id"/> <!-- 当前对象所对应的id -->

             <many-to-many class="com.shore.model.Teacher" column="teacher_id"/> <!-- 对方对象所对应的id -->

         </set>

     </class>

 </hibernate-mapping>
2.3、创建hibernate.cfg.xml 核心配置文件
 <?xml version='1.0' encoding='utf-8'?>

 <!DOCTYPE hibernate-configuration PUBLIC

         "-//Hibernate/Hibernate Configuration DTD 3.0//EN"

         "http://www.hibernate.org/dtd/hibernate-configuration-3.0.dtd">

 <hibernate-configuration>

     <session-factory>

         <!-- Database connection settings -->

         <property name="connection.driver_class">com.mysql.jdbc.Driver</property>

         <property name="connection.url">jdbc:mysql://localhost:3306/hibernate</property>

         <property name="connection.username">root</property>

         <property name="connection.password">123456</property>

         <property name="dialect">org.hibernate.dialect.MySQLDialect</property>

         <property name="cache.provider_class">org.hibernate.cache.NoCacheProvider</property>

         <property name="show_sql">true</property>

         <property name="hbm2ddl.auto">create</property>

         <!-- <mapping class="com.shore.model.Teacher" />

         <mapping class="com.shore.model.Student" /> -->

         <mapping resource="com/shore/model/Teacher.hbm.xml" />

         <mapping resource="com/shore/model/Student.hbm.xml" />

     </session-factory>

 </hibernate-configuration>
2.4、开始测试
 package com.shore.test;

 import org.hibernate.cfg.Configuration;

 import org.hibernate.tool.hbm2ddl.SchemaExport;

 import org.junit.Test;

 /**

  * @author DSHORE/2019-9-22

  *

  */

 public class XMLTest {

     @Test

     public void test() {//简单测试,只创建表,不插入数据

                     //xml版,这里用的是Configuration()方法。

         new SchemaExport(new Configuration().configure()).create(

                 false, true);

     }

 }
测试结果图:

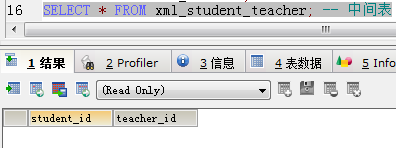

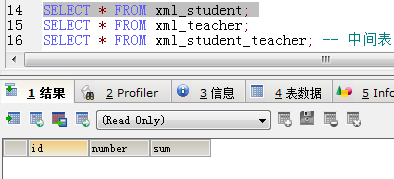
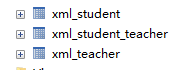
 表结构虽然看起来和单向多对多关联的没什么区别,但进行CRUD操作时,就会发现他们的区别了,此处不做解析
Hibernate一对一单向关联映射(Annotation+XML实现):https://www.cnblogs.com/dshore123/p/11545058.html
Hibernate一对一双向关联映射(Annotation+XML实现):https://www.cnblogs.com/dshore123/p/11545077.html
Hibernate多对一单向关联映射(Annotation+XML实现):https://www.cnblogs.com/dshore123/p/11553213.html
Hibernate一对多单向关联映射(Annotation+XML实现):https://www.cnblogs.com/dshore123/p/11553215.html
Hibernate一对多和多对一双向关联映射(Annotation+XML实现):https://www.cnblogs.com/dshore123/p/11560433.html
Hibernate多对多单向关联映射(Annotation+XML实现):https://www.cnblogs.com/dshore123/p/11568536.html
Hibernate多对多双向关联映射(Annotation+XML实现):https://www.cnblogs.com/dshore123/p/11568963.html
|
原创作者:DSHORE 作者主页:http://www.cnblogs.com/dshore123/ 原文出自:https://www.cnblogs.com/dshore123/p/11568963.html 版权声明:欢迎转载,转载务必说明出处。(如果本文对您有帮助,可以点击一下右下角的 推荐,或评论,谢谢!) |
Java进阶知识12 Hibernate多对多双向关联(Annotation+XML实现)的更多相关文章
- Java进阶知识11 Hibernate多对多单向关联(Annotation+XML实现)
1.Annotation 注解版 1.1.应用场景(Student-Teacher):当学生知道有哪些老师教,但是老师不知道自己教哪些学生时,可用单向关联 1.2.创建Teacher类和Student ...
- Java进阶知识08 Hibernate多对一单向关联(Annotation+XML实现)
1.Annotation 注解版 1.1.在多的一方加外键 1.2.创建Customer类和Order类 package com.shore.model; import javax.persisten ...
- Java进阶知识09 Hibernate一对多单向关联(Annotation+XML实现)
1.Annotation 注解版 1.1.在一的一方加Set 1.2.创建Customer类和Order类 package com.shore.model; import java.util.Hash ...
- Java进阶知识05 Hibernate联合主键之Annotation(注解)和XML实现方式
1.Hibernate联合主键(Annotation实现) 1.1.单列主键 1.1.1.为什么要有主键? //唯一确定一条记录 1.1.2.一个表能否有多个主键? //不能 1.1.3. ...
- Java进阶知识10 Hibernate一对多_多对一双向关联(Annotation+XML实现)
本文知识点(目录): 1.Annotation 注解版(只是测试建表) 2.XML版 的实现(只是测试建表) 3.附录(Annotation 注解版CRUD操作)[注解版有个问题:插入值时 ...
- Java进阶知识07 Hibernate一对一双向外键关联(Annotation+XML实现)
1.Annotation 注解版 1.1.创建Husband类和Wife类 package com.shore.model; import javax.persistence.Entity; impo ...
- Java进阶知识06 Hibernate一对一单向外键关联(Annotation+XML实现)
1.Annotation 注解版 1.1.创建Husband类和Wife类 package com.shore.model; import javax.persistence.Entity; impo ...
- hibernate多对一双向关联
关联是类(类的实例)之间的关系,表示有意义和值得关注的连接. 本系列将介绍Hibernate中主要的几种关联映射 Hibernate一对一主键单向关联Hibernate一对一主键双向关联Hiberna ...
- Hibernate多对多双向关联的配置
Hibernate的双向多对多关联有两种配置方法:那我们就来看看两种方案是如何配置的. 一.创建以各自类为类型的集合来关联 1.首先我们要在两个实体类(雇员<Emploee>.工程< ...
随机推荐
- POJ 1177 矩形周长并 模板
Picture 题目链接 http://poj.org/problem?id=1177 Description A number of rectangular posters, photographs ...
- php中的访问类型(public,private,protected)
类型的访问修饰符允许开发人员对类成员的访问进行限制,这是PHP5的新特性.但却是oop语言的一个好的特性.而且大多数的oop语言都已支持此特性.PHP5支持三种访问修饰符: public(公有的,默认 ...
- c c++各种类型的取值范围
int类型的变量存储值从-2147483648到2147483647 //例子 #include <iostream> using namespace std; int main(void ...
- Sql Server 收缩日志文件原理及always on 下的实践
一.准备知识 1.LSN LSN用来标识特定日志在日志文件中位置(详情请见什么是LSN:日志序列号),它由两部分组成:一部分用来标识VLF(虚拟日志文件)的序列号,剩下的用来标识该日志在VLF中的具体 ...
- vue采坑之——vue里面渲染html 并添加样式
在工作中,有次遇到要把返回的字符串分割成两部分,一部分用另外的样式显示. 这时候,我想通过对得到字符串进行处理,在需要特别样式的字符串片段用html标签(用的span)包裹起来再通过变量绑定就好了.不 ...
- 在javascript对象内搜索,貌似是一个新鲜的话题。
为啥 也不为啥,因为没找到. 用途 也没啥用途,比如,在电影网站找到链接,在小说网站找到链接.二货同事写的复杂对象.等等吧.反正要搜索就对了. 目标 在对象内,无论多少层,找到关键字. 关键字可能的位 ...
- Unity上线google商店 用IL2Cpp打包64位版本和Android APP Bundle优化 及产生的bug
ios刚上线,这边着手改成android版本,我开始使用的是unity2017.4.1版本 上传谷歌商店是出现这两个警告: 要支持64位,但是在2017版本上没有找到64位的打包选项,猜测应该是版本的 ...
- C#【堆与栈 值类型 引用类型】
先说C#中值类型和引用类型 概念: 1.值类型:数据存储在内存的堆栈中,从堆栈中可以快速地访问这些数据,因此,值类型表示实际的数据. 2.引用类型:表示指向存储在内存堆中的数据的指针或引用(包括类.接 ...
- jqGrid TreeGrid 加载数据 排序 扩展
发现 jqGrid TreeGrid 加载的数据必须要排序 给了两种平滑数据模式尽然不内部递归 所以改了下源码加了个数据二次过滤器扩展 数据本该是这样的 结果没排序成这样了 (而且还得是从根节点到子节 ...
- redis __详解 (转载自作者:孤独烟 出处: http://rjzheng.cnblogs.com/)
https://www.cnblogs.com/rjzheng/p/9096228.html [原创]分布式之redis复习精讲 引言 为什么写这篇文章? 博主的<分布式之消息队列复习精讲> ...