Fragment的创建与通信
由于这里涉及到接口回调的问题,所以先来看一看什么是接口回调:
这就好比老板和员工的微妙关系,老板需要员工去工作,员工挣钱了以后还要告诉老板自己挣了多少钱,然后由老板来处理这些钱。
首先创建一个接口:
package com.fitsoft;

public interface CallBack {

	void collectMoney(String name, int money);

}
由于员工挣完钱了以后,钱由老板来处理,因此接口也是由老板来实现
创建老板类:
package com.fitsoft;

/**

 * @author Joker

 * @since 2019/9/20 0020 18:49

 */

public class Boss implements CallBack {

    void makeMoney(){

        String name = "小三";

        System.out.println(name+"快去工作!");

        Staff staff = new Staff(name, this);

        staff.doWork();

    }

    public void collectMoney(String name, int money) {

        System.out.println(name+"帮我挣了"+money+"元");

    }

}
这里有两个方法,一个是叫员工去赚钱,在makeMoney()方法中创建一个员工,让员工去doWork(),另一个是员工赚完钱以后回调给老板,由老板来打印输出(花钱)。
看一看员工类:
package com.fitsoft;

/**

 * @author Joker

 * @since 2019/9/20 0020 18:35

 */

class Staff {

    private String myName;

    private CallBack callBack;

    Staff(String name, CallBack callBack){

        this.myName = name;

        this.callBack = callBack;

    }

    void doWork(){

        System.out.println(myName + " make money ing...");

        callBack.collectMoney(myName, 500);

    }

}
在构造函数中初始化名字和接口,在doWork()方法中(由老板来调用的方法),输出我正在赚钱,赚完钱之后,执行老板的collectMoney()方法,告诉老板:这钱是我给你的,你可以收了,然后老板就执行了:
public void collectMoney(String name, int money) {

    System.out.println(name+"帮我挣了"+money+"元");

}
总的流程大致是这样,接下来创建测试类:
package com.fitsoft;

/**

 * @author Joker

 * @since 2019/9/20 0020 18:47

 */

public class Test {

    @org.junit.Test

    public void test(){

        new Boss().makeMoney();

    }

}
直接调用老板类中的赚钱方法(赚钱是不可能赚钱的,这辈子都不可能去赚钱的,只有让员工去赚钱这样子才能维持生活...)。
看一看输出:
小三快去工作!

小三 make money ing...

小三帮我挣了500元
以上大致是接口回调的内容,接下来才是主题:Fragment
首先创建布局activity_main.xml:
<?xml version="1.0" encoding="utf-8"?>

<android.support.constraint.ConstraintLayout

    xmlns:android="http://schemas.android.com/apk/res/android"

    xmlns:app="http://schemas.android.com/apk/res-auto"

    xmlns:tools="http://schemas.android.com/tools"

    android:layout_width="match_parent"

    android:layout_height="match_parent"

    tools:context="com.fitsoft.MainActivity">

    <Button

        android:id="@+id/fragment_add"

        android:layout_width="wrap_content"

        android:layout_height="wrap_content"

        android:layout_marginStart="8dp"

        android:layout_marginLeft="8dp"

        android:layout_marginTop="24dp"

        android:layout_marginEnd="8dp"

        android:layout_marginRight="8dp"

        android:layout_marginBottom="8dp"

        android:text="add"

        app:layout_constraintBottom_toBottomOf="parent"

        app:layout_constraintEnd_toEndOf="parent"

        app:layout_constraintHorizontal_bias="0.498"

        app:layout_constraintStart_toStartOf="parent"

        app:layout_constraintTop_toTopOf="parent"

        app:layout_constraintVertical_bias="0.0" />

    <Button

        android:id="@+id/fragment_remove"

        android:layout_width="wrap_content"

        android:layout_height="wrap_content"

        android:layout_marginStart="8dp"

        android:layout_marginLeft="8dp"

        android:layout_marginTop="32dp"

        android:layout_marginEnd="8dp"

        android:layout_marginRight="8dp"

        android:text="remove"

        app:layout_constraintEnd_toEndOf="parent"

        app:layout_constraintHorizontal_bias="0.498"

        app:layout_constraintStart_toStartOf="parent"

        app:layout_constraintTop_toBottomOf="@+id/fragment_add" />

    <Button

        android:id="@+id/fragment_modify"

        android:layout_width="wrap_content"

        android:layout_height="wrap_content"

        android:layout_marginStart="8dp"

        android:layout_marginLeft="8dp"

        android:layout_marginTop="32dp"

        android:layout_marginEnd="8dp"

        android:layout_marginRight="8dp"

        android:text="modify"

        app:layout_constraintEnd_toEndOf="parent"

        app:layout_constraintHorizontal_bias="0.498"

        app:layout_constraintStart_toStartOf="parent"

        app:layout_constraintTop_toBottomOf="@+id/fragment_remove" />

    <LinearLayout

        android:id="@+id/main_fragment"

        android:layout_width="match_parent"

        android:layout_height="200dp"

        android:layout_marginStart="8dp"

        android:layout_marginLeft="8dp"

        android:layout_marginTop="8dp"

        android:layout_marginEnd="8dp"

        android:layout_marginRight="8dp"

        android:layout_marginBottom="8dp"

        android:orientation="vertical"

        app:layout_constraintBottom_toBottomOf="parent"

        app:layout_constraintEnd_toEndOf="parent"

        app:layout_constraintHorizontal_bias="1.0"

        app:layout_constraintStart_toStartOf="parent"

        app:layout_constraintTop_toTopOf="parent"

        app:layout_constraintVertical_bias="0.666" />

    <TextView

        android:id="@+id/tv_in_activity"

        android:layout_width="wrap_content"

        android:layout_height="wrap_content"

        android:layout_marginStart="8dp"

        android:layout_marginLeft="8dp"

        android:layout_marginTop="8dp"

        app:layout_constraintBottom_toBottomOf="parent"

        app:layout_constraintEnd_toEndOf="parent"

        app:layout_constraintStart_toStartOf="parent"

        app:layout_constraintTop_toBottomOf="@+id/main_fragment" />

</android.support.constraint.ConstraintLayout>
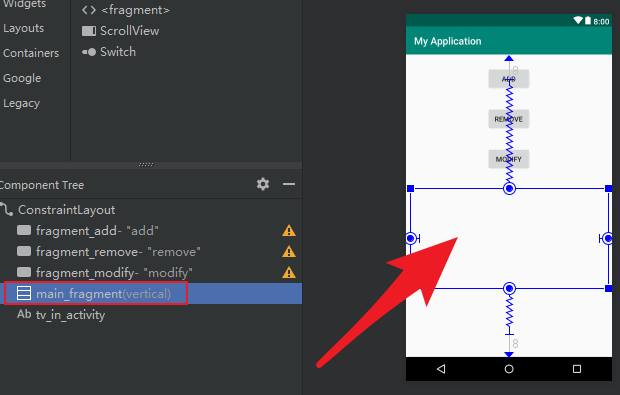
界面大致是这样子的:

然后创建Fragment中的布局fragment_main.xml:
<?xml version="1.0" encoding="utf-8"?>

<android.support.constraint.ConstraintLayout

    xmlns:android="http://schemas.android.com/apk/res/android"

    xmlns:app="http://schemas.android.com/apk/res-auto"

    android:background="#4CAF50"

    android:layout_width="match_parent"

    android:layout_height="match_parent">

    <TextView

        android:id="@+id/tv_in_fragment"

        android:layout_width="wrap_content"

        android:layout_height="wrap_content"

        android:layout_marginStart="8dp"

        android:layout_marginLeft="8dp"

        android:layout_marginTop="8dp"

        android:layout_marginEnd="8dp"

        android:layout_marginRight="8dp"

        android:layout_marginBottom="8dp"

        android:text="这是Fragment界面"

        android:textColor="#fff"

        app:layout_constraintBottom_toBottomOf="parent"

        app:layout_constraintEnd_toEndOf="parent"

        app:layout_constraintHorizontal_bias="0.498"

        app:layout_constraintStart_toStartOf="parent"

        app:layout_constraintTop_toTopOf="parent"

        app:layout_constraintVertical_bias="0.415" />

    <Button

        android:id="@+id/btn_in_fragment"

        android:layout_width="wrap_content"

        android:layout_height="wrap_content"

        android:layout_marginStart="8dp"

        android:layout_marginLeft="8dp"

        android:layout_marginTop="8dp"

        android:layout_marginEnd="8dp"

        android:layout_marginRight="8dp"

        android:layout_marginBottom="8dp"

        android:text="modify"

        app:layout_constraintBottom_toBottomOf="parent"

        app:layout_constraintEnd_toEndOf="parent"

        app:layout_constraintHorizontal_bias="0.498"

        app:layout_constraintStart_toStartOf="parent"

        app:layout_constraintTop_toBottomOf="@+id/tv_in_fragment"

        app:layout_constraintVertical_bias="0.064" />

</android.support.constraint.ConstraintLayout>
界面是这样的:
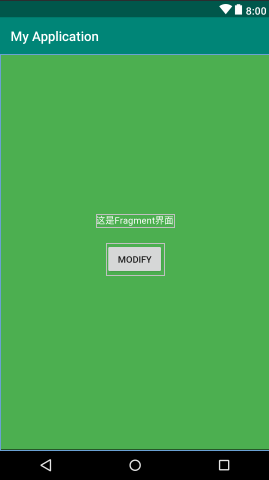
首先我们创建Activity的管理类MainActivity:
package com.fitsoft;

import android.os.Bundle;

import android.support.v4.app.FragmentActivity;

import android.support.v4.app.FragmentManager;

import android.support.v4.app.FragmentTransaction;

import android.view.View;

import android.widget.Button;

import android.widget.TextView;

public class MainActivity extends FragmentActivity {

    Button add;

    Button remove;

    Button modify;

    TextView textView;

    MainFragment mainFragment;

    @Override

    protected void onCreate(Bundle savedInstanceState) {

        super.onCreate(savedInstanceState);

        setContentView(R.layout.activity_main);

        textView = findViewById(R.id.tv_in_activity);

        mainFragment = new MainFragment();

        mainFragment.setOnBtnClickListener(new MainFragment.OnBtnClickListener() {

            @Override

            public void onBtnClick() {

                textView.setText("===这里的值已经被修改了===");

            }

        });

        add = findViewById(R.id.fragment_add);

        add.setOnClickListener(new View.OnClickListener() {

            @Override

            public void onClick(View v) {

                FragmentManager fm = getSupportFragmentManager();

                //获得fragment的事务

                FragmentTransaction ft = fm.beginTransaction();

                ft.add(R.id.main_fragment, mainFragment);

                ft.commit();

            }

        });

        remove = findViewById(R.id.fragment_remove);

        remove.setOnClickListener(new View.OnClickListener() {

            @Override

            public void onClick(View v) {

                FragmentManager fm = getSupportFragmentManager();

                //获得fragment的事务

                FragmentTransaction ft = fm.beginTransaction();

                ft.remove(mainFragment);

                ft.commit();

            }

        });

        modify = findViewById(R.id.fragment_modify);

        modify.setOnClickListener(new View.OnClickListener() {

            @Override

            public void onClick(View v) {

                mainFragment.modify();

            }

        });

    }

}
然后创建Fragment的管理类MainFragment:
package com.fitsoft;

import android.os.Bundle;

import android.support.annotation.NonNull;

import android.support.annotation.Nullable;

import android.support.v4.app.Fragment;  //兼容性好

import android.view.LayoutInflater;

import android.view.View;

import android.view.ViewGroup;

import android.widget.Button;

import android.widget.TextView;

/**

 * @author Joker

 * @since 2019/9/19 0019 20:48

 */

public class MainFragment extends Fragment {

    Button button;

    View view;

    TextView textView;

    private OnBtnClickListener onBtnClickListener;

    public void setOnBtnClickListener(OnBtnClickListener onBtnClickListener){

        this.onBtnClickListener = onBtnClickListener;

    }

    @Nullable

    @Override

    public View onCreateView(@NonNull LayoutInflater inflater, @Nullable ViewGroup container, @Nullable Bundle savedInstanceState) {

        view = inflater.inflate(R.layout.fragment_main, container, false);

        textView = view.findViewById(R.id.tv_in_fragment);

        button = view.findViewById(R.id.btn_in_fragment);

        button.setOnClickListener(new View.OnClickListener() {

            @Override

            public void onClick(View v) {

                if(onBtnClickListener != null)

                    onBtnClickListener.onBtnClick();

            }

        });

        return view;

    }

    public void modify(){

        textView.setText("===修改之后的值===");

    }

    public interface OnBtnClickListener {

        void onBtnClick();

    }

}
为了兼容性更好这里我用v4包下的Fragment,启动app之后出现如下界面:

这些就是运行之后我们Activity上面的布局,当我们点击ADD按钮之后,触发事件:
add.setOnClickListener(new View.OnClickListener() {

    @Override

    public void onClick(View v) {

        FragmentManager fm = getSupportFragmentManager();

        //获得fragment的事务

        FragmentTransaction ft = fm.beginTransaction();

        ft.add(R.id.main_fragment, mainFragment);

        ft.commit();

    }

});
在这里将我们的Fragment添加在LinearLayout布局中,就是这个:
点击之后看到Fragment已经生成了:
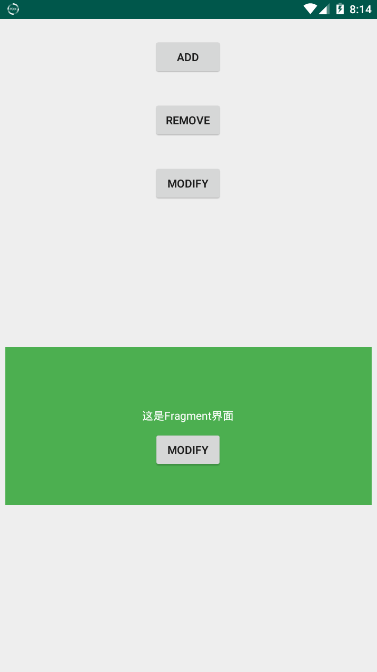
然后我们点击Activity中的MODIFY按钮,在Activity中修改Fragment中的文本值:
modify = findViewById(R.id.fragment_modify);

modify.setOnClickListener(new View.OnClickListener() {

    @Override

    public void onClick(View v) {

        mainFragment.modify();

    }

});
在MainFragment中是这么写的:
public void modify(){

    textView.setText("===修改之后的值===");

}
将Fragment中的TextView的值进行了修改,修改之后:
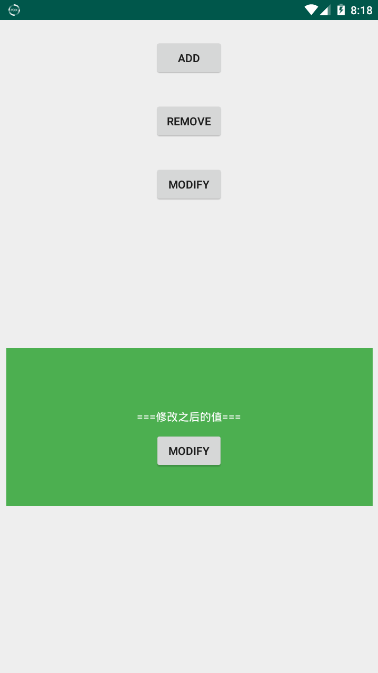
上面我们在Activity中修改Fragment,那么如何在Fragment中调用Activity中的方法呢,当然方法有很多,这里我们使用回调函数的方式进行通信:
在MainFragment中定义接口:
public interface OnBtnClickListener {

    void onBtnClick();

}
然后在MainFragment中定义方法,将接口提供给调用者:
public void setOnBtnClickListener(OnBtnClickListener onBtnClickListener){

    this.onBtnClickListener = onBtnClickListener;

}
这里MainActivity中使用匿名内部类的方式实现了接口的方法:
mainFragment = new MainFragment();

mainFragment.setOnBtnClickListener(new MainFragment.OnBtnClickListener() {

    @Override

    public void onBtnClick() {

        textView.setText("===这里的值已经被修改了===");

    }

});
为什么要set呢?这是为了让两个类中的接口保持一致,原来的MainFragment中的onBtnClickListener是null,而在MainActiviy中却已经写好了方法,就等着你去调用
然后Fragment按钮的点击事件中就调用了接口中的onBtnClick()方法,这跟普通的调用方法还有点不一样,它更像是调用实体类中的方法,只不过没有实例化:
button = view.findViewById(R.id.btn_in_fragment);

button.setOnClickListener(new View.OnClickListener() {

    @Override

    public void onClick(View v) {

        if(onBtnClickListener != null)

            onBtnClickListener.onBtnClick();

    }

});
这里还需要注意,据我分析(如果没有错的话):
onBtnClickListener.onBtnClick();
这行代码算不上调用,更像是执行,因为此时的onBtnClickListener已经不为null了,它只是执行了里面的onBtnClick()方法,
@Override

public void onBtnClick() {

    textView.setText("===这里的值已经被修改了===");

}
而真正要被执行的方法应该是已经早早的在set方法中被传递了过来。
然后看看回调之后的效果:
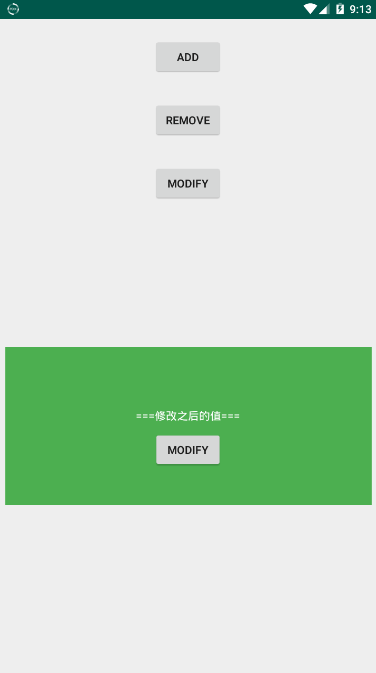
最后还有一个移除Fragment的按钮:
remove = findViewById(R.id.fragment_remove);

remove.setOnClickListener(new View.OnClickListener() {

    @Override

    public void onClick(View v) {

        FragmentManager fm = getSupportFragmentManager();

        //获得fragment的事务

        FragmentTransaction ft = fm.beginTransaction();

        ft.remove(mainFragment);

        ft.commit();

    }

});
整个过程大致是这样:

然后会有小伙伴发问了,这里和开头举的例子的回调方法不一样啊。。。
好,那我改成一致的...
MainActivity:
package com.fitsoft;

import android.os.Bundle;

import android.support.v4.app.FragmentActivity;

import android.support.v4.app.FragmentManager;

import android.support.v4.app.FragmentTransaction;

import android.view.View;

import android.widget.Button;

import android.widget.TextView;

public class MainActivity extends FragmentActivity implements OnBtnClickListener{

    Button add;

    Button remove;

    Button modify;

    TextView textView;

    MainFragment mainFragment;

    @Override

    protected void onCreate(Bundle savedInstanceState) {

        super.onCreate(savedInstanceState);

        setContentView(R.layout.activity_main);

        textView = findViewById(R.id.tv_in_activity);

        mainFragment = new MainFragment();

        mainFragment.setOnBtnClickListener(this);

        add = findViewById(R.id.fragment_add);

        add.setOnClickListener(new View.OnClickListener() {

            @Override

            public void onClick(View v) {

                FragmentManager fm = getSupportFragmentManager();

                //获得fragment的事务

                FragmentTransaction ft = fm.beginTransaction();

                ft.add(R.id.main_fragment, mainFragment);

                ft.commit();

            }

        });

        remove = findViewById(R.id.fragment_remove);

        remove.setOnClickListener(new View.OnClickListener() {

            @Override

            public void onClick(View v) {

                FragmentManager fm = getSupportFragmentManager();

                //获得fragment的事务

                FragmentTransaction ft = fm.beginTransaction();

                ft.remove(mainFragment);

                ft.commit();

            }

        });

        modify = findViewById(R.id.fragment_modify);

        modify.setOnClickListener(new View.OnClickListener() {

            @Override

            public void onClick(View v) {

                mainFragment.modify();

            }

        });

    }

    @Override

    public void onBtnClick() {

        textView.setText("===这里的值已经被修改了===");

    }

}
其实理解应该不难,毕竟点击事件的触发不也是这样的嘛...
modify.setOnClickListener(new View.OnClickListener() {

    @Override

    public void onClick(View v) {

        mainFragment.modify();

    }

});
也可以使类实现View.OnClickListener接口....
Fragment的创建与通信的更多相关文章
- fragment 数据传递,通信
Fragment之间的通信 在本节中,你会学到 1.定义接口 2.实现接口 3.将消息传递给fragment 为了重用Fragment UI 组件,在设计中你应该通过定义每一个fragemnt自己 ...
- Fragment基础----创建
1,Fragment的目的及应用场景 fragment 是3.0后引入的类,其字面翻译为“碎片”. 目的是将activity划分成许多单元再进行组合,可以根据不同分辨率屏幕,在不同状态下,灵活创建优化 ...
- android studio 2.2.2下fragment的创建和跳转
一,首先,Fragment是android应用中十分重要的一个功能,十分轻量化,也类似于activity一样,是一个个布局,可以相互跳转和传递参数.但是,它运行起来十分流畅,而且易于管理,下面是在学习 ...
- android开发(2):多页面的实现 | Fragment的创建与使用
APP中出现多个页面再常见不过了.使用activity与fragment都能实现多页面,这里使用fragment来实现.延续“知音”这个APP的开发,之前已经创建了底部导航条与mainactivity ...
- C# Socket系列二 简单的创建 socket 通信
看了系列一 我们开启了对socket tcp的监听状态,那么这一章我们来讲解怎么创建socket的通信代码 我新建一个类 TSocketBase public abstract class TSock ...
- Android(Fragment和Activity之间通信)
Fragment的使用可以让我们的应用更灵活的适配各种型号的安卓设备,但是对于Fragment和Activity之间的通信,很多朋友应该比较陌生,下面我们就通过一个实例来看一看如何实现. 一.Acti ...
- android中fragment与activity之间通信原理以及例子
参考文章 http://blog.csdn.net/guozh/article/details/25327685#comments Activity和fragment通信方式一般有3种方法 1.在fr ...
- Android笔记之Fragment中创建ViewModel的正确方式
之前一直都是这么写的 pageViewModel = ViewModelProviders.of(this).get(PageViewModel.class); //参数this是当前fragment ...
- Fragment的创建以及与activity的参数传递
点击下面不同的TextView变化不同的Fragment avtivity与Fragment之间传递消息不能使用构造器传递,用bunder传递 首先写一个含有FrameLayout(这个布局最佳),里 ...
随机推荐
- hadoop2.7之作业提交详解(上)
根据wordcount进行分析: import org.apache.hadoop.conf.Configuration; import org.apache.hadoop.fs.Path; impo ...
- spring-boot-plus项目目录结构(六)
spring-boot-plus项目目录结构 目录结构 bin:启动/重启命令脚本目录 logs:部署后记录日志目录 assembly:maven打包配置文件目录 java:源代码目录 resourc ...
- Oracle面对“数据倾斜列使用绑定变量”场景的解决方案
1.背景知识介绍 2.构造测试用例 3.场景测试 4.总结 1.背景知识介绍 我们知道,Oracle在传统的OLTP(在线事务处理)类系统中,强烈推荐使用绑定变量,这样可以有效的减少硬解析从而 ...
- OCP培训 MySQL OCP认证实战培训【低价送OCP考证名额】
一.OCP培训 MySQL 5.7 OCP认证全套实战培训[低价送OCP考试名额] 课程目标: 风哥为满足想参加MySQL OCP考证的学员,而设计的一套比较全面OCP实战培训课程. 课程涉及MySQ ...
- nanopi NEO2 学习笔记 3:python 安装 RPi.GPIO
如果我要用python控制NEO2的各种引脚,i2c 或 spi ,RPi.GPIO模块是个非常好的选择 这个第三方模块是来自树莓派的,好像友善之臂的工程师稍作修改移植到了NEO2上,就放在 /roo ...
- python 实现多个线程间消息队列传递,一个简单的列子
#-*-coding:utf8-*-"""Producer and consumer models: 1. There are many producers and co ...
- 设计模式(C#)——09外观模式
推荐阅读: 我的CSDN 我的博客园 QQ群:704621321 前言 在软件开发过程中,客户端程序经常会与复杂系统的内部子系统进行耦合,从而导致客户端程序随着子系统的变化而变化,然 ...
- CodeForces 989D
题意略. 思路: 可以看成是所有的云彩照常运动,而月亮在跑.只要两个云彩相交后,在分离前月亮能赶到,就算是符合题意的. 可以知道,两个相隔越远的相向运动地云彩是越有可能符合题意的,因为它们相遇所用时间 ...
- Leetcode之回溯法专题-37. 解数独(Sudoku Solver)
Leetcode之回溯法专题-37. 解数独(Sudoku Solver) 编写一个程序,通过已填充的空格来解决数独问题. 一个数独的解法需遵循如下规则: 数字 1-9 在每一行只能出现一次.数字 1 ...
- DOM的选择器
这几天学习了DOM的选择器,现在来进行一下总结分类. 1.DOM里的元素节点选择器 元素节点选择器包括id,class,name,tagname,高级,关系. 1.1 id选择器 id:返回的是单个对 ...