CycleBarrier与CountDownLatch原理
CountDownLatch
众所周知,它能解决一个任务必须在其他任务完成的情况下才能执行的问题,代码层面来说就是只有计数countDown到0的时候,await处的代码才能继续向下运行,例如:
import java.util.*;
import java.util.concurrent.*; public class Main {
public static void main(String[] args) throws Exception { CountDownLatch latch = new CountDownLatch(3); ThreadPoolExecutor executor = new ThreadPoolExecutor(10, 15, 60L, TimeUnit.SECONDS, new ArrayBlockingQueue<>(5));
Future<Integer>[] futures = new Future[3];
for (int i = 0; i < 3; i++){
futures[i] = executor.submit(() -> {
Random rand = new Random();
int n = rand.nextInt(100);
int result = 0;
for (int j = 0; j < n; j++){
result += j;
}
System.out.println(result + "|" + Thread.currentThread().getName());
latch.countDown();
return result;
});
}
latch.await();
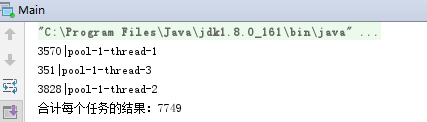
System.out.println("合计每个任务的结果:" + (futures[0].get()+futures[1].get()+futures[2].get()));
} }
运行结果:
源码
实际上内部十分简单,里面只有一个AQS的子类
private static final class Sync extends AbstractQueuedSynchronizer {

    private static final long serialVersionUID = 4982264981922014374L;

    // 它把AQS的state(同步状态)作为计数器,在AQS里,state是个volatile标记的int变量

    Sync(int count) {

        setState(count);

    }

    int getCount() {

        return getState();

    }

    protected int tryAcquireShared(int acquires) {

        // 同步状态为0,则返回1,否则返回-1

        return (getState() == 0) ? 1 : -1;

    }

    protected boolean tryReleaseShared(int releases) {

        // Decrement count; signal when transition to zero

        for (;;) {

            int c = getState();

            // 如果状态为0则返回false

            if (c == 0)

                return false;

            // 计数器减1

            int nextc = c-1;

            // CAS操作,如果内存中的同步状态值等于期望值c,那么将同步状态设置为给定的更新值nextc

            if (compareAndSetState(c, nextc))

                return nextc == 0;  // 当计数器减到0,返回true

        }

    }

}

public void countDown() {

    sync.releaseShared(1);

}

public void await() throws InterruptedException {

    sync.acquireSharedInterruptibly(1);

}
下面看具体做了什么事情
先来看await
public final void acquireSharedInterruptibly(int arg)

        throws InterruptedException {

    if (Thread.interrupted())

        throw new InterruptedException();

    // 当计数器不等于0,返回-1,证明还有任务未执行完,进入下面方法等待

    if (tryAcquireShared(arg) < 0)

        doAcquireSharedInterruptibly(arg);

}

private void doAcquireSharedInterruptibly(int arg)

    throws InterruptedException {

    // 把当前线程包装成Node放入等待队列

    final Node node = addWaiter(Node.SHARED);

    boolean failed = true;

    try {

        for (;;) {

            // 获取当前线程的前驱节点,以检查等待状态

            final Node p = node.predecessor();

            if (p == head) {

                // 如果计数器等于0,返回1,证明此时阻塞可以解除了

                int r = tryAcquireShared(arg);

                if (r >= 0) {

                    setHeadAndPropagate(node, r);

                    p.next = null; // help GC

                    failed = false;

                    return;

                }

            }

            if (shouldParkAfterFailedAcquire(p, node) &&

                parkAndCheckInterrupt())

                throw new InterruptedException();

        }

    } finally {

        if (failed)

            cancelAcquire(node);

    }

}
上面的过程可以总结为:当进入await方法后,如果此时计数器不为0,则进入死循环一直检查计数器的值,直到为0退出,此时停止等待。
再来看countDown
public final boolean releaseShared(int arg) {

    // 尝试计数器减1,只有减到0才会返回true

    if (tryReleaseShared(arg)) {

        doReleaseShared();

        return true;

    }

    return false;

}

private void doReleaseShared() {

    for (;;) {

        Node h = head;

        if (h != null && h != tail) {

            int ws = h.waitStatus;

            // 等待状态为SIGNAL

            if (ws == Node.SIGNAL) {

                // 把当前节点的等待状态从SIGNAL设置成0,如果设置失败则继续循环。

                if (!compareAndSetWaitStatus(h, Node.SIGNAL, 0))

                    continue;            // loop to recheck cases

                // 成功的话则卸载当前节点的所有后继

                unparkSuccessor(h);

            }

            // 如果等待状态为0,则尝试将状态设置为PROPAGATE,如果设置失败则继续循环。

            else if (ws == 0 && !compareAndSetWaitStatus(h, 0, Node.PROPAGATE))

                continue;                // loop on failed CAS

        }

        if (h == head)                   // loop if head changed

            break;

    }

}
countDown的过程可以总结为:尝试将计数器-1,直到为0,为0的时候通知等待线程。
CycleBarrier
栏栅的作用就是让指定的一批任务能够同时开始执行,比如
import java.util.*;
import java.util.concurrent.*; public class Main {
public static void main(String[] args) throws Exception {
CyclicBarrier cyclicBarrier = new CyclicBarrier(3); ThreadPoolExecutor executor = new ThreadPoolExecutor(10, 15, 60L, TimeUnit.SECONDS, new ArrayBlockingQueue<>(5));
Future<Integer>[] futures = new Future[3];
for (int i = 0; i < 3; i++){
futures[i] = executor.submit(() -> {
System.out.println("await|" + Thread.currentThread().getName());
cyclicBarrier.await();
Random rand = new Random();
int n = rand.nextInt(100);
int result = 0;
for (int j = 0; j < n; j++){
result += j;
}
System.out.println(result + "|" + Thread.currentThread().getName());
return result;
});
}
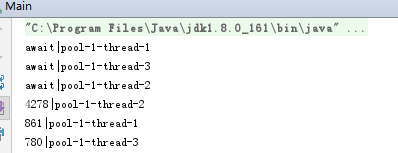
} }
运行结果
源码
进来之后首先发现的是成员变量
/** 用来保护栅栏入口的锁 */

private final ReentrantLock lock = new ReentrantLock();

/** 等待条件,直到计数器为0 */

private final Condition trip = lock.newCondition();

/** 参与线程的个数 */

private final int parties;

/* 计数器为0时要运行的命令,由用户定义 */

private final Runnable barrierCommand;

/** 当前等待的一代 */

private Generation generation = new Generation();

/**

 * parties数量的等待线程。每一代等待的数量从parties到0。当调用nextGeneration或者breakBarrier方法时重置。

 */

private int count;
从这里可以看出,除了内部实现用的ReentrantLock,其工作过程无非:计数器不为0的时候线程等待;当等待线程全部就绪,也就是计数器减为0的时候重置计数器并通知所有线程继续运行。
导致计数器重置原因有两个:一个就是发生异常,将当前这一代标记为无效(broken=true);另一个就是正常就绪,开启下一代(new Generation)
核心方法dowait
// 情况一:timed=false,nanos=0L,代表一直阻塞

// 情况二:timed=true,nanos!=0L,代表在超时时间内阻塞

private int dowait(boolean timed, long nanos)

    throws InterruptedException, BrokenBarrierException,

           TimeoutException {

    final ReentrantLock lock = this.lock;

    lock.lock();

    try {

        // 获取当前这一代

        final Generation g = generation;

        // 如果当前这一代已经销毁,抛异常

        if (g.broken)

            throw new BrokenBarrierException();

        // 测试当前线程是否被中断

        if (Thread.interrupted()) {

            // 将broken设置为true,代表这一代已经销毁,重置count;然后通知所有等待线程

            breakBarrier();

            throw new InterruptedException();

        }

        // count 减1

        int index = --count;

        // 如果减1之后变成0,证明等待线程全部就绪。

        if (index == 0) {  // tripped

            boolean ranAction = false;

            try {

                // 如果用户定义了额外的命令,则执行

                final Runnable command = barrierCommand;

                if (command != null)

                    command.run();

                ranAction = true;

                // 开启下一代(通知所有等待线程,重置count,new一个新的Generation)

                nextGeneration();

                return 0;

            } finally {

                if (!ranAction)

                    breakBarrier();

            }

        }

        // loop until tripped, broken, interrupted, or timed out

        // 如果减1之后不等于0,也就是还有其它线程没有就绪,那么进入此循环,直到就绪或者被销毁,或者被中断和超时

        for (;;) {

            try {

                if (!timed)

                    // 未定义超时,则一直阻塞

                    trip.await();

                else if (nanos > 0L)

                    // 等待指定的超时时间

                    nanos = trip.awaitNanos(nanos);

            } catch (InterruptedException ie) {

                if (g == generation && ! g.broken) {

                    breakBarrier();

                    throw ie;

                } else {

                    // We're about to finish waiting even if we had not

                    // been interrupted, so this interrupt is deemed to

                    // "belong" to subsequent execution.

                    Thread.currentThread().interrupt();

                }

            }

            if (g.broken)

                throw new BrokenBarrierException();

            if (g != generation)

                return index;

            // 超时,则销毁这一代,通知所有等待线程并重置count

            if (timed && nanos <= 0L) {

                breakBarrier();

                throw new TimeoutException();

            }

        }

    } finally {

        lock.unlock();

    }

}
总结
两个工具实现思路都很简单,唯一我思考的是,为什么CountDownLatch只能用一次?
CycleBarrier很明显,它无论正常执行或者发生异常中断都有重置count的逻辑。
而CountDownLatch则没有重置的逻辑,那么,到底是CountDownLatch不能重置还是仅仅因为没有重置的逻辑。为此我把CountDownLatch的代码照搬,然后加上了简单的重置方法,如下:
import java.util.concurrent.TimeUnit;

import java.util.concurrent.locks.AbstractQueuedSynchronizer;

public class MyCountDown {

    private static final class Sync extends AbstractQueuedSynchronizer {

        private static final long serialVersionUID = 4982264981922014374L;

        Sync(int count) {

            setState(count);

        }

        /**

         * 新加

         * @param count

         */

        void reset(int count){

            // 重新设置状态

            setState(count);

        }

        int getCount() {

            return getState();

        }

        protected int tryAcquireShared(int acquires) {

            return (getState() == 0) ? 1 : -1;

        }

        protected boolean tryReleaseShared(int releases) {

            // Decrement count; signal when transition to zero

            for (;;) {

                int c = getState();

                if (c == 0)

                    return false;

                int nextc = c-1;

                if (compareAndSetState(c, nextc))

                    return nextc == 0;

            }

        }

    }

    private final Sync sync;

    private final int count;

    public MyCountDown(int count) {

        if (count < 0) throw new IllegalArgumentException("count < 0");

        this.sync = new Sync(count);

        this.count = count;

    }

    public void await() throws InterruptedException {

        sync.acquireSharedInterruptibly(1);

    }

    public boolean await(long timeout, TimeUnit unit)

            throws InterruptedException {

        return sync.tryAcquireSharedNanos(1, unit.toNanos(timeout));

    }

    public void countDown() {

        sync.releaseShared(1);

    }

    public long getCount() {

        return sync.getCount();

    }

    public String toString() {

        return super.toString() + "[Count = " + sync.getCount() + "]";

    }

    /**

     * 新加

     */

    public void reset(){

        // 调用重置的方法

        this.sync.reset(count);

    }

}
测试:
import java.util.*;
import java.util.concurrent.*; public class Main {
public static void main(String[] args) throws Exception { MyCountDown myCountDown = new MyCountDown(3);
ThreadPoolExecutor executor = new ThreadPoolExecutor(10, 15, 60L, TimeUnit.SECONDS, new ArrayBlockingQueue<>(5));
Future<Integer>[] futures = new Future[3];
for (int i = 0; i < 3; i++){
futures[i] = executor.submit(() -> {
Random rand = new Random();
int n = rand.nextInt(100);
int result = 0;
for (int j = 0; j < n; j++){
result += j;
}
System.out.println(result + "|" + Thread.currentThread().getName());
Thread.sleep(new Random().nextInt(2000)); // 模拟耗时
myCountDown.countDown();
return result;
});
}
myCountDown.await();
System.out.println("第一次:" + (futures[0].get() + futures[1].get() + futures[2].get()));
myCountDown.reset(); // 重置 for (int i = 0; i < 3; i++){
futures[i] = executor.submit(() -> {
Random rand = new Random();
int n = rand.nextInt(100);
int result = 0;
for (int j = 0; j < n; j++){
result += j;
}
System.out.println(result + "|" + Thread.currentThread().getName());
Thread.sleep(new Random().nextInt(2000)); // 模拟耗时
myCountDown.countDown();
return result;
});
}
myCountDown.await();
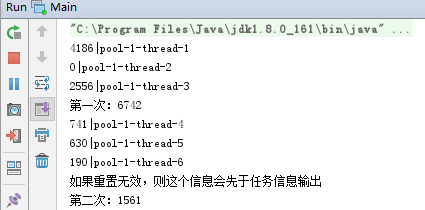
System.out.println("如果重置无效,则这个信息会先于任务信息输出");
System.out.println("第二次:" + (futures[0].get() + futures[1].get() + futures[2].get()));
} }
输出
如果换成CountDownLatch
import java.util.*;

import java.util.concurrent.*;

public class Main {

    public static void main(String[] args) throws Exception {

        CountDownLatch latch = new CountDownLatch(3);

        ThreadPoolExecutor executor = new ThreadPoolExecutor(10, 15, 60L, TimeUnit.SECONDS, new ArrayBlockingQueue<>(5));

        Future<Integer>[] futures = new Future[3];

        for (int i = 0; i < 3; i++){

            futures[i] = executor.submit(() -> {

                Random rand = new Random();

                int n = rand.nextInt(100);

                int result = 0;

                for (int j = 0; j < n; j++){

                    result += j;

                }

                System.out.println(result + "|" + Thread.currentThread().getName());

                Thread.sleep(new Random().nextInt(2000));   // 模拟耗时

                latch.countDown();

                return result;

            });

        }

        latch.await();

        System.out.println("第一次:" + (futures[0].get() + futures[1].get() + futures[2].get()));

        for (int i = 0; i < 3; i++){

            futures[i] = executor.submit(() -> {

                Random rand = new Random();

                int n = rand.nextInt(100);

                int result = 0;

                for (int j = 0; j < n; j++){

                    result += j;

                }

                System.out.println(result + "|" + Thread.currentThread().getName());

                Thread.sleep(new Random().nextInt(2000));   // 模拟耗时

                latch.countDown();

                return result;

            });

        }

        latch.await();

        System.out.println("如果重置无效,则这个信息会先于任务信息输出");

        System.out.println("第二次:" + (futures[0].get() + futures[1].get() + futures[2].get()));

    }

}
输出
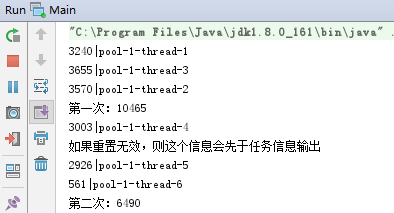
所以可以得出结论,CountDownLatch不是没有办法重置,只不过没有写相关逻辑。当然这个问题如果我说错了,望指正。
CycleBarrier与CountDownLatch原理的更多相关文章
- join和countDownLatch原理及区别详解
先上结论 原理 join 原理:在当前线程中调用另一个线程线程 thread 的 join() 方法时,会调用该 thread 的 wait() 方法,直到这个 thread 执行完毕(JVM在 ru ...
- CountDownLatch原理分析
CountDownLatch原理分析 CountDownLatch是一个同步工具类,它允许一个或多个线程一直等待,直到其他线程执行完后再执行.例如,应用程序的主线程希望在负责启动框架服务的线程已经启动 ...
- Java多线程系列--“JUC锁”09之 CountDownLatch原理和示例
概要 前面对"独占锁"和"共享锁"有了个大致的了解:本章,我们对CountDownLatch进行学习.和ReadWriteLock.ReadLock一样,Cou ...
- 【分布式锁】05-使用Redisson中Semaphore和CountDownLatch原理
前言 前面已经写了Redisson大多的内容,我们再看看Redisson官网共有哪些组件: image.png 剩下还有Semaphore和CountDownLatch两块,我们就趁热打铁,赶紧看看R ...
- CountDownLatch原理详解
介绍 当你看到这篇文章的时候需要先了解AQS的原理,因为本文不涉及到AQS内部原理的讲解. CountDownLatch是一种同步辅助,让我们多个线程执行任务时,需要等待线程执行完成后,才能执行下面的 ...
- CountDownLatch原理及使用场景
CountDownLatch是通过一个计数器来实现的,计数器的初始值为线程的数量.每当一个线程完成了自己的任务后,计数器的值就会减1.当计数器值到达0时,它表示所有的线程已经完成了任务,然后在闭锁 上 ...
- CountDownLatch原理
正如每个Java文档所描述的那样,CountDownLatch是一个同步工具类,它允许一个或多个线程一直等待,直到其他线程的操作执行完后再执行.在Java并发中,countdownlatch的概念是一 ...
- Java多线程系列--“JUC锁”10之 CyclicBarrier原理和示例
概要 本章介绍JUC包中的CyclicBarrier锁.内容包括:CyclicBarrier简介CyclicBarrier数据结构CyclicBarrier源码分析(基于JDK1.7.0_40)Cyc ...
- Java多线程系列--“JUC锁”11之 Semaphore信号量的原理和示例
概要 本章,我们对JUC包中的信号量Semaphore进行学习.内容包括:Semaphore简介Semaphore数据结构Semaphore源码分析(基于JDK1.7.0_40)Semaphore示例 ...
随机推荐
- Vue笔记1
index.html <!DOCTYPE html> <html> <head> <meta charset="UTF-8"> &l ...
- flink 批量梯度下降算法线性回归参数求解(Linear Regression with BGD(batch gradient descent) )
1.线性回归 假设线性函数如下: 假设我们有10个样本x1,y1),(x2,y2).....(x10,y10),求解目标就是根据多个样本求解theta0和theta1的最优值. 什么样的θ最好的呢?最 ...
- sparkSQL中的example学习(1)
SparkSQLDemo.scala import org.apache.spark.sql.{Row, SparkSession} import org.apache.spark.sql.types ...
- 简单使用:SpringBoot整合Redis
1.导入依赖: <dependency> <groupId>org.springframework.boot</groupId> <artifactId> ...
- postgreSQL 自动递增序号
创建表格 CREATE TABLE test ( id serial, name ) not null ); 查询当前创建好的表格 插入数据 BEGIN TRANSACTION; INSERT INT ...
- openstack 创建实例报错 **aborted: Failed to allocate the network(s), not rescheduling
消息 Build of instance 6320b5f2-edc2-4e8e-b07c-0047f7ed8f6a aborted: Failed to allocate the network(s) ...
- Celery详解(3)
1.什么是Celery? Celery是一个简单.灵活且可靠的,处理大量消息的分布式系统 专注于实时处理的异步任务队列,同时也支持任务调度 2.Celery架构 Celery的架构由三部分组成,消息中 ...
- 201871010133 赵永军《面向对象程序设计(java)》第六、七周学习总结
201871010133 赵永军<面向对象程序设计(java)>第六.七周学习总结 项目 内容 这个作业属于哪个课程 https://www.cnblogs.com/nwnu-daizh/ ...
- Anaconda 下载
Anaconda官网:https://repo.anaconda.com/archive/清华大学镜像站:https://mirrors.tuna.tsinghua.edu.cn/anaconda/a ...
- day4_常用的内置函数
# dict() 工厂函数, 生成字典 a = dict(u=2, i="hello", **{"kk":"cc"}) a = dict(y ...