
[UWP]CompositionLinearGradientBrush加BlendEffect,双倍的快乐
原文:[UWP]CompositionLinearGradientBrush加BlendEffect,双倍的快乐
1. 什么是BlendEffect#
上一篇文章介绍了CompositionLinearGradientBrush的基本用法, 这篇文章再结合BlendEffec介绍一些更复杂的玩法。
Microsoft.Graphics.Canvas.Effects命名空间下的BlendEffect 用于组合两张图片(分别是作为输入源的Background和Foreground),它包含多种模式,如下图所示:

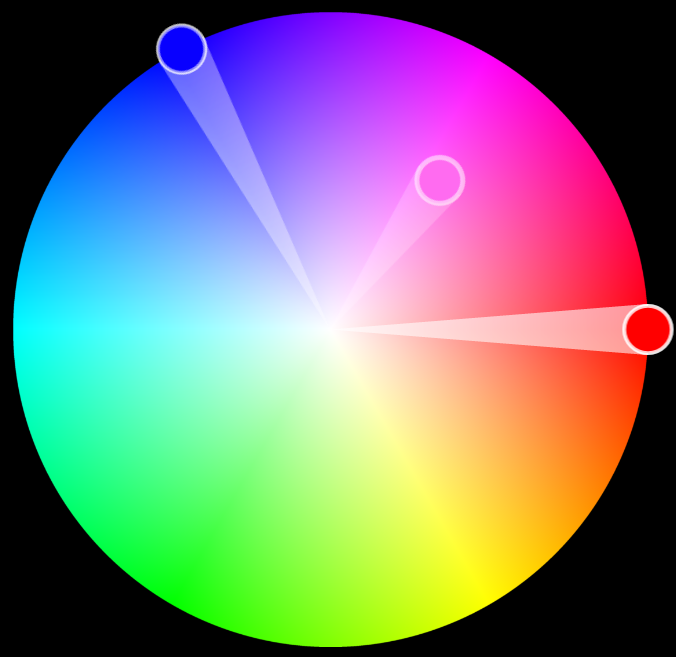
其中最简单的是Screen模式,它的计算公式如下

看起来有点复杂, 我的理解是它相当于色轮中Background和Foreground之间拉直线,在直线的中间点的颜色,如下面这张图,红色和蓝色组合成为紫色:
2. 组合CompositionBrush并使用BlendEffect#
许多 CompositionBrushes 使用其他 CompositionBrushes 作为输入。 例如,使用 SetSourceParameter 方法可以将其他 CompositionBrush 设为 CompositionEffectBrush 的输入。这是CompositionBrush最好玩的地方之一。下面的例子介绍了怎么使用BlendEffect创建CompositionBrush。
首先创建两个CompositionLinearGradientBrush:
Copyvar foregroundBrush = compositor.CreateLinearGradientBrush();
foregroundBrush.StartPoint = Vector2.Zero;
foregroundBrush.EndPoint = new Vector2(1.0f);
var redGradientStop = compositor.CreateColorGradientStop();
redGradientStop.Offset = 0f;
redGradientStop.Color = Color.FromArgb(255, 255, 0, 0);
var yellowGradientStop = compositor.CreateColorGradientStop();
yellowGradientStop.Offset = 1f;
yellowGradientStop.Color = Color.FromArgb(255, 0, 178, 255);
foregroundBrush.ColorStops.Add(redGradientStop);
foregroundBrush.ColorStops.Add(yellowGradientStop); var backgroundBrush = compositor.CreateLinearGradientBrush();
backgroundBrush.StartPoint = new Vector2(0, 1f);
backgroundBrush.EndPoint = new Vector2(1f, 0);
var blueGradientStop = compositor.CreateColorGradientStop();
blueGradientStop.Offset = 0f;
blueGradientStop.Color = Color.FromArgb(255, 0, 0, 255);
var greenGradientStop = compositor.CreateColorGradientStop();
greenGradientStop.Offset = 1f;
greenGradientStop.Color = Color.FromArgb(255, 0, 255, 0);
backgroundBrush.ColorStops.Add(blueGradientStop);
backgroundBrush.ColorStops.Add(greenGradientStop);
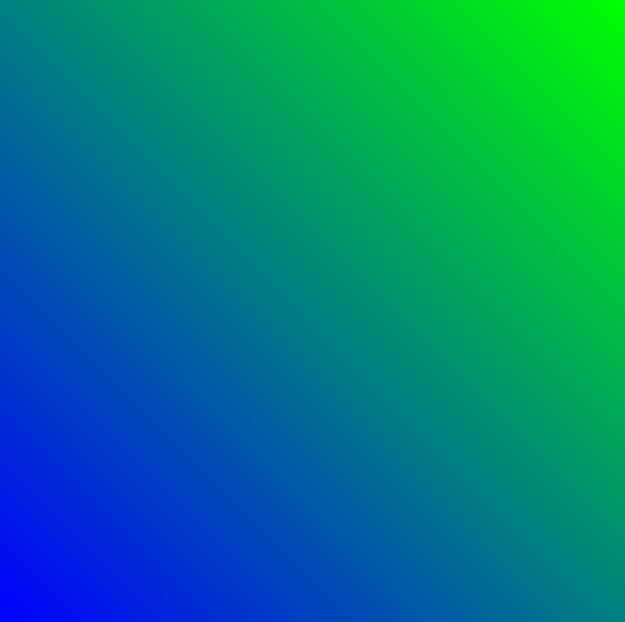
它们的效果分别如下面两张图片所示:

接下来创建BlendEffect,并将Foreground和Background设置为CompositionEffectSourceParameter
Copyvar blendEffect = new BlendEffect()
{
Mode = BlendEffectMode.Screen,
Foreground = new CompositionEffectSourceParameter("Main"),
Background = new CompositionEffectSourceParameter("Tint"),
};
使用BlendEffect创建Brush,并用SetSourceParameter设置它的Foreground和Background。
Copyvar effectFactory = compositor.CreateEffectFactory(blendEffect);
var blendEffectBrush = effectFactory.CreateBrush();
blendEffectBrush.SetSourceParameter("Main", foregroundBrush);
blendEffectBrush.SetSourceParameter("Tint", backgroundBrush);
最后就是一般的使用这个blendEffectBrush的代码:
Copy//创建SpriteVisual并设置Brush
var spriteVisual = compositor.CreateSpriteVisual();
spriteVisual.Brush = blendEffectBrush; //将自定义 SpriteVisual 设置为元素的可视化树的最后一个子元素。
ElementCompositionPreview.SetElementChildVisual(Gradient, spriteVisual);
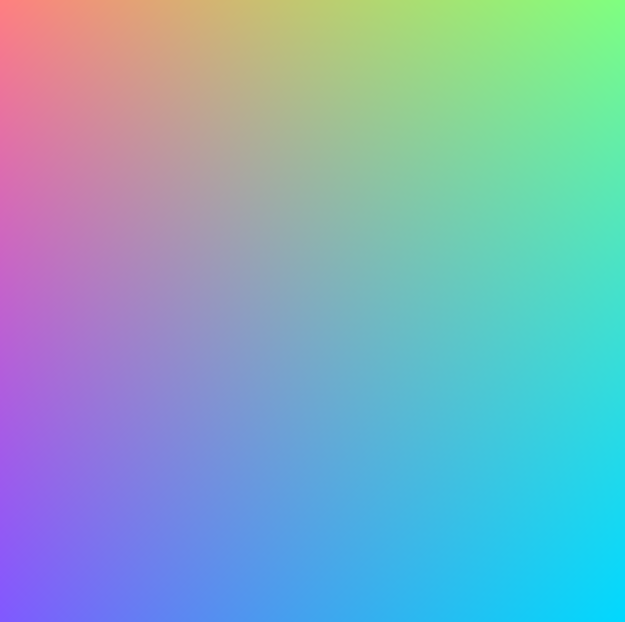
最终运行效果如下:
3. 创建动画#
和上一篇文章一样,我也把这篇文章用到的技术用在了一个番茄钟应用里,,简单地使用ColorKeyFrameAnimation和ScalarKeyFrameAnimation制作动画:
Copyprivate void StartOffsetAnimation(CompositionColorGradientStop gradientOffset, float offset)
{
var offsetAnimation = _compositor.CreateScalarKeyFrameAnimation();
offsetAnimation.Duration = TimeSpan.FromSeconds(1);
offsetAnimation.InsertKeyFrame(1.0f, offset);
gradientOffset.StartAnimation(nameof(CompositionColorGradientStop.Offset), offsetAnimation);
} private void StartColorAnimation(CompositionColorGradientStop gradientOffset, Color color)
{
var colorAnimation = _compositor.CreateColorKeyFrameAnimation();
colorAnimation.Duration = TimeSpan.FromSeconds(2);
colorAnimation.Direction = Windows.UI.Composition.AnimationDirection.Alternate;
colorAnimation.InsertKeyFrame(1.0f, color);
gradientOffset.StartAnimation(nameof(CompositionColorGradientStop.Color), colorAnimation);
}
完整代码在这里,具体运行效果如下:

4. 结语#
上面的动画可以安装我的番茄钟应用试玩一下,安装地址:
这篇文章的动画和代码都参考了JustinLiu的代码,感谢他的分享。
使用XAML画笔难以做到这种多向渐变的效果,这都多亏了UWP提供了BlendEffect这个好玩的东西。BlendEffect还有很多其它好玩的模式,大家有空可以多多尝试。
参考#
合成画笔 - Windows UWP applications _ Microsoft Docs
源码#
OnePomodoro_GradientsWithBlend.xaml.cs at master
[UWP]CompositionLinearGradientBrush加BlendEffect,双倍的快乐的更多相关文章
- [UWP]用Win2D和CompositionAPI实现文字的发光效果,并制作动画
1. 成果 献祭了周末的晚上,成功召唤出了上面的番茄钟.正当我在感慨"不愧是Shadow大人,这难道就是传说中的五彩斑斓的黑?" "那才不是什么阴影效果,那是发光效果.& ...
- [UWP]组合CompositionBrush并使用BlendEffect
1. 什么是BlendEffect 上一篇文章介绍了CompositionLinearGradientBrush的基本用法, 这篇文章再结合BlendEffec介绍一些更复杂的玩法. Microsof ...
- UWP开发细节记录:加载图像文件到D2D位图和D3D纹理
在UWP中加载文件一般先创建 StorageFile 对象,然后调用StorageFile.OpenReadAsync 方法得到一个IRandomAccessStream 接口用来读取数据: Stor ...
- [UWP]推荐一款很Fluent Design的bilibili UWP客户端 : 哔哩
UWP已经有好几个Bilibili的客户端,最近有多了一个: 哔哩 - Microsoft Store 作者云之幻是一位很擅长设计的UWP开发者,我也从他那里学到了很多设计方面的技巧.它还是一位Bil ...
- win10 uwp 让焦点在点击在页面空白处时回到textbox中
在网上 有一个大神问我这样的问题:在做UWP的项目,怎么能让焦点在点击在页面空白处时回到textbox中? 虽然我的小伙伴认为他这是一个 xy 问题,但是我还是回答他这个问题. 首先需要知道什么是空白 ...
- win10 uwp 获得Slider拖动结束的值
原文:win10 uwp 获得Slider拖动结束的值 本文讲的是如何获得Slider移动结束的值,也就是触发移动后的值.如果我们监听ValueChanged,在我们鼠标放开之前,只要拖动不放,那么就 ...
- 2019-11-25-win10-uwp-通过命令行脚本开启旁加载
原文:2019-11-25-win10-uwp-通过命令行脚本开启旁加载 title author date CreateTime categories win10 uwp 通过命令行脚本开启旁加载 ...
- 迁移桌面程序到MS Store(5)——.NET Standard
接下来的几篇,我想讨论下迁移桌面程序到MS Store,可以采用的比较常见.通用性比较强的实施步骤和分层架构. 通常商业项目一般都是不断的迭代,不太可能突然停止更新现有的桌面版本,然后花很长时间从头来 ...
- 2018BNU校赛总决赛
题解是qls的题解我就懒得写了23333 A塞特斯玛斯塔 时间限制:C/C++ 1秒,其他语言2秒 空间限制:C/C++ 32768K,其他语言65536K 64bit IO Format: %lld ...
随机推荐
- C++ - C++简介
一.C与C++ 一般来说,计算机要处理两个概念--算法和数据.C在面世时是过程性的语言,过程性的语言指的是程序的过程较比其他语言,会更加的有序可读(清晰性和可读性).因为它把程序分解成各个分支,并执行 ...
- sh_05_偶数求和
sh_05_偶数求和 # 计算 0 ~ 100 之间 所有 偶数 的累计求和结果 # 开发步骤 # # 1. 编写循环 确认 要计算的数字 # 2. 添加 结果 变量,在循环内部 处理计算结果 # 1 ...
- JS深度判断两个数组对象字段相同
/** * 判断此对象是否是Object类型 * @param {Object} obj */ function isObject(obj){ return Object.prototype.toSt ...
- [CSP-S模拟测试]:数列(数学)
题目传送门(内部题95) 输入格式 第一行三个整数$n,a,b$,第二行$n$个整数$x_1\sim x_n$表示数列. 输出格式 一行一个整数表示答案.无解输出$-1$. 样例 样例输入:2 2 3 ...
- 大数据笔记(二十八)——执行Spark任务、开发Spark WordCount程序
一.执行Spark任务: 客户端 1.Spark Submit工具:提交Spark的任务(jar文件) (*)spark提供的用于提交Spark任务工具 (*)example:/root/traini ...
- 关闭layer.open打开的页面
window.parent.location.reload(); //刷新父页面 var index = parent.layer.getFrameIndex(window.name); //获取窗口 ...
- leetcode-mid-sorting and searching - 240. Search a 2D Matrix II -NO
mycode time limited def searchMatrix(matrix, target): def deal(data): if not data: return False ro ...
- 在WCF程序中动态修改app.config配置文件
今天在个WCF程序中加入了修改配置文件的功能.我是直接通过IO操作修改的app.config文件内容,修改后发现发现其并不生效,用Google搜了一下,在园子里的文章动态修改App.Config 和w ...
- python - Tkinter 模块 - python 自带的gui模块
Tkinter模块("Tk 接口")是Python的标准Tk GUI工具包的接口,位Python的内置模块,直接import tkinter即可使用. 1.创建窗口 from Tk ...
- WPF中的WndProc
其实,在WPF中,要想利用WndProc来处理所有的事件,需要利用到SourceInitialized Event,首先需要创建一个HwndSource对象,然后利用其AddHook方法来将所有的w ...