【转】Spring线程及线程池的使用
spring @Async 线程池使用
最近公司项目正逐渐从dubbo向springCloud转型,在本次新开发的需求中,全部使用springcloud进行,在使用时线程池,考虑使用spring封装的线程池,现将本次使用心得及内容记录下来
一、线程池常规使用方式
之前使用线程池的方式,都是自己定义线程池,然后写多线程类,用线程池去调用,如下:
package cn.leadeon.message.client;

import cn.leadeon.comm.log.Log;

import cn.leadeon.message.req.MessageProducerReq;

import lombok.Data;

import java.util.concurrent.ExecutorService;

import java.util.concurrent.Executors;

/**

 * 流量消息发送类,线程池调用

 *

 * @author LiJunJun

 * @since 2018/9/30

 */

@Data

public class MessageClientSendMsg {

    /**

     * 日志记录器

     */

    private static final Log LOGGER = new Log(MessageClientSendMsg.class);

    /**

     * 线程池

     */

    private static ExecutorService threadPool;

    /**

     * trace

     */

    private String trace;

    /**

     * 手机号

     */

    private String cellNum;

    /**

     * 消息实体

     */

    private MessageProducerReq messageProducerReq;

    static {

        threadPool = Executors.newFixedThreadPool(10);

    }

    /**

     * 构造函数

     *

     * @param trace 请求流水

     * @param cellNum 电话号码

     * @param messageProducerReq 消息实体

     */

    public MessageClientSendMsg(String trace, String cellNum, MessageProducerReq messageProducerReq) {

        this.trace = trace;

        this.cellNum = cellNum;

        this.messageProducerReq = messageProducerReq;

    }

    /**

     * 消息发送

     */

    public void sendMsg() {

        SendMsgRunable sendMsgRunable = new SendMsgRunable();

        threadPool.execute(sendMsgRunable);

    }

    /**

     * 发送消息内部类并处理异常,不能影响主线程的业务

     */

    class SendMsgRunable implements Runnable {

        @Override

        public void run() {

            try {

                MessageClientProducer msgClintProducer = new MessageClientProducer();

                msgClintProducer.sendAsyncWithPartition(trace, cellNum, messageProducerReq);

            } catch (Exception e) {

                LOGGER.error("消息发送失败!,trace:" + trace);

            }

        }

    }

}
二、使用spring的线程池
- 线程池的启用
有两种方式,配置文件或者注解
注解:使用@EnableAsync标注启用spring线程池,@Async将方法标注为异步方法,spring扫描到后,执行该方法时,会另起新线程去执行,非常简单
package cn.leadeon.message.test;

import org.springframework.scheduling.annotation.Async;

import org.springframework.scheduling.annotation.EnableAsync;

import org.springframework.stereotype.Component;

/**

 * @author LiJunJun

 * @since 2018/10/11

 */

@Component

@EnableAsync

public class AsyncTest {

    @Async

    public void test1() {

        System.out.println("异步执行test1!!!");

        System.out.println("线程id:" + Thread.currentThread().getId());

        System.out.println("线程名称:" + Thread.currentThread().getName());

    }

    @Async

    public void test2() {

        System.out.println("异步执行test2!!!");

        System.out.println("线程id:" + Thread.currentThread().getId());

        System.out.println("线程名称:" + Thread.currentThread().getName());

    }

    @Async

    public void test3() {

        System.out.println("异步执行test3!!!");

        System.out.println("线程id:" + Thread.currentThread().getId());

        System.out.println("线程名称:" + Thread.currentThread().getName());

    }

}
配置文件:新增spring的配置文件spring-threadpool.xml
<?xml version="1.0" encoding="UTF-8"?>

<beans xmlns="http://www.springframework.org/schema/beans"

       xmlns:xsi="http://www.w3.org/2001/XMLSchema-instance" xmlns:aop="http://www.springframework.org/schema/aop"

       xmlns:tx="http://www.springframework.org/schema/tx" xmlns:jdbc="http://www.springframework.org/schema/jdbc"

       xmlns:context="http://www.springframework.org/schema/context"

       xmlns:mvc="http://www.springframework.org/schema/mvc" xmlns:task="http://www.springframework.org/schema/task"

       xsi:schemaLocation="http://www.springframework.org/schema/context http://www.springframework.org/schema/context/spring-context-3.1.xsd

     http://www.springframework.org/schema/beans http://www.springframework.org/schema/beans/spring-beans-3.1.xsd

     http://www.springframework.org/schema/jdbc http://www.springframework.org/schema/jdbc/spring-jdbc-3.1.xsd

     http://www.springframework.org/schema/tx http://www.springframework.org/schema/tx/spring-tx-3.1.xsd

     http://www.springframework.org/schema/aop http://www.springframework.org/schema/aop/spring-aop-3.1.xsd http://www.springframework.org/schema/task http://www.springframework.org/schema/task/spring-task.xsd"

       default-autowire="byName">

    <description>流量消息spring线程池配置</description>

    <!-- 缺省的异步任务线程池 -->

    <task:annotation-driven executor="messageExecutor"/>

    <task:executor id="asyncExecutor" pool-size="100-10000" queue-capacity="10"/>

    <!-- 处理message的线程池 -->

    <task:executor id="messageExecutor" pool-size="15-50" queue-capacity="100" keep-alive="60"

                   rejection-policy="CALLER_RUNS"/>

</beans>
使用注解引入配置文件或者在自己的spring配置文件中import即可

package cn.leadeon.message.test;

import org.springframework.context.annotation.ImportResource;

import org.springframework.scheduling.annotation.Async;

import org.springframework.stereotype.Component;

/**

 * @author LiJunJun

 * @since 2018/10/11

 */

@Component

@ImportResource("classpath:/config/spring-threadpool.xml")

public class AsyncTest {

    @Async

    public void test1() {

        System.out.println("异步执行test1!!!");

        System.out.println("线程id:" + Thread.currentThread().getId());

        System.out.println("线程名称:" + Thread.currentThread().getName());

    }

    @Async

    public void test2() {

        System.out.println("异步执行test2!!!");

        System.out.println("线程id:" + Thread.currentThread().getId());

        System.out.println("线程名称:" + Thread.currentThread().getName());

    }

    @Async

    public void test3() {

        System.out.println("异步执行test3!!!");

        System.out.println("线程id:" + Thread.currentThread().getId());

        System.out.println("线程名称:" + Thread.currentThread().getName());

    }

}
配置文件可以自己配置线程池的相关参数,自己可以配置多个线程池,使用时,用@Async(value="beanId")区分即可
注意点:
@EnableAsync注解与<task:annotation-driven executor="messageExecutor"/>等价,两者只能使用其一,不然启动会报错
- java编程方式配置自定义线程池,如下:
package cn.leadeon.message.base.threadpool;

import org.springframework.beans.factory.annotation.Value;

import org.springframework.context.annotation.Bean;

import org.springframework.context.annotation.Configuration;

import org.springframework.scheduling.concurrent.ThreadPoolTaskExecutor;

import java.util.concurrent.Executor;

import java.util.concurrent.ThreadPoolExecutor;

/**

 * 流量消息线程池配置

 *

 * @author LiJunJun

 * @since 2018/10/10

 */

@Configuration

public class ThreadPoolConfiguration {

    /**

     * 核心线程数:线程池创建时候初始化的线程数

     */

    @Value("${executor.core.pool.size}")

    private int corePoolSize;

    /**

     * 最大线程数:线程池最大的线程数,只有在缓冲队列满了之后才会申请超过核心线程数的线程

     */

    @Value("${executor.max.pool.size}")

    private int maxPoolSize;

    /**

     * 缓冲队列200:用来缓冲执行任务的队列

     */

    @Value("${executor.queue.capacity}")

    private int queueCapacity;

    /**

     * 允许线程的空闲时间(单位:秒):当超过了核心线程出之外的线程在空闲时间到达之后会被销毁

     */

    @Value("${executor.keepalive.Seconds}")

    private int keepAliveSeconds;

    /**

     * 线程池名的前缀:设置好了之后可以方便我们定位处理任务所在的线程池

     */

    @Value("${executor.thread.name.prefix}")

    private String threadNamePrefix;

    @Bean

    public Executor MessageExecutor() {

        ThreadPoolTaskExecutor executor = new ThreadPoolTaskExecutor();

        executor.setCorePoolSize(corePoolSize);

        executor.setMaxPoolSize(maxPoolSize);

        executor.setQueueCapacity(queueCapacity);

        executor.setKeepAliveSeconds(keepAliveSeconds);

        executor.setThreadNamePrefix(threadNamePrefix);

        // 线程池对拒绝任务的处理策略:这里采用了CallerRunsPolicy策略,当线程池没有处理能力的时候,该策略会直接在 execute 方法的调用线程中运行被拒绝的任务;如果执行程序已关闭,则会丢弃该任务

        executor.setRejectedExecutionHandler(new ThreadPoolExecutor.CallerRunsPolicy());

        executor.initialize();

        return executor;

    }

}
- 测试
package cn.leadeon.message.test; import org.junit.Test;
import org.springframework.beans.factory.annotation.Autowired; /**
* spring线程池单元测试
*
* @author LiJunJun
* @since 2018/10/11
*/
public class TestSpringThreadPool extends JunitTestBase { @Autowired
private AsyncTest asyncTest; /**
* spring线程池单元测试
*/
@Test
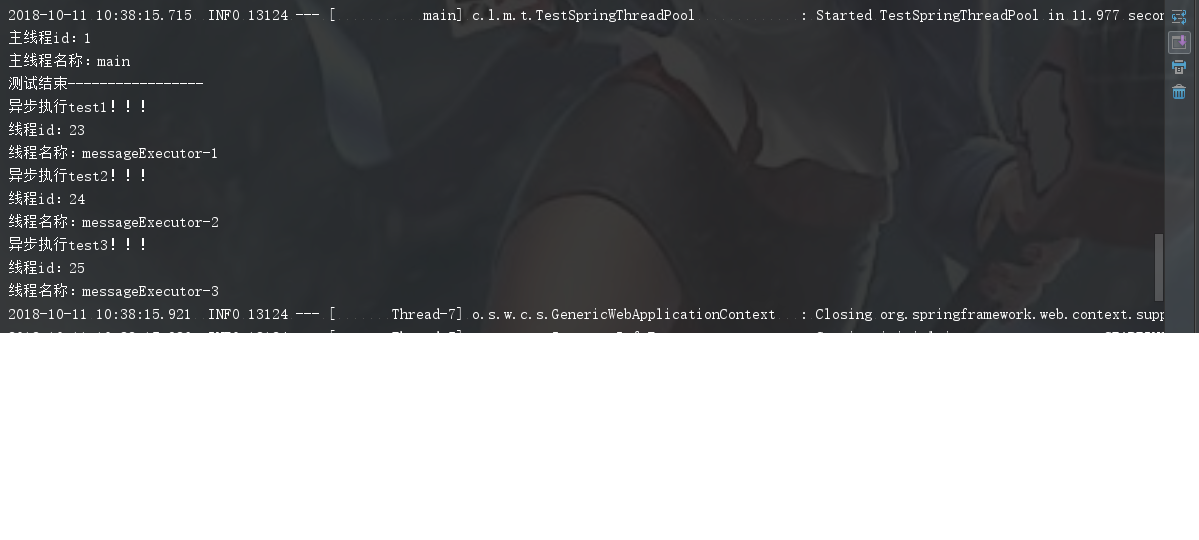
public void testThreadPool() { System.out.println("主线程id:" + Thread.currentThread().getId());
System.out.println("主线程名称:" + Thread.currentThread().getName());
asyncTest.test1();
asyncTest.test2();
asyncTest.test3(); }
}
测试结果:主线程和异步方法分别使用了不同的线程去调用,测试完成
******************************
xml配置线程池的另一种方式
<!-- 线程池配置 -->

    <bean id="executor" class="org.springframework.scheduling.concurrent.ThreadPoolTaskExecutor">

        <!-- 核心线程数,默认为1 -->

        <property name="corePoolSize" value="10" />

        <!--最大线程数,默认为Integer.MAX_VALUE -->

        <property name="maxPoolSize" value="50" />

        <!--队列最大长度,一般需要设置值>=notifyScheduledMainExecutor.maxNum;默认为Integer.MAX_VALUE -->

        <property name="queueCapacity" value="10000" />

        <!--线程池维护线程所允许的空闲时间,默认为60s -->

        <property name="keepAliveSeconds" value="300" />

        <!--线程池对拒绝任务(无线程可用)的处理策略,目前只支持AbortPolicy、CallerRunsPolicy;默认为后者

        1. CallerRunsPolicy :这个策略重试添加当前的任务,他会自动重复调用 execute() 方法,直到成功。

        2. AbortPolicy :超过队列最大数量后对拒绝的任务抛弃处理,并且抛出异常。

        -->

        <property name="rejectedExecutionHandler">

            <bean class="java.util.concurrent.ThreadPoolExecutor.CallerRunsPolicy" />

        </property>

    </bean>
【转】Spring线程及线程池的使用的更多相关文章
- spring提供的线程池
SPRING中的线程池ThreadPoolTaskExecutor 分类: JAVA Spring2013-07-12 10:36 14896人阅读 评论(9) 收藏 举报 Spring线程池多线程 ...
- Spring中的线程池和定时任务功能
1.功能介绍 Spring框架提供了线程池和定时任务执行的抽象接口:TaskExecutor和TaskScheduler来支持异步执行任务和定时执行任务功能.同时使用框架自己定义的抽象接口来屏蔽掉底层 ...
- spring boot自定义线程池以及异步处理
spring boot自定义线程池以及异步处理@Async:什么是线程池?线程池是一种多线程处理形式,处理过程中将任务添加到队列,然后在创建线程后自动启动这些任务.线程池线程都是后台线程.每个线程都使 ...
- Spring中的线程池ThreadPoolTaskExecutor介绍
前言: Java SE 5.0引入了ThreadPoolExecutor.ScheduledThreadPoolExecutor.Spring 2.x借助ConcurrentTaskExecutor和 ...
- 007-多线程-JUC线程池-Spring线程池配置、池子如何配置参数
一.概述 Spring通过ThreadPoolTaskExecutor实现线程池技术,它是使用jdk中的Java.util.concurrent.ThreadPoolExecutor进行实现. 1.1 ...
- 基于Spring Boot的线程池监控方案
前言 这篇是推动大家异步编程的思想的线程池的准备篇,要做好监控,让大家使用无后顾之忧,敬畏生产. 为什么需要对线程池进行监控 Java线程池作为最常使用到的并发工具,相信大家都不陌生,但是你真的确定使 ...
- 聊一聊Spring中的线程安全性
Spring作为一个IOC/DI容器,帮助我们管理了许许多多的“bean”.但其实,Spring并没有保证这些对象的线程安全,需要由开发者自己编写解决线程安全问题的代码. Spring对每个bean提 ...
- 聊一聊 Spring 中的线程安全性
Spring与线程安全 Spring作为一个IOC/DI容器,帮助我们管理了许许多多的“bean”.但其实,Spring并没有保证这些对象的线程安全,需要由开发者自己编写解决线程安全问题的代码. Sp ...
- java并发学习--第二章 spring boot实现线程的创建
除了之前介绍的创建线程方式外,spring boot为我们了提供一套完整的线程创建方式,其中包括了:线程.线程池.线程的监控. 一.使用spring boot提供的方法创建线程与线程池 1.首先在sp ...
随机推荐
- 关闭Postman 证书的验证
1.问题背景 使用自己生成的SSL证书,用Postman访问失败.需要忽略SSL证书的验证 2.关闭Postman 证书的验证 在Settings-General中 关闭SSL certificate ...
- MySQL之查询篇(三)
一:查询 1.创建数据库,数据表 -- 创建数据库 create database python_test_1 charset=utf8; -- 使用数据库 use python_test_1; -- ...
- C#开发中常用的加密解密方法
转载自:https://www.cnblogs.com/bj981/p/11203711.html C#开发中常用的加密解密方法 相信很多人在开发过程中经常会遇到需要对一些重要的信息进行加密处理,今天 ...
- Java 字符串(一)字符串初始化
一.String类概述 1.概述 java.lang.String 类代表字符串.Java程序中所有的字符串文字(例如 "abc" )都可以被看作是实现此类的实例.String 是 ...
- springboot设置访问端口和项目路径
找到,application.properties, 添加如下配置即可 server.port=8088server.servlet.context-path=/
- ingress controller 注解使用
ingress controller 注解使用 官网github注解地址: https://github.com/kubernetes/ingress-nginx/blob/master/docs/u ...
- 【转载】jmeter-命令行执行脚本
原文地址:https://blog.csdn.net/qq_35451939/article/details/79643560 日常测试过程中发现,在大数量并发时,jmeterGUI界面时长宕机.卡死 ...
- ArcGIS 生成要素轮廓线掩膜
先说效果: 生成轮廓之前:
- c小例子 10个数找出第一名
这个小例子,是从十个数中找到第一名,如果第一名的分数相同,则二者都可以晋级,进入下一轮比赛,我们就对这个数进行排序,这样要求输出晋级人员的标号0-9号中其中一个或几个. 如何用c语言来实现呢? 1) ...
- discuz网站前端代码优化思路
一.head标签中的局部 1.URL设计 URL尽量含有通用已成趋向的移动命名,例如“m./wap./3g./mobi./mobile./mob/wml/”,能够在子域名等方面表现 2.页面顶部的do ...