微服务:springboot与swagger2的集成
现在测试都提倡自动化测试,那我们作为后台的开发人员,也得进步下啊,以前用postman来测试后台接口,那个麻烦啊,一个字母输错就导致测试失败,现在swagger的出现可谓是拯救了这些开发人员,便捷之处真的不是一点两点。下面我们看下如何在微服务中将springboot与swagger来结合吧。
1、swagger是什么,这个我觉得凡是一个开发人员就应该知道度娘啊,绝对强大。
简单说下,它的出现就是为了方便进行测试后台的restful形式的接口,实现动态的更新,当我们在后台的接口修改了后,swagger可以实现自动的更新,而不需要认为的维护这个接口进行测试。
2、springboot与swagger的集成:
第一步:jar包的引入:
<!-- swagger2  -->

<dependency>

    <groupId>io.springfox</groupId>

    <artifactId>springfox-swagger2</artifactId>

    <version>2.9.2</version>

</dependency>

<dependency>

    <groupId>io.springfox</groupId>

    <artifactId>springfox-swagger-ui</artifactId>

    <version>2.9.2</version>

</dependency>

关于jar包的引入出现了一个问题就是版本的问题,可能需要与你的编辑器或者jdk要匹配吧,试了几个才最终成功导入jar。
第二步:swagger的配置启动类编写:
要使用swagger要进行一些配置,这个在界面的图上是可以显示的:类似于说明书:在这个类中我们会使用注解来进行启动swagger:
具体配置如下:
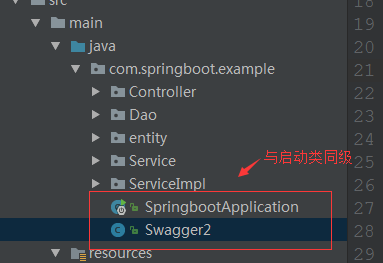
package com.springboot.example;

//swagger2的配置文件,在项目的启动类的同级文件建立

import org.springframework.context.annotation.Bean;

import org.springframework.context.annotation.Configuration;

import springfox.documentation.builders.ApiInfoBuilder;

import springfox.documentation.builders.PathSelectors;

import springfox.documentation.builders.RequestHandlerSelectors;

import springfox.documentation.service.ApiInfo;

import springfox.documentation.service.Contact;

import springfox.documentation.spi.DocumentationType;

import springfox.documentation.spring.web.plugins.Docket;

import springfox.documentation.swagger2.annotations.EnableSwagger2;

@Configuration

@EnableSwagger2

public class Swagger2 {

//swagger2的配置文件,这里可以配置swagger2的一些基本的内容,比如扫描的包等等

    @Bean

    public Docket createRestApi() {

        return new Docket(DocumentationType.SWAGGER_2)

                .apiInfo(apiInfo())

                .select()

                //为当前包路径

                .apis(RequestHandlerSelectors.basePackage("com.springboot.example.Controller"))

                .paths(PathSelectors.any())

                .build();

    }

    //构建 api文档的详细信息函数,注意这里的注解引用的是哪个

    private ApiInfo apiInfo() {

        return new ApiInfoBuilder()

                //页面标题

                .title("Spring Boot 测试使用 Swagger2 构建RESTful API")

                //创建人

                .contact(new Contact("MarryFeng", "http://www.baidu.com", ""))

                //版本号

                .version("1.0")

                //描述

                .description("API 描述")

                .build();

    }

}
这里的坑是:所使用类的引入文件要注意到底是哪个,之前因为这个出错了,
|
1 2 |
|
|
1 2 |
|
第三步:使用swagger来进行模拟测试:
使用swagger2来进行测试接口主要是在哪些类中使用:这里我们依然选择在controller层:
package com.springboot.example.Controller;

import com.springboot.example.Service.StudentService;

import com.springboot.example.entity.Student;

import io.swagger.annotations.Api;

import io.swagger.annotations.ApiImplicitParam;

import io.swagger.annotations.ApiOperation;

import org.slf4j.Logger;

import org.slf4j.LoggerFactory;

import org.springframework.beans.factory.annotation.Autowired;

import org.springframework.web.bind.annotation.PathVariable;

import org.springframework.web.bind.annotation.RequestMapping;

import org.springframework.web.bind.annotation.RequestMethod;

import org.springframework.web.bind.annotation.RestController;

/**

 * Created by Administrator on 2017/9/13.

 */

@RestController

@RequestMapping("api")

@Api("swaggerDemoController相关的api")

public class SwaggerDemoController {

    @Autowired

    private StudentService studentService;

    private static final Logger logger= LoggerFactory.getLogger(SwaggerDemoController.class);

    @ApiOperation(value = "根据id查询学生信息", notes = "查询数据库中某个的学生信息")

    @ApiImplicitParam(name = "id", value = "学生ID", paramType = "path", required = true, dataType = "Integer")

    @RequestMapping(value = "/{id}", method = RequestMethod.GET)

    public Student getStudent(@PathVariable int id) {

        logger.info("开始查询某个学生信息");

        return studentService.selectStudentById(id);

    }

}
上面这些可以看下具体的注解是什么意思:
这样swagger2与springboot就集成完毕了。
看下最终效果吧:
访问路径:
http://localhost:8080/swagger-ui.html
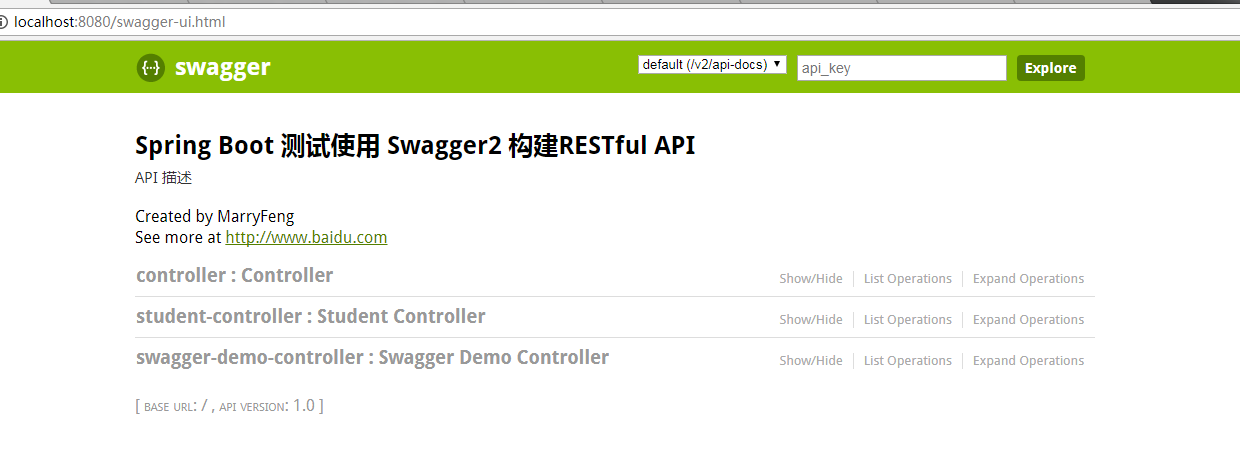

输入id后,我们可以看到查询结果:、

是不是很方便,我们不用像postman一样来编写入口,swagger2自动完成:
而且实时更新:

是不是很方便!
至此swagger2与springboot的集成完毕。
转载:https://www.cnblogs.com/fengli9998/p/7522973.html
微服务:springboot与swagger2的集成的更多相关文章
- springboot与swagger2的集成
springboot与swagger2的集成 1.出现的背景 随着互联网技术的发展,现在的网站架构基本都由原来的后端渲染变成了:前端渲染.先后端分离的形态,而前端和后端的唯一联系,变成了API接口: ...
- 微服务学习二:springboot与swagger2的集成
现在测试都提倡自动化测试,那我们作为后台的开发人员,也得进步下啊,以前用postman来测试后台接口,那个麻烦啊,一个字母输错就导致测试失败,现在swagger的出现可谓是拯救了这些开发人员,便捷之处 ...
- 微服务springboot视频最新SpringBoot2.0.3版本技术视频教程【免费学习】
超火爆的springboot微服务技术怎么学,看这里,springboot超详细的教程↓↓↓↓↓↓https://ke.qq.com/course/179440?tuin=9b386640 01.sp ...
- 【下一代核心技术DevOps】:(五)微服务CI与Rancher持续集成
1. 引言 DevOps的核心魅力是快速的持续集成交付,降低研发和实施运维之间的交互,使得传统的各种扯皮现象统统消失.最重要的是降低成本 保障产品交付可靠性. 使用Rancher作为持续集成的关键环节 ...
- 微服务-springboot+websocket在线聊天室
一.引入依赖 <dependency> <groupId>org.springframework.boot</groupId> <artifactId> ...
- 微服务-springboot日志配置
springboot 默认会加载classpath:logback-spring.xml文件. springProfile 中的name名字对应application-xx.properties 中的 ...
- 微服务-springboot多环境配置(开发生产测试环境切换)
springboot根据spring.profiles.active会去寻找应该加载开发环境配置还是生产环境配置 application.properties #生产环境,开发环境,测试环境切换 pr ...
- Java微服务(Spring-boot+MyBatis+Maven)入门教程
1,项目创建 新建maven项目,如下图: 选择路径,下一步 输入1和2的内容,点完成 项目创建完毕,结构如下图所示: 填写pom.xml里内容,为了用于打包,3必须选择jar,4和5按图上填写 ...
- 微服务SpringBoot总结
什么是SpringBootSpringBoot是Spring项目中的一个子工程,与我们所熟知的Spring-framework 同属于spring的产品官方介绍:Spring Boot makes i ...
随机推荐
- 电视CI卡详解
CAM卡中文名视密卡,它是一种数字视频条件接收模块,是一个连接电视机与外部信号源的设备.它可以将压缩的数字信号转成电视内容,并在电视机上显示出来.CAM卡(亦称大卡)和智能卡(亦称小卡)配合使用,插入 ...
- 【ztree】隐藏显示节点
//显示隐藏的节点 var nodes = zTreeObj.getNodesByParam("isHidden", true); zTreeObj.showNodes(nodes ...
- Swagger2生成后台的API文档
添加依赖: <!--Swagger2API生成--> <dependency> <groupId>io.springfox</groupId> < ...
- Idea Spring 、SpringBoot相关设置技巧
1.Spring变量依赖注入出现红色波浪线 Could not autowire. No beans of 'UserMapper' type found. less... (Ctrl+F1) Che ...
- Word 查找替换高级玩法系列之 -- 通配符大全B篇
未完 ...... 点击访问原文(进入后根据右侧标签,快速定位到本文)
- 重置 Macbook 登录密码
1.按 开机键 的同时 按 Command + R,等进度条走完,会出现如下图 2.在菜单栏,选取“实用工具”>“终端”. 3.在终端窗口,键入下面的命令:resetpassword 按下回车键 ...
- Python之路【第二十六篇】:HTTP协议
HTTP协议 一.HTTP概述 HTTP(hypertext transport protocol),即超文本传输协议.这个协议详细规定了浏览器和万维网服务器之间互相通信的规则. HTTP就是通信规则 ...
- libevent源码分析二--timeout事件响应
libevent不仅支持io事件,同时还支持timeout事件与signal事件,这篇文件将分析libevent是如何组织timeout事件以及如何响应timeout事件. 1. min_heap ...
- 唯一ID生成器--雪花算法
在微服务架构,分布式系统中的操作会有一些全局性ID的需求,所以我们不能用数据库本身的自增功能来产生主键值,只能由程序来生成唯一的主键值.我们采用的是twitter的snokeflake(雪花)算法. ...
- Java-手动搭建SSH(maven版)
创建maven项目 把maven项目变为动态网站,步骤如下: 项目结构图如下: 开始搭建spring+springmvc+Hibernate项目 环境版本就不多说了,直接贴出pom.xml文件 < ...