
Windows Service 学习系列(二):C# windows服务:安装、卸载、启动和停止Windows Service几种方式
一、通过InstallUtil.exe安装、卸载、启动、停止Windows Service
方法一
1.以管理员身份运行cmd
2.安装windows服务
切换cd C:\Windows\Microsoft.NET\Framework\v4.0.30319(InstallUtil.exe的路径下,注意InstallUtil.exe的版本号需要和项目的版本号相同)
3.安装windows服务
InstallUtil.exe D:\SimpleService\SimpleService\bin\Debug\SimpleService.exe(项目的路径)
(安装过程中出现的错误:Window Service Install "帐户名无效或不存在,或者密码对于指定的帐户名无效。" 解决方法:填用户名时,要在前面加上 .\)
4.启动windows服务
net start Servive1(服务名称)
5.卸载windows服务
InstallUtil.exe /u D:\SimpleService\SimpleService\bin\Debug\SimpleService.exe
方法二
1、找到 Installutil.exe 文件,并把它复制到 D:\SimpleService\SimpleService\bin\Debug\目录
2、现在 Installutil.exe 程序在 D:\SimpleService\SimpleService\bin\Debug 目录下,需要通过cmd命令 "cd" 切换到该目录下。
3、安装服务:
installutil.exe SimpleService.exe
4、卸载服务:
installutil.exe SimpleService.exe
二、通过代码模拟InstallUtil.exe安装、卸载、启动、停止Windows Service
1、Program.cs中的代码
using System.ServiceProcess;

namespace MyWindowsService

{

    static class Program

    {

        /// <summary>

        /// 应用程序的主入口点。

        /// </summary>

        static void Main(string [] args)

        {

            const string SERVICE_NAME = "MyWindowsService";

            if (args.Length>&&(args[].ToLower()=="-install"||args[].ToLower()=="-i"))

            {

                if (!ServiceIsExisted(SERVICE_NAME))

                {

                    System.Configuration.Install.ManagedInstallerClass.InstallHelper(new string[] { string.Concat(SERVICE_NAME,".exe")});

                    ServiceController c = new ServiceController(SERVICE_NAME);

                    c.Start();

                }

            }

            else if(args.Length>&&(args[].ToLower()== "-uninstall" || args[].ToLower()=="-u"))

            {

                if (ServiceIsExisted(SERVICE_NAME))

                {

                    System.Configuration.Install.ManagedInstallerClass.InstallHelper(new string[] { "/u", string.Concat(SERVICE_NAME, ".exe")});

                }

            }

            else

            {

                ServiceBase[] ServicesToRun= { new Service1() };

                ServiceBase.Run(ServicesToRun);

            }

        }

        /// <summary>

        /// 判断是否了安装该服务

        /// </summary>

        /// <param name="svcName"></param>

        /// <returns></returns>

        private static bool ServiceIsExisted(string svcName)

        {

            ServiceController[] services = ServiceController.GetServices();

            foreach (ServiceController s in services)

            {

                if (string.CompareOrdinal(s.ServiceName,svcName)==)

                {

                    return true;

                }

            }

            return false;

        }

    }

}
2、管理员身份打开命令提示符
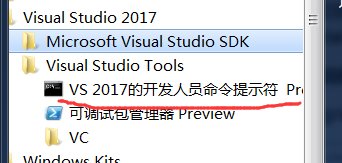
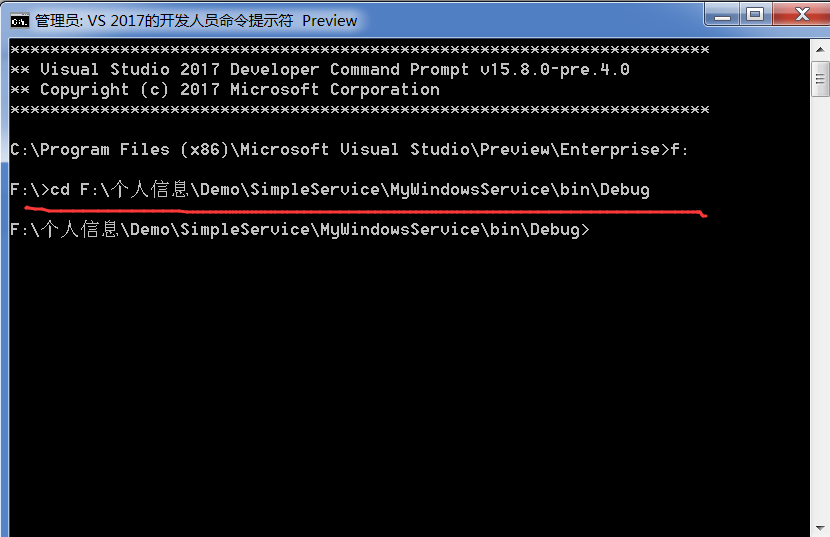
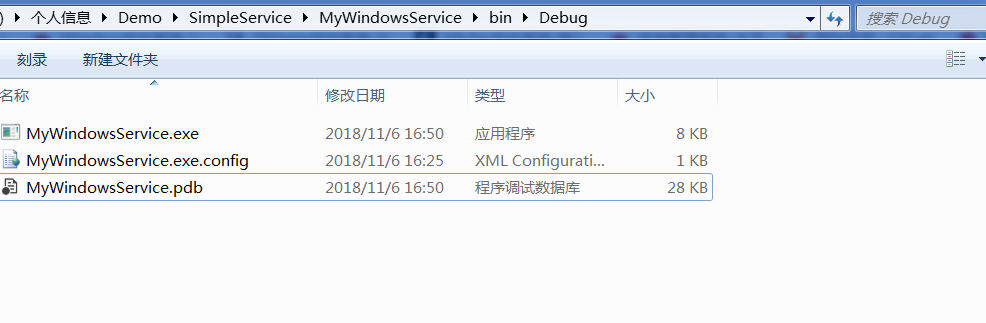
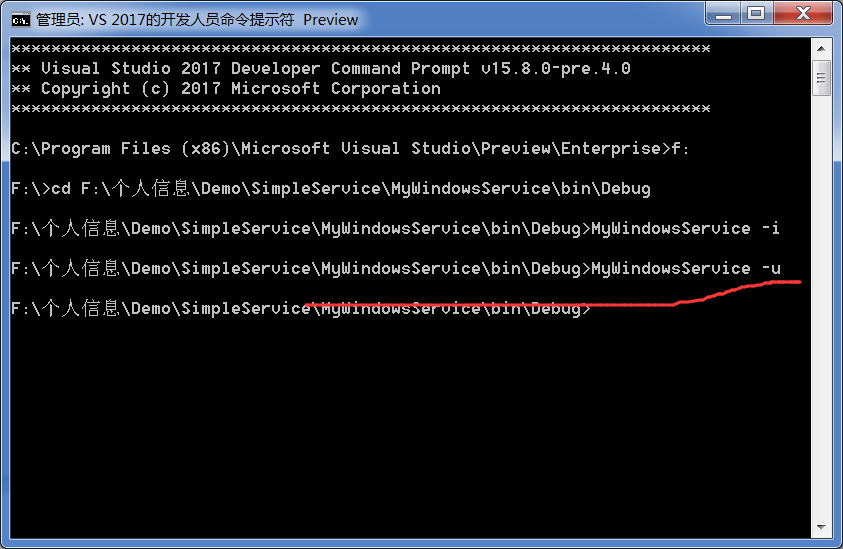
3、切换到exe所在的目录,如下图
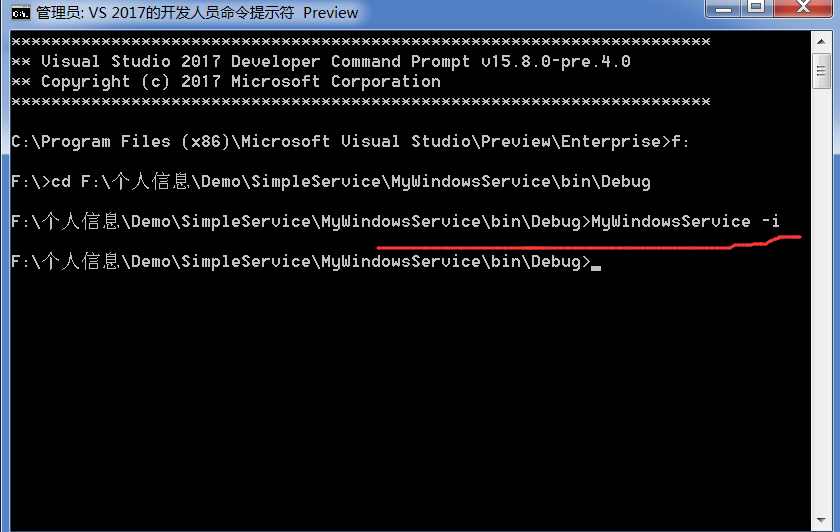
4、安装服务
MyWindowsService -i
其中MyWindowsService是服务名称,-i是安装服务的命令符号,可以看一下program.cs的代码就明白了。
5、卸载服务
MyWindowsService -i
其中MyWindowsService是服务名称,-u是卸载服务的命令符号,可以看一下program.cs的代码就明白了。
三、通过SC命令安装、卸载、启动、停止Windows Service
1、安装Windows service
sc create service1 binPath= "D:\SimpleService\SimpleService\bin\Debug\ SimpleService.exe"
其中:service1 为创建的服务名,binPath后面是运行exe文件的所在路径
2、配置服务
sc config service1 start= AUTO (自动)
sc config service1 start= DEMAND (手动)
sc config service1 start= DISABLED(禁用)
其中service1是创建的服务名
3、开启服务
net start service1
其中service1是创建的服务名
4、关闭服务
net stop service1
其中service1是创建的服务名
5、删除服务
sc delete service1
其中service1是创建的服务名
四、批处理
(新建一个txt文件,自己命名,把后缀改为.bat文件)
1、创建、配置、开启服务
@echo.服务启动......

@echo off

@sc create test1 binPath= "C:\Users\Administrator\Desktop\win32srvdemo\win32srvdemo\Debug\win32srvdemo.exe"

@net start test1

@sc config test1 start= AUTO

@echo off

@echo.启动完毕!

@pause
2、关闭服务
@echo.服务关闭

@echo off

@net stop test1

@echo off

@echo.关闭结束!

@pause
3、删除服务
@echo.服务删除

@echo off

@sc delete test1

@echo off

@echo.删除结束!

@pause
Windows Service 学习系列(二):C# windows服务:安装、卸载、启动和停止Windows Service几种方式的更多相关文章
- 手把手教用C#编写Windows服务 并控制服务 安装、启动、停止、卸载
Windows服务 Microsoft Windows 服务(即,以前的 NT 服务)使您能够创建在它们自己的 Windows 会话中可长时间运行的可执行应用程序.这些服务可以在计算机启动时自动启动, ...
- Windows 64下elasticsearch-1.7.1集群 安装、启动、停止
elasticsearch-1.7.1 (es Windows 64) 安装.启动.停止的详细记录 https://blog.csdn.net/qq_27093465/article/details/ ...
- 【转】monkeyrunner学习总结二:连接、安装、启动
一.获取packageName与startActivity 前置条件:已成功安装配置SL4A并连接PC调试(参见:monkeyrunner学习总结一:环境搭建:http://www.amsoft.cn ...
- Windows Service 学习系列(一):建立简单的Windows service
参考:https://www.cnblogs.com/cncc/p/7170951.html 一.开发环境 操作系统:Windows 7 X64 开发环境:VS2017 编程语言:C# .NET版本: ...
- WCF学习系列二---【WCF Interview Questions – Part 2 翻译系列】
http://www.topwcftutorials.net/2012/09/wcf-faqs-part2.html WCF Interview Questions – Part 2 This WCF ...
- RabbitMQ学习系列二-C#代码发送消息
RabbitMQ学习系列二:.net 环境下 C#代码使用 RabbitMQ 消息队列 http://www.80iter.com/blog/1437455520862503 上一篇已经讲了Rabbi ...
- windows服务安装卸载
到C盘下找到对应的开发VS的installutil.exe文件,复制到程序的执行文件(*.exe)相同目录下在开始程序中找到VS命令提示工具 转到程序的执行文件(*.exe)目录下 C:\>cd ...
- c#创建windows服务(代码方式安装、启动、停止、卸载服务)
转载于:https://www.cnblogs.com/mq0036/p/7875864.html 一.开发环境 操作系统:Windows 10 X64 开发环境:VS2015 编程语言:C# .NE ...
- Windows Server 2012之活动目录域服务的卸载
Windows Server 2012之活动目录域服务的卸载 2012-07-11 06:27:35 标签:Windows Server 2012 活动目录域服务 卸载 原创作品,允许转载,转载时请务 ...
随机推荐
- 说一说MVC的CustomHandlerErrorAttribute(五)
九月第一篇,呵呵 前言:最近刚入职了一家公司,上司让我维护一个项目,我接手了看了一下项目,try catch 严重影响我的视觉,我直接通过vs插件将其try catch全部替换掉占位符,呵呵. 所以我 ...
- Elasticsearch 分词器
无论是内置的分析器(analyzer),还是自定义的分析器(analyzer),都由三种构件块组成的:character filters , tokenizers , token filters. 内 ...
- C#版 - PAT乙级(Basic Level)真题 之 1021.个位数统计 - 题解
版权声明: 本文为博主Bravo Yeung(知乎UserName同名)的原创文章,欲转载请先私信获博主允许,转载时请附上网址 http://blog.csdn.net/lzuacm. C#版 - P ...
- 痞子衡嵌入式:一表全搜罗常见低功耗广域物联网协议(NB-IoT/eMTC/LoRa/SigFox...)
大家好,我是痞子衡,是正经搞技术的痞子.今天痞子衡给大家介绍的是低功耗广域物联网协议. 上一篇痞子衡给大家搜罗了短距离无线通信协议,它是物联网的基础,但它的应用距离比较短,对于长距离的物联网应用鞭长莫 ...
- 重复造轮子,编写一个轻量级的异步写日志的实用工具类(LogAsyncWriter)
一说到写日志,大家可能推荐一堆的开源日志框架,如:Log4Net.NLog,这些日志框架确实也不错,比较强大也比较灵活,但也正因为又强大又灵活,导致我们使用他们时需要引用一些DLL,同时还要学习各种用 ...
- "每日一道面试题".net托管堆是否会存在内存泄漏的情况
首先说答案:会 所谓的内存泄漏,就是指内存空间上产生了不再被实际使用却又无非被分配的对象.严格意义上来说,在.net中经常会遇到内存泄漏的情况,因为托管堆内的对象不再被使用时,需要等待下一次GC才会被 ...
- [PHP] assert()断言检测函数
assert_options函数 设置断言的参数 assert 函数 ,检测一个断言 <?php // 激活断言,并设置它为 quiet assert_options(ASSERT_ACTIVE ...
- Java 学习笔记 二维数组和对象数组
定义二维数组 int[][] a = new int[4][5]; 可以不指定列数 int[][] a = new int[4][]; 获取行 int i = a.length(); 如果使用第一个例 ...
- java学习笔记 线程的实现与同步
2019.4.2 线程实现的两种方式 继承线程,复写其中的run方法 实现runnable接口,复写run方法 使用: MyThread target = new MyThread(); new Th ...
- 设计模式之Factory模式 代码初见
ObjectFactory就是通过Factory建造一个Object,比如说DBConnectionFactory就是专门建造DBConnection的工厂 BuilderFactory就是通过Fac ...