spring 5.x 系列第22篇 —— spring 定时任务 (代码配置方式)
源码Gitub地址:https://github.com/heibaiying/spring-samples-for-all
一、说明
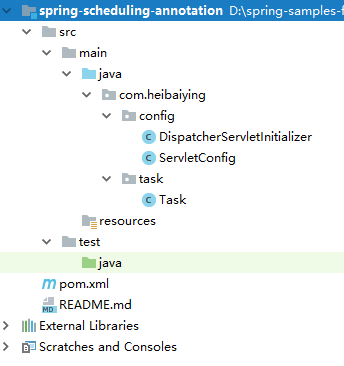
1.1 项目结构说明
关于任务的调度配置定义在ServletConfig.java中,为方便观察项目定时执行的情况,项目以web的方式构建。
1.2 依赖说明
导入基本依赖
<?xml version="1.0" encoding="UTF-8"?>
<project xmlns="http://maven.apache.org/POM/4.0.0"
         xmlns:xsi="http://www.w3.org/2001/XMLSchema-instance"
         xsi:schemaLocation="http://maven.apache.org/POM/4.0.0 http://maven.apache.org/xsd/maven-4.0.0.xsd">
    <modelVersion>4.0.0</modelVersion>

    <groupId>com.heibaiying</groupId>
    <artifactId>spring-scheduling</artifactId>
    <version>1.0-SNAPSHOT</version>
    <build>
        <plugins>
            <plugin>
                <groupId>org.apache.maven.plugins</groupId>
                <artifactId>maven-compiler-plugin</artifactId>
                <configuration>
                    <source>8</source>
                    <target>8</target>
                </configuration>
            </plugin>
        </plugins>
    </build>
    <properties>
        <spring-base-version>5.1.3.RELEASE</spring-base-version>
    </properties>

    <dependencies>
        <dependency>
            <groupId>org.springframework</groupId>
            <artifactId>spring-context</artifactId>
            <version>${spring-base-version}</version>
        </dependency>
        <dependency>
            <groupId>org.springframework</groupId>
            <artifactId>spring-beans</artifactId>
            <version>${spring-base-version}</version>
        </dependency>
        <dependency>
            <groupId>org.springframework</groupId>
            <artifactId>spring-core</artifactId>
            <version>${spring-base-version}</version>
        </dependency>
        <dependency>
            <groupId>org.springframework</groupId>
            <artifactId>spring-web</artifactId>
            <version>${spring-base-version}</version>
        </dependency>
        <dependency>
            <groupId>org.springframework</groupId>
            <artifactId>spring-webmvc</artifactId>
            <version>${spring-base-version}</version>
        </dependency>
        <dependency>
            <groupId>javax.servlet</groupId>
            <artifactId>javax.servlet-api</artifactId>
            <version>4.0.1</version>
            <scope>provided</scope>
        </dependency>
    </dependencies>

</project>
二、spring scheduling
2.1 创建定时任务
/**
 * @author : heibaiying
 */
@Component
public class Task {

    /**
     * 基于间隔的触发器,其中间隔是从上一个任务的  完成时间  开始计算, 时间单位值以毫秒为单位。
     */
    @Scheduled(fixedDelay = 5000, initialDelay = 1000)
    public void methodA() {
        Thread thread = Thread.currentThread();
        System.out.println(String.format("线程名称:%s ; 线程ID:%s ; 调用方法:%s ; 调用时间:%s",
                thread.getName(), thread.getId(), "methodA方法执行", LocalDateTime.now()));
    }

    /**
     * 基于间隔的触发器,其中间隔是从上一个任务的  开始时间  开始测量的。
     */
    @Scheduled(fixedRate = 5000)
    @Async
    public void methodB() throws InterruptedException {
        Thread thread = Thread.currentThread();
        System.out.println(String.format("线程名称:%s ; 线程ID:%s ; 调用方法:%s ; 调用时间:%s",
                thread.getName(), thread.getId(), "methodB方法执行", LocalDateTime.now()));
        Thread.sleep(10 * 1000);
    }

    @Scheduled(cron = "0/10 * * * * ?")
    public void methodC() {
        Thread thread = Thread.currentThread();
        System.out.println(String.format("线程名称:%s ; 线程ID:%s ; 调用方法:%s ; 调用时间:%s",
                thread.getName(), thread.getId(), "methodC方法执行", LocalDateTime.now()));
    }
}
2.2 配置定时任务
/**
 * @author : heibaiying
 * spring 主配置类
 */
@Configuration
@EnableWebMvc
@EnableScheduling  //启用Spring的计划任务执行功能
@EnableAsync       //启用Spring的异步方法执行功能
@ComponentScan(basePackages = {"com.heibaiying.task"})
public class ServletConfig implements WebMvcConfigurer, AsyncConfigurer, SchedulingConfigurer {

    private ThreadPoolTaskExecutor executor = new ThreadPoolTaskExecutor();

    // 任务执行器线程池配置
    @Override
    public Executor getAsyncExecutor() {
        executor.setCorePoolSize(5);
        executor.setMaxPoolSize(10);
        executor.setQueueCapacity(100);
        executor.setThreadNamePrefix("MyExecutor-");
        executor.initialize();
        return executor;
    }

    // 这个方法可以监听到异步程序发生的错误
    @Override
    public AsyncUncaughtExceptionHandler getAsyncUncaughtExceptionHandler() {
        return new AsyncUncaughtExceptionHandler() {
            @Override
            public void handleUncaughtException(Throwable ex, Method method, Object... params) {
                System.out.println(method.getName() + "发生错误:" + ex.getMessage());
            }
        };
    }

    // 如果程序结束,需要关闭线程池 不然程序无法完全退出 只能kill才能完全退出
    @PreDestroy
    public void destroy() {
        if (executor != null) {
            executor.shutdown();
        }
    }

    // 调度程序线程池配置
    @Override
    public void configureTasks(ScheduledTaskRegistrar taskRegistrar) {
        taskRegistrar.setScheduler(taskExecutor());
    }

    // 如果程序结束,需要关闭线程池
    @Bean(destroyMethod = "shutdown")
    public Executor taskExecutor() {
        return Executors.newScheduledThreadPool(50);
    }
}
关于调度程序线程池作用说明:
按照例子 我们有methodA 、 methodB 、methodC 三个方法 其中 methodB 是耗时的方法如果不声明调度程序线程池 则methodB 会阻塞 methodA 、methodC 方法的执行 因为调度程序是单线程的
关于任务执行线程池作用说明:
按照例子 如果我们声明 methodB 是按照 fixedRate=5000 方法执行的 ,理论上不管任务耗时多久,任务都应该是每5秒执行一次,但是实际上任务是被加入执行队列,也不会立即被执行,因为默认执行任务是单线程的,这个时候需要开启@EnableAsync 并指定方法是 @Async 异步的,并且配置执行任务线程池(如果不配置就使用默认的线程池配置)
附:源码Gitub地址:https://github.com/heibaiying/spring-samples-for-all
spring 5.x 系列第22篇 —— spring 定时任务 (代码配置方式)的更多相关文章
- spring 5.x 系列第2篇 —— springmvc基础 (代码配置方式)
文章目录 一.搭建hello spring工程 1.1 项目搭建 1.2 相关注解说明 二.配置自定义拦截器 三.全局异常处理 四.参数绑定 4.1 参数绑定 4.2 关于日期格式转换的三种方法 五. ...
- spring 5.x 系列第18篇 —— 整合websocket (代码配置方式)
源码Gitub地址:https://github.com/heibaiying/spring-samples-for-all 一.说明 1.1 项目结构说明 项目模拟一个简单的群聊功能,为区分不同的聊 ...
- spring 5.x 系列第16篇 —— 整合dubbo (代码配置方式)
文章目录 一. 项目结构说明 二.项目依赖 三.公共模块(dubbo-ano-common) 四. 服务提供者(dubbo-ano-provider) 4.1 提供方配置 4.2 使用注解@Servi ...
- spring 5.x 系列第14篇 —— 整合RabbitMQ (代码配置方式)
源码Gitub地址:https://github.com/heibaiying/spring-samples-for-all 一.说明 1.1 项目结构说明 本用例关于rabbitmq的整合提供简单消 ...
- spring 5.x 系列第12篇 —— 整合memcached (代码配置方式)
文章目录 一.说明 1.1 XMemcached客户端说明 1.2 项目结构说明 1.3 依赖说明 二.spring 整合 memcached 2.1 单机配置 2.2 集群配置 2.3 存储基本类型 ...
- spring 5.x 系列第10篇 —— 整合mongodb (代码配置方式)
源码Gitub地址:https://github.com/heibaiying/spring-samples-for-all 一.说明 1.1 项目结构说明 配置文件位于com.heibaiying. ...
- spring 5.x 系列第17篇 —— 整合websocket (xml配置方式)
源码Gitub地址:https://github.com/heibaiying/spring-samples-for-all 一.说明 1.1 项目结构说明 项目模拟一个简单的群聊功能,为区分不同的聊 ...
- spring 5.x 系列第15篇 —— 整合dubbo (xml配置方式)
文章目录 一. 项目结构说明 二.项目依赖 三.公共模块(dubbo-common) 四. 服务提供者(dubbo-provider) 4.1 productService是服务的提供者( 商品数据用 ...
- spring 5.x 系列第13篇 —— 整合RabbitMQ (xml配置方式)
源码Gitub地址:https://github.com/heibaiying/spring-samples-for-all 一.说明 1.1 项目结构说明 本用例关于rabbitmq的整合提供简单消 ...
随机推荐
- QT定时器的两种应用(QObject就有timerEvent事件,一种什么样的居心呢?)
QT中定时器的使用方法(1)重载timerEvent(QTimerEvent *)函数,然后再在类的构造函数中设置时间间隔 startTimer(50);//单位为毫秒(2)在类的构造函数中设定如 ...
- SpringMVC+easyUI 分页,查询 (完整的CRUD)
最终完毕CRUD的功能了,注意,这里会对前面有一些修改,UserController的listUser() 已经改写了,如今把所有整理一下吧. JSP: <%@ page language=&q ...
- C# WPF MVVM QQ密码管家项目(8,完结篇:自动输入QQ号、密码)
原文:C# WPF MVVM QQ密码管家项目(8,完结篇:自动输入QQ号.密码) 目录: 1,界面设计 2,数据模型的建立与数据绑定 3,添加QQ数据 4,修改QQ数据 5,删除QQ数据 6,密码选 ...
- MFC 窗口分割与通信
一.关于CSplitterWnd类我们在使用CuteFtp或者NetAnt等工具的时候,一般都会被其复杂的界面所吸引,在这些界面中窗口被分割为若干的区域,真正做到了窗口的任意分割. 那么我们自己如何创 ...
- matlab 二元函数的画法
plot:画线(curve,二维空间以及三维空间) surf:画面(surface,一般在三维空间) 1. surf 绘图函数 surf 是 surface 的缩写,表示表面(显然至少三维图像才会有表 ...
- 在python3下用PIL做图像处理
Python Imaging Library (PIL)是python下的图像处理模块,支持多种格式,并提供强大的图形与图像处理功能. 目前PIL的官方最新版本为1.1.7,支持的版本为python ...
- 介绍MFC参与设计模式框架(一个)
最近我读了一些相关MFC参与设计的花纹纸架,为了帮助您了解MFC在此框架总结,我们希望对大家有帮助. 简介设计模式 设计模式是一套被重复使用.多数人知晓的.经过分类编目的.代码设计经验的总结.使用设计 ...
- matlab GUI 编程
matlab 语法的简便,在 GUI 上也不遑多让呀: uigetfile [filename, pathname] = uigetfile('*.m', 'choose a m file') 1. ...
- [Unity3D]Unity3D圣骑士模仿游戏开发传仙灵达到当局岛
大家好,我是秦培.欢迎关注我的博客.我的博客地址blog.csdn.net/qinyuanpei. 在前面的文章中.我们分别实现了一个自己定义的角色控制器<[Unity3D]Unity3D游戏开 ...
- WPF特效-鱼游动动画
原文:WPF特效-鱼游动动画 实现思路: 通过VisualBrush Binding方式获取鱼局部图像,在Viewport3D中创建ModelVisual3D块并把获取到的局部 ...