[原创]CI持续集成系统环境---部署Gitlab环境完整记录
Gitlab是一个代码托管平台,在实际工作中,对代码管理十分有用。
废话不多说,下面是对我自己搭建的Gitlab环境做一记录:
(1)安装
------------------------------------------------------------------------
或者直接下载bitnami-gitlab-7.1.1-0-linux-x64-installer.run
下载地址:http://pan.baidu.com/s/1i4RaCKH
提取密码:tcia
-------------------------------------------------------------------------
Gitlab的安装采用的是一键安装方式
[root@115 ~]#cd /opt
[root@115 ~]#wget https://bitnami.com/redirect/to/39039/bitnami-gitlab-8.8.4-0-linux-x64-installer.run
[root@115 ~]#chmod 755 bitnami-gitlab-8.8.4-0-linux-x64-installer.run
[root@115 ~]#./bitnami-gitlab-7.1.1-0-linux-x64-installer.run 一路回车
---------------------------------------------------------------------
Welcome to the Bitnami Gitlab Stack Setup Wizard.
---------------------------------------------------------------------
Select the components you want to install; clear the components you do
not want
to install. Click Next when you are ready to continue.
GitLab : Y (Cannot be edited)
GitLab CI [Y/n] :Y
Is the selection above correct? [Y/n]: Y
---------------------------------------------------------------------
Installation folder
Please, choose a folder to install Bitnami Gitlab Stack
Select a folder [/opt/gitlab-7.4.3-0]:
---------------------------------------------------------------------
Create Admin account
Bitnami Gitlab Stack admin user creation
Email Address [xschao@xxx.com]:
Login [xschao]:
Password :xxxxxxxxxxx
Please confirm your password :
---------------------------------------------------------------------
-------
Hostname that will be used to create internal URLs. If this value is
incorrect,
you may be unable to access your Gitlab installation from other computers.
It is
advisable to use a Domain instead of an IP address for compatibility with
different browsers.
Domain [127.0.0.1]: 这里最好写外网 ip 或者域名
Do you want to configure mail support? [y/N]: y
---------------------------------------------------------------------
Configure SMTP Settings
This is required so your application can send notifications via email.
Default email provider:
[1] GMail
[2] Custom
Please choose an option [1] : 1
---------------------------------------------------------------------
Configure SMTP Settings
This data is stored in the application configuration files and may be
visible to
others. For this reason, it is recommended that you do not use your
personal
account credentials.
GMail address []: xschao.test@gmail.com
GMail password :
Re-enter :
---------------------------------------------------------------------
Setup is now ready to begin installing Bitnami Gitlab Stack on your
computer.
Do you want to continue? [Y/n]: Y
---------------------------------------------------------------------
-------
Please wait while Setup installs Bitnami Gitlab Stack on your computer.
Installing
0% ______________ 50% ______________ 100%
(2)启动命令
[root@115 ~]#/opt/gitlab-8.8.4-0/ctlscript.sh start/restart/stop
(3)访问
http://ip:端口
在远程可以使用ssh方式连接gitlab并clone代码
需要先将远程客户端机器的公钥放到Gitlab的SSH Keys里面,做成无密码的信任关系
------------------------------------------------------------------------------------------------------------------------------------------
修改gitlab的访问端口,需要修改下面几个文件:
/opt/gitlab-8.8.4-0/apache2/conf/httpd.conf
/opt/gitlab-8.8.4-0/apache2/conf/bitnami/bitnami.conf
/opt/gitlab-8.8.4-0/apps/gitlab/gitlab-shell/config.yml
/opt/gitlab-8.8.4-0/apps/gitlab/htdocs/config/gitlab.yml
------------------------------------------------------------------------------------------------------------------------------------------
修改gitlab访问的ip或域名
/opt/gitlab-8.8.4-0/apps/gitlab/gitlab-shell/config.yml
/opt/gitlab-8.8.4-0/apps/gitlab/htdocs/config/gitlab.yml
例如我测试机上修改如下:之前是ip访问(假设ip为111.112.113.45),现在改为域名访问(假设域名为git.huanqiu.net)
[root@115 ~]# vim /opt/gitlab-8.8.4-0/apps/gitlab/gitlab-shell/config.yml
.......
gitlab_url: http://git.xqshijie.net:8081/
[root@115 ~]# vim /opt/gitlab-8.8.4-0/apps/gitlab/htdocs/config/gitlab.yml
.......
gitlab:
## Web server settings (note: host is the FQDN, do not include http://)
host: git.huanqiu.net
port: 8081 # Set to 443 if using HTTPS, see installation.md#using-https for additional HTTPS configuration details
https: false
最后重启服务
[root@115 gitlab-8.8.4-0]# pwd
/opt/gitlab-8.8.4-0
[root@115 gitlab-8.8.4-0]# ./ctlscript.sh restart
最好在/etc/hosts文件里做下映射(此步骤不是必须)
[root@115 ~]# vim /etc/hosts
111.112.113.45 git.huanqiu.net
------------------------------------------------------------------------------------------------------------------------------------------
linux客户端使用ssh方式连接gitlab
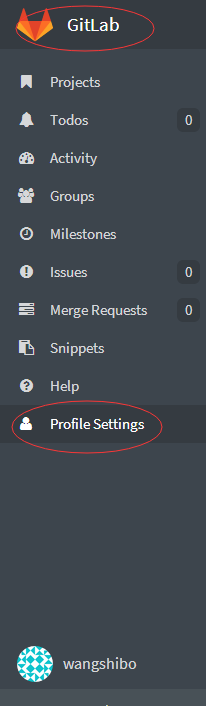
其实只需要将linux客户机的公钥内容拷贝到gitlab的“Profile Settings”->"SSH Keys"里
比如:
使用“王士博”账号登陆gitlab
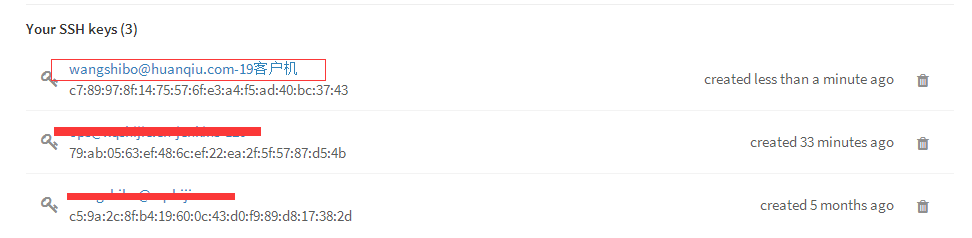
同一个gitlab账号下可以添加多个Keys,也就是可以对应多台客户机的Keys,也可以是同一台客户机的不同账号下的Keys;
注意Keys中公钥内容可以通过邮件去识别,也可以不跟邮件识别(比如在linux客户机和windows本地都产生公私钥,公钥内容中的邮件可以都用wangshibo@huanqiu.com)。特别注意一点:添加不同客户机上的相关账号公钥后,就只能在这个账号状态下进行git代码下载。比如下面添加了客户机的wangshibo账号下的公钥,就只能在这台主机的wangshibo账号下进行git代码下载,在root账号下是下载不了的,会一直提示输入密码.....
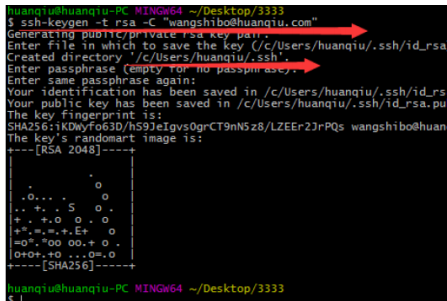
1)首先需要在linux客户机上生成公私钥
[root@test-huanqiu ~]# useradd wangshibo
[root@test-huanqiu ~]# su - wangshibo
[wangshibo@redmine ~]$ ssh-keygen -t rsa -C “wangshibo@huanqiu.com" //也可以不跟-C进行后面的邮件识别,一路回车
......
......
[wangshibo@test-huanqiu ~]$ cd .ssh/
[wangshibo@test-huanqiu .ssh]$ ls
id_rsa id_rsa.pub
[wangshibo@test-huanqiu .ssh]$ cp id_rsa.pub authorized_keys
[wangshibo@localhost .ssh]$ cat id_rsa.pub
ssh-rsa AAAAB3NzaC1yc2EAAAABIwAAAQEAmMF2BG6uDnPYukynYfvWT7jbwYlaqEOEuN2Z3CKvIX0WhiM0mRwsRYXpR2snUXrXhki6CTR3frUzgbdIe+KMN9f9LxsnEeyWWheiGdNj6nm4UgondFA0rW6N5zGXHbDz7Q/clr/jX6K7ChhLd4iH7yKsZFCwo827xIVD0D+oFTQKRaC/eXS5FVFgsEE8FlGOt9hOwBT85dwaNBaSJ2+xfc9CADGYdyVE06FAGbbM+76QAvxllvIr8RJmVamd3dME1fi8lXgn7CLQKZE/4lTfOFNTw3BGtcgD9MwQfE2pwdrLK92tHaaaZ28kYChkAdNrlDnWL6e7ady9IkPQwGaUMw== wangshibo@huanqiu.com
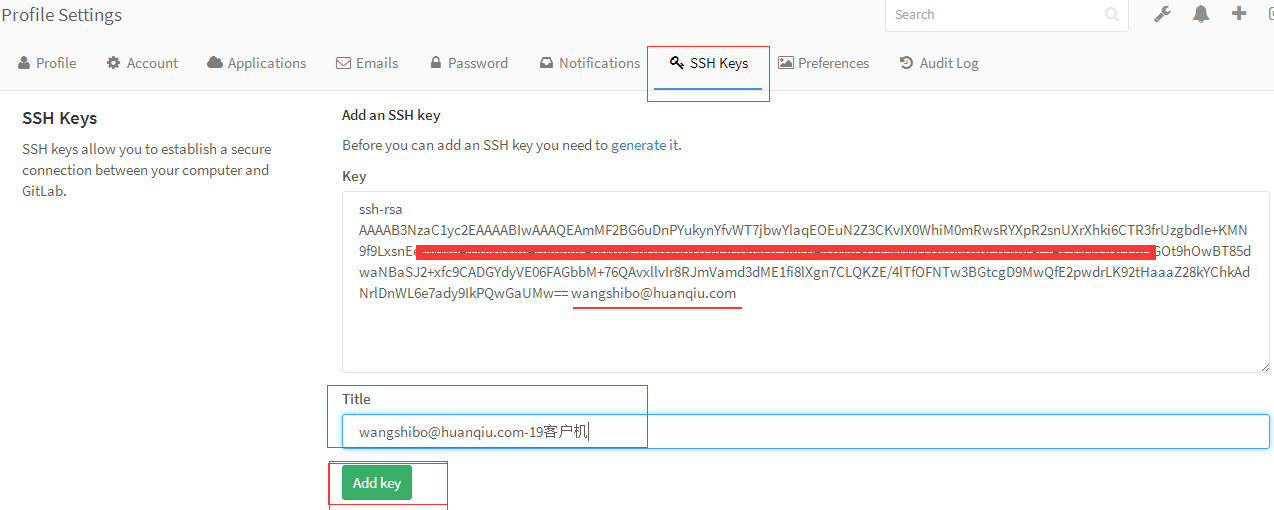
2)将上面产生的公钥内容添加到gitlab上,如下:

可以在下面的“Title”处注明公钥信息,方便管理
查看已添加的Keys
3)在客户机通过ssh连接gitlab,比如下载gitlab的test工程代码,进行操作。操作步骤如下:
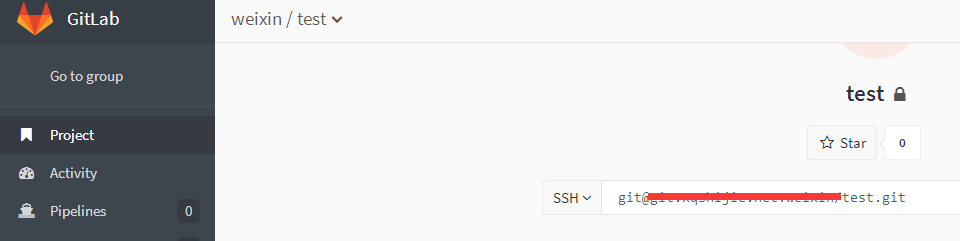
注意下面在git clone代码前进行的”Git global setup“全局设置:
第一行对应的是gitlab的用户名
第二行对应的是这个用户下的Keys的名称(如果创建公私钥时,用-C “邮箱”方式进行秘钥识别,那么这里就用邮箱;如果创建公私钥时没有用-C “邮箱”识别,那么这里对应的就只是单纯的Keys的名称了,在gitlab控制台的SSH-Keys里能查看到)

----------------------------------------------------------------------------------------------------------------------------------------------
解决Gitlab的Gravatar头像无法显示的问题,如下:
解决办法:
修改/opt/gitlab-8.8.4-0/apps/gitlab/htdocs/config/gitlab.yml文件的下面两行
.........
gravatar:
# gravatar urls: possible placeholders: %{hash} %{size} %{email}
#plain_url: "http://..." # default: http://www.gravatar.com/avatar/%{hash}?s=%{size}&d=identicon
plain_url: "http://gravatar.duoshuo.com/avatar/%{hash}?s=%{size}&d=identicon" 【添加这一行】
# ssl_url: "https://..." # default: https://secure.gravatar.com/avatar/%{hash}?s=%{size}&d=identicon
.........
gravatar:
enabled: false 【由true改为false】
重启服务
/opt/gitlab-8.8.4-0/ctlscript.sh restart
再次访问,gravatar图片就显示出来了
<<<<<<<<<<<<<<<<<<<<<<<<<<<<<<<<<<<
*************************************************************************************
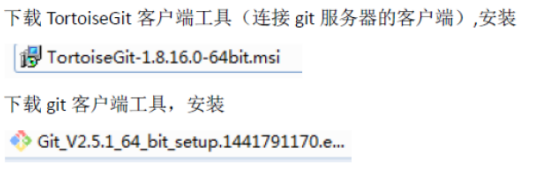
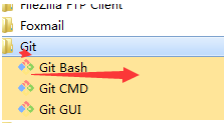
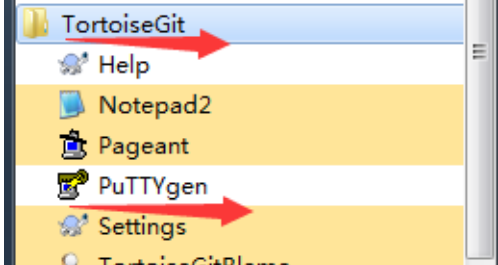
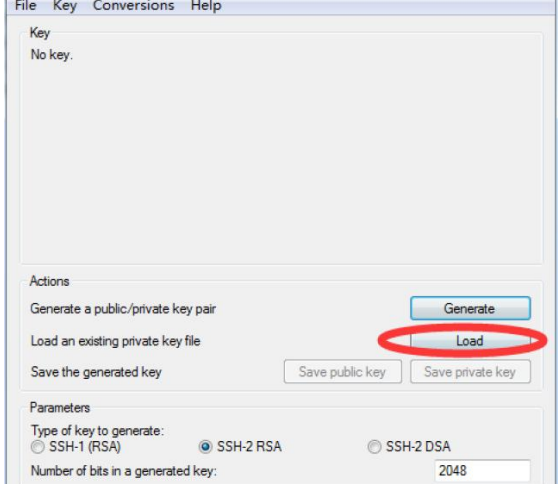
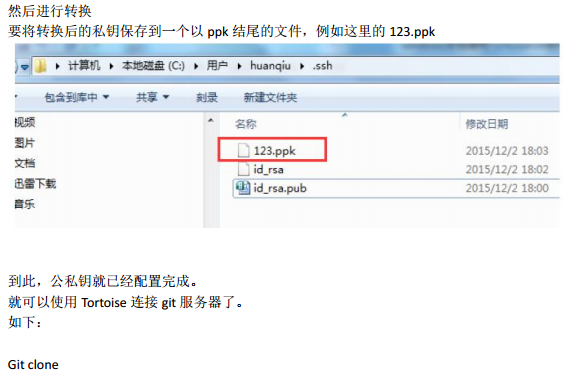
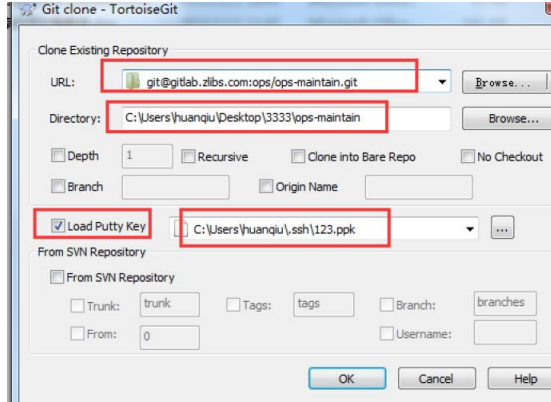
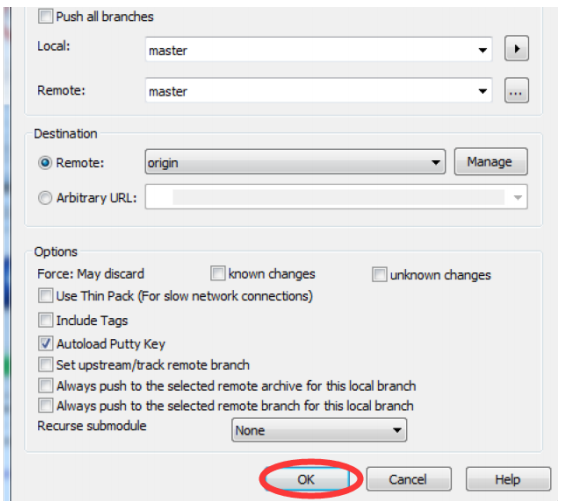
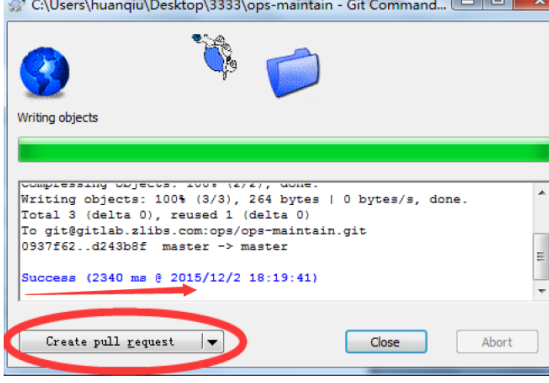
下面记录在windows客户端使用TortoiseGit的ssh方式连接gitlab的记录
下面两个客户端软件的下载地址是:
http://pan.baidu.com/s/1slqxcMp (提取密码:keks)


[原创]CI持续集成系统环境---部署Gitlab环境完整记录的更多相关文章
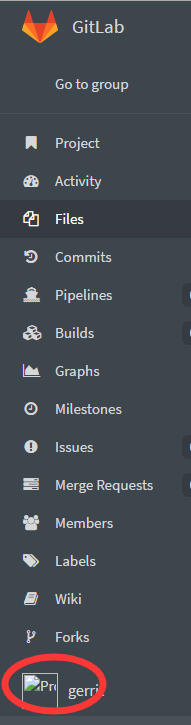
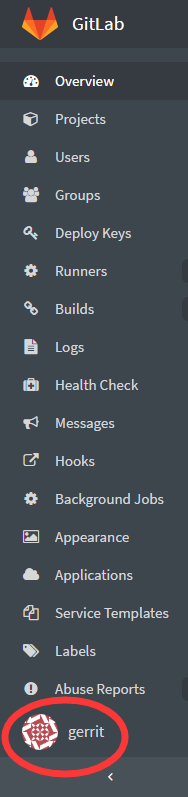
- [原创]CI持续集成系统环境---部署gerrit环境完整记录
开发同事提议在线上部署一套gerrit代码审核环境,不用多说,下面就是自己部署gerrit的操作记录. 提前安装好java环境,mysql环境,nginx环境 测试系统:centos6.5 下载下面三 ...
- [原创]CI持续集成系统环境---部署Jenkins完整记录
Jenkins通过脚本任务触发,实现代码的自动化分发,是CI持续化集成环境中不可缺少的一个环节. 下面对Jenkins环境的部署做一记录. ------------------------------ ...
- [原创]CI持续集成系统环境--Gitlab+Gerrit+Jenkins完整对接
近年来,由于开源项目.社区的活跃热度大增,进而引来持续集成(CI)系统的诞生,也越发的听到更多的人在说协同开发.敏捷开发.迭代开发.持续集成和单元测试这些拉风的术语.然而,大都是仅仅听到在说而已,国内 ...
- [原创]CI持续集成系统环境--Gitlab+Gerrit+Jenkins完整对接https://www.cnblogs.com/kevingrace/p/5651447.html
近年来,由于开源项目.社区的活跃热度大增,进而引来持续集成(CI)系统的诞生,也越发的听到更多的人在说协同开发.敏捷开发.迭代开发.持续集成和单元测试这些拉风的术语.然而,大都是仅仅听到在说而已, ...
- CI持续集成系统环境--Gitlab+Gerrit+Jenkins完整对接
原文地址https://www.cnblogs.com/kevingrace/p/5651447.html 近年来,由于开源项目.社区的活跃热度大增,进而引来持续集成(CI)系统的诞生,也越发的听到更 ...
- 部署gerrit环境完整记录【转】
开发同事提议在线上部署一套gerrit代码审核环境,废话不多说,部署gerrit的操作记录如下:提前安装好java环境,mysql环境,nginx环境测试系统:centos6.5下载下面三个包,放到/ ...
- CI持续集成 -- git 与 gitlab
版本控制系统概述 git Git基本概述 Git是一个免费的开源分布式版本控制系统,旨在快速高效地处理从小型到大型项目的所有内容. Git安装配置 #安装Git yum install -y git ...
- 【补充】Gitlab 部署 CI 持续集成
上一篇:<劈荆斩棘:Gitlab 部署 CI 持续集成> 上一篇所配置的.gitlab-ci.yml: stages: - build - test before_script: - ec ...
- GitLab CI持续集成配置方案
目录 1. 持续集成介绍 1.1 概念 1.2 持续集成的好处 2. GitLab持续集成(CI) 2.1 简介 2.2 GitLab简单原理图 2.3 GitLab持续集成所需环境 2.4 需要了解 ...
随机推荐
- 关于HTML的编码问题
平时我在写html文件时,很容易忘掉这个文件的编码类型,<meta charset=”utf-8”> 的语句,因为编辑器默认设置了一个编码,所以在我没有写编码格式设置语句的情况下,效果依然 ...
- Android项目实战(十四):TextView显示html样式的文字
项目需求: TextView显示一段文字,格式为:(消息个数,不确定)条消息 这段文字中名字和数字的长度是不确定的,还要求名字和数字各自有各自的颜色. 一开始我想的是用(转) SpannableStr ...
- Python基础(8)--文件
文件是我们储存信息的地方,我们经常要对文件进行读.写.删除等的操作,在Python中,我们可用Python提供的函数和方法方便地操作文件.文件可以通过调用open或file来打开,open通常比fil ...
- 基础学习day08---多态、简单工厂、Object类equals和toString
一.多态 1.1.多态概念 定义:某一类事物的多种存在形态. 例:动物中猫,狗. 猫这个对象对应的类型是猫类型:猫 x = new 猫(); 同时猫也是动物中的一种,也可以 ...
- iOS开发之网络编程--XCode7 更新以来需要手动设置的内容
XCode7 更新以来,默认是不允许加载一些http网络请求,是因为现在网络大部分使用更安全的https协议头. 所以,iOS网络编程如果出现请求无效,事先考虑是否设置一下了以下操作:
- [AapacheBench工具]web性能压力测试工具的应用与实践
背景:网站性能压力测试是性能调优过程中必不可少的一环.服务器负载太大而影响程序效率是很常见的事情,一个网站到底能够承受多大的用户访问量经常是我们最关心的问题.因此,只有让服务器处在高压情况下才能真正体 ...
- INFORMATICA 的调优之一 源数据的优化
5W1H法来实现源数据的优化 做数据仓库项目的朋友都能感到数据质量和数据抽取展现的性能是整个数据仓库项目的重点.下面谈谈我在DW项目中处理源数据质量问题的5W1H方法. 5W : WHO ,WHAT, ...
- JavaScript Patterns 2.8 Number Conversions with parseInt()
Strings that start with 0 are treated as octal numbers (base 8) in ECMAScript 3; however, this has c ...
- ASP.NET操作Cookie
1.生成Cookie public static void SetDataByCookie(string mainKey, string subKey, string value, string do ...
- cxf开发Restful Web Services
一.restful web services rest全称是Representation State Transfer(表述性状态转移).它是一种软件架构风格,只是提供了一组设计原则和约束条件.在re ...