tensorflow GPU版本配置加速环境
import tensorflow as tf
tf.test.is_gpu_available()
- 背景
环境:Anaconda 、tensorflow_gpu==1.4.0 (这里就用1.4.0版本做演示了,虽然现在的已经是2.0版本了)
如下图是各个版本的cuda版本信息,在安装时需要看清楚,并不是所有的gpu版本都是cuda_8.0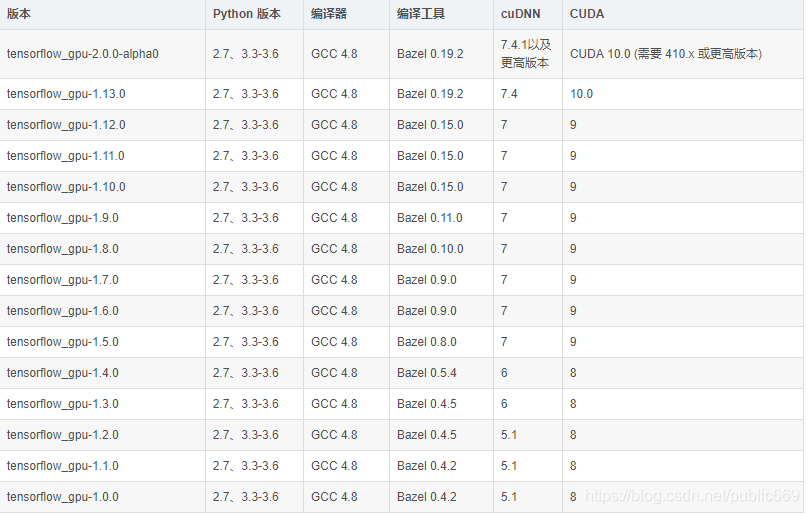
材料:cuda_8.0版本链接:https://pan.baidu.com/s/1lzKSWRLl5lYMrYcLjGbVXw
提取码:2p9i - 安装cuda
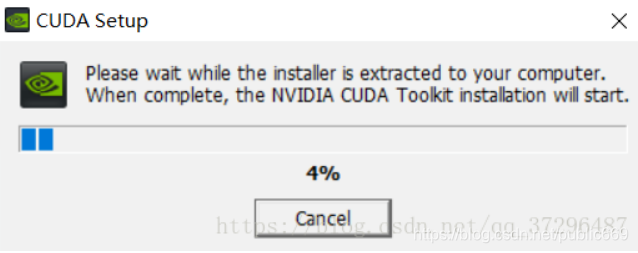
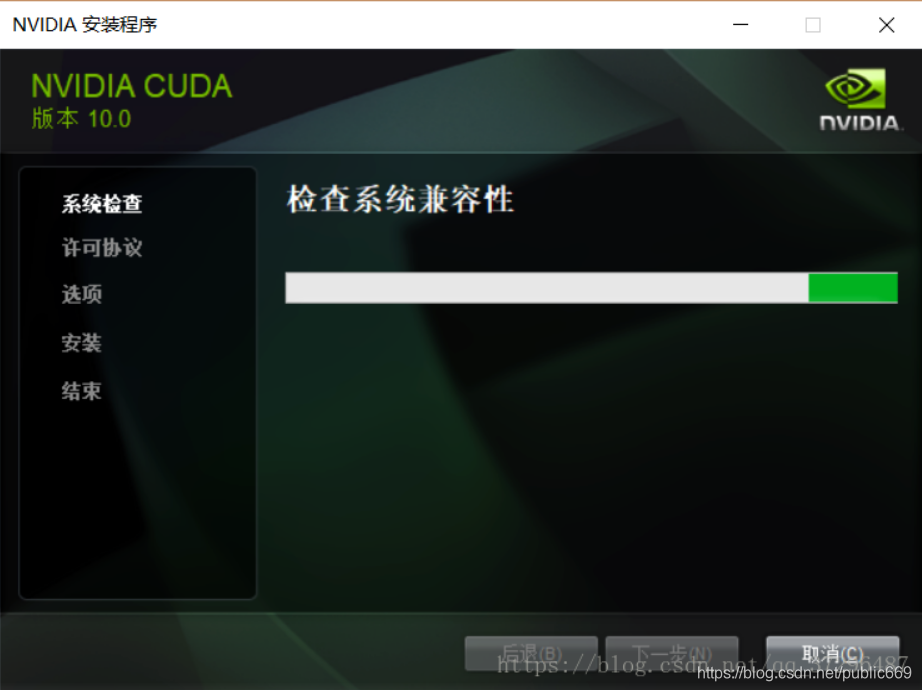
下载之后点击执行cuda
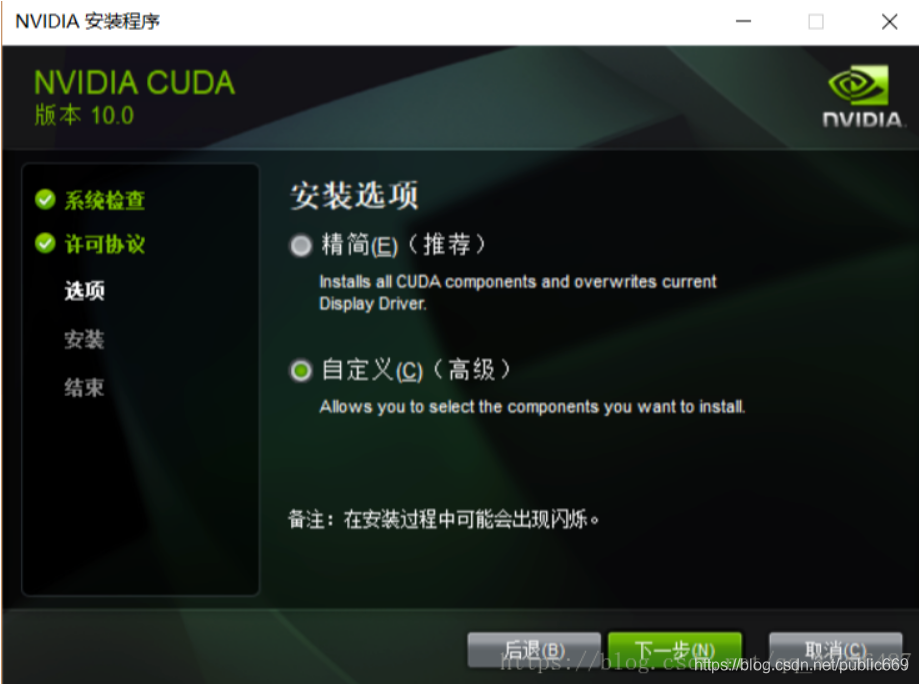
这里可以选择安装的模式:精简也可以选择自定义
安装路径可以自定义,也可以默认。选择自定义得记住安装的路径(后面配置环境变量)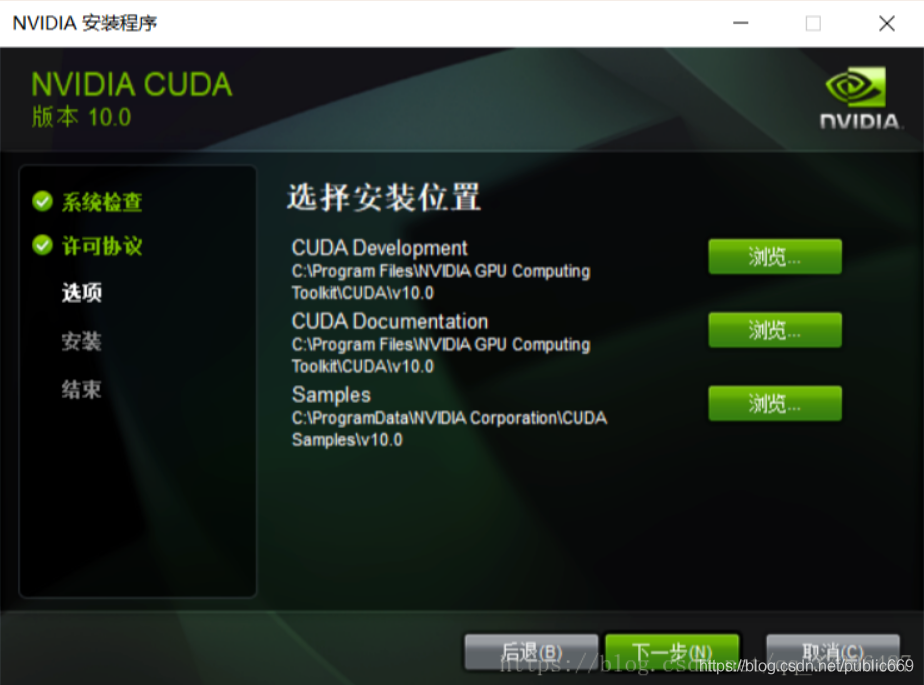
后面的就是一键Next,完成即可 - 配置系统环境变量
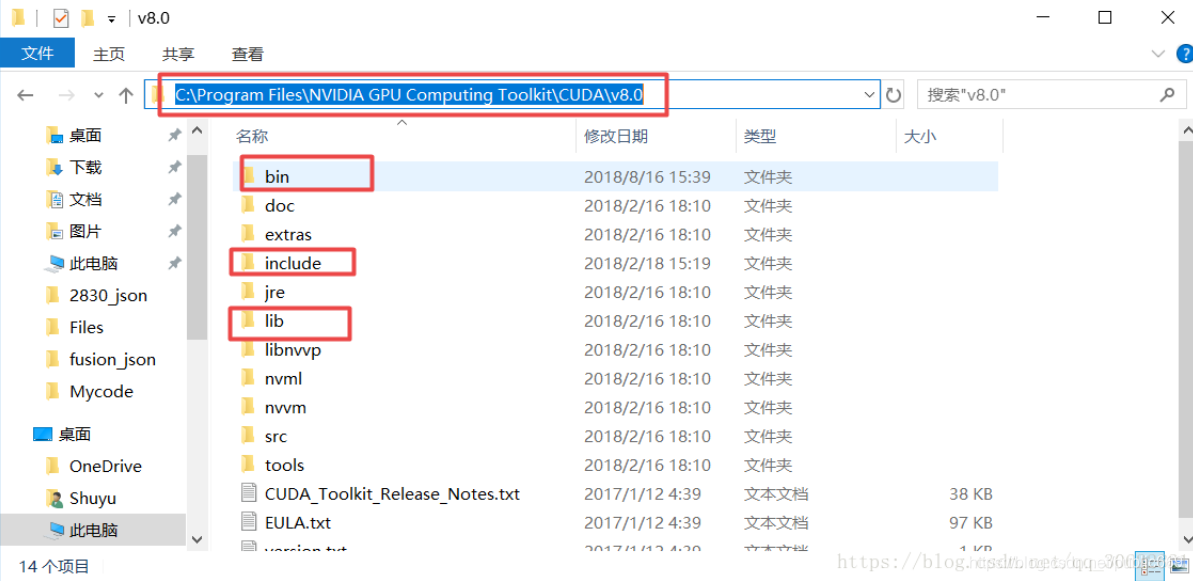
在系统环境变量中配置环境变量,在cuda安装好时会自动的配置两个,另外两个需要自己配置(ps:如果安装路径是自定义的话,需要根据情况自行变动)
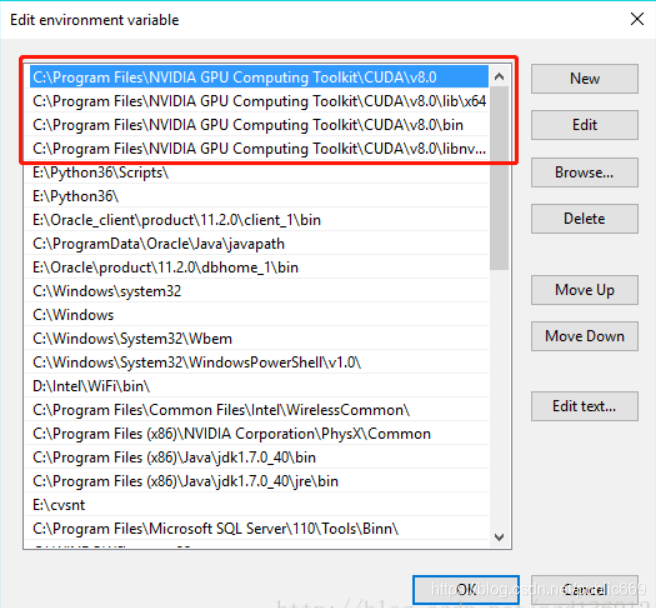
C:\Program Files\NVIDIA GPU Computing Toolkit\CUDA\v8.0

C:\Program Files\NVIDIA GPU Computing Toolkit\CUDA\v8.0\bin

C:\Program Files\NVIDIA GPU Computing Toolkit\CUDA\v8.0\lib\x64

C:\Program Files\NVIDIA GPU Computing Toolkit\CUDA\v8.0\libnvvp
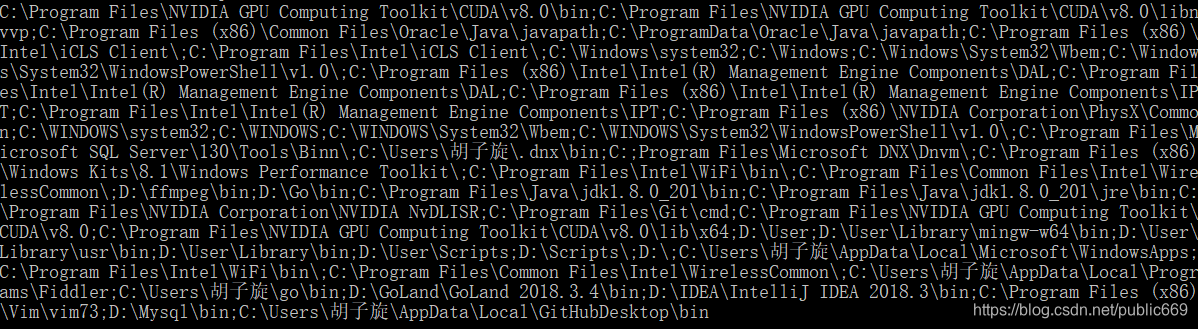
在完成了上述的配置后,可以验证一下是否配置成功:
在cmd中输入如下的代码:
echo %path%
执行结果如下:
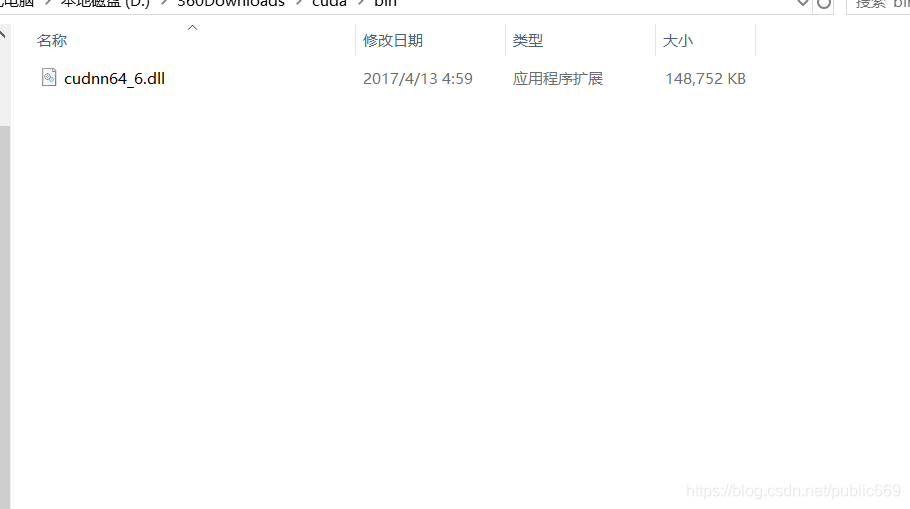
4.配置cudnn:
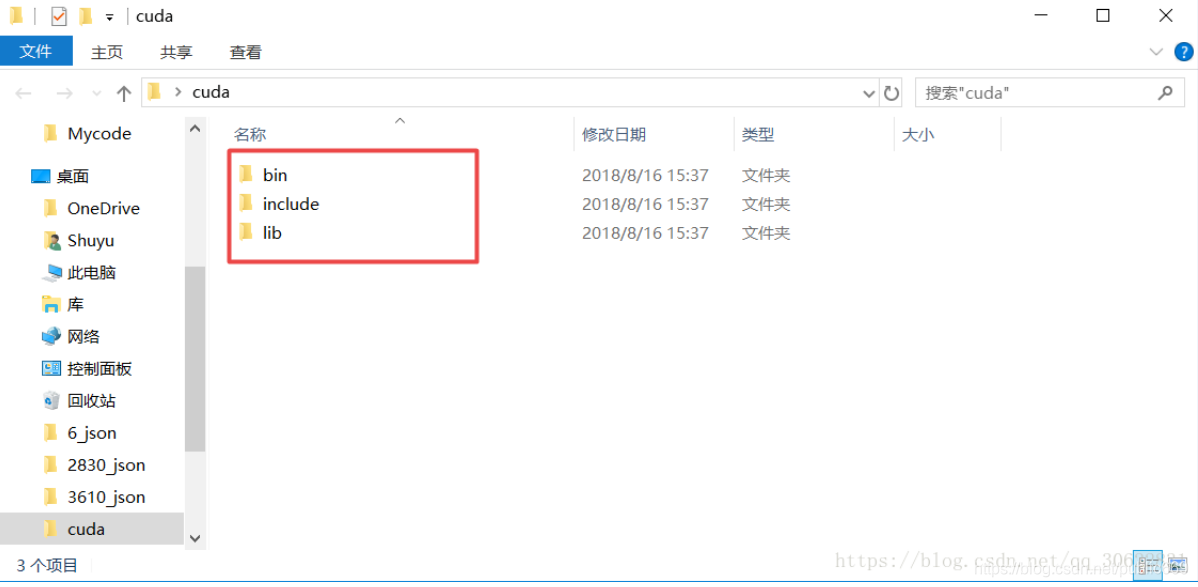
在分享的安装包中有一个压缩包,将其解压会出现三个文件夹:
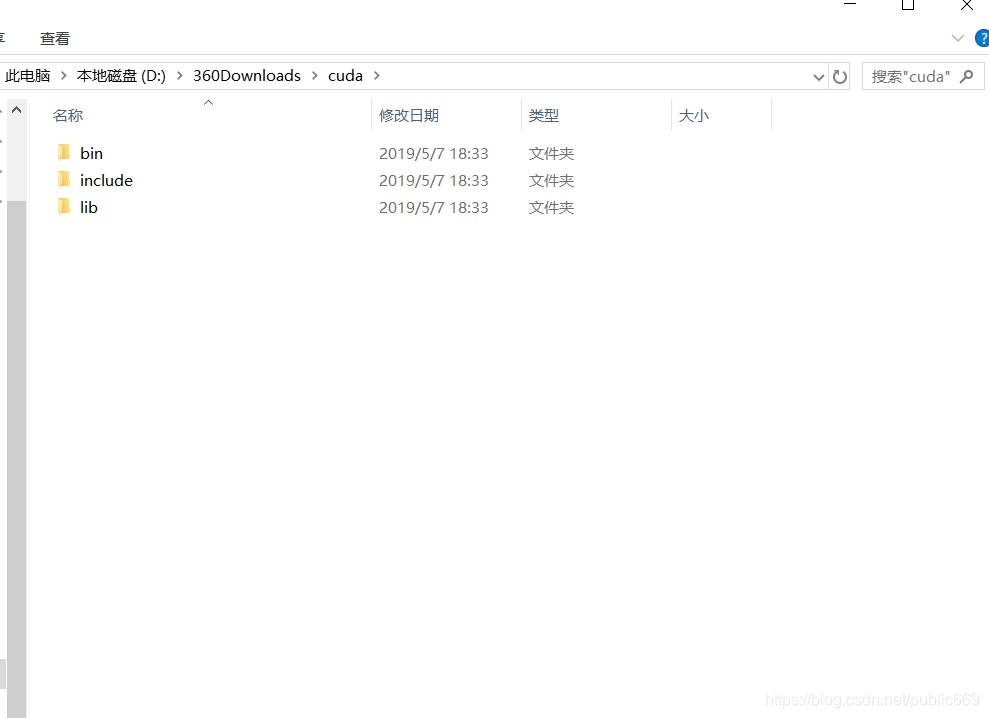
将这三个文件夹里面的文件对应的复制到cuda文件下:
(注意这里是将文件下的文件复制到cuda对应的文件夹里面,而不是将文件夹直接替代cuda下的文件夹(这步特别重要))
4.验证:
完成上述的所有步骤后,基本上就完成了大部分了!!!
验证是否成功:
打开pycharm,在里面输入如下测试代码:(前提是已经安装了相应版本tensorflow_gpu,这里给出1.4.0安装方法:在cmd中输入pip install -i https://pypi.tuna.tsinghua.edu.cn/simple tensorflow-gpu==1.4.0)
import ctypes

import imp

import sys

def main():

    try:

        import tensorflow as tf

        print("TensorFlow successfully installed.")

        if tf.test.is_built_with_cuda():

            print("The installed version of TensorFlow includes GPU support.")

        else:

            print("The installed version of TensorFlow does not include GPU support.")

        sys.exit(0)

    except ImportError:

        print("ERROR: Failed to import the TensorFlow module.")

    candidate_explanation = False

    python_version = sys.version_info.major, sys.version_info.minor

    print("\n- Python version is %d.%d." % python_version)

    if not (python_version == (3, 5) or python_version == (3, 6)):

        candidate_explanation = True

        print("- The official distribution of TensorFlow for Windows requires "

              "Python version 3.5 or 3.6.")

    try:

        _, pathname, _ = imp.find_module("tensorflow")

        print("\n- TensorFlow is installed at: %s" % pathname)

    except ImportError:

        candidate_explanation = False

        print("""

- No module named TensorFlow is installed in this Python environment. You may

  install it using the command `pip install tensorflow`.""")

    try:

        msvcp140 = ctypes.WinDLL("msvcp140.dll")

    except OSError:

        candidate_explanation = True

        print("""

- Could not load 'msvcp140.dll'. TensorFlow requires that this DLL be

  installed in a directory that is named in your %PATH% environment

  variable. You may install this DLL by downloading Microsoft Visual

  C++ 2015 Redistributable Update 3 from this URL:

  https://www.microsoft.com/en-us/download/details.aspx?id=53587""")

    try:

        cudart64_80 = ctypes.WinDLL("cudart64_80.dll")

    except OSError:

        candidate_explanation = True

        print("""

- Could not load 'cudart64_80.dll'. The GPU version of TensorFlow

  requires that this DLL be installed in a directory that is named in

  your %PATH% environment variable. Download and install CUDA 8.0 from

  this URL: https://developer.nvidia.com/cuda-toolkit""")

    try:

        nvcuda = ctypes.WinDLL("nvcuda.dll")

    except OSError:

        candidate_explanation = True

        print("""

- Could not load 'nvcuda.dll'. The GPU version of TensorFlow requires that

  this DLL be installed in a directory that is named in your %PATH%

  environment variable. Typically it is installed in 'C:\Windows\System32'.

  If it is not present, ensure that you have a CUDA-capable GPU with the

  correct driver installed.""")

    cudnn5_found = False

    try:

        cudnn5 = ctypes.WinDLL("cudnn64_5.dll")

        cudnn5_found = True

    except OSError:

        candidate_explanation = True

        print("""

- Could not load 'cudnn64_5.dll'. The GPU version of TensorFlow

  requires that this DLL be installed in a directory that is named in

  your %PATH% environment variable. Note that installing cuDNN is a

  separate step from installing CUDA, and it is often found in a

  different directory from the CUDA DLLs. You may install the

  necessary DLL by downloading cuDNN 5.1 from this URL:

  https://developer.nvidia.com/cudnn""")

    cudnn6_found = False

    try:

        cudnn = ctypes.WinDLL("cudnn64_6.dll")

        cudnn6_found = True

    except OSError:

        candidate_explanation = True

    if not cudnn5_found or not cudnn6_found:

        print()

        if not cudnn5_found and not cudnn6_found:

            print("- Could not find cuDNN.")

        elif not cudnn5_found:

            print("- Could not find cuDNN 5.1.")

        else:

            print("- Could not find cuDNN 6.")

            print("""

  The GPU version of TensorFlow requires that the correct cuDNN DLL be installed

  in a directory that is named in your %PATH% environment variable. Note that

  installing cuDNN is a separate step from installing CUDA, and it is often

  found in a different directory from the CUDA DLLs. The correct version of

  cuDNN depends on your version of TensorFlow:

  * TensorFlow 1.2.1 or earlier requires cuDNN 5.1. ('cudnn64_5.dll')

  * TensorFlow 1.3 or later requires cuDNN 6. ('cudnn64_6.dll')

  You may install the necessary DLL by downloading cuDNN from this URL:

  https://developer.nvidia.com/cudnn""")

    if not candidate_explanation:

        print("""

- All required DLLs appear to be present. Please open an issue on the

  TensorFlow GitHub page: https://github.com/tensorflow/tensorflow/issues""")

    sys.exit(-1)

if __name__ == "__main__":

    main()
如果出现以下结果则表明已经配置成功了:
TensorFlow successfully installed.

The installed version of TensorFlow includes GPU support.
若是出现以下问题则表明环境配置出错了:
Could not load ‘cudart64_80.dll’. The GPU version of TensorFlow

requires that this DLL be installed in a directory that is named in

your %PATH% environment variable. Download and install CUDA 8.0 from

this URL: https://developer.nvidia.com/cuda-toolkit
5.模型gpu加速训练:
# 测试tensorflow_gpu版本加速效果代码

from datetime import datetime

import math

import time

import tensorflow as tf

import os

#os.environ["CUDA_DEVICE_ORDER"] = "PCI_BUS_ID"

#os.environ["CUDA_VISIBLE_DEVICES"] = "-1"

batch_size = 32

num_batches = 100

# 该函数用来显示网络每一层的结构,展示tensor的尺寸

def print_activations(t):

print(t.op.name, ' ', t.get_shape().as_list())

# with tf.name_scope('conv1') as scope # 可以将scope之内的variable自动命名为conv1/xxx,便于区分不同组件

def inference(images):

parameters = []

# 第一个卷积层

with tf.name_scope('conv1') as scope:

# 卷积核、截断正态分布

kernel = tf.Variable(tf.truncated_normal([11, 11, 3, 64],

dtype=tf.float32, stddev=1e-1), name='weights')

conv = tf.nn.conv2d(images, kernel, [1, 4, 4, 1], padding='SAME')

# 可训练

biases = tf.Variable(tf.constant(0.0, shape=[64], dtype=tf.float32), trainable=True, name='biases')

bias = tf.nn.bias_add(conv, biases)

conv1 = tf.nn.relu(bias, name=scope)

print_activations(conv1)

parameters += [kernel, biases]

# 再加LRN和最大池化层,除了AlexNet,基本放弃了LRN,说是效果不明显,还会减速?

lrn1 = tf.nn.lrn(conv1, 4, bias=1.0, alpha=0.001 / 9, beta=0.75, name='lrn1')

pool1 = tf.nn.max_pool(lrn1, ksize=[1, 3, 3, 1], strides=[1, 2, 2, 1], padding='VALID', name='pool1')

print_activations(pool1)

# 第二个卷积层,只有部分参数不同

with tf.name_scope('conv2') as scope:

kernel = tf.Variable(tf.truncated_normal([5, 5, 64, 192], dtype=tf.float32, stddev=1e-1), name='weights')

conv = tf.nn.conv2d(pool1, kernel, [1, 1, 1, 1], padding='SAME')

biases = tf.Variable(tf.constant(0.0, shape=[192], dtype=tf.float32), trainable=True, name='biases')

bias = tf.nn.bias_add(conv, biases)

conv2 = tf.nn.relu(bias, name=scope)

parameters += [kernel, biases]

print_activations(conv2)

# 稍微处理一下

lrn2 = tf.nn.lrn(conv2, 4, bias=1.0, alpha=0.001 / 9, beta=0.75, name='lrn2')

pool2 = tf.nn.max_pool(lrn2, ksize=[1, 3, 3, 1], strides=[1, 2, 2, 1], padding='VALID', name='pool2')

print_activations(pool2)

# 第三个

with tf.name_scope('conv3') as scope:

kernel = tf.Variable(tf.truncated_normal([3, 3, 192, 384], dtype=tf.float32, stddev=1e-1), name='weights')

conv = tf.nn.conv2d(pool2, kernel, [1, 1, 1, 1], padding='SAME')

biases = tf.Variable(tf.constant(0.0, shape=[384], dtype=tf.float32), trainable=True, name='biases')

bias = tf.nn.bias_add(conv, biases)

conv3 = tf.nn.relu(bias, name=scope)

parameters += [kernel, biases]

print_activations(conv3)

# 第四层

with tf.name_scope('conv4') as scope:

kernel = tf.Variable(tf.truncated_normal([3, 3, 384, 256], dtype=tf.float32, stddev=1e-1), name='weights')

conv = tf.nn.conv2d(conv3, kernel, [1, 1, 1, 1], padding='SAME')

biases = tf.Variable(tf.constant(0.0, shape=[256], dtype=tf.float32), trainable=True, name='biases')

bias = tf.nn.bias_add(conv, biases)

conv4 = tf.nn.relu(bias, name=scope)

parameters += [kernel, biases]

print_activations(conv4)

# 第五个

with tf.name_scope('conv5') as scope:

kernel = tf.Variable(tf.truncated_normal([3, 3, 256, 256], dtype=tf.float32, stddev=1e-1), name='weights')

conv = tf.nn.conv2d(conv4, kernel, [1, 1, 1, 1], padding='SAME')

biases = tf.Variable(tf.constant(0.0, shape=[256], dtype=tf.float32), trainable=True, name='biases')

bias = tf.nn.bias_add(conv, biases)

conv5 = tf.nn.relu(bias, name=scope)

parameters += [kernel, biases]

print_activations(conv5)

# 之后还有最大化池层

pool5 = tf.nn.max_pool(conv5, ksize=[1, 3, 3, 1], strides=[1, 2, 2, 1], padding='VALID', name='pool5')

print_activations(pool5)

return pool5, parameters

# 全连接层

# 评估每轮计算时间,第一个输入是tf得Session,第二个是运算算子,第三个是测试名称

# 头几轮有显存加载,cache命中等问题,可以考虑只计算第10次以后的

def time_tensorflow_run(session, target, info_string):

num_steps_burn_in = 10

total_duration = 0.0

total_duration_squared = 0.0

# 进行num_batches+num_steps_burn_in次迭代

# 用time.time()记录时间,热身过后,开始显示时间

for i in range(num_batches + num_steps_burn_in):

start_time = time.time()

_ = session.run(target)

duration = time.time() - start_time

if i >= num_steps_burn_in:

if not i % 10:

print('%s:step %d, duration = %.3f' % (datetime.now(), i - num_steps_burn_in, duration))

total_duration += duration

total_duration_squared += duration * duration

# 计算每轮迭代品均耗时和标准差sd

mn = total_duration / num_batches

vr = total_duration_squared / num_batches - mn * mn

sd = math.sqrt(vr)

print('%s: %s across %d steps, %.3f +/- %.3f sec / batch' % (datetime.now(), info_string, num_batches, mn, sd))

def run_benchmark():

# 首先定义默认的Graph

with tf.Graph().as_default():

# 并不实用ImageNet训练,知识随机计算耗时

image_size = 224

images = tf.Variable(tf.random_normal([batch_size, image_size, image_size, 3], dtype=tf.float32, stddev=1e-1))

pool5, parameters = inference(images)

init = tf.global_variables_initializer()

sess = tf.Session(config=tf.ConfigProto(allow_soft_placement=True, log_device_placement=False))

sess.run(init)

# 下面直接用pool5传入训练(没有全连接层)

# 只是做做样子,并不是真的计算

time_tensorflow_run(sess, pool5, "Forward")

# 瞎弄的,伪装

objective = tf.nn.l2_loss(pool5)

grad = tf.gradients(objective, parameters)

time_tensorflow_run(sess, grad, "Forward-backward")

run_benchmark()
好啦,到这里就大功告成啦~~~~
可以体会gpu给你带来训练时的高速了,个人觉得还是得有一块好的显卡,这样加速效果会更好,速度更快。。。。
6.结束:
有什么问题和建议欢迎给我发邮件:1017190168@qq.com
或者直接联系我:1017190168
tensorflow GPU版本配置加速环境的更多相关文章
- 【转】Ubuntu 16.04安装配置TensorFlow GPU版本
之前摸爬滚打总是各种坑,今天参考这篇文章终于解决了,甚是鸡冻\(≧▽≦)/,电脑不知道怎么的,安装不了16.04,就安装15.10再升级到16.04 requirements: Ubuntu 16.0 ...
- Eclipse(非J2EE版本)配置Extjs环境以及安装部署Tomcat
Eclipse(非J2EE版本)配置Extjs环境(Spket) 1. 安装spket插件,帮助->安装新软件->http://www.agpad.com/update. 2. 设置Spk ...
- 通过Anaconda在Ubuntu16.04上安装 TensorFlow(GPU版本)
一. 安装环境 Ubuntu16.04.3 LST GPU: GeForce GTX1070 Python: 3.5 CUDA Toolkit 8.0 GA1 (Sept 2016) cuDNN v6 ...
- Windows7 64bits下安装TensorFlow GPU版本(图文详解)
不多说,直接上干货! Installing TensorFlow on Windows的官网 https://www.tensorflow.org/install/install_windows 首先 ...
- win10系统下安装TensorFlow GPU版本
首先要说,官网上的指南是最好的指南. https://www.tensorflow.org/install/install_windows 需要FQ看. 想要安装gpu版本的TensorFlow.我们 ...
- Win10上安装Keras 和 TensorFlow(GPU版本)
一. 安装环境 Windows 10 64bit 家庭版 GPU: GeForce GTX1070 Python: 3.5 CUDA: CUDA Toolkit 8.0 GA1 (Sept 2016 ...
- tensorflow 一些好的blog链接和tensorflow gpu版本安装
pading :SAME,VALID 区别 http://blog.csdn.net/mao_xiao_feng/article/details/53444333 tensorflow实现的各种算法 ...
- windows下caffe GPU版本配置
由于项目需要,所以在自己本子上配置了一下windows下GPU版本的caffe; 硬件: win10 ; gtx1070独显(计算能力6.1): 安装软件: cudnn-8. ...
- 说说Windows7 64bits下安装TensorFlow GPU版本会遇到的一些坑
不多说,直接上干货! 再写博文,回顾在Windows7上安装TensorFlow-GPU的一路坑 Windows7上安装TensorFlow的GPU版本后记 欢迎大家,加入我的微信公众号:大数据躺过的 ...
- tensorflow GPU版本安装及配置
经检测速度大幅度上升,不枉费我折腾了这么久,最坑的就是网上教程.书都没有写将cuda的bin加入全局变量,还是根据报错信息推出来的. 1.cuda9.0下载安装 https://developer.n ...
随机推荐
- 简单对比一下 C 与 Go 两种语言
以下内容为本人的学习笔记,如需要转载,请声明原文链接微信公众号「ENG八戒」https://mp.weixin.qq.com/s/U6jIT837x5Yxe6Ev1aMDsA 使用一个简单的计数程序将 ...
- 一篇关于获得拼多多商品详情 API的使用说明
拼多多(Pinduoduo)是中国一家快速发展的电商平台,为了帮助开发者更好地接入拼多多,平台提供了丰富的 API 接口供开发者使用,其中包括获取拼多多商品详情的 API.接下来,我们将介绍如何使用拼 ...
- 如何通过API接口获取微店的商品详情
微店是一款电商平台,对于商家而言,了解商品详情数据是非常重要的.通过API接口获取微店的商品详情,可以让商家更加便捷地管理和分析商品数据.下面就让我们详细了解一下如何通过API获取微店的商品详情. 第 ...
- OpenLDAP 自助修改密码系统
一.创建docker-compose文件 root@xx:~# mkdir self-service-password root@xx:~# cd self-service-password root ...
- 第2章 Git安装
兄弟,恭喜你,刷到这篇超详细安装GIt教程,就让Codeyang带你一步一步的安装Git!~~ Git官网地址: https://git-scm.com/ 查看 GNU 协议,可以直接点击下一步. 选 ...
- 开源通用型流式大数据统计系统XL-LightHouse介绍
概述 XL-LightHouse是针对互联网领域繁杂的流式数据统计需求而开发的一套集成了数据写入.数据运算.数据存储和数据可视化等一系列功能,支持大数据量,支持高并发的[通用型流式大数据统计平台]: ...
- 织梦DEDEBIZ调用全站文章数量
织梦DEDEBIZ如何调用全站文章数量{dede:sql sql="select count(*) as c from biz_archives} 共有文章:[field:c/] 篇 {/d ...
- Solution -「洛谷 P5072」「YunoOI 2015」盼君勿忘
Description Link. 无修支持查询:查询一个区间 \([l,r]\) 中所有子序列分别去重后的和 \(\bmod\ p\) Solution 这是数据结构一百题的第50题(一半了哦)的纪 ...
- modbus转profinet网关连接ABB变频器在博图程序案例
modbus转profinet网关连接ABB变频器在博图程序案例 在博图里PLC无需编程利用兴达易控modbus转Profinet网关将ABB变频器接入到西门子网络中,用到设备为西门子1200PLC, ...
- ORA-01008:并非所有变量都已绑定-解决办法
近期批量处理数据,后台用JAVA编写,连接Oracle数据库,程序运行报ORA-01008问题.解决这个问题时遇见的坑较多,下面复盘现象.问题提出解决办法,希望能帮到遇见同类问题的你. 调试问题: 后 ...