[Xamarin] 動態載入Fragment (转帖)
這篇我們來動態加入,一樣務求好懂簡單
1.一樣先將專案調整成3.0以上版本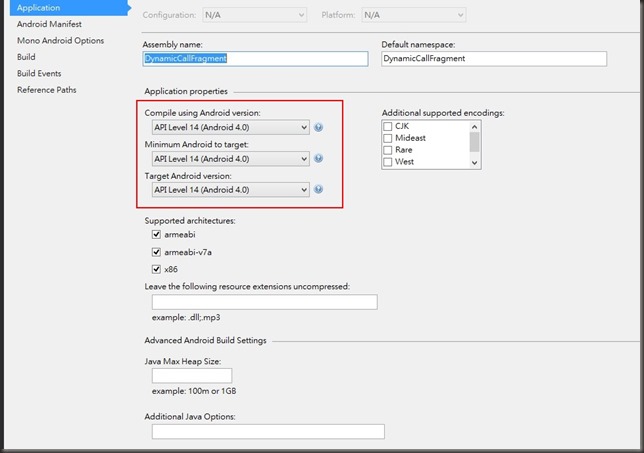
2.首先建立自定Control的Layout \Resources\Layout\MyControlLayout1.axml
主要我要設定此元件有一個按鈕 按下去後,可以改變上方TextView (textView1) 的文字內容,當然這文字內容可能是由主要的Activity給予的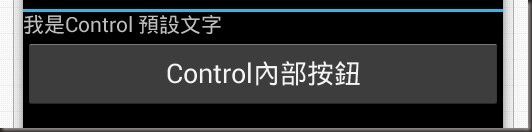
MyControlLayout1.axml Code :
<?xml version="1.0" encoding="utf-8"?>
<LinearLayout xmlns:android="http://schemas.android.com/apk/res/android"
android:layout_width="match_parent"
android:layout_height="match_parent"
android:orientation="vertical">
<TextView
android:id="@+id/textView1"
android:layout_width="wrap_content"
android:layout_height="wrap_content"
android:text="我是Control 預設文字" />
<Button
android:text="Control內部按鈕"
android:layout_width="fill_parent"
android:layout_height="wrap_content"
android:id="@+id/btnChangeText" />
</LinearLayout>
3. 來開一個Fragment 來操控 MyControlLayout1 的Layout \MyControlFragment.cs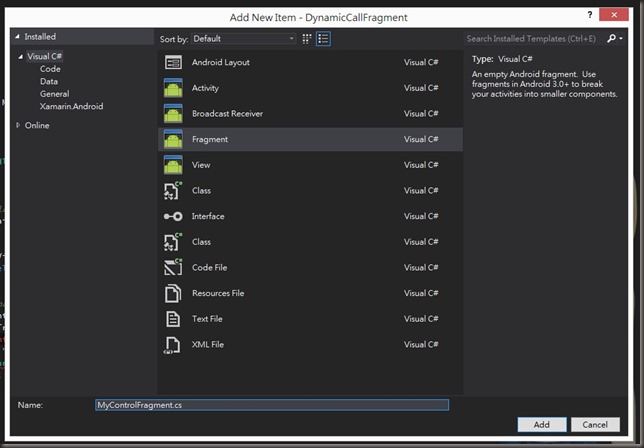
MyControlFragment.cs Code :
using Android.App;
using Android.OS;
using Android.Views;
using Android.Widget;
namespace DynamicCallFragment
{
public class MyControlFragment : Fragment
{
/// <summary>
/// Poroperty DisplayContext
/// 欲呈現的文字
/// </summary>
public string DisplayContext { get; set; }
public override View OnCreateView(LayoutInflater inflater, ViewGroup container, Bundle savedInstanceState)
{
View v = inflater.Inflate(Resource.Layout.MyControlLayout1, container, false);
var btnChangeText = v.FindViewById<Button>(Resource.Id.btnChangeText);
//設定 btnChangeText 點擊後將 textView1 的內容設為 DisplayContext
btnChangeText.Click += delegate
{
var textView1 = v.FindViewById<TextView>(Resource.Id.textView1);
textView1.Text = DisplayContext;
};
return v;
}
}
}
4.主Activity Layout \Resources\Layout\Main.axml
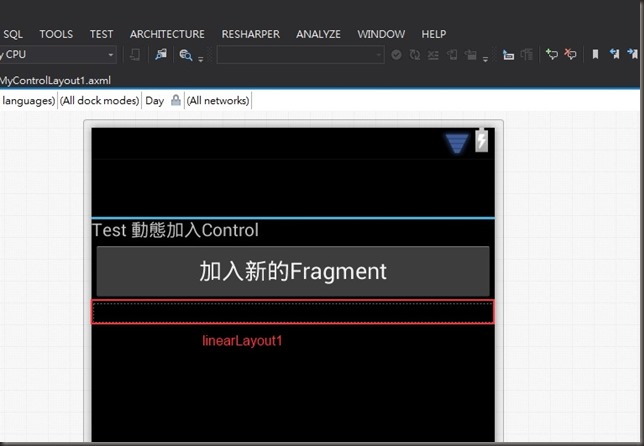
其中我放入一個LinearLayout (linearLayout1)拿來放生出來的Control Main.axml :
<?xml version="1.0" encoding="utf-8"?>
<LinearLayout xmlns:android="http://schemas.android.com/apk/res/android"
xmlns:tools="http://schemas.android.com/tools"
android:layout_width="fill_parent"
android:orientation="vertical"
android:layout_height="fill_parent">
<TextView
android:id="@+id/textView1"
android:layout_width="fill_parent"
android:layout_height="wrap_content"
android:text="Test 動態加入Control" />
<Button
android:text="加入新的Fragment"
android:layout_width="fill_parent"
android:layout_height="wrap_content"
android:id="@+id/btnDynamicAddFragment" />
<LinearLayout
android:orientation="vertical"
android:minWidth="25px"
android:minHeight="25px"
android:layout_width="fill_parent"
android:layout_height="wrap_content"
android:id="@+id/linearLayout1" />
</LinearLayout>
5.接下來就是 MainActivity 來做動態生成的部分拉:
using Android.App;
using Android.Widget;
using Android.OS;
namespace DynamicCallFragment
{
[Activity(Label = "動態加入Control", MainLauncher = true, Icon = "@drawable/icon")]
public class Activity1 : Activity
{
private int count { get; set; }
protected override void OnCreate(Bundle bundle)
{
base.OnCreate(bundle);
// Set our view from the "main" layout resource
SetContentView(Resource.Layout.Main);
// --- 動態呼叫
var btnDynamicAddFragment = FindViewById<Button>(Resource.Id.btnDynamicAddFragment);
btnDynamicAddFragment.Click += delegate
{
var fragmentManager = FragmentManager;
FragmentTransaction fragmentTransaction = fragmentManager.BeginTransaction();
var d_fragment1 = new MyControlFragment();
//加上計數作為辨識
d_fragment1.DisplayContext = "我是動態叫起來的" + count;
fragmentTransaction.Add(Resource.Id.linearLayout1, d_fragment1);
fragmentTransaction.Commit();
count++;
};
}
}
}
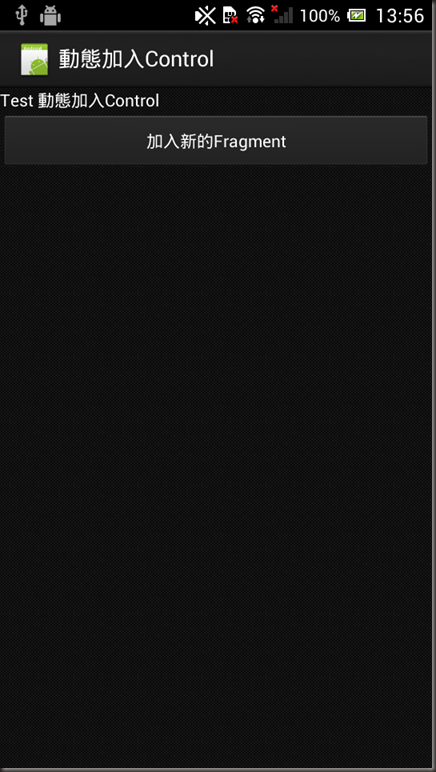
結果: 執行起來
按下加入新的Fragment後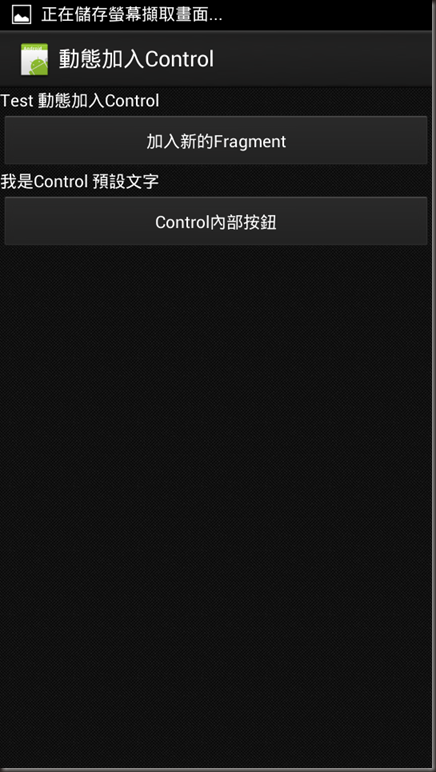
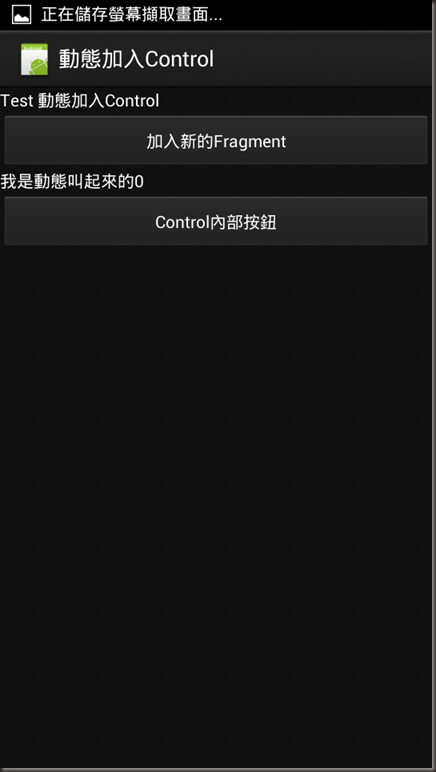
按下Control內部按鈕:
多測試幾個
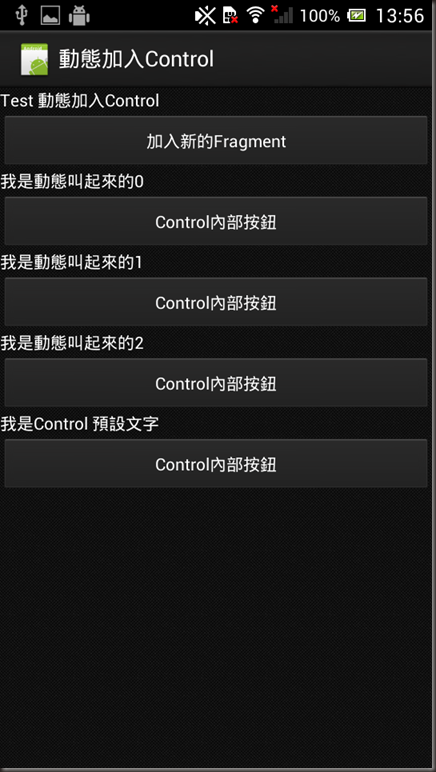
是不是比之前單純Inflate好管理多了呢 :)
Reference: http://docs.xamarin.com/guides/android/platform_features/fragments
http://blog.kenyang.net/2013/03/android-fragment-activity.html
[Xamarin] 動態載入Fragment (转帖)的更多相关文章
- 篇章三:[AngularJS] 使用AngularCSS動態載入CSS
前言 使用AngularAMD動態載入Controller 使用AngularAMD動態載入Service 上列兩篇文章裡,介紹了如何如何使用AngularAMD來動態載入Controller與Ser ...
- 篇章二:[AngularJS] 使用AngularAMD動態載入Service
前言 「使用AngularAMD動態載入Controller」:這篇文章裡介紹如何使用AngularAMD來動態載入Controller.本篇文章以此為基礎,介紹如何使用AngularAMD來動態載入 ...
- 篇章一:[AngularJS] 使用AngularAMD動態載入Controller
前言 使用AngularJS來開發Single Page Application(SPA)的時候,可以選用AngularUI Router來提供頁面內容切換的功能.但是在UI Router的使用情景裡 ...
- [Xamarin] 使用LayoutInflater.Inflate載入預先設計好的Layout並使用 (转帖)
開發的時候,一定會把一些東西設計成元件,並且可以多次使用,今天紀錄一篇比較簡單的方法,可以載入事先做好的Layout 並且給予事件 介紹一下範例: Main.axml: <?xml versio ...
- JavaFX結合 JDBC, Servlet, Swing, Google Map及動態產生比例圖 (3):部署設定及應用 (转帖)
說明:這一篇主要是說明如何將程式部署到Application Server,以及程式如何運作,產生的檔案置於何處,以及如何以瀏覽器呈現(Applet),或是當成桌面應用程式,或是 桌面Applet,這 ...
- JavaFX結合 JDBC, Servlet, Swing, Google Map及動態產生比例圖 (2):JavaFX建立及程式碼說明 (转帖)
說明:就如同標題一樣,前端會用到JavaFX.Swing.Java Web Start.Google Map 的技術, 後端就是JDBC.Servlet的技術,以及我們會簽署認證jar檔案,這樣才可存 ...
- JavaFX結合 JDBC, Servlet, Swing, Google Map及動態產生比例圖 (1):NetBeans 寫 Servlet (转帖)
JavaFX結合 JDBC, Servlet, Swing, Google Map及動態產生比例圖 (1):NetBeans 寫 Servlet 功能:這支程式的主要功能是將 javafx 與 swi ...
- Jquery easy ui datagrid動態加載列問題
1.如下图效果是当选择不同的日期范围时datagrid则会加载出对应的列数
- [Xamarin] 使用Webview 來做APP (转帖)
有時候,企業要求的沒有這麼多,他原本可能官方網站就已經有支援Mobile Web Design 他只需要原封不動的開發一個APP 也或是,他只是要型錄型,或是問卷調查的型的APP,這時候透過類似像if ...
随机推荐
- 记录视频“ Why I build Docker"
Why we built Docker ? IT界中云计算革命正在如火如荼的进行着,docker 正在引领着这个潮流. 那么docker 是怎么引进来的呢? Docker的CTO在下面视频里如此清晰的 ...
- Ubuntu 远程登录服务器--ssh的安装和配置
Ubuntu的安装包居然不自带openssh服务器,所以若要使用ssh远程登录Ubuntu主机,需要首先安装ssh服务器: sudo apt-get install openssh-server 安装 ...
- WNDR3700V4 安装SVN Server
下文所用路由器型号为:WNDR3700V4 参考链接:http://dd-wrt.ca/phpBB2/viewtopic.php?t=86912&highlight=optware http: ...
- 2-3. Using Type Deduction
Type Deduction 发生在编译时期 可以对一般类型,自定义类型进行类型自推导 下面有两个例子: 1. Using auto with a class #include <iostrea ...
- cmd运行的程序的工作目录
如图所示,cmd通过输入自己编写的程序的实际路径,或者将程序放在环境变量中然后在cmd中执行,用start执行,该程序运行时的工作目录都是cmd当前所在目录:在cmd中输入该程序的快捷方式执行该程序, ...
- Getting Started With Hazelcast 读书笔记(第八章-第十章)
第八章到第十章就是一些介绍性的描述,吹的就是Hazelcast能使用在各种地方.. 第八章 -从外面看 1.Hazelcast做了一个memcache的java实现,方便py和php使用. 2.可 ...
- rdlc报表大小设置
参考:http://stackoverflow.com/questions/427730/how-to-limit-rdlc-report-for-one-page-in-a-pdf 主要设置为:报表 ...
- 使用swfobject.js时样式及传参的问题
swfobject.js 最近需要在项目中引入swf文件. 最初的写法: <div id="recorderDiv"> <object id="reco ...
- Flashback for MySQL 5.7
实现原理 flashback的概念最早出现于Oracle数据库,用于快速恢复用户的误操作. flashback for MySQL用于恢复由DML语句引起的误操作,目前不支持DDL语句.例如下面的语句 ...
- Jquery基础知识
//使用$操作得到的对象,都是Jquery对象 如何把Jquery对象转换成dom对象?$abc 方法1:var div = $div.get(0) 方法2:var div = $div[0] 如何把 ...