ZRender实现粒子网格动画实战
注:本博文代码基于ZRender 3.4.3版本号开发,相应版本号库地址:ZRender 库。
效果

实现分析
通过上面显示的效果图,能够看出,这样的效果就是在Canvas中生成多个可移动的点,然后依据点之间的距离来确定是否连线。思路比較简单。
实现问题:
- 保持Canvas 100%显示
- resize时。自己主动调节Canvas尺寸和内部变量
- 生成圆点
- 实现圆点的移动,及边界处理
- 实现原点的直线连接
Canvas设置
html:
<canvas id="main"></canvas>css:
#main{

          position: absolute; //用于100%填充

          left:0;

          top:0;

          background: #000;

          z-index: -1; //方便做背景层使用

      }
ZRender部分
这里主要用到的形状就是Circle和Line。先引入这两个组件:
['zrender',

    'zrender/graphic/shape/Circle',

    'zrender/graphic/shape/Line'],

function(zrender, Circle, Line){}
设置全局及配置项用到的变量
var winH = window.innerHeight; //同步页面宽、高

var winW = window.innerWidth; //同步页面宽、高

var opts = { //可配置參数

    background: '#000', //Canvas背景色

    paricalRadius: 2, //粒子半径

    paricalColor: 'rgb(0, 255, 0)', //粒子颜色

    lineColor: 'rgb(0, 255, 0)', //连线颜色

    joinLineDis: 300, //粒子间连线的要求距离

    particalAmount: 30, //生成的粒子数量

    speed: 1, //粒子速度

};

var tid; //setTimeout id,防抖处理

var particals = []; //用于存储partical对象
初始化ZRender
var zr= zrender.init(main, {width: winW, height: winH});

zr.dom.style.backgroundColor = opts.background; //设置背景色
窗体 resize 处理
window.addEventListener('resize', function(){

    clearTimeout(tid);

    var tid = setTimeout(function(){ //防抖处理

        winW = zr.dom.width = window.innerWidth;

        winH = zr.dom.height = window.innerHeight;

        zr.refresh();

    }, 300); //这里设置了300ms的防抖间隔

}, false);
效果:
创建粒子类 Partical
总结一下这个类,须要下面属性:
- 坐标位置 x, y
- 粒子速度
- 粒子移动角度
- 粒子颜色
- 粒子半径
- 粒子的角度方向变量
- 粒子的ZRender形状实例
方法:
- 更新位置坐标
- 划线
这边直接用ES6的语法来创建类:
class Partical {}构造器:
constructor(){

    this.lines = [], //用于存储连线

    //粒子坐标初始化

    this.x = winW * Math.random();

    this.y = winH * Math.random();

    this.speed = opts.speed + Math.random(); //这个random可不加,主要是为了制作不同的速度的

    this.angle = ~~(360 * Math.random());

    this.color = opts.paricalColor;

    this.radius = opts.paricalRadius + Math.random();

    this.vector = {

        x: this.speed * Math.cos(this.angle),

        y: this.speed * Math.sin(this.angle),

    }

    this.element = new Circle({

        shape: {

            cx: this.x,

            cy: this.y,

            r: this.radius,

        },

        style: {

            fill: this.color,

        }

    });

};
更新位置坐标方法:
updatePosition(){

    //边界推断

    if(this.x >= winW || this.x <= 0){

        this.vector.x *= -1;

    }

    if(this.y >= winH || this.y <= 0){

        this.vector.y *= -1;

    }

    if(this.x > winW){

        this.x = winW;

    }

    if(this.x < 0){

        this.x = 0;

    }

    if(this.y > winH){

        this.y = winH;

    }

    if(this.y < 0){

        this.y = 0;

    }

    //更新位置坐标

    this.x += this.vector.x;

    this.y += this.vector.y;

    //更新形状坐标

    this.element.shape.cx = this.x;

    this.element.shape.cy = this.y;

    this.element.dirty();

};
划线方法:
drawLines(){

    //清空lines。用于重绘线

    for(let i = 0; i < this.lines.length; i ++){

        let l = this.lines[i];

        zr.remove(l); //删除形状

        l = null; //并解除绑定

    }

    this.lines = []; //删除后。清空数组

    //遍历各个点之间的距离

    for(let i = 0; i < particals.length; i ++){

        let p = particals[i];

        //勾股定理,获取两点之间的距离

        let distance = Math.sqrt(Math.pow(this.x - p.x, 2) + Math.pow(this.y - p.y, 2));

        if(distance <= opts.joinLineDis && distance > 0){

            let opacity = 1 - distance / opts.joinLineDis; //依据距离大小来设置透明度

            let color = opts.lineColor.match(/\d+/g); //由于这里要用到透明度。所以须要又一次组合rgba。先把各个颜色值取到数组中

            let l = new Line({

                 shape: {

                    x1: this.x,

                    y1: this.y,

                    x2: p.x,

                    y2: p.y,

                },

                style: {

                    stroke: 'rgba(' + color[0] + ',' + color[1] + ',' + color[2] + ',' + opacity + ')', //组建颜色

                    fill: null

                },

            });

            this.lines.push(l); //存入lines

            zr.add(l); //增加ZRender Storage中

        }

    };

}
眼下所有核心部分已完毕,如今来初始化它:
var init = function(){

    for (let i = 0; i < opts.particalAmount; i++) {

        let p = new Partical();

        particals.push(p); // 把粒子实例 存入particals中,方便后面操作

        zr.add(p.element); //增加 ZRender Storage中

    }

};
效果:
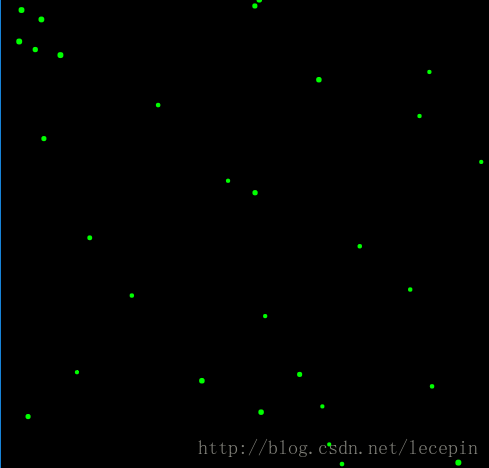
開始动画函数,让粒子动起来,并生成连接线:
function loop(){

    for(let i = 0; i < particals.length; i ++){

        let p = particals[i];

        p.updatePosition(); //更新位置

        p.drawLines(); //绘制线段

    }

    window.requestAnimationFrame(loop);

};
终于效果:
所有代码
<!DOCTYPE html>

<html lang="en">

<head>

    <meta charset="UTF-8">

    <title>Document</title>

    <script src="./esl.js"></script>

    <style>

        #main{

            position: absolute;

            left:0;

            top:0;

            background: #000;

            z-index: -1;

        }

    </style>

</head>

<body>

    <canvas id="main"></canvas>

<script>

require.config({

    packages:[

        {

            name: 'zrender',

            location: './src',

            main: 'zrender',

        },

    ],

});

require(['zrender',

    'zrender/graphic/shape/Circle',

    'zrender/graphic/shape/Line'], function(zrender, Circle, Line){

    /*

     * 作者:王乐平

     * 博客:http://blog.csdn.net/lecepin/

     */

    //-----全局var-----{

    var winH = window.innerHeight;

    var winW = window.innerWidth;

    var opts = {

        background: '#000', //Canvas背景色

        paricalRadius: 2,

        paricalColor: 'rgb(0, 255, 0)',

        lineColor: 'rgb(0, 255, 0)',

        joinLineDis: 300,

        particalAmount: 30,

        speed: 1,

    };

    var tid; //setTimeout id。防抖处理

    var particals = []; //用于存储partical对象

    //-----------------}

    var zr = zrender.init(main, {width: winW, height: winH});

    zr.dom.style.backgroundColor = opts.background;

    window.addEventListener('resize', function(){

        clearTimeout(tid);

        var tid = setTimeout(function(){

            winW = zr.dom.width = window.innerWidth;

            winH = zr.dom.height = window.innerHeight;

            zr.refresh();

        }, 300); //这里设置了300ms的防抖间隔

    }, false);

    class Partical {

        constructor(){

            this.lines = [], //用于存储连线

            //粒子坐标初始化

            this.x = winW * Math.random();

            this.y = winH * Math.random();

            this.speed = opts.speed + Math.random(); //这个random可不加,主要是为了制作不同的速度的

            this.angle = ~~(360 * Math.random());

            this.color = opts.paricalColor;

            this.radius = opts.paricalRadius + Math.random();

            this.vector = {

                x: this.speed * Math.cos(this.angle),

                y: this.speed * Math.sin(this.angle),

            }

            this.element = new Circle({

                shape: {

                    cx: this.x,

                    cy: this.y,

                    r: this.radius,

                },

                style: {

                    fill: this.color,

                }

            });

        };

        updatePosition(){

            if(this.x >= winW || this.x <= 0){

                this.vector.x *= -1;

            }

            if(this.y >= winH || this.y <= 0){

                this.vector.y *= -1;

            }

            if(this.x > winW){

                this.x = winW;

            }

            if(this.x < 0){

                this.x = 0;

            }

            if(this.y > winH){

                this.y = winH;

            }

            if(this.y < 0){

                this.y = 0;

            }

            this.x += this.vector.x;

            this.y += this.vector.y;

            this.element.shape.cx = this.x;

            this.element.shape.cy = this.y;

            this.element.dirty();

        };

        drawLines(){

            //清空lines

            for(let i = 0; i < this.lines.length; i ++){

                let l = this.lines[i];

                zr.remove(l);

                l = null;

            }

            this.lines = [];

            //遍历各个点之间的距离

            for(let i = 0; i < particals.length; i ++){

                let p = particals[i];

                //勾股定理

                let distance = Math.sqrt(Math.pow(this.x - p.x, 2) + Math.pow(this.y - p.y, 2));

                if(distance <= opts.joinLineDis && distance > 0){

                    let opacity = 1 - distance / opts.joinLineDis;

                    let color = opts.lineColor.match(/\d+/g);

                    let l = new Line({

                         shape: {

                            x1: this.x,

                            y1: this.y,

                            x2: p.x,

                            y2: p.y,

                        },

                        style: {

                            stroke: 'rgba(' + color[0] + ',' + color[1] + ',' + color[2] + ',' + opacity + ')',

                            fill: null

                        },

                    });

                    this.lines.push(l);

                    zr.add(l);

                }

            };

        }

    }

    var init = function(){

        for (let i = 0; i < opts.particalAmount; i++) {

            let p = new Partical();

            particals.push(p);

            zr.add(p.element);

        }

    };

    function loop(){

        for(let i = 0; i < particals.length; i ++){

            let p = particals[i];

            p.updatePosition();

            p.drawLines();

        }

        window.requestAnimationFrame(loop);

    };

    init();

    loop();

});

</script>

</body>

</html>博客名称:王乐平博客
CSDN博客地址:http://blog.csdn.net/lecepin
 本作品採用知识共享署名-非商业性使用-禁止演绎 4.0 国际许可协议进行许可。
ZRender实现粒子网格动画实战的更多相关文章
- 3D Grid Effect – 使用 CSS3 制作网格动画效果
今天我们想与大家分享一个小的动画概念.这个梦幻般的效果是在马库斯·埃克特的原型应用程序里发现的.实现的基本思路是对网格项目进行 3D 旋转,扩展成全屏,并呈现内容.我们试图模仿应用程序的行为,因此 ...
- cocos2d-x 网格动画深入分析
转自:http://www.2cto.com/kf/201212/179828.html 在TestCpp中的EffectsTest示例中展示了一些屏幕特效,它是将屏幕划分为多个格子,并对这些格子进行 ...
- iOS CAEmitterLayer 实现粒子发射动画效果
iOS CAEmitterLayer 实现粒子发射动画效果 效果图 代码已上传 GitHub:https://github.com/Silence-GitHub/CoreAnimationDemo 动 ...
- 基于HTML5/CSS3图片网格动画特效
现在HTML5技术可以让网页上的图片变得非常神奇,各种各样的HTML5图片动画特效让你眼花缭乱.今天要分享的这款HTML5图片网格动画特效就非常炫酷.图片缩略图按网格的布局一行行排列,你只需点击按钮即 ...
- iOS自定义转场动画实战讲解
iOS自定义转场动画实战讲解 转场动画这事,说简单也简单,可以通过presentViewController:animated:completion:和dismissViewControllerA ...
- Android Animation动画实战(二):从屏幕底部弹出PopupWindow
在这篇文章之前,我已经陆陆续续写了几篇博客,介绍了Android Animation是如何使用的,有还不明白的,可以点击查看: 1. Android Animation动画详解(一): 补间动画 2. ...
- Android 属性动画实战
什么是属性动画? 属性动画可以通过直接更改 View 的属性来实现 View 动画.例如: 通过不断的更改 View 的坐标来实现让 View 移动的效果: 通过不断的更改 View 的背景来实现让 ...
- Android Animation动画实战(一): 从布局动画引入ListView滑动时,每一Item项的显示动画
前言: 之前,我已经写了两篇博文,给大家介绍了Android的基础动画是如何实现的,如果还不清楚的,可以点击查看:Android Animation动画详解(一): 补间动画 及 Android An ...
- Frame动画实战
Android动画分为Tween动画和Frame动画,Tween动画主要包括图片的放大缩小.旋转.透明度变化.移动等等操作:Frame动画则简单得多了,就是把一张张的图片连续播放产生动画效果. 本节主 ...
随机推荐
- 实战小项目之RTMP流媒体演示系统
项目简介 windows下使用基于Qt对之前的RtmpApp进行封装与应用,单独功能使用线程执行,主要包括以下几个功能: 视频下载 推送文件 推送摄像头数据或者桌面 基于libvlc的播放器 视频下载 ...
- 单元测试-mock基础
本文较短,只是备份一下mock的几个常用基础例子方便复习 目录 介绍mock的使用例子 maven资源 <dependency> <groupId>org.mockito< ...
- CodeForces Round #515 DIv.3 F. Yet another 2D Walking
http://codeforces.com/contest/1066/problem/F Maksim walks on a Cartesian plane. Initially, he stands ...
- mvc与mvp与mvvm
==MVC,MVP和MVVM都是常见的软件架构设计模式,它通过分离关注点来改进代码的组织方式== MVC.MVP和MVVM的相同点和不同点 不同部分是C(Controller).P(Presenter ...
- Codeforces 1158C Permutation recovery
https://codeforces.com/contest/1158/problem/C 题目 已知 $p_1, p_2, \dots, p_n$ 是 $1$ 到 $n$ 的一个排列. 给出关于这个 ...
- ZOJ 3780 Paint the Grid Again(隐式图拓扑排序)
Paint the Grid Again Time Limit: 2 Seconds Memory Limit: 65536 KB Leo has a grid with N × N cel ...
- HDU 1811 Rank of Tetris(并查集按秩合并+拓扑排序)
Rank of Tetris Time Limit: 1000/1000 MS (Java/Others) Memory Limit: 32768/32768 K (Java/Others) T ...
- [TC_SRM_460]TheCitiesAndRoadsDivOne
[TC_SRM_460]TheCitiesAndRoadsDivOne 试题描述 John and Brus have become very famous people all over the w ...
- 蔬菜(vegetable)
蔬菜(vegetable) 题目描述 题目背景:您使用脚本刷出了上题游戏 998244353 关的最高分 (最优解),心满意足的准备点继续学习,忽然一条弹窗弹了出来:你想明白活着的意义吗?你想真正的. ...
- bzoj2338数矩形(rectangle)
数矩形(rectangle) 计算几何 把所有点两两连线,把这些线按长度排序,再按中点排序 能组成矩形的线一定是连续的 最坏就是所有点围成一个圆,交于圆心 复杂度O(可以过) 要用叉积,不然会被卡精 ...