python 音频处理(1)——重采样、音高提取
采集数据->采样率调整
使用
torchaudio进行重采样(cpu版)首先导入相关包,既然使用torch作为我们的选项,安装torch环境我就不必多说了,如果你不想用torch可以使用后文提到的另一个库
1 import torch

2 import torchaudio

3 from torchaudio.transforms import Resample

4 from time import time#仅计算时间,不影响主体
使用
torchaudio.load导入音频文件设定目标采样率并构造
resample函数调用构造好的
resample函数调用
torchaudio的保存函数
封装一下,总函数【记得先导入】:
1 def resample_by_cpu():
2 file_path = input("please input your file path: ")
3 start_time = time()#不影响,可去掉
4 y, sr = torchaudio.load(file_path) #使用torchaudio.load导入音频文件
5
6 target_sample = 32000 #设定目标采样率
7 resampler = Resample(orig_freq=sr, new_freq=target_sample)#构造resample函数,输入原始采样率和目标采样率
8 resample_misic = resampler(y) #调用resample函数
9
10 torchaudio.save("test.mp3", resample_misic, target_sample)#调用torchaudio的保存即可
11 print(f"cost :{time() - start_time}s")#不影响,可去掉最后结果大概是几秒钟这样子
使用使用
torchaudio进行重采样(gpu版):有了上面cpu的基础,其实调用gpu也就更换一下设备,和放入gpu的操作就好了,因此不过多赘述
def resample_use_cuda():
device = torch.device('cuda' if torch.cuda.is_available() else 'cpu')
start_time = time()
file_path = input("please input your file path:")
y, sr = torchaudio.load(file_path)
y = y.to(device)
target_sample = 32000
resampler = Resample(orig_freq=sr, new_freq=target_sample).to(device)
resample_misic = resampler(y)
torchaudio.save("test.mp3", resample_misic.to('cpu'), target_sample) #这里注意要把结果从gpu中拿出来到cpu,不然会报错。
print(f"cost :{time() - start_time}s")时间方面嘛,单个音频多了放入gpu取出gpu的步骤肯定会稍慢的,但是跑过cuda都知道它的强大,更多是用于后续的操作说是。
使用librosa库进行重采样
具体步骤:
导入两个库文件,
librosa和音频文件读写库soundfileimport librosa
import soundfile as sf
from time import time#仅计算时间,不影响主体导入音频文件
设定目标采样率
重采样
输出
综合封装成函数:
1 def resample_by_lisa():

2     file_path = input("please input your file path:")

3     start_time = time()

4     y, sr = librosa.load(file_path)     #使用librosa导入音频文件

5     target_sample_rate = 32000

6     y_32k = librosa.resample(y=y, orig_sr=sr, target_sr=target_sample_rate)         #使用librosa进行重采样至目标采样率

7     sf.write("test_lisa.mp3", data=y_32k, samplerate=target_sample_rate)        #使用soundfile进行文件写入

8     print(f"cost :{time() - start_time}s")
总结:
优点,简单小巧,
ibrosa有很多能处理音频的功能缺点:无法调用cuda,保存的时候需要依赖
soundfile库。时间:也是几秒左右,和
torchaudiocpu版差不多小声bb:提取32k的效果好像没有torchaudio好【嘛,毕竟librosa历史有点久了,没有专注深度学习的torch好很正常啦】,你们也可以自己测一下
all code:
1 import torch
2 import torchaudio
3 from torchaudio.transforms import Resample
4 import librosa
5 import soundfile as sf
6 from time import time
7
8 def resample_by_cpu():
9 file_path = input("please input your file path: ")
10 start_time = time()
11 y, sr = torchaudio.load(file_path) #使用torchaudio.load导入音频文件
12
13 target_sample = 32000 #设定目标采样率
14 resampler = Resample(orig_freq=sr, new_freq=target_sample)#构造resample函数,输入原始采样率和目标采样率
15 resample_misic = resampler(y) #调用resample函数
16
17 torchaudio.save("test.mp3", resample_misic, target_sample)#调用torchaudio的保存即可
18 print(f"cost :{time() - start_time}s")
19 def resample_use_cuda():
20
21 device = torch.device('cuda' if torch.cuda.is_available() else 'cpu')
22 start_time = time()
23 file_path = input("please input your file path:")
24 y, sr = torchaudio.load(file_path)
25
26 y = y.to(device)
27 target_sample = 32000
28 resampler = Resample(orig_freq=sr, new_freq=target_sample).to(device)
29 resample_misic = resampler(y)
30 torchaudio.save("test.mp3", resample_misic.to('cpu'), target_sample)
31 print(f"cost :{time() - start_time}s")
32
33 def resample_by_lisa():
34 file_path = input("please input your file path:")
35 start_time = time()
36 y, sr = librosa.load(file_path)#使用librosa导入音频文件
37 target_sample_rate = 32000
38 y_32k = librosa.resample(y=y, orig_sr=sr, target_sr=target_sample_rate)#使用librosa进行重采样至目标采样率
39 sf.write("test_lisa.mp3", data=y_32k, samplerate=target_sample_rate)#使用soundfile进行文件写入
40 print(f"cost :{time() - start_time}s")
41
42 if __name__ == '__main__':
43 resample_use_cuda()
44 resample_by_cpu()
45 resample_by_lisa()
2.2 提取pitch基频特征【音高提取】
使用
torchaudio进行基频特征提取其实主要使用的这个函数:
torchaudio.transforms._transforms.PitchShift让我们来看看它官方的
example,仿照着来写就好啦>>> waveform, sample_rate = torchaudio.load("test.wav", normalize=True)
>>> transform = transforms.PitchShift(sample_rate, 4)
>>> waveform_shift = transform(waveform) # (channel, time)步骤:
导入依赖
import torchaudio
import torchaudio.transforms as Tf
import matplotlib.pyplot as plt #画图依赖
导入音频
构造
PitchShift使用这个函数对歌曲进行基频提取
code:
def get_pitch_by_torch():
file_path = input("file path:")
y, sr = torchaudio.load(file_path)
"""specimen:
>>> waveform, sample_rate = torchaudio.load("test.wav", normalize=True)

>>> transform = transforms.PitchShift(sample_rate, 4)

>>> waveform_shift = transform(waveform)  # (channel, time)
"""
pitch_tf = Tf.PitchShift(sample_rate=sr, n_steps=0)
feature = pitch_tf(y)
# 绘制基频特征 这部分可以忽略,只是画图而已,可以直接复制不用理解
plt.figure(figsize=(16, 5))
plt.plot(feature[0].numpy(), label='Pitch')
plt.xlabel('Frame')
plt.ylabel('Frequency (Hz)')
plt.title('Pitch Estimation')
plt.legend()
plt.show()输出图片【总歌曲】效果:
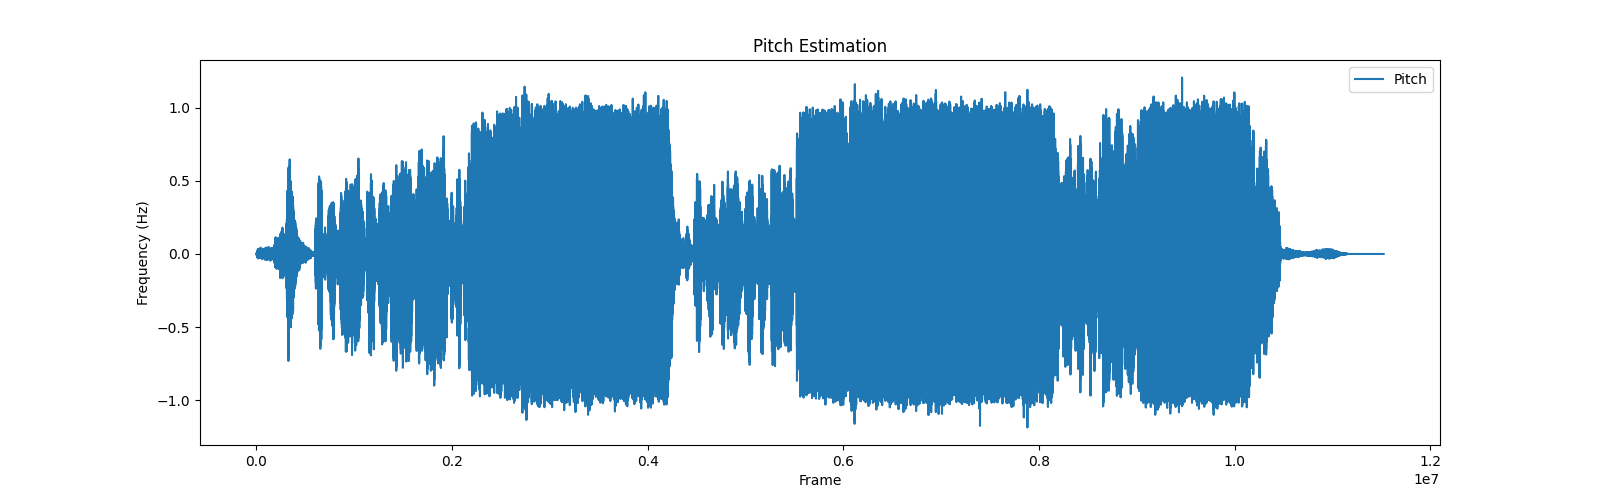
将输出的范围稍微改一下,切分特征的一部分,就是歌曲部分的音高特征啦,效果就很明显了
改为:
plt.plot(feature[0][5000:10000].numpy(), label='Pitch')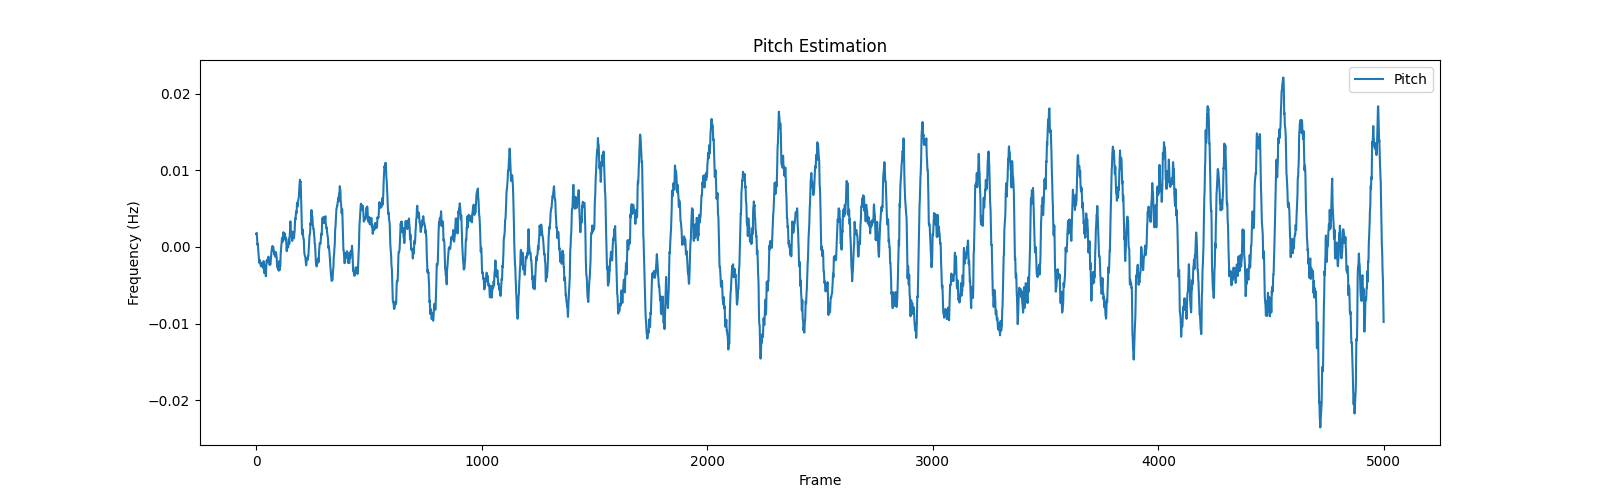
使用librosa提取基频特征
步骤:
导入包
提取基频特征
(可选)绘制基频特征
主要函数:
librosa.pyin,请见官方example
#Computing a fundamental frequency (F0) curve from an audio input
>>> y, sr = librosa.load(librosa.ex('trumpet'))
>>> f0, voiced_flag, voiced_probs = librosa.pyin(y,
...                                              sr=sr,
...                                              fmin=librosa.note_to_hz('C2'),
...                                              fmax=librosa.note_to_hz('C7'))
>>> times = librosa.times_like(f0, sr=sr)
code:
1 def get_pitch_by_librosa():
2
3 file_path = input("请输入音频文件路径:")
4 y, sr = librosa.load(file_path)
5 """librosa.pyin(y,sr=sr,fmin=librosa.note_to_hz('C2'),fmax=librosa.note_to_hz('C7'))"""
6 # 使用pyin提取基频特征
7 f0, voiced_flag, voiced_probs = librosa.pyin(y, sr=sr, fmin=librosa.note_to_hz('C2'), fmax=librosa.note_to_hz('C7'))
8
9 # 绘制基频特征,可忽略
10 plt.figure(figsize=(14, 5))
11 librosa.display.waveshow(y, sr=sr, alpha=0.5)
12 plt.plot(librosa.times_like(f0), f0, label='f0 (fundamental frequency)', color='r')
13 plt.xlabel('Time (s)')
14 plt.ylabel('Frequency (Hz)')
15 plt.title('Pitch (fundamental frequency) Estimation')
16 plt.legend()
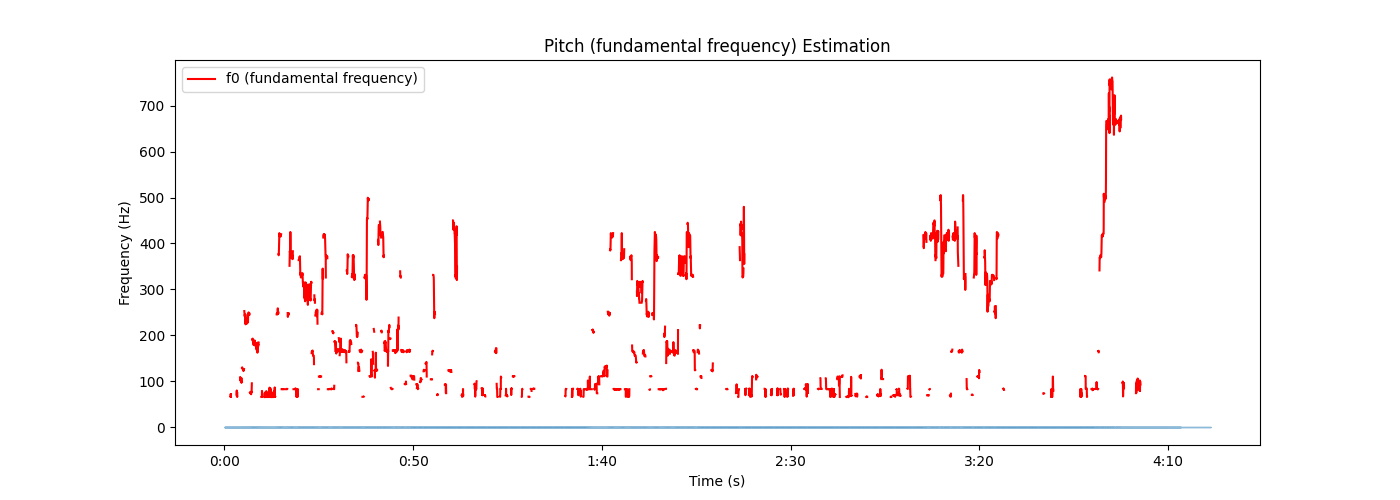
17 plt.show()总结:
比torchaudio略微麻烦一点,不过多了两个参数
voiced_flag, voiced_probs,看起来的视觉图好像也有些不一样,不过都是按照官方的这个来了,这也不对的话我也不会了
输出:
all code:
import torchaudio
import torchaudio.transforms as Tf
import matplotlib.pyplot as plt
import librosa
def get_pitch_by_torch():
file_path = input("file path:")
y, sr = torchaudio.load(file_path)
"""specimen:
>>> waveform, sample_rate = torchaudio.load("test.wav", normalize=True)
>>> transform = transforms.PitchShift(sample_rate, 4)
>>> waveform_shift = transform(waveform) # (channel, time)
"""
pitch_tf = Tf.PitchShift(sample_rate=sr, n_steps=0)
feature = pitch_tf(y)
# 绘制基频特征
plt.figure(figsize=(16, 5))
plt.plot(feature[0][5000:10000].numpy(), label='Pitch')
plt.xlabel('Frame')
plt.ylabel('Frequency (Hz)')
plt.title('Pitch Estimation')
plt.legend()
plt.show()
def get_pitch_by_librosa():
file_path = input("请输入音频文件路径:")
y, sr = librosa.load(file_path)
"""librosa.pyin(y,sr=sr,fmin=librosa.note_to_hz('C2'),fmax=librosa.note_to_hz('C7'))"""
# 使用pyin提取基频特征
f0, voiced_flag, voiced_probs = librosa.pyin(y, sr=sr, fmin=librosa.note_to_hz('C2'), fmax=librosa.note_to_hz('C7'))
# 绘制基频特征,可忽略
plt.figure(figsize=(14, 5))
librosa.display.waveshow(y, sr=sr, alpha=0.5)
plt.plot(librosa.times_like(f0), f0, label='f0 (fundamental frequency)', color='r')
plt.xlabel('Time (s)')
plt.ylabel('Frequency (Hz)')
plt.title('Pitch (fundamental frequency) Estimation')
plt.legend()
plt.show()
if __name__ == '__main__':
# get_pitch_by_torch()
# get_pitch_by_librosa()后续PPG特征、vec特征见下一章
python 音频处理(1)——重采样、音高提取的更多相关文章
- Python即时网络爬虫项目: 内容提取器的定义(Python2.7版本)
1. 项目背景 在Python即时网络爬虫项目启动说明中我们讨论一个数字:程序员浪费在调测内容提取规则上的时间太多了(见上图),从而我们发起了这个项目,把程序员从繁琐的调测规则中解放出来,投入到更高端 ...
- python操作三大主流数据库(5)python操作mysql⑤使用Jinja2模板提取优化页面展示
python操作mysql⑤使用Jinja2模板提取优化页面展示 在templates目录下的index.html.cat.html等页面有一些共同的元素,代码比较冗余可以使用模板提取公共代码,在各网 ...
- 『开发技巧』Python音频操作工具PyAudio上手教程
『开发技巧』Python音频操作工具PyAudio上手教程 0.引子 当需要使用Python处理音频数据时,使用python读取与播放声音必不可少,下面介绍一个好用的处理音频PyAudio工具包. ...
- < python音频库:Windows下pydub安装配置、过程出现的问题及常用API >
< python音频库:Windows下pydub安装配置.过程出现的问题及常用API > 背景 刚从B站上看过倒放挑战之后也想体验下,心血来潮一个晚上完成了基本的实现.其中倒放与播放部分 ...
- Python音频操作+同时播放两个音频
对于python而言,音频的操作可以使用pygame包中的sound 和 music对象,本博客主要讲解这两个对象. 1.sound对象 Sound对象适合处理较短的音乐,如OGG和WAV格式的音频文 ...
- python音频处理相关类库
一.eyeD3 以下是eyed3的官方介绍 eyeD3 is a Python tool for working with audio files, specifically mp3 files co ...
- Python即时网络爬虫项目: 内容提取器的定义
1. 项目背景 在python 即时网络爬虫项目启动说明中我们讨论一个数字:程序员浪费在调测内容提取规则上的时间,从而我们发起了这个项目,把程序员从繁琐的调测规则中解放出来,投入到更高端的数据处理工作 ...
- python音频处理用到的操作
作者:桂. 时间:2017-05-03 12:18:46 链接:http://www.cnblogs.com/xingshansi/p/6799994.html 前言 本文主要记录python下音频 ...
- 短文本分析----基于python的TF-IDF特征词标签自动化提取
绪论 最近做课题,需要分析短文本的标签,在短时间内学习了自然语言处理,社会标签推荐等非常时髦的技术.我们的需求非常类似于从大量短文本中获取关键词(融合社会标签和时间属性)进行用户画像.这一切的基础就是 ...
- Python爬虫10-页面解析数据提取思路方法与简单正则应用
GitHub代码练习地址:正则1:https://github.com/Neo-ML/PythonPractice/blob/master/SpiderPrac15_RE1.py 正则2:match. ...
随机推荐
- react this指向问题
在JSX事件函数方法中的 this,默认不会绑定 this指向.如果你忘记绑定,当你调用这个函数的时候 this 的值为 undefined.所以使用时一定要绑定好this的指向. 构造方法中绑定 c ...
- INFINI Labs 产品更新 | Console 告警中心 UI 全新改版,新增 Dashboard 全屏模式等功能
本次 INFINI Labs 产品更新主要发布 Console v1.7.0,重点优化了 Console 告警中心和数据看板 Dashboard 可视化功能.详细介绍如下: 优化告警中心 UI 上个版 ...
- invalid comparison: java.util.ArrayList and java.lang.String 异常分析及解决方法
nvalid comparison: java.util.ArrayList and java.lang.String 异常解决方法异常原因首先我们可以确定是在mybatis的xml中的 list 操 ...
- python 日志写入文件
import logging fmt = "%(asctime)s %(filename)s[line:%(lineno)d] %(levelname)s: %(message)s" ...
- PowerBI_一分钟了解POWERBI计算组_基础运用篇(一)
在第一篇计算组的文章中,给大家介绍了,POWERBI的计算组功能的基本概念和作用. 本文,旨在通过简单案例,介绍计算组功能的具体应用场景. 没有看过第一篇的同学,可以先简单过一下第一篇,补齐一下概念和 ...
- #PowerBi Superchange PowerBi 开篇(1)
本书由B站京西漫步老师推荐,并提供了相应的学习资源,有同感兴趣的朋友,可以加我好友免费分享资源. 本书主要以总结笔记,原文+译文+部分案例实操为主. 预计更新时间为23年6月-23年7月. 本系列笔记 ...
- 关于编译告警 C4819 的完整解决方案 - The file contains a character that cannot be represented in the current code page (number). Save the file in Unicode format to prevent data loss.
引言 今天迁移开发环境的时候遇到一个问题,同样的操作系统和 Visual Studio 版本,原始开发环境一切正常,但是迁移后 VS 出现了 C4819 告警,上网查了中文的一些博客,大部分涵盖几种解 ...
- pycharm中运行jupyter notebook
进入anaconda prompt,进入对应的虚拟环境 输入jupyter notebook,找到路径和token 这两个随便复制一个,注意是包括token也要复制到 然后打开pycharm,并建立一 ...
- 小米节假日API, 查询调休
小米的节假日API, 用于查询一年中的第X天是否正在放假或是在调休. 在浏览器中打开保存下来, 一年只需要调用一次即可. https://api.comm.miui.com/holiday/holid ...
- 【资料分享】RK3568开发板规格书(4x ARM Cortex-A55(64bit),主频1.8GHz)
1 开发板简介 创龙科技TL3568-EVM是一款基于瑞芯微RK3568J/RK3568B2处理器设计的四核ARM Cortex-A55国产工业评估板,每核主频高达1.8GHz/2.0GHz,由核心板 ...