
WPF拖动总结[转载]
WPF拖动总结
这篇博文总结下WPF中的拖动,文章内容主要包括:
1.拖动窗口
2.拖动控件 Using Visual Studio
2.1thumb控件
2.2Drag、Drop(不连续,没有中间动画)
2.3拖动一个控件
2.4让一个窗口内的所有(指定的)控件可拖动
3.Expression Blend X实现拖动(Best Practice)
小结
1.拖动窗口
我们知道,鼠标放在窗口的标题栏上按下就可以拖动窗体。我们要实现在窗口的全部地方或特定地方按下鼠标左键实现拖动。
Winform的做法是,获取鼠标的位置信息,从而设置窗体的位置。
WPF也可以采用Winform类似的方法,但是没有必要,因为有更加单的方法。

<Window x:Class="WpfApplicationDrugMove.MainWindow"

        xmlns="http://schemas.microsoft.com/winfx/2006/xaml/presentation"

        xmlns:x="http://schemas.microsoft.com/winfx/2006/xaml"

        Title="窗体拖动" Height="350" Width="525">

    <Grid Background="Green" MouseLeftButtonDown="Grid_MouseLeftButtonDown">

        <Canvas Height="65" Background="Gray" HorizontalAlignment="Left" Margin="284,110,0,0" Name="canvas1" VerticalAlignment="Top" Width="74" MouseLeftButtonDown="canvas1_MouseLeftButtonDown">

        </Canvas>

    </Grid>

</Window>
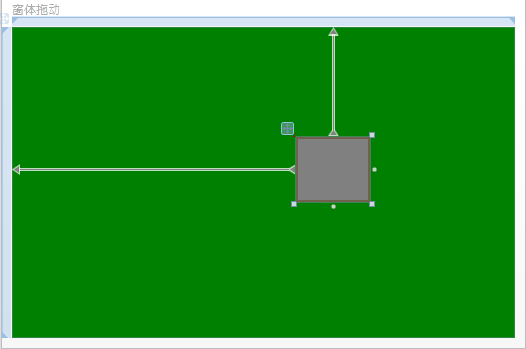
有Grid布局的窗口,里面放置了一个Canvas。
要实现在Grid内按下鼠标左键实现窗体拖动/或是Canvas内实现按下鼠标左键实现窗体拖动,代码如下:
private void canvas1_MouseLeftButtonDown(object sender, MouseButtonEventArgs e)

{

   base.DragMove();//实现整个窗口的拖动

}

private void Grid_MouseLeftButtonDown(object sender, MouseButtonEventArgs e)

{

   base.DragMove();

}
从上面的代码我们可以看到,DragMove()方法仅用来实现窗体的拖动。
2.拖动控件
2.1thumb控件
thumb控件MSDN的描述非常简单:Represents a control that can be dragged by the user.(表示可由用户拖动的控件)。
由DragStarted、DragDelta、DragCompleted着三个事件完成控件的拖动。
给个例子:我们在Canvas中加入如下thumb控件
<Thumb Name="thumb1" Background="Red" Height="50" Width="100" DragDelta="DragDelta" DragStarted="DragStarted" DragCompleted="DragCompleted" Canvas.Left="335" Canvas.Top="121" />
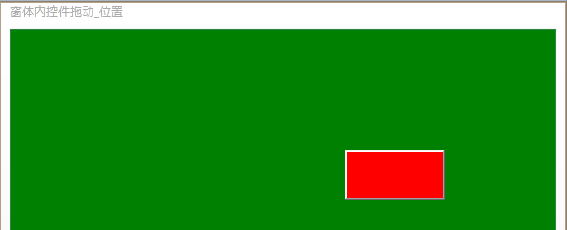
实现相应的事件,即可完成该控件的拖动工作。
private void DragDelta(object sender, System.Windows.Controls.Primitives.DragDeltaEventArgs e)

{

   Canvas.SetLeft(thumb1,Canvas.GetLeft(thumb1)+e.HorizontalChange);

   Canvas.SetTop(thumb1, Canvas.GetTop(thumb1) + e.VerticalChange);

}

private void DragStarted(object sender, System.Windows.Controls.Primitives.DragStartedEventArgs e)

{

   thumb1.Background = Brushes.White;

}

private void DragCompleted(object sender, System.Windows.Controls.Primitives.DragCompletedEventArgs e)

{

   thumb1.Background = Brushes.Red;

}
这只是一个简单的示例,我们知道thumb有拇指的意思,代表着很棒的意思。
sukram在2008-08-23在codeproject上发表的WPF Diagram Designer(WPF图形设计器)系列文章(共3篇),被国内很多人Copy过来说是他自己弄的(吐槽:这里省去3K字),其中关于thumb的运用可供参考,thumb可以实现控件的拖动。
2.2 drag、drop(不连续,没有中间动画)
很多控件都有AllowDrop属性:允许放下;和Drop事件。
给出两个例子。
例1:
<Grid>

  <Label Name ="label1" Content="TestDrop" Background="Red" Height ="28" HorizontalAlignment="Left" Margin="70,35,0,0"  VerticalAlignment="Top" MouseDown="label1_MouseDown"  />

  <Label Name="label2"  Content="ToHere"  Background="Green" Height="28" HorizontalAlignment="Left" Margin ="342,107,0,0"  VerticalAlignment="Top" AllowDrop ="True" Drop="tagert_drop"   />

</Grid>
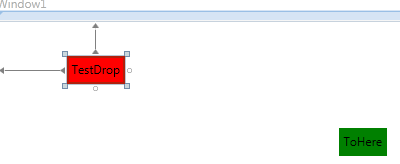
现在,拖拽label1到label上,把label1的text赋值给label2.实现如下:
private void label1_MouseDown(object sender, MouseButtonEventArgs e)

{

    Label lbl = (Label)sender;

    DragDrop.DoDragDrop(lbl, lbl.Content, DragDropEffects.Copy);

}

private void tagert_drop(object sender, DragEventArgs e)

{

    ((Label)sender).Content = e.Data.GetData(DataFormats.Text);

}
例2:
界面上有两个Canvas,右面的Canvas里面有一个Rectangle。拖动右面的Rectangle把它拖到左边来,并且保留右边的Rectangle。
<Window x:Class="WpfApplicationDrugMove.Windowdragdrop"

        xmlns="http://schemas.microsoft.com/winfx/2006/xaml/presentation"

        xmlns:x="http://schemas.microsoft.com/winfx/2006/xaml"

        Title="Windowdragdrop" Height="369" Width="559">

    <Grid>

        <Canvas Background="ForestGreen" Height="282" HorizontalAlignment="Left" Margin="22,20,0,0" Name="canvas1" VerticalAlignment="Top" Width="226" />

        <Canvas Background="ForestGreen" Height="282" HorizontalAlignment="Left" Margin="278,20,0,0" Name="canvas2" VerticalAlignment="Top" Width="232">

            <Rectangle Fill="Yellow" Canvas.Left="35" Canvas.Top="36" Height="100" Name="rectangle1" Stroke="Black" Width="150" />

        </Canvas>

    </Grid>

</Window>
namespace WpfApplicationDrugMove

{

    /// <summary>

    /// Interaction logic for Windowdragdrop.xaml

    /// </summary>

    public partial class Windowdragdrop : Window

    {

        public Windowdragdrop()

        {

            InitializeComponent();

            canvas1.AllowDrop = true;

            rectangle1.PreviewMouseMove += new MouseEventHandler(rectangle1_PreviewMouseMove);

            canvas1.DragOver += new DragEventHandler(canvas1_DragOver);

            canvas1.Drop += new DragEventHandler(canvas1_Drop);

        }

        void rectangle1_PreviewMouseMove(object sender, MouseEventArgs e)

        {

            if (e.LeftButton == MouseButtonState.Pressed)

            {

                DataObject data = new DataObject(typeof(Rectangle), rectangle1);

                DragDrop.DoDragDrop(rectangle1, data, DragDropEffects.Copy);

            }

        }

        void canvas1_Drop(object sender, DragEventArgs e)

        {

            IDataObject data = new DataObject();

            data = e.Data;

            if (data.GetDataPresent(typeof(Rectangle)))

            {

                Rectangle rect = new Rectangle();

                rect = data.GetData(typeof(Rectangle)) as Rectangle;

                //canvas2.Children.Remove(rect);

                //canvas1.Children.Add(rect);

                //序列化Control,以深复制Control!!!!

                string rectXaml = XamlWriter.Save(rect);

                StringReader stringReader = new StringReader(rectXaml);

                XmlReader xmlReader = XmlReader.Create(stringReader);

                UIElement clonedChild = (UIElement)XamlReader.Load(xmlReader);

                canvas1.Children.Add(clonedChild);

            }

        }

        void canvas1_DragOver(object sender, DragEventArgs e)

        {

            if(!e.Data.GetDataPresent(typeof(Rectangle)))

            {

                e.Effects = DragDropEffects.None;

                e.Handled = true;

            }

        }

    }

}
效果如下: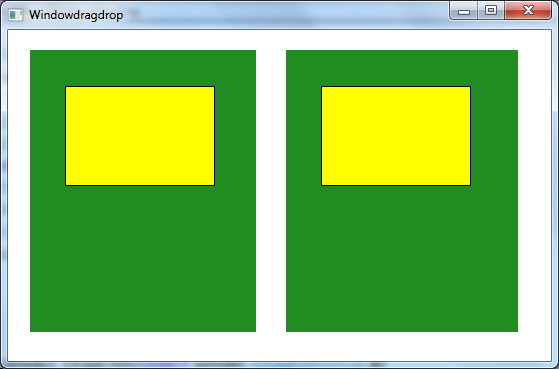
这个也就回答了博客园的一篇博问:WPF拖拽实现
虽然这个问题被标记为解决,但是其解决的方法过于丑陋,具体请看DebugLZQ本文代码实现。
2.3拖动一个控件
实现和thumb一样的效果,不同于drag/drop,拖动的时候控件跟随鼠标移动。
<Canvas x:Name="canvas1" Background="Green">

  <Canvas  Background="Yellow" Canvas.Left="85" Canvas.Top="51" Height="100" Name="canvas2" Width="105" MouseLeftButtonDown="canvas2_MouseDown"   MouseMove="canvas2_MouseMove" MouseLeftButtonUp="canvas2_MouseLeftButtonUp"></Canvas>

</Canvas>
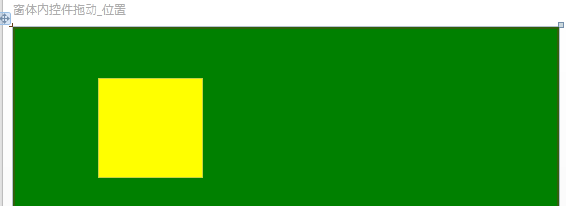
Canvas中又一个控件(Canvas2),实现canvas2的拖动。
实现canvas2的MouseLeftButtonDown、MouseMove、MouseLeftButtonUp事件。
Point oldPoint = new Point();

bool isMove = false;

private void canvas2_MouseMove(object sender, MouseEventArgs e)

{

   if (isMove)

   {

       canvas2.Background = Brushes.White;

       FrameworkElement currEle = sender as FrameworkElement;

       double xPos = e.GetPosition(null).X - oldPoint.X + (double)currEle.GetValue(Canvas.LeftProperty);

       double yPos = e.GetPosition(null).Y - oldPoint.Y + (double)currEle.GetValue(Canvas.TopProperty);

       currEle.SetValue(Canvas.LeftProperty, xPos);

       currEle.SetValue(Canvas.TopProperty, yPos);

       oldPoint = e.GetPosition(null);

   }

}

private void canvas2_MouseDown(object sender, MouseButtonEventArgs e)

{

   isMove = true;

   oldPoint = e.GetPosition(null);

}

private void canvas2_MouseLeftButtonUp(object sender, MouseButtonEventArgs e)

{

   isMove = false;

   canvas2.Background = Brushes.Yellow;

}
2.4让一个窗口内的所有(指定的)控件可拖动
有2.3的基础,现在我们就可以很方便的实现容器内所有控件拖动了。不仅仅局限于Canvas。其实Canvas的绝对定位和其他的容器(如Grid)没多好差别,只不过Canvas使用Left/Top来定位;Grid是用Margin,仅此而已!
1.还是Canvas中的拖动
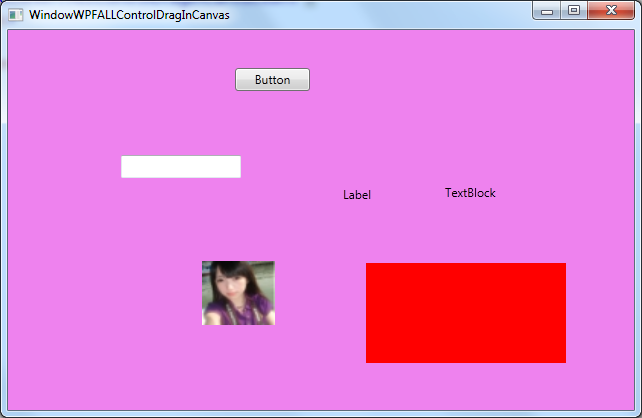
<Window x:Class="WpfApplicationDrugMove.WindowWPFALLControlDragInCanvas"

        xmlns="http://schemas.microsoft.com/winfx/2006/xaml/presentation"

        xmlns:x="http://schemas.microsoft.com/winfx/2006/xaml"

        Title="WindowWPFALLControlDragInCanvas" Height="418" Width="642">

    <Canvas x:Name="LayoutRoot" Background="Violet">

        <Label Canvas.Left="330" Canvas.Top="151" Content="Label" Height="28" Name="label1" />

        <TextBlock Canvas.Left="437" Canvas.Top="154" Height="23" Name="textBlock1" Text="TextBlock" />

        <Image Canvas.Left="206" Canvas.Top="231" Height="64" Name="image1" Stretch="Fill" Width="73" Source="/WpfApplicationDrugMove;component/1.jpg" />

        <Canvas Canvas.Left="358" Canvas.Top="233" Height="100" Name="canvas1" Width="200"  Background="Red"></Canvas>

        <Button Canvas.Left="227" Canvas.Top="38" Content="Button" Height="23" Name="button1" Width="75" />

        <TextBox Canvas.Left="113" Canvas.Top="125" Height="23" Name="textBox1" Width="120" />

    </Canvas>

</Window>
using System;

using System.Collections.Generic;

using System.Linq;

using System.Text;

using System.Windows;

using System.Windows.Controls;

using System.Windows.Data;

using System.Windows.Documents;

using System.Windows.Input;

using System.Windows.Media;

using System.Windows.Media.Imaging;

using System.Windows.Shapes;

namespace WpfApplicationDrugMove

{

    /// <summary>

    /// Interaction logic for WindowWPFALLControlDrag.xaml

    /// </summary>

    public partial class WindowWPFALLControlDragInCanvas:Window

    {

        public WindowWPFALLControlDragInCanvas()

        {

            InitializeComponent();

            foreach (UIElement uiEle in LayoutRoot.Children)

            {

                //WPF设计上的问题,Button.Clicked事件Supress掉了Mouse.MouseLeftButtonDown附加事件等.

                //不加这个Button、TextBox等无法拖动

                if (uiEle is Button||uiEle is TextBox)

                {

                    uiEle.AddHandler(Button.MouseLeftButtonDownEvent, new MouseButtonEventHandler(Element_MouseLeftButtonDown), true);

                    uiEle.AddHandler(Button.MouseMoveEvent, new MouseEventHandler(Element_MouseMove),true);

                    uiEle.AddHandler(Button.MouseLeftButtonUpEvent, new MouseButtonEventHandler(Element_MouseLeftButtonUp), true);

                    continue;

                }

                //

                uiEle.MouseMove += new MouseEventHandler(Element_MouseMove);

                uiEle.MouseLeftButtonDown += new MouseButtonEventHandler(Element_MouseLeftButtonDown);

                uiEle.MouseLeftButtonUp += new MouseButtonEventHandler(Element_MouseLeftButtonUp);

            }

        }

        bool isDragDropInEffect = false;

        Point pos = new Point();

        void Element_MouseMove(object sender, MouseEventArgs e)

        {

            if (isDragDropInEffect)

            {

                FrameworkElement currEle = sender as FrameworkElement;

                double xPos = e.GetPosition(null).X - pos.X + (double)currEle.GetValue(Canvas.LeftProperty);

                double yPos = e.GetPosition(null).Y - pos.Y + (double)currEle.GetValue(Canvas.TopProperty);

                currEle.SetValue(Canvas.LeftProperty, xPos);

                currEle.SetValue(Canvas.TopProperty, yPos);

                pos = e.GetPosition(null);

            }

        }

        void Element_MouseLeftButtonDown(object sender, MouseButtonEventArgs e)

        {

            FrameworkElement fEle = sender as FrameworkElement;

            isDragDropInEffect = true;

            pos = e.GetPosition(null);

            fEle.CaptureMouse();

            fEle.Cursor = Cursors.Hand;

        }

        void Element_MouseLeftButtonUp(object sender, MouseButtonEventArgs e)

        {

            if (isDragDropInEffect)

            {

                FrameworkElement ele = sender as FrameworkElement;

                isDragDropInEffect = false;

                ele.ReleaseMouseCapture();

            }

        }

    }

}
注意:需要用AddHandler添加Button.MouseLeftButtonDown等事件,不然无法触发,因为Button.Clicked事件Supress掉了MouseLeftButtonDown。
这样页面上的所有控件就可以随意拖动了。
今天在CodeProject上看到了这篇文章:WPF - Catch Events Even if they are Already Handled,说的是一个事情。
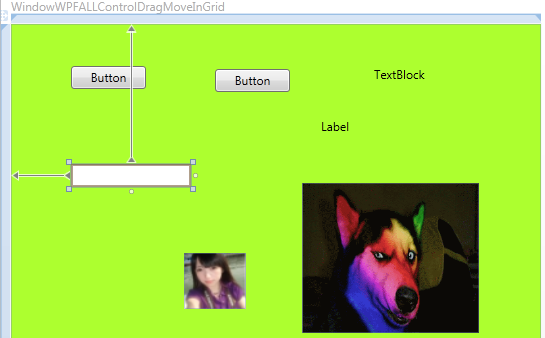
2.Canvas换成Grid。Grid中所有控件可拖动。
<Window x:Class="WpfApplicationDrugMove.WindowWPFALLControlDragMoveInGrid"

        xmlns="http://schemas.microsoft.com/winfx/2006/xaml/presentation"

        xmlns:x="http://schemas.microsoft.com/winfx/2006/xaml"

        Title="WindowWPFALLControlDragMoveInGrid" Height="382" Width="552">

    <Grid x:Name="LayoutRoot" Background="GreenYellow">

        <Button Content="Button" Height="23" HorizontalAlignment="Left" Margin="60,42,0,0" Name="button1" VerticalAlignment="Top" Width="75" />

        <Label Content="Label" Height="28" HorizontalAlignment="Left" Margin="305,89,0,0" Name="label1" VerticalAlignment="Top" />

        <Button Content="Button" Height="23" HorizontalAlignment="Left" Margin="204,45,0,0" Name="button2" VerticalAlignment="Top" Width="75" />

        <TextBlock Height="23" HorizontalAlignment="Left" Margin="363,42,0,0" Name="textBlock1" Text="TextBlock" VerticalAlignment="Top" />

        <TextBox Height="23" HorizontalAlignment="Left" Margin="60,140,0,0" Name="textBox1" VerticalAlignment="Top" Width="120" />

        <Image Height="56" HorizontalAlignment="Left" Margin="173,229,0,0" Name="image1" Stretch="Fill" VerticalAlignment="Top" Width="62" Source="/WpfApplicationDrugMove;component/1.jpg" />

        <Image Height="150" HorizontalAlignment="Left" Margin="291,159,0,0" Name="image2" Stretch="Fill" VerticalAlignment="Top" Width="177" Source="/WpfApplicationDrugMove;component/2.gif" />

    </Grid>

</Window>
using System;

using System.Collections.Generic;

using System.Linq;

using System.Text;

using System.Windows;

using System.Windows.Controls;

using System.Windows.Data;

using System.Windows.Documents;

using System.Windows.Input;

using System.Windows.Media;

using System.Windows.Media.Imaging;

using System.Windows.Shapes;

namespace WpfApplicationDrugMove

{

    /// <summary>

    /// Interaction logic for WindowWPFALLControlDragMoveInGrid.xaml

    /// </summary>

    public partial class WindowWPFALLControlDragMoveInGrid : Window

    {

        public WindowWPFALLControlDragMoveInGrid()

        {

            InitializeComponent();

            foreach (UIElement uiEle in LayoutRoot.Children)

            {

                if (uiEle is Button || uiEle is TextBox)

                {

                    uiEle.AddHandler(Button.MouseLeftButtonDownEvent, new MouseButtonEventHandler(Element_MouseLeftButtonDown), true);

                    uiEle.AddHandler(Button.MouseMoveEvent, new MouseEventHandler(Element_MouseMove), true);

                    uiEle.AddHandler(Button.MouseLeftButtonUpEvent, new MouseButtonEventHandler(Element_MouseLeftButtonUp), true);

                    continue;

                }

                uiEle.MouseMove += new MouseEventHandler(Element_MouseMove);

                uiEle.MouseLeftButtonDown += new MouseButtonEventHandler(Element_MouseLeftButtonDown);

                uiEle.MouseLeftButtonUp += new MouseButtonEventHandler(Element_MouseLeftButtonUp);

            }

        }

        bool isDragDropInEffect = false;

        Point pos = new Point();

        void Element_MouseMove(object sender, MouseEventArgs e)

        {

            if (isDragDropInEffect)

            {

                FrameworkElement currEle = sender as FrameworkElement;

                double xPos = e.GetPosition(null).X - pos.X + currEle.Margin.Left;

                double yPos = e.GetPosition(null).Y - pos.Y + currEle.Margin.Top;

                currEle.Margin = new Thickness(xPos, yPos, 0, 0);

                pos = e.GetPosition(null);

            }

        }

        void Element_MouseLeftButtonDown(object sender, MouseButtonEventArgs e)

        {

            FrameworkElement fEle = sender as FrameworkElement;

            isDragDropInEffect = true;

            pos = e.GetPosition(null);

            fEle.CaptureMouse();

            fEle.Cursor = Cursors.Hand;

        }

        void Element_MouseLeftButtonUp(object sender, MouseButtonEventArgs e)

        {

            if (isDragDropInEffect)

            {

                FrameworkElement ele = sender as FrameworkElement;

                isDragDropInEffect = false;

                ele.ReleaseMouseCapture();

            }

        }

    }

}
效果如下: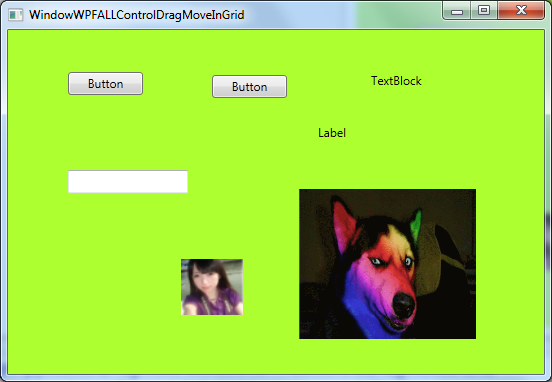
Grid界面中的所有控件可随意拖动。
3.使用Expression Blend实现拖动(Best Practice)
使用如下的一个Behavior:MouseDragElementBehavior
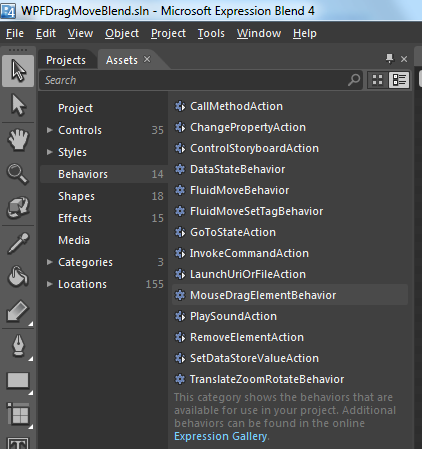
实现方法非常简单,let's say 我们有个Rectangle,无论在什么容器中,我们要实现其拖动。
直接把这个MouseDragElementBehavior 拖动到Rectangle中即可。
XAML如下:
<Window

        xmlns="http://schemas.microsoft.com/winfx/2006/xaml/presentation"

        xmlns:x="http://schemas.microsoft.com/winfx/2006/xaml"

        xmlns:i="http://schemas.microsoft.com/expression/2010/interactivity"

        xmlns:ei="http://schemas.microsoft.com/expression/2010/interactions"  x:Class="WPFDragMoveBlend.MainWindow"

        Title="MainWindow" Height="350" Width="525">

    <Grid>

        <Rectangle Fill="Red" Stroke="Black" Margin="145,82,164,50" Width="200" Height="180" >

            <i:Interaction.Behaviors>

                <ei:MouseDragElementBehavior/>

            </i:Interaction.Behaviors>

        </Rectangle>

    </Grid>

</Window>
(如您所见,DebugLZQ使用的是 Expression Blend 4)。
程序运行正常,Rectangle可随意拖动如下:
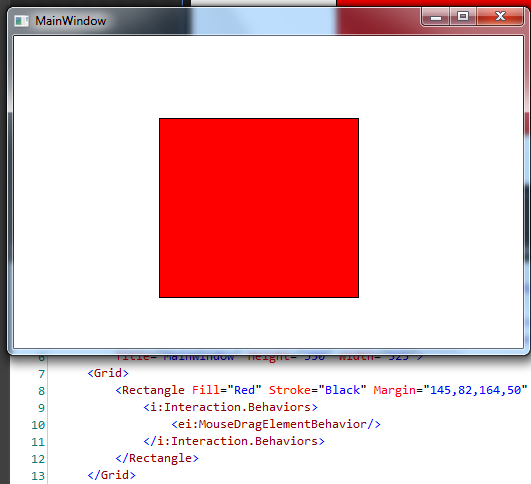
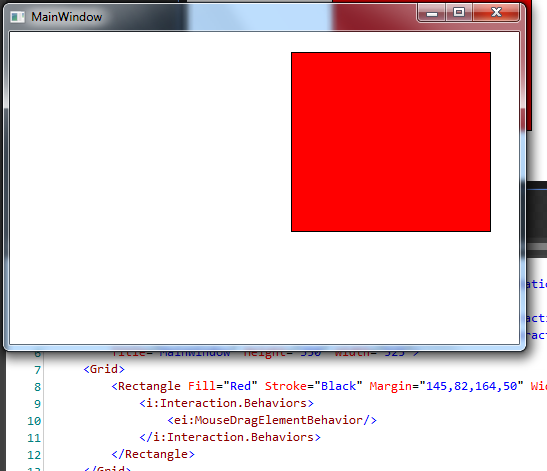
使用Blend借助Behaviors不需要额外的C#代码,最为简洁。
其他的一些Behaviors也非常有用,
如播放MP3:
<Window

        xmlns="http://schemas.microsoft.com/winfx/2006/xaml/presentation"

        xmlns:x="http://schemas.microsoft.com/winfx/2006/xaml"

        xmlns:i="http://schemas.microsoft.com/expression/2010/interactivity"

        xmlns:ei="http://schemas.microsoft.com/expression/2010/interactions"  x:Class="WPFDragMoveBlend.MainWindow"

        Title="MainWindow" Height="350" Width="525">

    <Grid>

        <Rectangle Fill="Red" Stroke="Black" Margin="145,82,164,50" Width="200" Height="180" >

            <i:Interaction.Triggers>

                <i:EventTrigger EventName="MouseLeftButtonDown">

                    <ei:PlaySoundAction Source="C:\Users\Public\Music\Sample Music\Kalimba.mp3"/>

                </i:EventTrigger>

            </i:Interaction.Triggers>

            <i:Interaction.Behaviors>

                <ei:MouseDragElementBehavior/>

            </i:Interaction.Behaviors>

        </Rectangle>

    </Grid>

</Window>
程序可正常运行。
还有如CallMethodAction,ControlStoryboardAction,及MVVM中使用较多的InvokeCommandAction等。
小结一下:
关于2.2例2中控件的序列化、反序列化! 参考:WPF控件深拷贝:序列化/反序列化
关于Button.MouseLeftButtonDown用C#代码注册的话需要用AddHandler添加,直接添加会被Button.Clicked阻止! 另一种情况是:我们如何捕获一个路由事件,即使这个路由事件已经被标记为e.handled=true。这个很重要!!!参考:WPF捕获事件即使这个事件被标记为Handled 。拖动不局限于Canvas.
所有方法中,Blend实现最为Clearn.关于Blend 4的快捷键,请参考:A Complete Guide to Expression Blend 4 Shortcut Keys
老鸟绕过,轻拍~
Wish it helps.
WPF拖动总结[转载]的更多相关文章
- WPF拖动DataGrid滚动条时内容混乱的解决方法
WPF拖动DataGrid滚动条时内容混乱的解决方法 在WPF中,如果DataGrid里使用了模板列,当拖动滚动条时,往往会出现列表内容显示混乱的情况.解决方法就是在Binding的时候给Update ...
- Rendering Transparent 3D Surfaces in WPF with C#(转载)
Rendering Transparent 3D Surfaces in WPF with C# The primary problems that arise when rendering semi ...
- Winform 无边框随意拖动【转载】
本篇技术内容转载自:http://www.cnblogs.com/ap0606122/archive/2012/10/23/2734964.html using System; using Syste ...
- C#——Winform 无边框随意拖动【转载】
本篇技术内容转载自:http://www.cnblogs.com/ap0606122/archive/2012/10/23/2734964.html using System; using Syste ...
- WPF拖动DataGrid中的数据到ListBox
1.效果图: 2.XAML <Window x:Class="WpfApplication2.MainWindow" xmlns="http://schemas.m ...
- WPF拖动绘制
using System; using System.Windows; using System.Windows.Controls; using System.Windows.Input; using ...
- WPF拖动总结
https://www.cnblogs.com/DebugLZQ/archive/2013/05/07/3062733.html <Window xmlns="http://schem ...
- js鼠标拖动(转载)
<!DOCTYPE html PUBLIC "-//W3C//DTD XHTML 1.0 Transitional//EN" "http://www.w3.org/ ...
- WPF阴影效果(DropShadowEffect)(转载)
<TextBlock Text="阴影效果" FontSize="32"> <TextBlock.Effect> <DropSha ...
随机推荐
- Beans(dp,两次dp)
Beans Time Limit: 2000/1000 MS (Java/Others) Memory Limit: 32768/32768 K (Java/Others) Total Subm ...
- map的类型映射
以下是使用STL中map类型,对类型的转换示例,主要可以解决的问题,也就是一般的类型之间的相互转换,可以较好的解决相关的问题. 以下是C++源码,比较简短,容易理解的. #include " ...
- 解决Xcode6.4安装插件后插件不能使用的问题
下面是上网查的方法,综合了一下,亲测 原因: 苹果要求加入UUID证书从而保证插件的稳定性. 解决方法: 一.查看Xcode的UUID 在终端执行 defaults read /Application ...
- struts2面试题
由于找了很久的工作都没有找的,只能四处收集那个面试题的.和看面试题的 还有那个记忆力也不是很好了的,而那些公司面试的时候总会有一个面试题的! 在这里分享给大家(那个本来是想上传文件的,但是找不到的 ...
- Android 使用Facebook的 Stetho工具
Stetho在Android Studio中用: 1, 引入 compile 'com.facebook.stetho:stetho:1.3.1' compile 'com.facebook.stet ...
- 1230.2——iOS准备(阅读开发者文档时的笔记)
1.程序启动的过程 .在桌面找到相应的应用的图标 点击图标 .main函数 UIApplication类Every app has exactly one instance of UIAp ...
- Masonry的一些使用。
除了等距的有问题(懒得改了),其他用过挺正常的,我自己也是刚使用,有问题还请海涵. 地址:http://pan.baidu.com/s/1boyxu8Z
- YUI Array 之some(检测|any)
YUI原码 YUI someYArray.some = Lang._isNative(Native.some) ? function (array, fn, thisObj) { return Nat ...
- Django中文无法转换成latin-1编码的解决方案
在Ubuntu上用Django做Web开发的时候遇到了中文保存到Cookie无法解析的问题,经过了下面几个步骤终于把问题解决了: 修改/usr/lib/python3.4/wsgiref/header ...
- ThinkPHP框架一
1.1 框架的概念 框架其实就是可重用代码的集合,框架的代码是框架架构的代码,不是业务逻辑代码,框架代码保护类.方法.函数等等,框架代码按照一定的规则组合起来就形成了框架. 1.2 不使用框架开发的时 ...