自定义非等高 Cell
1、自定义非等高 Cell介绍
1.1 代码自定义(frame)
- 新建一个继承自 UITableViewCell 的类。
- 重写 initWithStyle:reuseIdentifier: 方法。
- 添加所有需要显示的子控件(不需要设置子控件的数据和 frame, 子控件要添加到 contentView 中)。
- 进行子控件一次性的属性设置(有些属性只需要设置一次, 比如字体\固定的图片)。
- 提供 2 个模型。
- 数据模型: 存放文字数据\图片数据。
- frame 模型: 存放数据模型\所有子控件的 frame\cell 的高度。
- cell 拥有一个 frame 模型(不要直接拥有数据模型)。
- 重写 cell frame 模型属性的 setter 方法: 在这个方法中设置子控件的显示数据和 frame。
- frame 模型数据的初始化已经采取懒加载的方式(每一个 cell 对应的 frame 模型数据只加载一次)。
1.2 代码自定义(Autolayout)
- 新建一个继承自 UITableViewCell 的类。
- 重写 initWithStyle:reuseIdentifier: 方法。
- 添加所有需要显示的子控件(不需要设置子控件的数据和 frame, 子控件要添加到 contentView 中)。
- 进行子控件一次性的属性设置(有些属性只需要设置一次, 比如字体\固定的图片)。
- 设置 cell 上子控件的约束。
- 在模型中增加一个 cellHeight 属性,用来存放对应 cell 的高度。
- 在 cell 的模型属性 set 方法中调用 [self layoutIfNeed] 方法强制布局,然后计算出模型的 cellheight 属性值。
- 在控制器中实现 tableView:estimatedHeightForRowAtIndexPath: 方法,返回一个估计高度,比如 200。
- 在控制器中实现 tableView:heightForRowAtIndexPath: 方法,返回 cell 的真实高度(模型中的 cellHeight 属性)。
2、代码
2.1 XMGStatus.h
@interface XMGStatus : NSObject

@property (strong, nonatomic) NSString *name;

@property (strong, nonatomic) NSString *text;

@property (strong, nonatomic) NSString *icon;

@property (strong, nonatomic) NSString *picture;

@property (assign, nonatomic, getter=isVip) BOOL vip;

/** cell 的高度 */

@property (assign, nonatomic) CGFloat cellHeight;

+ (instancetype)statusWithDict:(NSDictionary *)dict;

@end
2.2 XMGStatus.m
@implementation XMGStatus

+ (instancetype)statusWithDict:(NSDictionary *)dict {

	XMGStatus *status = [[self alloc] init];

	[status setValuesForKeysWithDictionary:dict];

	return status;

}

@end
2.3 XMGStatusCell.h
@class XMGStatus;

@interface XMGStatusCell : UITableViewCell

+ (instancetype)cellWithTableView:(UITableView *)tableView;

/** 模型数据 */

@property (nonatomic, strong) XMGStatus *status;

@end
2.4 XMGStatusCell.m
#define MAS_SHORTHAND

#define MAS_SHORTHAND_GLOBALS

#import "Masonry.h"

@interface XMGStatusCell()

@property (weak, nonatomic) UIImageView *iconView;

@property (weak, nonatomic) UILabel *nameLabel;

@property (weak, nonatomic) UIImageView *vipView;

@property (weak, nonatomic) UILabel *contentLabel;

@property (weak, nonatomic) UIImageView *pictureView;

@end

@implementation XMGStatusCell

+ (instancetype)cellWithTableView:(UITableView *)tableView {

	static NSString *ID = @"status";

	XMGStatusCell *cell = [tableView dequeueReusableCellWithIdentifier:ID];

	if (cell == nil) {

		cell = [[XMGStatusCell alloc] initWithStyle:UITableViewCellStyleDefault reuseIdentifier:ID];

	}

	return cell;

}

- (instancetype)initWithStyle:(UITableViewCellStyle)style reuseIdentifier:(NSString *)reuseIdentifier {

	if (self = [super initWithStyle:style reuseIdentifier:reuseIdentifier]) {

		UIImageView *iconView = [[UIImageView alloc] init];

		[self.contentView addSubview:iconView];

		self.iconView = iconView;

		UILabel *nameLabel = [[UILabel alloc] init];

		[self.contentView addSubview:nameLabel];

		self.nameLabel = nameLabel;

		UIImageView *vipView = [[UIImageView alloc] init];

		[self.contentView addSubview:vipView];

		self.vipView = vipView;

		UILabel *contentLabel = [[UILabel alloc] init];

		contentLabel.numberOfLines = 0;

		// 设置 label 每一行文字的最大宽度

		contentLabel.preferredMaxLayoutWidth = [UIScreen mainScreen].bounds.size.width - 20;

		[self.contentView addSubview:contentLabel];

		self.contentLabel = contentLabel;

		UIImageView *pictureView = [[UIImageView alloc] init];

		[self.contentView addSubview:pictureView];

		self.pictureView = pictureView;

	}

	return self;

}

- (void)layoutSubviews {

	[super layoutSubviews];

	CGFloat margin = 10;

	[self.iconView makeConstraints:^(MASConstraintMaker *make) {

		make.size.equalTo(30);

		make.left.top.offset(margin);

	}];

	[self.nameLabel makeConstraints:^(MASConstraintMaker *make) {

		make.top.equalTo(self.iconView);

		make.left.equalTo(self.iconView.right).offset(margin);

	}];

	[self.vipView makeConstraints:^(MASConstraintMaker *make) {

		make.size.equalTo(14);

		make.left.equalTo(self.nameLabel.right).offset(margin);

		make.centerY.equalTo(self.nameLabel.centerY);

	}];

	[self.contentLabel makeConstraints:^(MASConstraintMaker *make) {

		make.top.equalTo(self.iconView.bottom).offset(margin);

		make.left.offset(margin);

		//        make.right.offset(-margin);       // 可加可不加

	}];

	[self.pictureView makeConstraints:^(MASConstraintMaker *make) {

		make.size.equalTo(100);

		make.top.equalTo(self.contentLabel.bottom).offset(margin);

		make.left.offset(margin);

	}];

}

- (void)setStatus:(XMGStatus *)status {

	_status = status;

	// 设置显示的数据

	self.iconView.image = [UIImage imageNamed:status.icon];

	self.nameLabel.text = status.name;

	if (status.isVip) {

		self.nameLabel.textColor = [UIColor orangeColor];

		self.vipView.hidden = NO;

	} else {

		self.nameLabel.textColor = [UIColor blackColor];

		self.vipView.hidden = YES;

	}

	self.contentLabel.text = status.text;

	if (status.picture) {

		self.pictureView.hidden = NO;

		self.pictureView.image = [UIImage imageNamed:status.picture];

	} else {

		self.pictureView.hidden = YES;

	}

	// 计算 cell 高度

	// 强制布局

	[self layoutIfNeeded];

	// 计算 cell 的高度

	if (self.pictureView.hidden) {  // 没有配图

		_status.cellHeight = CGRectGetMaxY(self.contentLabel.frame) + 10;

	} else {                        // 有配图

		_status.cellHeight = CGRectGetMaxY(self.pictureView.frame) + 10;

	}

}

@end
2.5 XMGStatusesViewController.m
@interface XMGStatusesViewController ()

@property (strong, nonatomic) NSArray *statuses;

@end

@implementation XMGStatusesViewController

- (NSArray *)statuses {

	if (_statuses == nil) {

		// 加载plist中的字典数组

		NSString *path = [[NSBundle mainBundle] pathForResource:@"statuses.plist" ofType:nil];

		NSArray *dictArray = [NSArray arrayWithContentsOfFile:path];

		// 字典数组 -> 模型数组

		NSMutableArray *statusArray = [NSMutableArray array];

		for (NSDictionary *dict in dictArray) {

			XMGStatus *status = [XMGStatus statusWithDict:dict];

			[statusArray addObject:status];

		}

		_statuses = statusArray;

	}

	return _statuses;

}

#pragma mark - Table view data source

- (NSInteger)tableView:(UITableView *)tableView numberOfRowsInSection:(NSInteger)section {

	return self.statuses.count;

}

- (UITableViewCell *)tableView:(UITableView *)tableView cellForRowAtIndexPath:(NSIndexPath *)indexPath {

	XMGStatusCell *cell = [XMGStatusCell cellWithTableView:tableView];

	cell.status = self.statuses[indexPath.row];

	return cell;

}

#pragma mark - 代理方法

// 返回每一行的高度

- (CGFloat)tableView:(UITableView *)tableView heightForRowAtIndexPath:(NSIndexPath *)indexPath {

	XMGStatus *staus = self.statuses[indexPath.row];

	return staus.cellHeight;

}

/**

* 返回每一行的估计高度

* 只要返回了估计高度,那么就会先调用 tableView:cellForRowAtIndexPath: 方法创建 cell,

* 再调用 tableView:heightForRowAtIndexPath: 方法获取 cell 的真实高度

*/

- (CGFloat)tableView:(UITableView *)tableView estimatedHeightForRowAtIndexPath:(NSIndexPath *)indexPath {

	return 200;

}

@end
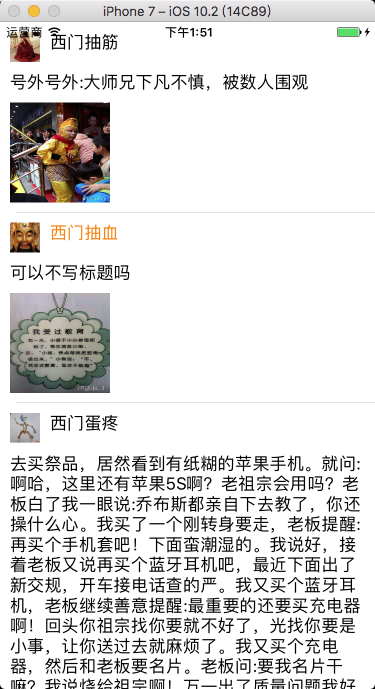
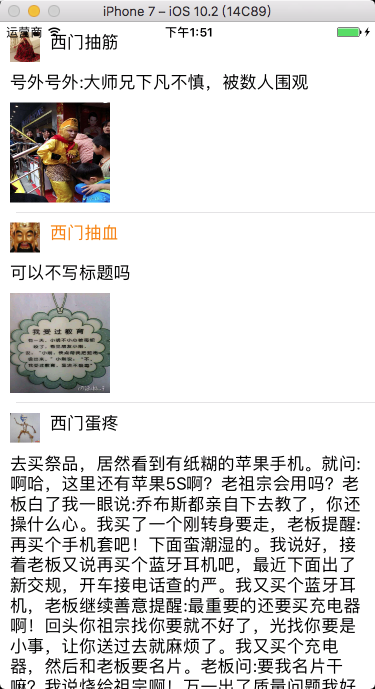
2.6 运行效果图
 ---
--- 
3、其它设置方式
3.1 计算方式
- BookModel.h
@property(nonatomic, copy)NSString *title;

@property(nonatomic, copy)NSString *detail;

@property(nonatomic, copy)NSString *icon;

@property(nonatomic, copy)NSString *price;
- BookCell.h
@property(nonatomic, retain)UILabel *titleLabel;

@property(nonatomic, retain)UILabel *detailLabel;

@property(nonatomic, retain)UIImageView *iconView;

@property(nonatomic, retain)UILabel *priceLabel;
- 设置行高
- (CGFloat)tableView:(UITableView *)tableView heightForRowAtIndexPath:(NSIndexPath *)indexPath {

	// 从数据源数组中取出数据

	BookModel *bookModel = [myDataArray objectAtIndex:indexPath.row];

	// 计算 detailLabel 占用的高度

	CGFloat detialHeight = [bookModel.detail boundingRectWithSize:CGSizeMake(self.view.bounds.size.width - 40, CGFLOAT_MAX)

	options:NSStringDrawingUsesLineFragmentOrigin

	attributes:@{NSFontAttributeName: [UIFont systemFontOfSize:14]}

	context:nil].size.height;

	// 判断是否有图片

	if (bookModel.icon.length) {

		// 60 为图片的高度

		return 30 + detialHeight + 60 + 30;

	}

	else {

		return 30 + detialHeight + 30;

	}

}
- 设置每一行显示的内容
// 设置每一行显示的内容

- (UITableViewCell *)tableView:(UITableView *)tableView cellForRowAtIndexPath:(NSIndexPath *)indexPath {

	BookCell3 *cell = [tableView dequeueReusableCellWithIdentifier:@"test" forIndexPath:indexPath];

	BookModel *bookModel = [myDataArray objectAtIndex:indexPath.row];

	// 设置 titleLabel

	cell.titleLabel.text = bookModel.title;

	// 设置 detailLabel

	// 计算 detailLabel 的高度

	CGSize detialSize = [bookModel.detail boundingRectWithSize:CGSizeMake(self.view.bounds.size.width - 40, CGFLOAT_MAX)

	options:NSStringDrawingUsesLineFragmentOrigin

	attributes:@{NSFontAttributeName: [UIFont systemFontOfSize:14]}

	context:nil].size;

	CGRect detialFrame = cell.detailLabel.frame;

	detialFrame.size.height = detialSize.height + 5;    // 加偏移量 5,适应标点无法换行

	detialFrame.size.width = detialSize.width + 5;

	cell.detailLabel.frame = detialFrame;               // 设置 detailLabel 的 frame

	cell.detailLabel.text = bookModel.detail;

	// 判断是否有图片

	if (bookModel.icon.length) {

		// 设置 iconView

		CGRect iconFrame = cell.iconView.frame;

		iconFrame.origin.y = detialFrame.origin.y + detialFrame.size.height;

		cell.iconView.frame = iconFrame;

		cell.iconView.image = [UIImage imageNamed: bookModel.icon];

		// 设置 priceLabel

		CGRect priceFrame = cell.priceLabel.frame;

		priceFrame.origin.y = iconFrame.origin.y + iconFrame.size.height;

		cell.priceLabel.frame = priceFrame;

		cell.priceLabel.text = bookModel.price;

	}

	else {

		// 设置 priceLabel

		CGRect priceFrame = cell.priceLabel.frame;

		priceFrame.origin.y = detialFrame.origin.y + detialFrame.size.height;

		cell.priceLabel.frame = priceFrame;

		cell.priceLabel.text = bookModel.price;

	}

	return cell;

}
3.2 系统自动布局方式
- 自适应 cell 中较高的一个视图的高度。
- ImageView 与 Label 同行显示,且都设置了上下边缘约束,ImageView 的图片填充模式为 Aspect Fit,否则图片将会被拉长。
- 协议方法 方式设置
// 动态设置行高
- (CGFloat)tableView:(UITableView *)tableView estimatedHeightForRowAtIndexPath:(NSIndexPath *)indexPath { /*
行高自适应 Label 高度
*/ secondTableViewCell *cell = [tableView dequeueReusableCellWithIdentifier:@"secondTableViewCell" forIndexPath:indexPath]; cell.secondLabel.text = [_labelArray objectAtIndex:indexPath.row]; return [cell.contentView systemLayoutSizeFittingSize:(UILayoutFittingCompressedSize)].height + 1;
} // 属性变量 方式设置
self.tableView.estimatedRowHeight = 80;
self.tableView.rowHeight = UITableViewAutomaticDimension;
```
自定义非等高 Cell的更多相关文章
- iOS边练边学--自定义非等高的cell
一.使用xib或者storyboard自定义非等高的cell实现方式差不多,这里简单介绍一下通过xib文件实现的方法 <1.1>创建一个继承自UITableViewCell的子类,比如Ch ...
- 非等高cell实战(01)-- 实现微博页面
非等高cell实战(01)-- 实现微博页面 学习过UITableView.AutoLayout以及MVC的相关知识,接下来通过一个微博页面实战来整合一下. 首先看一下效果图: 需求分析 此页面为非等 ...
- 非等高cell实战--实现微博页面
代码地址如下:http://www.demodashi.com/demo/11639.html 前言 学习过UITableView.AutoLayout以及MVC的相关知识,接下来通过一个微博页面实战 ...
- 自定义不等高cell—storyBoard或xib自定义不等高cell
1.iOS8之后利用storyBoard或者xib自定义不等高cell: 对比自定义等高cell,需要几个额外的步骤(iOS8开始才支持) 添加子控件和contentView(cell的content ...
- iOS开发——UI进阶篇(三)自定义不等高cell,如何拿到cell的行高,自动计算cell高度,(有配图,无配图)微博案例
一.纯代码自定义不等高cell 废话不多说,直接来看下面这个例子先来看下微博的最终效果 首先创建一个继承UITableViewController的控制器@interface ViewControll ...
- iOS开发——UI进阶篇(二)自定义等高cell,xib自定义等高的cell,Autolayout布局子控件,团购案例
一.纯代码自定义等高cell 首先创建一个继承UITableViewCell的类@interface XMGTgCell : UITableViewCell在该类中依次做一下操作1.添加子控件 - ( ...
- 不等高cell的tableView界面搭建
一.搭建界面 1.界面分析 分析界面的层次结构,分析界面应该用什么控件来搭建 2.界面层次结构 分析之后,我们可以把这个界面分为四个模块(topView middleView commentView ...
- 【Android 应用开发】 自定义组件 宽高适配方法, 手势监听器操作组件, 回调接口维护策略, 绘制方法分析 -- 基于 WheelView 组件分析自定义组件
博客地址 : http://blog.csdn.net/shulianghan/article/details/41520569 代码下载 : -- GitHub : https://github.c ...
- ios中自定义tableView,CollectionView的cell什么时候用nib加载,什么时候用标识重用
做了一段时间的iOS,在菜鸟的路上还有很长的路要走,把遇到的问题记下来,好记性不如烂笔头. 在项目开发中大家经常会用到tableView和collectionView两个控件,然而在cell的自定义上 ...
随机推荐
- DropShadowEffect导致下拉框控件抖动
<!--<Border.Effect> <DropShadowEffect Direction="180" BlurRadius="1" ...
- webrtc自带client的视频引擎创建代码走读
src\webrtc\examples\peerconnection\client\conductor.ccbool Conductor::InitializePeerConnection()1 we ...
- phpBB安装
要测试一个网站的安全性,不得不安装一个网站.常用的Hello World!不行了,找了个phpBB安装.非常方便,记录一下安装过程. 下载phpBB 下载地址:http://tianjin.mycod ...
- C语言第二次实验作业
PTA ================= 11-6 方阵循环右移 --------------- 本题要求编写程序,将给定n×n方阵中的每个元素循环向右移m个位置,即将第0.1.....n-1列变换 ...
- SPRING中的线程池ThreadPoolTaskExecutor
一.初始化 1,直接调用 ThreadPoolTaskExecutor poolTaskExecutor = new ThreadPoolTaskExecutor(); //线程池所使用的缓冲队列 p ...
- JAVA生成Word文档(经过测试)
首先告诉大家这篇文章的原始出处:http://www.havenliu.com/java/514.html/comment-page-1#comment-756 我也是根据他所描述完成的,但是有一些地 ...
- Python Django框架 补充
Django REST framework ORM框架整理 Django框架 app间互借models字段的操作 ORM数据库操作补充:models中的一对一操作.过滤.事务 Django model ...
- CGContextRef详解
/* CoreGraphics - CGContext.h */ /** Graphics state functions. **/ //为了让开发者在进行坐标变换时无须计算多次坐标变换后的累加结果, ...
- jdbcTemplate学习(一)
概述 Spring JDBC抽象框架core包提供了JDBC模板类,其中JdbcTemplate是core包的核心类,所以其他模板类都是基于它封装完成的,JDBC模板类是第一种工作模式. JdbcTe ...
- 【274】Python 相关问题
一.中文编码 参考:Python 中文编码 Python中默认的编码格式是 ASCII 格式,在没修改编码格式时无法正确打印汉字,所以在读取中文时会报错. 解决方法为只要在文件开头加入如下代码,任 ...
