
Flutter 集成到现有iOS工程
前沿
由于我司已经有自己的App,flutter属于技术引进的一部分,也不太可能重新启动一个项目,因此目前我们是将flutter模块形式注入我们的App之中。即:将flutter模块集成到现在有iOS工程之中。
目录
- 创建flutter模块工程
- 使用pod 将flutter 模块工程添加到现有工程之中
- code 执行flutter 工程
- 运行热更新
1. 创建flutter模块工程
我这里是使用Android Studio 创建flutter工程,如下:
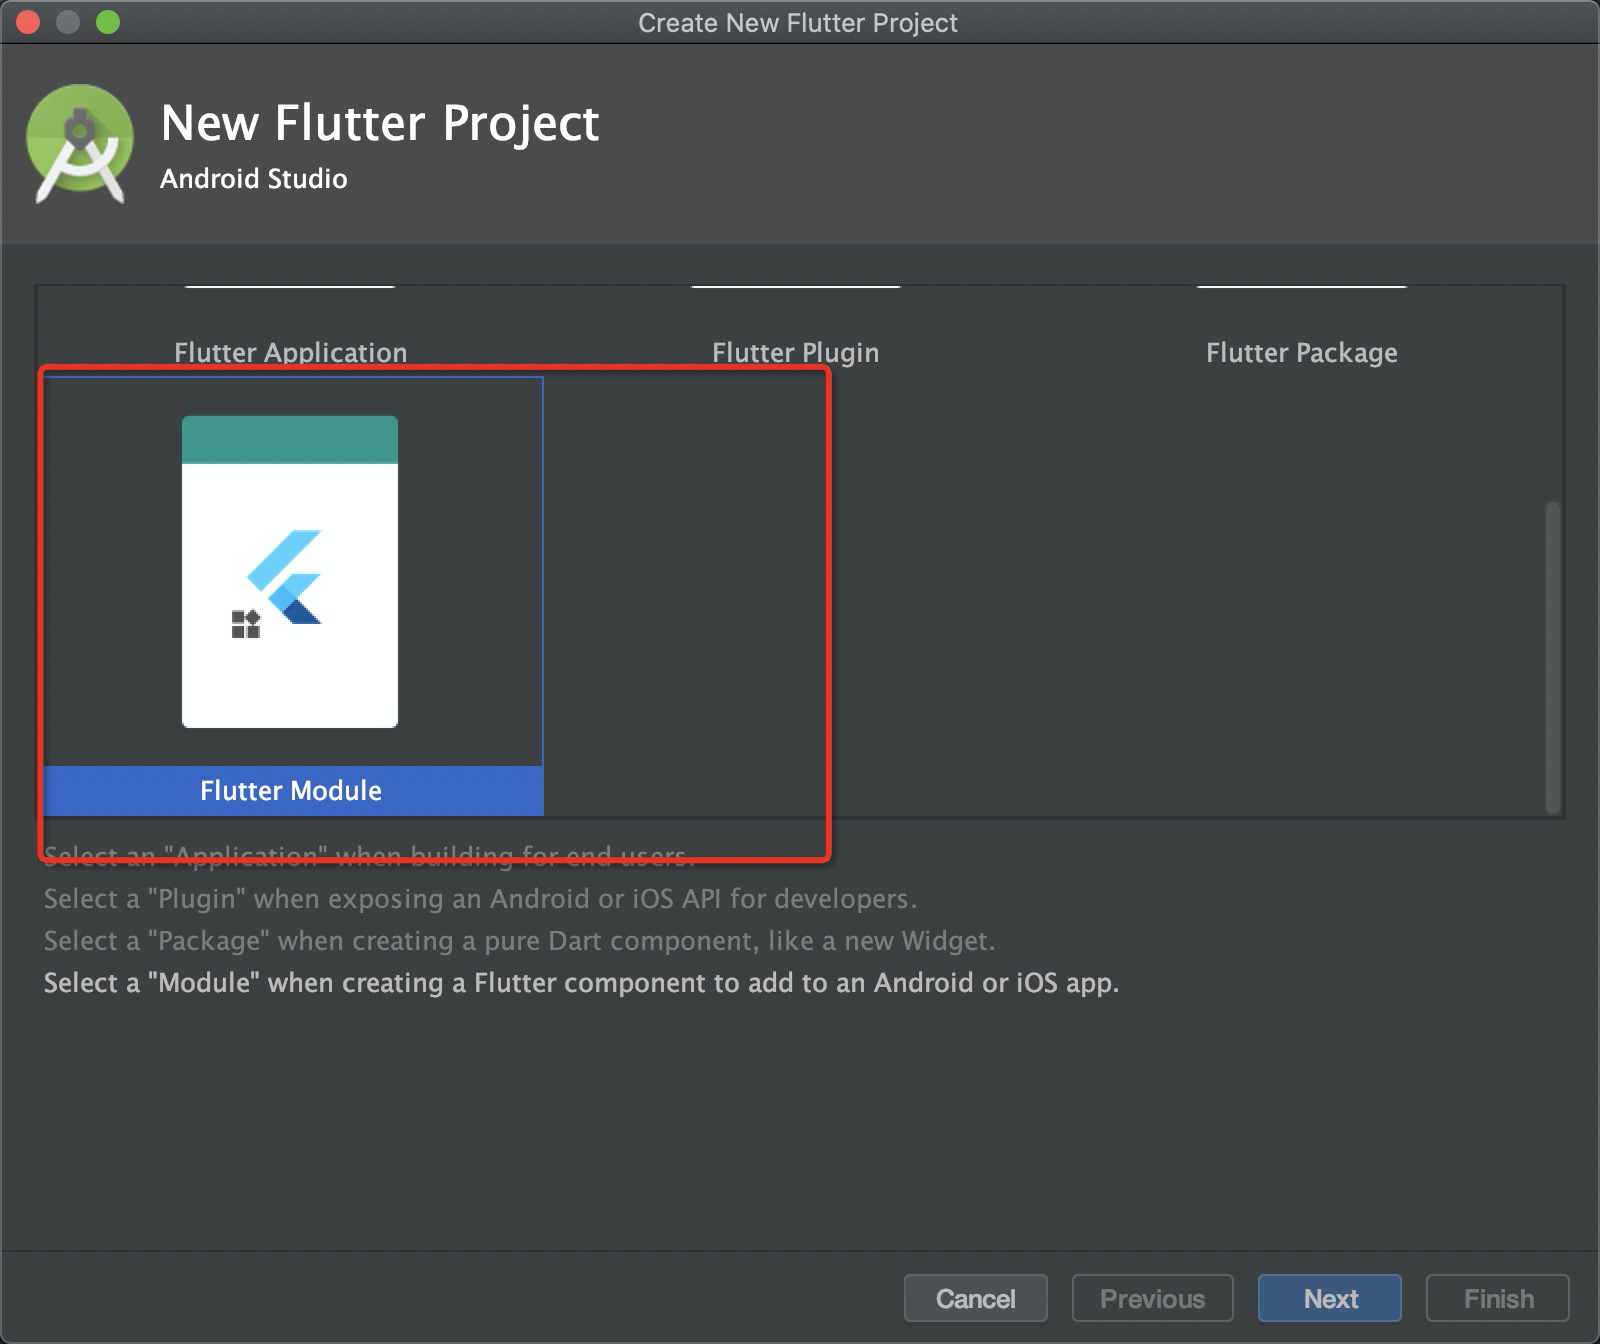
当然也可以使用flutter命令行进行创建,命令如下:
$ cd some/path/

$ flutter create -t module my_flutter
工程结构 和我们的iOS 工程保持相对目录,结构如下:
some/path/

  my_flutter/

    lib/main.dart

    .ios/

  MyApp/

    MyApp/

      AppDelegate.h

      AppDelegate.m (or swift)

      :
2. 使用pod 将flutter 模块工程添加到现有工程之中
2.1 podfile 文件之中引入 flutter模块工程
####Flutter###

flutter_application_path = '../my_flutter' //目录结构按照具体我们存储的路径进行

eval(File.read(File.join(flutter_application_path, '.ios', 'Flutter', 'podhelper.rb')), binding)
2.2 然后执行pod install
2.3 ENABLE_BITCODE 设置为NO
2.4 Build Phares 添加 以下脚本(+ 号添加一个新的脚本,然后复制下面的内容)
"$FLUTTER_ROOT/packages/flutter_tools/bin/xcode_backend.sh" build

"$FLUTTER_ROOT/packages/flutter_tools/bin/xcode_backend.sh" embed
执行编译即可
最新版本集成 (最新版本已经优化了很多东西,不需要配置sh)
####Flutter###

flutter_application_path = 'somepath/flutter_rokid'

load File.join(flutter_application_path, '.ios', 'Flutter', 'podhelper.rb')
target 'App' do
install_all_flutter_pods(flutter_application_path)
....
end
3.code 执行flutter 工程
1. AppDelete.h 配置
import FlutterPluginRegistrant // Only if you have Flutter Plugins.

@UIApplicationMain

class AppDelegate: FlutterAppDelegate {
  ...
self.flutterEngine = FlutterEngine(name: "xxx.flutter", project: nil);
self.flutterEngine?.run(withEntrypoint: nil);
GeneratedPluginRegistrant.register(with: self.flutterEngine);
   ...
}
2. 业务方调用
import Foundation

import Flutter

class RKFlutterDemo : UIViewController {

    override func viewDidLoad() {

        title = "flutter "

        var button = UIButton(type:UIButtonType.custom)

        button.addTarget(self, action: #selector(handleButtonAction), for: .touchUpInside)

        button.setTitle("Press me", for: UIControlState.normal)

        button.frame = CGRect(x: 80.0, y: 210.0, width: 160.0, height: 40.0)

        button.backgroundColor = UIColor.blue

        self.view.addSubview(button)

        button = UIButton(type:UIButtonType.custom)

        button.addTarget(self, action: #selector(handleButtonAction1), for: .touchUpInside)

        button.setTitle("Press me v1", for: UIControlState.normal)

        button.frame = CGRect(x: 80.0, y: 270.0, width: 160.0, height: 40.0)

        button.backgroundColor = UIColor.blue

        self.view.addSubview(button)

        button = UIButton(type:UIButtonType.custom)

        button.addTarget(self, action: #selector(handleButtonAction2), for: .touchUpInside)

        button.setTitle("Press me v2", for: UIControlState.normal)

        button.frame = CGRect(x: 80.0, y: 330.0, width: 160.0, height: 40.0)

        button.backgroundColor = UIColor.blue

        self.view.addSubview(button)

    }


  //全局生命周期,即便是 VC 退出页面下次打开还是会 停留在上一次操作结果(所以适合全局性页面)

    @objc func handleButtonAction() {

        let flutterEngine = (UIApplication.shared.delegate as? AppDelegate)?.flutterEngine;

        let flutterViewController = FlutterViewController(engine: flutterEngine, nibName: nil, bundle: nil)!;

        self.navigationController?.pushViewController(flutterViewController, animated: true)

    }


     //每次都会创建实例

    @objc func handleButtonAction1(){

        let flutterViewController = FlutterViewController();

        self.navigationController?.pushViewController(flutterViewController, animated: true)

    }


     //如果一个模块有多个 页面导航,则需要设置路由进行跳转

    @objc func handleButtonAction2(){

        let flutterViewController = FlutterViewController();

        flutterViewController.setInitialRoute("router1") //跳转到路由

        self.navigationController?.pushViewController(flutterViewController, animated: true)

    }

}
4. 运行热更新
其实在我们App 集成完成之后,我们还是可以在flutter工程之中直接运行到我们自己的工程之中
4.1 使用Xcode运行我们的App Command+R 运行
4.2 cd 到 在flutter 工程下 执行命令行:
flutter attach
这样我们直接编写 ,然后在 命令行中 按住 r 就可以 直接更新 App 中的页面了
备注:在3的打开方式之中 只能以下模式的页面可以更新
   @objc func handleButtonAction() {

        let flutterEngine = (UIApplication.shared.delegate as? AppDelegate)?.flutterEngine;

        let flutterViewController = FlutterViewController(engine: flutterEngine, nibName: nil, bundle: nil)!;

        self.navigationController?.pushViewController(flutterViewController, animated: true)

    }
参考文献
Flutter 集成到现有iOS工程的更多相关文章
- Cordova-在现有iOS工程自动化接入Cordova插件
模拟Cordova插件命令 自己编写脚本,了解cordova添加插件做了哪些事情. 上一篇文章了解到,web与native的交互主要是cordova.js中的exec方法调用,触发交互事件.UIWeb ...
- Flutter-现有iOS工程引入Flutter
前言 Flutter 是一个很有潜力的框架,但是目前使用Flutter的APP并不算很多,相关资料并不丰富,介绍现有工程引入Flutter的相关文章也比较少.项目从零开始,引入Flutter操作比较简 ...
- 升级添加到现有iOS Xcode项目的Flutter
如果你在2019年8月之前将Flutter添加到现有iOS项目,本文值得你一看. 在2019年7月30日,合并合并请求flutter / flutter#36793之前Flutter 1.8.4-pr ...
- Flutter踩坑日记:接入现有iOS项目
之前搞的Flutter版工具链已经弄完了,感兴趣的朋友可以围观下,Android版本dio库(v2.0.14)发送网络请求老是报错,去官方提了issue还没回,于是今天搞一下把Flutter模块接入到 ...
- 现有iOS项目集成React Native过程记录
在<Mac系统下React Native环境搭建>配置了RN的开发环境,然后,本文记录在现有iOS项目集成React Native的过程,官方推荐使用Cocoapods,项目一开始也是使用 ...
- react native 之 在现有的iOS工程中集成react native
在现有的iOS工程中集成react native, 或者说将react native引入到iOS 项目,是RN和iOS混合开发的必经之路 参考官网教程:https://reactnative.cn/d ...
- Cordova与现有框架的结合,Cordova插件使用教程,Cordova自定义插件,框架集成Cordova,将Cordova集成到现有框架中
一.框架集成cordova 将cordova集成到现有框架中 一般cordova工程是通过CMD命令来创建一个工程并添加Android.ios等平台,这样的创建方式可以完整的下载开发过程中所需要的的插 ...
- 将React Native 集成进现有OC项目中(过程记录) 、jsCodeLocation 生成方式总结
将RN集成到现有OC项目应该是最常见的,特别是已经有OC项目的,不太可能会去专门搞个纯RN的项目.又因为RN不同版本,引用的依赖可能不尽相同,所以特别说明下,本文参考的文档是React Native ...
- 给iOS工程增加Daily Build
给iOS工程增加Daily Build 前言 Daily Build 是一件非常有意义的事情,也是敏捷开发中关于 "持续集成" 的一个实践.Daily Build 对于开发来说有 ...
随机推荐
- nginx502问题
常见的502错误1.配置错误因为nginx找不到php-fpm了,所以报错,一般是fastcgi_pass后面的路径配置错误了,后面可以是socket或者是ip:port 2.资源耗尽lnmp架构在处 ...
- jsp2自定义标签开篇
在JSP2中开发标签库需要以下几个步骤: 1.开发自定义标签处理类: 2.建立一个*.tld文件,每个*.tld文件对应一个标签库,每个标签库可包含多个标签: 3.在JSP文件中使用自定义标签. 第一 ...
- yum设置代理
echo "proxy=http://[proxy_url]:8080" >> /etc/yum.conf
- POJ 3805 Separate Points (判断凸包相交)
题目链接:POJ 3805 Problem Description Numbers of black and white points are placed on a plane. Let's ima ...
- Codeforcs 1183B Equalize Prices
题目链接:codeforces.com/problemset/problem/1183/B 题意:给你 n 个数,每个数能在k范围内上下浮动,求能否使所有数相等,能输出相等的最大值,不能输出 -1. ...
- 面向对象(三)——组合、多态、封装、property装饰器
组合.多态.封装.property装饰器 一.组合 1.什么是组合 组合指的是某一个对象拥有一个属性,该属性的值是另外一个类的对象 class Foo(): pass class Bar(): pas ...
- jQuery中html()再探究(转载)
我们先来看段代码,很简单,如下: /*html部分*/ <div id="div1"> <span>111</span> <span> ...
- js 点击获取验证码后的倒数60s
<!DOCTYPE html> <html> <head> <meta charset="UTF-8" /> <script ...
- CyberArk
CyberArk PIM 套件由5个部分组成: · CyberArk EPV (Enterprise Password Vault)– 企业密码保险库 基于CyberArk 专利的Vault技术,为企 ...
- Mycat搭建负载均衡,读写分离的Mysql集群
Mycat搭建负载均衡,读写分离的Mysql集群 准备环境 1.mysql-5.7.24-linux-glibc2.12-x86_64.tar.gz 2.Mycat-server-1.6.7.4-te ...