springBoot 实现中文国际化
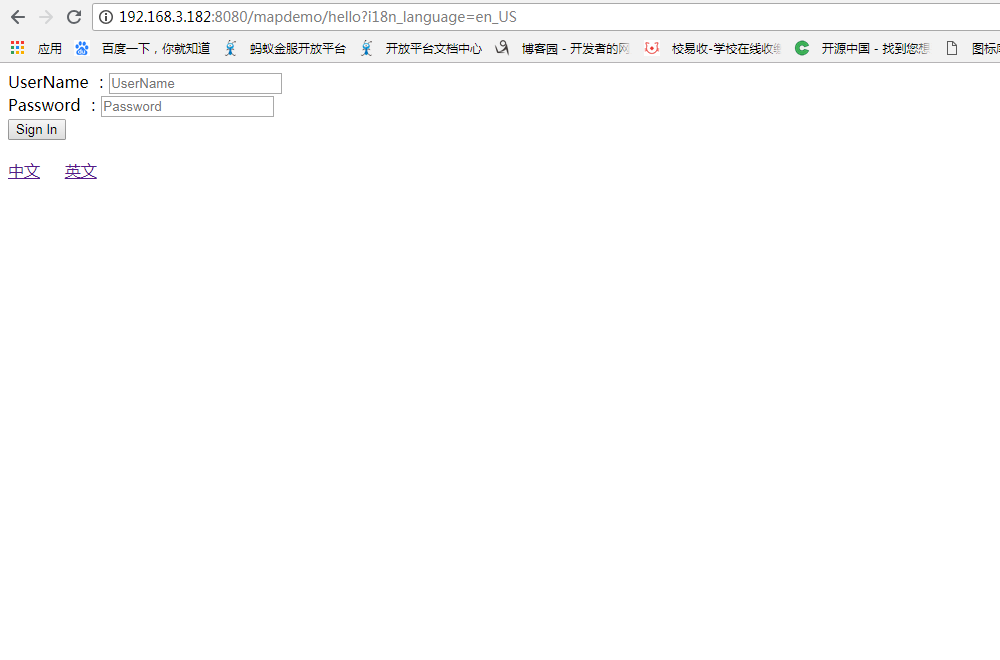
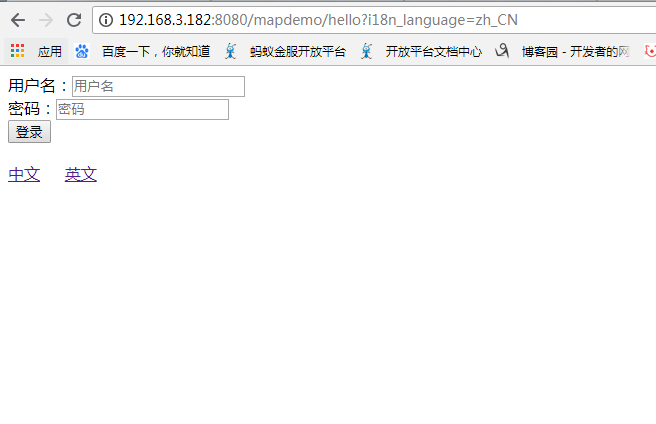
一:实现效果如下:
二 SpringBoot 国际化配置
1、创建国际化配置文件(3个):
messages.properties
messages.user.name=用户名

messages.user.password=密码

messages.user.btn=登录
messages_en_US.properties
messages.user.name=UserName

messages.user.password=Password

messages.user.btn=Sign In

messages.keyword=keyword
messages_zh_CN.properties
messages.user.name=\u7528\u6237\u540d

messages.user.password=\u5bc6\u7801

messages.user.btn=\u767b\u5f55

messages.keyword=\u5173\u952e\u8bcd
SpringBoot默认国际化文件为:classpath:message.properties,如果放在其它文件夹中,则需要在application.properties配置属性spring.messages.basename:
#表示放在classpath的i18n文件夹,文件前缀为mess

spring.messages.basename=i18n/messages
2.自定义国际化语言解析器
package com.joyny.ecas.config;

import org.springframework.web.servlet.LocaleResolver;

import org.thymeleaf.util.StringUtils;

import javax.servlet.http.HttpServletRequest;

import javax.servlet.http.HttpServletResponse;

import javax.servlet.http.HttpSession;

import java.util.Locale;

/**

 * 自定义国际化语言解析器

 *

 */

public class MyLocaleResolver implements LocaleResolver {

    private static final String I18N_LANGUAGE = "i18n_language";

    private static final String I18N_LANGUAGE_SESSION = "i18n_language_session";

    @Override

    public Locale resolveLocale(HttpServletRequest req) {

        String i18n_language = req.getParameter(I18N_LANGUAGE);

        Locale locale = Locale.getDefault();

        if(!StringUtils.isEmpty(i18n_language)) {

            String[] language = i18n_language.split("_");

            locale = new Locale(language[0], language[1]);

            //将国际化语言保存到session

            HttpSession session = req.getSession();

            session.setAttribute(I18N_LANGUAGE_SESSION, locale);

        }else {

            //如果没有带国际化参数,则判断session有没有保存,有保存,则使用保存的,也就是之前设置的,避免之后的请求不带国际化参数造成语言显示不对

            HttpSession session = req.getSession();

            Locale localeInSession = (Locale) session.getAttribute(I18N_LANGUAGE_SESSION);

            if(localeInSession != null) {

                locale = localeInSession;

            }

        }

        return locale;

    }

    @Override

    public void setLocale(HttpServletRequest req, HttpServletResponse res, Locale locale) {

    }

}
3、把国际化语言解析器放到Spring容器中:
package com.joyny.ecas.config;

import org.springframework.context.annotation.Bean;

import org.springframework.context.annotation.Configuration;

import org.springframework.web.servlet.LocaleResolver;

import org.springframework.web.servlet.config.annotation.InterceptorRegistry;

import org.springframework.web.servlet.config.annotation.WebMvcConfigurer;

//WebMvcConfigurerAdapter

//使用WebMvcConfigurerAdapter可以扩展SpringMvc的功能,包括拦截器,转换器等

//@EnableWebMvc //设置@EnableWebMvc为完全接管SpringMvc,但一般不要设置完全接管SpringMvc

@Configuration

public class CustomMvcConfig implements WebMvcConfigurer {

    /**

     * 配置自己的国际化语言解析器

     * @return

     */

    @Bean

    public LocaleResolver localeResolver() {

        return new MyLocaleResolver();

    }

    /**

     * 配置自己的拦截器

     */

    @Override

    public void addInterceptors(InterceptorRegistry registry) {

        //super.addInterceptors(registry);

    }

}
4、页面显示及切换国际化操作:
<!DOCTYPE html>

<html xmlns:th="http://www.thymeleaf.org">

<head>

    <meta charset="UTF-8">

    <title>Insert title here</title>

    <style type="text/css">

        .ib{

            display: inline-block;

        }

        .ml20{

            margin-left: 20px;

        }

        .mt20{

            margin-top: 20px;

        }

    </style>

</head>

<body>

<div>

    <div>[[#{messages.user.name}]]:<input th:placeholder="#{messages.user.name}"/></div>

</div>

<div>

    <div>[[#{messages.user.password}]]:<input th:placeholder="#{messages.user.password}"/></div>

</div>

<div>

    <div><button>[[#{messages.user.btn}]]</button></div>

</div>

<div class="mt20">

    <span class="ib"><a th:href="@{/mapdemo/hello(i18n_language=zh_CN)}">中文</a></span>

    <span class="ib ml20"><a th:href="@{/mapdemo/hello(i18n_language=en_US)}">英文</a></span>

</div>

</body>

</html>
springBoot 实现中文国际化的更多相关文章
- SpringBoot起飞系列-国际化(六)
一.前言 国际化这个功能可能我们不常用,但是在有需要的地方还是必须要上的,今天我们就来看一下怎么在我们的web开发中配置国际化,让我们的网站可以根据语言来展示不同的形式.本文接续上一篇SpringBo ...
- SpringBoot系列——i18n国际化
前言 国际化是项目中不可或缺的功能,本文将实现springboot + thymeleaf的HTML页面.js代码.java代码国际化过程记录下来. 代码编写 工程结构 每个文件里面的值(按工程结构循 ...
- springboot + freemarker 实现国际化
前言 写过一篇springboot+freemarker国际化过程中的细节问题,但没有写过具体的国际化实现过程.正好有人在问,我就把我实现的过程贴出来,即使自己知识的一个备份,如果对别人有点用,那是再 ...
- SpringBoot 快速支持国际化i18n
学习目标 快速学会如何在工程中支持国际化语言. 快速查阅 专题阅读:<SpringBoot 布道系列> 源码下载:springboot-locale-i18n — Hey Man,Don' ...
- SpringBoot 配置文件 中文乱码
本方案,支持springboot 很简单 在配置文件中不写中文,写中文的ascll码 直接百度在线转ASCII,用工具 把中文转ASCII码==>\u628a\u4e2d\u6587\u8f6c ...
- SpringBoot + Spring MVC国际化使用示例
项目中需要显示中英文两种语言,所以需要对显示的内容进行国际化,如下是一个示例程序. 程序文件结构,如下图,后面详细列出各文件的代码. 1. 编写maven的pom.xml文件,如下: <proj ...
- Flutter中的日期插件date_format 中文 国际化 及flutter_cupertino_date_picker
今天我们来聊聊Flutter中的日期和日期选择器. Flutter中的日期和时间戳 //日期时间戳转换 var _nowTime = DateTime.now();//获取当前时间 print(_no ...
- springboot自动配置国际化失效分析
最近在整理springBoot国际化时,发现国际化没有生效,通过报错提示在 MessageTag -> doEndTag处打断点 最后发现messageSource并不是ResourceBund ...
- SpringBoot @RequestBody 中文乱码
今天突然想学习一下Restful风,详细的我就不赘述了,我的理解是同一个请求路径根据请求方式不同进行不同的处理 如四种提交方式,这里推荐一个插件Postman,可以模仿各种请求类型,自行百度安装吧 G ...
随机推荐
- CTE 中字符串拼接
1>cte语法 1.1>基础语句和递归语句中必须有字段 1.2>最后只能跟一条查询语句 1.3>字符串拼接,要将拼接的字段转成字符串类型,cast(fieldName as n ...
- SSL技术白皮书
首页产品技术操作系统ComwareV5安全和VPN SSL技术白皮书 下载 收藏 打印 推荐 摘自:http://www.h3c.com/cn/d_200812/622834_30003_0.htm# ...
- /etc/profile、~/.bash_profile等几个文件的执行过程
/etc/profile.~/.bash_profile等几个文件的执行过程 摘自:http://blog.chinaunix.net/uid-14735472-id-3190130.html 分类 ...
- matrix derivatives
来源:cs229 stanford Machine Learning Notes
- [GO]tcp网络通信和实现
服务端的代码 package main import ( "net" "fmt" ) func main() { //监听 listener, err := n ...
- Hadoop有点难
从看<Hadoop权威指南>第一眼开始,我一直觉得Hadoop很难,很难.....看着这本书,我觉得好像是文言文,我是真的看不懂,我的一腔热血瞬间冷了下来!很幸运,但是也不幸运,我来到了一 ...
- Linq实战 之 Linq to Sql及Entity Framework操作详解
Linq实战 之 Linq to Sql及Entity Framework操作详解 一:linq to db的框架 1. linq to sql 2. linq to ado.net entity f ...
- duilib入门简明教程 -- 完整的自绘标题栏(8)
看了前面那么多教程,相信对duilib已有基本映像了,我们就快马加鞭,做出一个完整的自绘标题栏吧~ 看到下面这个效果图,小伙伴们是不是有点惊呆了呢~O(∩_∩)O~ duil ...
- [python] [转]如何自动生成和安装requirements.txt依赖
[转]如何自动生成和安装requirements.txt依赖 在查看别人的Python项目时,经常会看到一个requirements.txt文件,里面记录了当前程序的所有依赖包及其精确版本号.这个文件 ...
- EF:无法检查模型兼容性,因为数据库不包含模型元数据。
Model compatibility cannot be checked because the database does not contain model metadata. Model ...