
CUDA一维纹理内存
纹理一词来源于GPU图形世界,GPU通用并行计算“盗用”了纹理一词,定义了一个纹理内存的概念。纹理内存缓存在 设备上,在某些情况下能减少对内存的请求并降低内存带宽的使用,是专门为那些在内存访问模式中存在大量空间局部性的图形应用而设计,意味着一个线程读取的位置可能与邻近线程读取的位置“非常接近”。对于GPU内核而言,纹理内存是只读内存,并且只有通过特殊的纹理API才能对其访问。
纹理内存分为一维纹理内存和二维纹理内存,理解纹理内存最好的方式是丢掉“纹理”两个字,纹理内存本质上是一块内存,是GPU在特定应用中对一维、二维变量的特殊声明定义以及特殊使用,这种特殊使用能够减少内存流量,提升运算性能。
纹理变量(引用)必须声明为文件作用域内的全局变量,这里先探讨一下一维纹理内存的使用方法。一维纹理内存的关键操作如下:
- 1、用texture<类型>类型声明。
如声明一个unsigned char 型的一维纹理tex1,格式为:
texture<unsigned char,1,cudaReadmodeElementType> tex1;
- 2、通过cudaBindTexture()绑定到纹理内存中,并关联到对应的数据上。
如将unsigned char类型的dev_A绑定到一维纹理tex1上,格式为:
cudaBindTexture(0,tex1,dev_A);
注意一旦将数据绑定到一个纹理内存上,该数据就已经传输到了设备缓存上,在核函数中就可以直接访问,不再需要额外传入。
- 3、 通过tex1Dfetch()来读取纹理内存中的数据。
纹理内存是一种特殊的内存,需要使用特定的纹理API来访问其中的数据。如访问tex1数组的第3个元素,格式为:
tex1Dfetch(tex1,2);
- 4、 通过cudaUnbindTexture()取消绑定纹理内存。
纹理内存使用完之后需要取消绑定,释放空间,如解除纹理tex1的绑定,格式为:
cudaUnbindTexture(tex1);
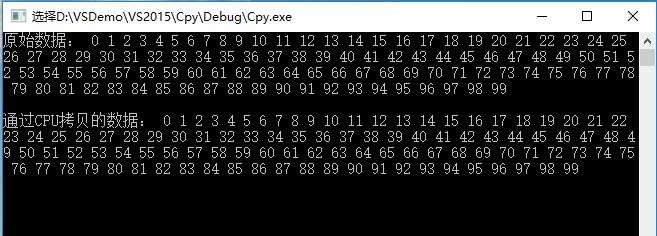
考虑一个简单的应用,把一个长度是100的向量A中的数据拷贝到一个向量B中,使用普通CPU编程实现如下:
#include <iostream>

using namespace std;

#define _length 100

//CPU函数实现复制一个数组

void Copy_CPU(unsigned int * listSource, unsigned int * listTarget, int length)

{

	for (int i = 0; i < length; i++)

	{

		listTarget[i] = listSource[i];

	}

}

int main()

{

	unsigned int * listSource = new unsigned int[_length];

	unsigned int * listTarget = new unsigned int[_length];

	//赋值

	for (int i = 0; i < _length; i++)

	{

		listSource[i] = i;

	}

	//调用CPU复制函数

	Copy_CPU(listSource, listTarget, _length);

	cout << "原始数据: ";

	for (int i = 0; i < _length; i++)

	{

		cout << listSource[i] << " ";

	}

	cout << endl << endl << "通过CPU拷贝的数据: ";

	for (int i = 0; i < _length; i++)

	{

		cout << listTarget[i] << " ";

	}

	getchar();

}
运行结果:
使用GPU编程,普通变量编程实现:
#include"cuda_runtime.h"

#include"device_launch_parameters.h"

#include<iostream>

#define _length 100

using namespace std;

//声明要调用的Copy_GPU函数

extern "C" void Copy_GPU(unsigned int* listSource, unsigned int* listTarget, int length);

void main(int argc, char** argv)

{

	unsigned int *listSource = new unsigned int[_length];

	unsigned int *listTarget = new unsigned int[_length];

	//赋值

	for (int i = 0; i < _length; i++)

	{

		listSource[i] = i;

	}

	// 调用Copy_GPU函数,Copy_GPU中会调用gpu端的kernel函数

	Copy_GPU(listSource, listTarget, _length);

	cout << "原始数据: ";

	for (int i = 0; i < _length; i++)

	{

		cout << listSource[i] << " ";

	}

	cout << endl << endl << "通过GPU普通内存拷贝的数据: ";

	for (int i = 0; i < _length; i++)

	{

		cout << listTarget[i] << " ";

	}

	getchar();

}

//核心代码,在gpu端执行的kernel,

__global__ void Blending_Texture(unsigned int* listSource, unsigned int* listTarget, int size)

{

	//通过线程ID得到数组下标

	int index = blockIdx.x * blockDim.x + threadIdx.x;

	if (index < size)

		listTarget[index] = listSource[index];

}

void Copy_GPU(unsigned int* listSource, unsigned int* listTarget, int length)

{

	int data_size = length * sizeof(unsigned int);

	unsigned int *dev_Source;

	unsigned int *dev_Target;

	//在设备上申请显存空间

	cudaMalloc((void**)&dev_Source, data_size);

	cudaMalloc((void**)&dev_Target, data_size);

	//将host端的数据拷贝到device端

	cudaMemcpy(dev_Source, listSource, data_size, cudaMemcpyHostToDevice);

	//调用kernel

	Blending_Texture << < ceil(_length / 10), 10 >> > (dev_Source, dev_Target, _length);

	//将结果拷贝到host端 ☆host就是CPU

	cudaMemcpy(listTarget, dev_Target, data_size, cudaMemcpyDeviceToHost);

	//释放内存空间

	cudaFree(dev_Source);

	cudaFree(dev_Target);

}
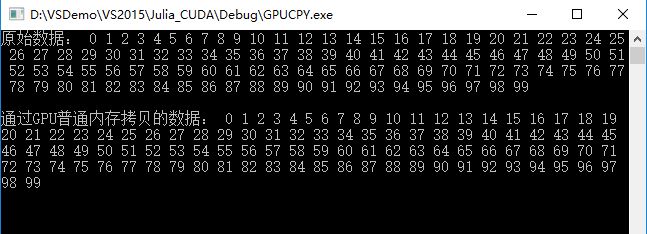
运行结果:
使用GPU编程,一维纹理变量编程实现:
#include"cuda_runtime.h"

#include"device_launch_parameters.h"

#include<iostream>

#define _length 100

using namespace std;

//声明纹理,用来绑定纹理,其实也就是个纹理标识

texture<unsigned int, 1, cudaReadModeElementType> rT1;

//声明要调用的Copy_GPU函数

extern "C" void Copy_GPU(unsigned int* listSource, unsigned int* listTarget, int length);

void main(int argc, char** argv)

{

	unsigned int *listSource = new unsigned int[_length];

	unsigned int *listTarget = new unsigned int[_length];

	//赋值

	for (int i = 0; i < _length; i++)

	{

		listSource[i] = i;

	}

	// 调用Copy_GPU函数,Copy_GPU中会调用gpu端的kernel函数

	Copy_GPU(listSource, listTarget, _length);

	cout << "原始数据: ";

	for (int i = 0; i < _length; i++)

	{

		cout << listSource[i] << " ";

	}

	cout << endl << endl << "通过GPU纹理内存拷贝的数据: ";

	for (int i = 0; i < _length; i++)

	{

		cout << listTarget[i] << " ";

	}

	getchar();

}

//核心代码,在gpu端执行的kernel,

__global__ void Blending_Texture(unsigned int* listTarget, int size)

{

	//通过线程ID得到数组下标

	int index = blockIdx.x * blockDim.x + threadIdx.x;

	//通过纹理获取函数得到数据再运算

	if (index < size)

		listTarget[index] = tex1Dfetch(rT1, index);

}

void Copy_GPU(unsigned int* listSource, unsigned int* listTarget, int length)

{

	int data_size = length * sizeof(unsigned int);

	unsigned int *dev_Source;

	unsigned int *dev_Target;

	//在设备上申请显存空间

	cudaMalloc((void**)&dev_Source, data_size);

	cudaMalloc((void**)&dev_Target, data_size);

	//将host端的数据拷贝到device端

	cudaMemcpy(dev_Source, listSource, data_size, cudaMemcpyHostToDevice);

	//绑定纹理,绑定的纹理标识对应的数据

	cudaBindTexture(0, rT1, dev_Source);

	//调用kernel

	Blending_Texture << < ceil(_length / 10), 10 >> > (dev_Target, _length);

	//将结果拷贝到host端 ☆host就是CPU

	cudaMemcpy(listTarget, dev_Target, data_size, cudaMemcpyDeviceToHost);

	//取消绑定

	cudaUnbindTexture(rT1);

	//释放内存空间

	cudaFree(dev_Source);

	cudaFree(dev_Target);

}
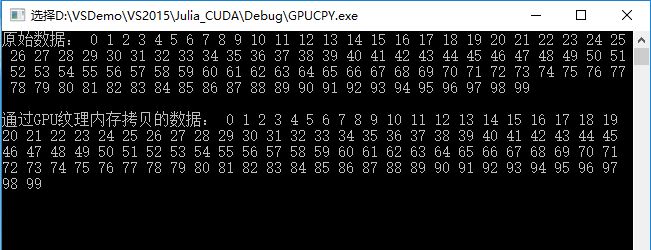
运行结果:
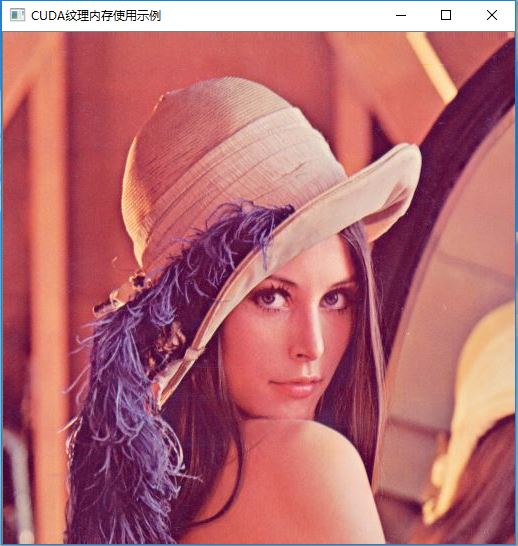
再举一个使用CUDA+OpenCv编程,实现复制一幅图像的例子:
#include"cuda_runtime.h"

#include<iostream>

#include<highgui/highgui.hpp>

#include<imgproc/imgproc.hpp>

#define DIM 512   //图像尺寸

using namespace std;

using namespace cv;

//一维纹理声明

texture<unsigned char, 1, cudaReadModeElementType> rT1;

__global__ void Kernel_Copy(unsigned char* imageTarget)

{

	int x = threadIdx.x + blockIdx.x*blockDim.x;

	int y = threadIdx.y + blockIdx.y*blockDim.y;

	int offset = x + y*blockDim.x*gridDim.x;

	//复制图像

	imageTarget[offset * 3 + 2] = tex1Dfetch(rT1, offset * 3 + 2);

	imageTarget[offset * 3 + 1] = tex1Dfetch(rT1, offset * 3 + 1);

	imageTarget[offset * 3 + 0] = tex1Dfetch(rT1, offset * 3 + 0);

}

void main(int argc, char** argv)

{

	Mat image = imread("D:\\lena.jpg");

	Mat imageSource;

	resize(image, imageSource, Size(DIM, DIM)); //调整图像大小

	Mat imageTarget = Mat(Size(DIM, DIM), CV_8UC3, Scalar::all(0));

	//分配空间

	unsigned char *dev_imageSource;

	unsigned char *dev_imageTarget;

	cudaMalloc((void**)&dev_imageSource, 3 * imageSource.rows*imageSource.cols);

	cudaMalloc((void**)&dev_imageTarget, 3 * imageSource.rows*imageSource.cols);

	cudaMemcpy(dev_imageSource, imageSource.data, 3 * imageSource.cols*imageSource.rows, cudaMemcpyHostToDevice);

	cudaMemcpy(dev_imageTarget, imageTarget.data, 3 * imageSource.cols*imageSource.rows, cudaMemcpyHostToDevice);

	//绑定纹理

	cudaBindTexture(0, rT1, dev_imageSource);

	dim3 grids(DIM / 16, DIM / 16);

	dim3 threads(16, 16);

	//调用kernel

	Kernel_Copy << < grids, threads >> > (dev_imageTarget);

	//将结果拷贝到host端 ☆host就是CPU

	cudaMemcpy(imageTarget.data, dev_imageTarget, 3 * imageSource.cols*imageSource.rows, cudaMemcpyDeviceToHost);

	imshow("CUDA纹理内存使用示例", imageTarget);

	waitKey();

	//解除纹理绑定

	cudaUnbindTexture(rT1);

	cudaFree(dev_imageSource);

	cudaFree(dev_imageSource);

}
运行结果:
CUDA一维纹理内存的更多相关文章
- CUDA:纹理内存
纹理内存: 与常量内存类似,纹理内存是另一种形式的只读内存,并且同样缓存在芯片上.因此某些情况下能够减少对内存的请求并提供高效的内存带宽.纹理内存是专门为那些在内存访问模式中存在大量空间局部性的图形应 ...
- 《GPU高性能编程CUDA实战》第七章 纹理内存
▶ 本章介绍了纹理内存的使用,并给出了热传导的两个个例子.分别使用了一维和二维纹理单元. ● 热传导(使用一维纹理) #include <stdio.h> #include "c ...
- CUDA二维纹理内存+OpenCV图像滤波
CUDA和OpenCV混合编程,使用CUDA的纹理内存,实现图像的二值化以及滤波功能. #include <cuda_runtime.h> #include <highgui/hig ...
- CUDA Texture纹理存储器 示例程序
原文链接 /* * Copyright 徐洪志(西北农林科技大学.信息工程学院). All rights reserved. * Data: 2012-4-20 */ // // 此程序是演示了1D和 ...
- CUDA中多维数组以及多维纹理内存的使用
纹理存储器(texture memory)是一种只读存储器,由GPU用于纹理渲染的图形专用单元发展而来,因此也提供了一些特殊功能.纹理存储器中的数据位于显存,但可以通过纹理缓存加速读取.在纹理存储器中 ...
- cuda纹理内存的使用
CUDA纹理内存的访问速度比全局内存要快,因此处理图像数据时,使用纹理内存是一个提升性能的好方法. 贴一段自己写的简单的实现两幅图像加权和的代码,使用纹理内存实现. 输入:两幅图 lena, moon ...
- 基于纹理内存的CUDA热传导模拟
原文链接 项目中有三个,第一个是全局内存,其余两个分别是基于1d和2d纹理内存.项目打包下载. 纹理内存是只读内存,与常量内存相同的是,纹理内存也缓存在芯片中,因此某些情况下,它能减少对内存的请求并提 ...
- CUDA C 纹理提取Texture Fetching
CUDA C 纹理提取Texture Fetching 一.参数曲面的纹理 使用纹理指定参数曲面属性. 二.CUDA C 纹理获取开发 用于计算纹理函数,根据纹理引用的各种属性返回的值的公式(请参见 ...
- CUDA 纹理内存
原文链接 1.概述 纹理存储器中的数据以一维.二维或者三维数组的形式存储在显存中,可以通过缓存加速访问,并且可以声明大小比常数存储器要大的多. 在kernel中访问纹理存储器的操作称为纹理拾取(tex ...
随机推荐
- 基于mpvue的小程序项目搭建的步骤一
未标题-1.png mpvue 是美团开源的一套语法与vue.js一致的.快速开发小程序的前端框架,按官网说可以达到小程序与H5界面使用一套代码.使用此框架,开发者将得到完整的 Vue.js 开发体验 ...
- Elasticsearch 2.3.2 从oracle中同步数据
Elasticsearch 2.3.2 从oracle中同步数据 1 数据批量导入-oracle 采用 elasticsearch-jdbc 插件 安装.版本需要ES版本一致 最新 ...
- IGeometryCollection Interface
Come from ArcGIS Online IGeometryCollection Interface Provides access to members that can be used fo ...
- 对延时敏感的应用是否应该使用Docker?
在High Scalability上看到一篇文章 How Does The Use of Docker Effect Latency? .文章回答了一个问题 I keep hearing about ...
- 钢琴 - steinway
http://www.wangyanpiano.com/bbs/thread-104723-1-1.html Poston 波士顿钢琴 三角钢琴 GP-156 黑色抛光 178 ...
- 使用Perl批量读取文件最后行
使用Perl批量读取文件最后行 面对成百上千个文件,有时我们需要查看它的最后行,单个文件打开将耗费大量时间,而通过Perl提取出最后行,将快速的帮助我们处理繁琐的事务. 特性 整个目录完全遍历,自动提 ...
- [D3] Create Labels from Numeric Data with Quantize Scales in D3 v4
Sometimes data needs to be converted from a continuous range, like test scores, to a discrete set of ...
- HDU1575-Tr A(矩阵高速幂)
题目链接 题意:A为一个方阵,则Tr A表示A的迹(就是主对角线上各项的和),现要求Tr(A^k)%9973. 思路:简单的矩阵高速幂 代码: #include <iostream> #i ...
- POJ 2914 Minimum Cut 最小割算法题解
最标准的最小割算法应用题目. 核心思想就是缩边:先缩小最大的边.然后缩小次大的边.依此缩小 基础算法:Prime最小生成树算法 只是本题測试的数据好像怪怪的,相同的算法时间执行会区别非常大,并且一样的 ...
- todo bitnami
https://bitnami.com/stack/dokuwiki https://bitnami.com/stack/jenkins/installer