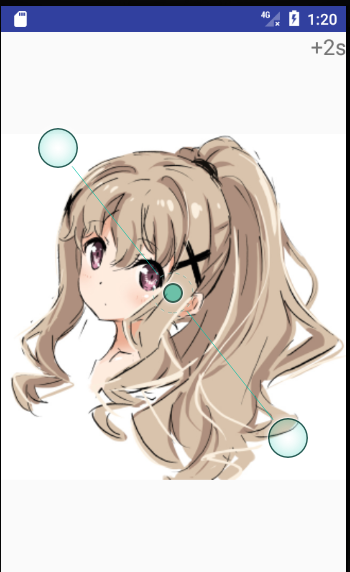
Android课程设计第六天欢迎界面(跳转)
注意:课程设计只为完成任务,不做细节描述~

package com.example.myapplication;

import android.app.Activity;

import android.content.Intent;

import android.os.Bundle;

import android.os.Handler;

import android.view.View;

import android.widget.TextView;

/**

 * Created by 樱花落舞 on 2017/6/13.

 */

public class JumpActivity extends Activity {

    TextView textView;

    int time=3;

    Handler handler=new Handler();

    @Override

    protected void onCreate(Bundle savedInstanceState) {

        super.onCreate(savedInstanceState);

        setContentView(R.layout.jump);

        textView= (TextView) findViewById(R.id.textview);

        handler.postDelayed(runnable,1000);

    }

    Runnable runnable=new Runnable() {

        @Override

        public void run() {

            time--;

            handler.postDelayed(this,1000);

            textView.setText("+"+time+"s");

            if(time==0){

                Intent intent = new Intent(JumpActivity.this,TestActivity.class);

                startActivity(intent);

                finish();

            }else {

                textView.setOnClickListener(new View.OnClickListener() {

                    @Override

                    public void onClick(View v) {

                        Intent intent=new Intent(JumpActivity.this,TestActivity.class);

                        startActivity(intent);

                        //结束线程

                        handler.removeCallbacks(runnable);

                        finish();

                    }

                });

            }

        }

    };

}
package com.example.myapplication;

import android.content.Intent;

import android.support.v7.app.AppCompatActivity;

import android.os.Bundle;

public class MainActivity extends AppCompatActivity {

    @Override

    protected void onCreate(Bundle savedInstanceState) {

        super.onCreate(savedInstanceState);

        setContentView(R.layout.activity_main);

        intent.setClass(MainActivity.this,JumpActivity.class);

        startActivity(intent);

        MainActivity.this.finish();

    }

    Intent intent = new Intent();

}
package com.example.myapplication;

import android.app.Activity;

import android.os.Bundle;

import android.support.annotation.Nullable;

/**

 * Created by 樱花落舞 on 2017/6/13.

 */

public class TestActivity extends Activity {

    @Override

    protected void onCreate(@Nullable Bundle savedInstanceState) {

        super.onCreate(savedInstanceState);

        setContentView(R.layout.empty_activity);

    }

}
<?xml version="1.0" encoding="utf-8"?>

<RelativeLayout xmlns:android="http://schemas.android.com/apk/res/android"

    xmlns:app="http://schemas.android.com/apk/res-auto"

    xmlns:tools="http://schemas.android.com/tools"

    android:layout_width="match_parent"

    android:layout_height="match_parent"

    tools:context="com.example.myapplication.MainActivity"

    android:orientation="vertical">

    <ImageView

        android:layout_width="match_parent"

        android:layout_height="match_parent"

        android:src="@mipmap/bg"/>

    <TextView

        android:layout_width="wrap_content"

        android:layout_height="wrap_content"

        android:text="+3秒"

        android:id="@+id/text"

        android:textSize="20dp"

        android:layout_alignParentRight="true"/>

</RelativeLayout>
<?xml version="1.0" encoding="utf-8"?>

<RelativeLayout xmlns:android="http://schemas.android.com/apk/res/android"

    android:layout_width="match_parent" android:layout_height="match_parent">

   <TextView

       android:layout_width="wrap_content"

       android:layout_height="wrap_content"

       android:background="@mipmap/a"/>

</RelativeLayout>
<?xml version="1.0" encoding="utf-8"?>

<RelativeLayout xmlns:android="http://schemas.android.com/apk/res/android"

    android:layout_width="match_parent" android:layout_height="match_parent"

    android:orientation="vertical">

    <ImageView

        android:layout_width="match_parent"

        android:layout_height="match_parent"

        android:src="@mipmap/bg"/>

    <TextView

        android:layout_width="wrap_content"

        android:layout_height="wrap_content"

        android:id="@+id/textview"

        android:textSize="20sp"

        android:text="+3s"

        android:layout_alignParentRight="true"/>

</RelativeLayout>
<?xml version="1.0" encoding="utf-8"?>

<manifest xmlns:android="http://schemas.android.com/apk/res/android"

    package="com.example.myapplication">

    <application

        android:allowBackup="true"

        android:icon="@mipmap/ic_launcher"

        android:label="@string/app_name"

        android:roundIcon="@mipmap/ic_launcher_round"

        android:supportsRtl="true"

        android:theme="@style/AppTheme">

        <activity android:name=".MainActivity">

            <intent-filter>

                <action android:name="android.intent.action.MAIN" />

                <category android:name="android.intent.category.LAUNCHER" />

            </intent-filter>

        </activity>

        <activity android:name=".JumpActivity"

            android:label="@string/app_name"

        >

            <meta-data

                android:name="android.support.PARENT_ACTIVITY"

                android:value=".MainActivity"/>

        </activity>

        <activity android:name=".TestActivity"

            android:label="@string/app_name">

            <meta-data

                android:name="android.support.PARENT_ACTIVITY"

                android:value=".MainActivity"/>

        </activity>

    </application>

</manifest>
Android课程设计第六天欢迎界面(跳转)的更多相关文章
- Android课程设计第二天界面排版
注意:课程设计只为完成任务,不做细节描述~ 老师叫我们做一个这个样子,然后.. <?xml version="1.0" encoding="utf-8"? ...
- Android课程设计第五天欢迎界面(滑动)和图形选择
注意:课程设计只为完成任务,不做细节描述~ 滑动界面 package com.example.myapplication; import android.content.Intent; import ...
- Android课程设计——博学谷1.0
本文讲述了如何应用大三下学期智能移动终端开发技术课程所学知识,完成包含服务器端.客户端程序的应用——博学谷登录模块的开发,结合java语言基本知识,例如:字符串.列表.类.数据库读写等,设计.实现一个 ...
- java(课程设计之记事本界面部分代码公布)
代码:涉及记事本的一些界面......!! /* *java课程设计之记事本(coder @Gxjun) * 编写一个记事本程序 * 要求: * 用图形用户界面实现. * 能实现编辑.保存.另存为.查 ...
- Android课程设计第四天ListView运用
注意:课程设计只为完成任务,不做细节描述~ 效果图 <?xml version="1.0" encoding="utf-8"?> <Relat ...
- Android课程设计第三天帧动画区间动画
注意:课程设计只为完成任务,不做细节描述~ 点火是帧动画,发射是区间动画,于是 <?xml version="1.0" encoding="utf-8"? ...
- Android课程设计第一天Android Studio安装
注意:课程设计只为完成任务,不做细节描述~ 学校有一个Android的课设,所以顺便把Android Studio安装了上去. 实际上安装过程并不复杂,只有几个地方需要注意~ 安装包可以去http:/ ...
- java课程设计--WeTalk(201521123072秦贞一)
在线群聊系统 1,团队课程设计博客链接 http://www.cnblogs.com/slickghost/p/7018105.html 个人负责模块或任务说明 负责模块:界面设计与实现 2,自己的代 ...
- Android 手机卫士--设置界面&功能列表界面跳转逻辑处理
在<Android 手机卫士--md5加密过程>中已经实现了加密类,这里接着实现手机防盗功能 本文地址:http://www.cnblogs.com/wuyudong/p/5941959. ...
随机推荐
- java 调用ant的自己定义task,默认不是build.xml 的一点问题
java 调用ant的自己定义task, File buildFile = new File(".//ee-build.xml"); // 创建一个ANT项目 ...
- JAVA学习之 Model2中的Servlet与.NET一般处理程序傻傻分不清楚
时隔多日,多日合适吗,应该是时隔多月.我又想起了一般处理程序.这都是由于近期在实现的DRP系统中经经常使用到jsp+servlet达到界面与逻辑的分离.servlet负责处理从jsp传回的信息:每当这 ...
- [转]XCode中修改缺省公司名称/开发人员名称
本文转载至 http://www.cnblogs.com/zhulin/archive/2011/11/24/2261537.html XCode新建文件后,头部会有开发人员名称,公司名称等信息 ...
- Golang 现有的哲学中,要求你尽量手工处理所有的错误返回
更优雅的 Golang 错误处理 - Go语言中文网 - Golang中文社区 https://studygolang.com/articles/9407
- BigDecimal快速使用
double类型最多支持16位有效数字,且最大值只支持10^308次方,大一点的数字会变为科学计数法,小数精度不够等有一系列不方便的问题: 引进BigDecimal解决此类麻烦,弊端,BigDecim ...
- docker 初试---常用命令
http://blog.csdn.net/wsscy2004/article/details/25878363 常用命令 查看容器的root用户密码 docker logs <容器名orID&g ...
- hdu 4022 Bombing(map,multiset)
题意:n个基地放在2维平面,然后m个炸弹人,每个炸弹人可以炸一行或者一列,输出每个炸弹人炸掉的基地个数. 思路:用map<int,multiset<int> >对应起来一行或者 ...
- CollectionView垂直缩放卡片布局
实现效果 实现思路 从效果图可以看到变化是,越是往中间滚动的item显示最大,越显眼.而越是往前面,或者越是后面的,反而显示越小,这样就形成了视觉差. 实现的思路就是通过重写在可见范围内的所有item ...
- bzoj2973石头游戏——矩阵乘法
题目:权限题! 写了一下,但提交不了,先放着吧. 代码如下: #include<iostream> #include<cstdio> #include<cstring&g ...
- 树莓派Dietpi系统配置Dueros
dietpi 系统安装alsa工具 安装依赖 sudo apt-get install python-dateutil sudo apt-get install gir1.2-gstreamer- ...
