harbor 构建企业级镜像仓库
安装harbor
构建企业级镜像仓库
Harbor是由VMware公司开源的镜像仓库,harbor是在docker Registry上进行了企业级扩展,从而获得了更广泛的应用,这些新的企业级特性包括:管理用户界面,基于角色的访问控制,AD/LDAP继承以及审计日志的功能,足以满足企业需求.
官方地址: https://vmware.github.io/barbor/cn/
安装harbor
docker-harbor-2-3-0.tar.gz
wget https://github.com/goharbor/harbor/releases/download/v2.3.1/harbor-offline-installer-v2.3.1.tgz
tar xf harbor-offline-installer-v2.3.1.tgz -C /usr/local
cd harbor
vi harbor.yml
修改hostname为本机IP地址
#hostname: reg.mydomain.com
hostname: 192.168.3.250
修改完毕后保存.
准备harbor仓库:
[root@master1 harbor]# ./prepare
#注意安装harbor需要依赖两个环境 一个是docker 一个是docker compose
docker已经安装完毕.现在安装docker compose
同时你直接安装也会提醒你 没有安装docke-compose:
Note: docker version: 19.03.7
Need to install docker-compose(1.18.0+) by yourself first and run this script again
0. 生成ca证书:
mkdir /data/ssl -p
cd /data/ssl/
openssl genrsa -out ca.key 3072
#生成一个3072位的key,也就是私钥
openssl req -new -x509 -days 3650 -key ca.key -out ca.pem
[root@localhost ssl]# openssl req -new -x509 -days 3650 -key ca.key -out ca.pem
You are about to be asked to enter information that will be incorporated
into your certificate request.
What you are about to enter is what is called a Distinguished Name or a DN.
There are quite a few fields but you can leave some blank
For some fields there will be a default value,
If you enter '.', the field will be left blank.
-----
Country Name (2 letter code) [XX]:CN #<---------写 CN
State or Province Name (full name) []:SH #<---------- 写 SH
Locality Name (eg, city) [Default City]:SH #<---------- 写 SH
Organization Name (eg, company) [Default Company Ltd]: #<---------- 下面的全部回车
Organizational Unit Name (eg, section) []:
Common Name (eg, your name or your server's hostname) []:
Email Address []:
# 生成的证书目录: /data/ssl
[root@localhost ssl]# ll
total 8
-rw-r--r-- 1 root root 2459 Aug 8 23:39 ca.key
-rw-r--r-- 1 root root 1574 Aug 8 23:41 ca.pem
#生成一个数字证书ca.pem,3650表示证书的有效时间是3年,按箭头提示填写即可,没有箭头标注的为空:
# 再生成一个域名的证书:
openssl genrsa -out harbor.key 3072
[root@localhost ssl]# openssl req -new -key harbor.key -out harbor.csr
You are about to be asked to enter information that will be incorporated
into your certificate request.
What you are about to enter is what is called a Distinguished Name or a DN.
There are quite a few fields but you can leave some blank
For some fields there will be a default value,
If you enter '.', the field will be left blank.
-----
Country Name (2 letter code) [XX]:CN
State or Province Name (full name) []:SH
Locality Name (eg, city) [Default City]:SH
Organization Name (eg, company) [Default Company Ltd]:
Organizational Unit Name (eg, section) []:
Common Name (eg, your name or your server's hostname) []:harbor
Email Address []:
Please enter the following 'extra' attributes
to be sent with your certificate request
A challenge password []:
An optional company name []:
# 签发证书:
[root@localhost ssl]# openssl x509 -req -in harbor.csr -CA ca.pem -CAkey ca.key -CAcreateserial -out harbor.pem -days 3650
#提示:
Signature ok
subject=/C=CN/ST=SH/L=SH/O=Default Company Ltd/CN=harbor
Getting CA Private Key
1. 安装docker compose:
git clone https://github.com/docker/compose.git 或者上传 compose
https://www.chenleilei.net/soft/docker/docker-compose-Linux-x86_64.tar.gz
课件:第一阶段重新认识Docker课件.zip中也有,上传docker-compose
[root@master1 harbor]# tar xf docker-compose-Linux-x86_64.tar.gz
[root@master1 harbor]# mv docker-compose-Linux-x86_64 /usr/bin/docker-compose
[root@master1 harbor]# chmod +x /usr/bin/docker-compose
2. 安装harbor
wget https://www.chenleilei.net/soft/k8s/harbor-offline-installer-v2.3.0-rc3.tgz
[root@master1 ~]# tar -xf harbor-offline-installer-v2.3.0-rc3.tgz -C /usr/local/
[root@master1 ~]# cd /usr/local/harbor
[root@master1 ~]# vi harbor.yml
1. 修改hostname为本机IP地址
#hostname: reg.mydomain.com 这行注释,下面写本机IP:
hostname: 192.168.3.250
2. 添加ssl证书
#生成的证书位置:
/data/ssl/harbor.pem
/data/ssl/harbor.key
#添加到harbor.yaml中
找到以下内容:
# https related config
# https:
# https port for harbor, default is 443
# port: 443
# The path of cert and key files for nginx
# certificate: /your/certificate/path
# private_key: /your/private/key/path
改为:
# https related config
https:
# https port for harbor, default is 443
port: 443
# The path of cert and key files for nginx
certificate: /data/ssl/harbor.pem
private_key: /data/ssl/harbor.key
修改完毕后保存.
# 可选: 如果有安装包的话直接导入就好,没有就让系统自动下载
# 直接导入:
[root@localhost harbor]# docker load -i docker-harbor-2-3-0.tar.gz
# 没有的话直接下面的初始化。
3. 初始化harbor:
[root@master1 harbor]# ./prepare
#出现报错: ERROR:root:Error: The protocol is https but attribute ssl_cert is not set
# 注释 https port: 443 然后再次执行
[root@master1 harbor]# ./install.sh # 安装,之后如果要启动则使用: /harbor/start.sh 即可
正确输出:
Note: stopping existing Harbor instance ...
Stopping harbor-jobservice ... done
Stopping nginx ... done
Stopping harbor-core ... done
Stopping registryctl ... done
Stopping harbor-portal ... done
Stopping registry ... done
Stopping harbor-db ... done
Stopping redis ... done
Stopping harbor-log ... done
Removing harbor-jobservice ... done
Removing nginx ... done
Removing harbor-core ... done
Removing registryctl ... done
Removing harbor-portal ... done
Removing registry ... done
Removing harbor-db ... done
Removing redis ... done
Removing harbor-log ... done
Removing network harbor_harbor
[Step 5]: starting Harbor ...
Creating network "harbor_harbor" with the default driver
Creating harbor-log ... done
Creating harbor-db ... done
Creating harbor-portal ... done
Creating redis ... done
Creating registryctl ... done
Creating registry ... done
Creating harbor-core ... done
Creating harbor-jobservice ... done
Creating nginx ... done
----Harbor has been installed and started successfully.----
#看到这个就是安装成功了
4. 如果没有正常启动harbor,需要手动启动:
[root@master1 harbor]# docker-compose up
[root@master1 harbor]# docker-compose start
Starting log ... done
Starting registry ... done
Starting registryctl ... done
Starting postgresql ... done
Starting portal ... done
Starting redis ... done
Starting core ... done
Starting jobservice ... done
Starting proxy ... done
启动成功后查看状态:
[root@localhost harbor]# docker-compose ps
Name Command State Ports
------------------------------------------------------------------------------------------------------------------------------------------------
harbor-core /harbor/entrypoint.sh Up (healthy)
harbor-db /docker-entrypoint.sh 96 13 Up (healthy)
harbor-jobservice /harbor/entrypoint.sh Up (healthy)
harbor-log /bin/sh -c /usr/local/bin/ ... Up (healthy) 127.0.0.1:1514->10514/tcp
harbor-portal nginx -g daemon off; Up (healthy)
nginx nginx -g daemon off; Up (healthy) 0.0.0.0:80->8080/tcp,:::80->8080/tcp, 0.0.0.0:443->8443/tcp,:::443->8443/tcp
redis redis-server /etc/redis.conf Up (healthy)
registry /home/harbor/entrypoint.sh Up (healthy)
registryctl /home/harbor/start.sh Up (healthy)
#如果你看到的状态事这样:
Can't find a suitable configuration file in this directory or any
parent. Are you in the right directory?
Supported filenames: docker-compose.yml, docker-compose.yaml
那么可能是 你不在harbor目录中或者命令没有配置..需要先进入harbor目录再次查看.
4. 检擦harbor启动状态:
[root@k8s-master2 harbor]# ps -ef|grep harbor
root 101657 101620 0 16:18 ? 00:00:00 /bin/sh /harbor/start.sh
root 101934 101657 0 16:18 ? 00:00:00 sudo -E -u #10000 /harbor/harbor_registryctl -c /etc/registryctl/config.yml
10000 101939 101934 0 16:18 ? 00:00:00 /harbor/harbor_registryctl -c /etc/registryctl/config.yml
10000 101970 101952 0 16:18 ? 00:00:00 /harbor/harbor_core
10000 102052 102035 0 16:18 ? 00:00:00 /harbor/harbor_jobservice -c /etc/jobservice/config.yml
root 102587 45443 0 16:19 pts/1 00:00:00 grep --color=auto harbor
5. 访问harbor前配置:
因为配置了https,则需要添加host解析[Windows上的hosts添加解析]:
192.168.3.250 harbor.com
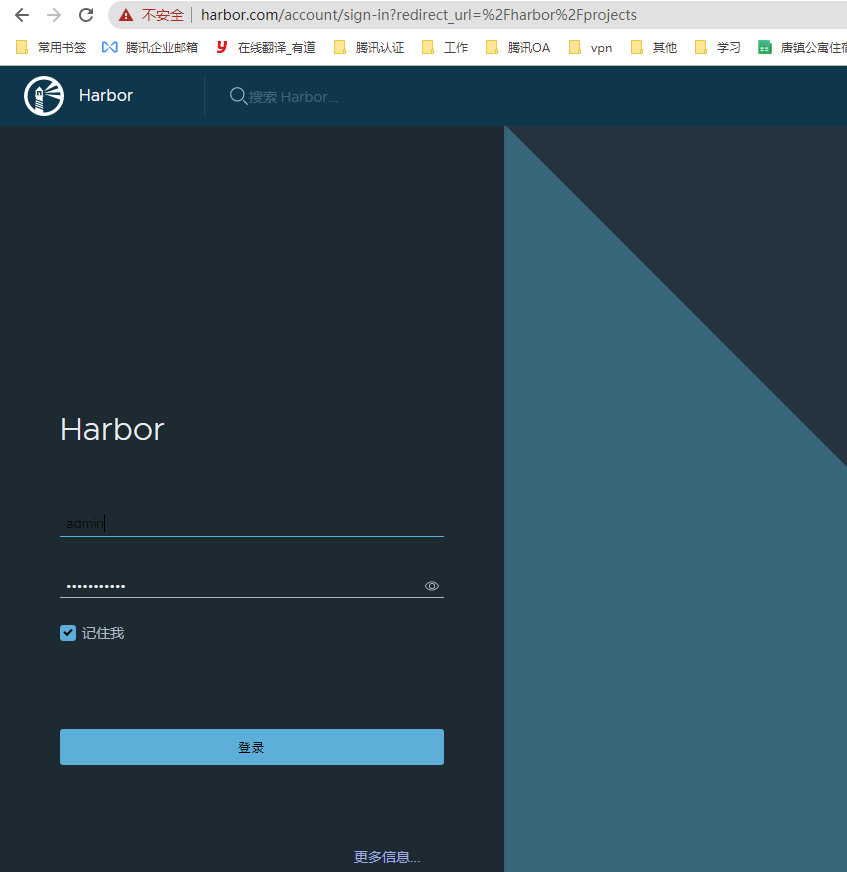
5. 登录harbor
默认账号密码:
admin
Harbor12345
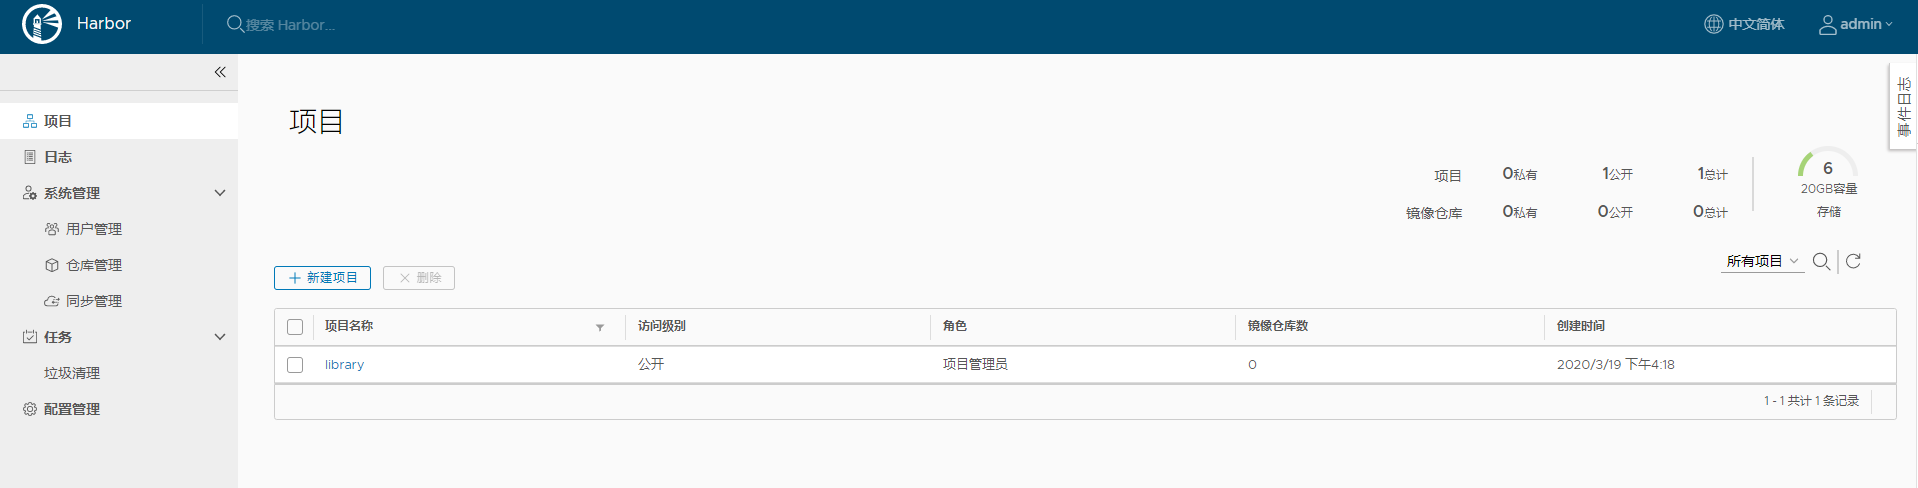
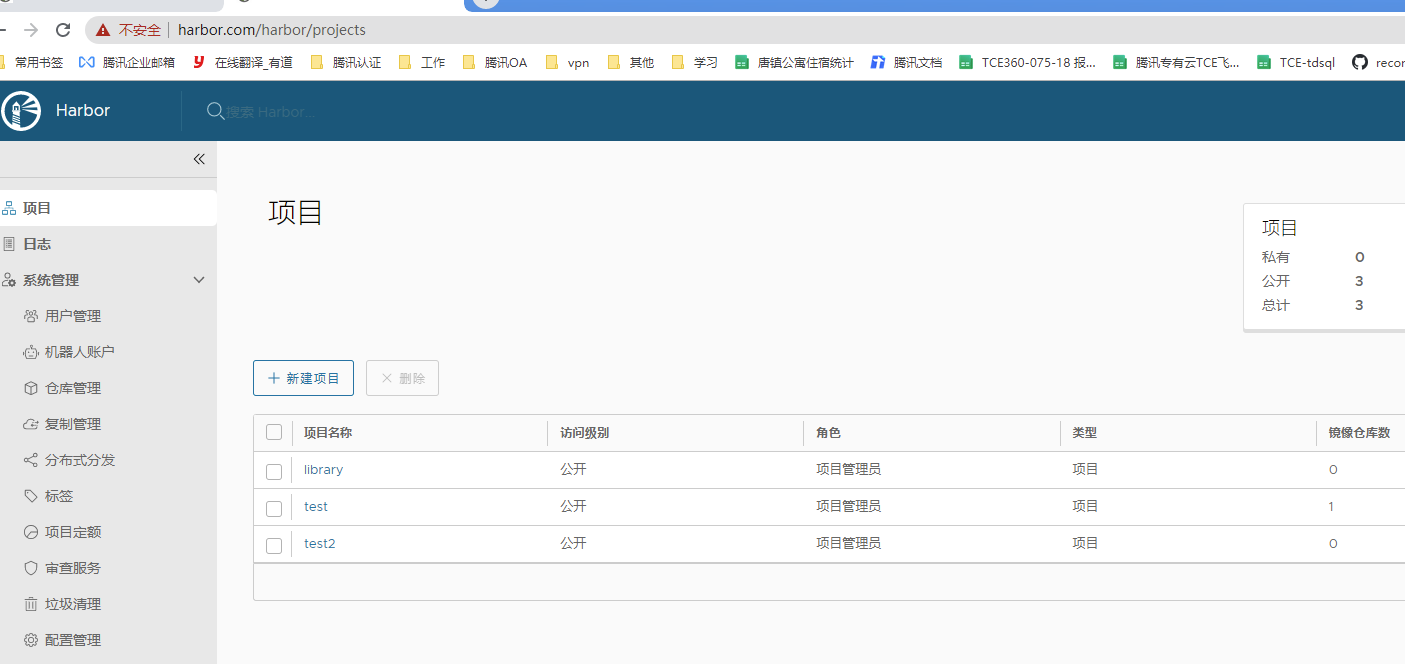
harbor中创建一个项目
harbor的日常使用
harbor需要创建用户,分配给运维或开发人员使用.
如何推送镜像到harbor中?
本地先dockerfile制作个镜像:
FROM centos:7
LABEL maintainer www.chenleilei.net
RUN useradd www -u 1200 -M -s /sbin/nologin
RUN mkdir -p /var/log/nginx
RUN yum install -y cmake pcre pcre-devel openssl openssl-devel gd-devel \
zlib-devel gcc gcc-c++ net-tools iproute telnet wget curl &&\
yum clean all && \
rm -rf /var/cache/yum/*
RUN wget https://www.chenleilei.net/soft/nginx-1.16.1.tar.gz
RUN tar xf nginx-1.16.1.tar.gz
WORKDIR nginx-1.16.1
RUN ./configure --prefix=/usr/local/nginx --with-http_image_filter_module --user=www --group=www \
--with-http_ssl_module --with-http_v2_module --with-http_stub_status_module \
--error-log-path=/var/log/nginx/error.log --http-log-path=/var/log/nginx/access.log \
--pid-path=/var/run/nginx/nginx.pid
RUN make -j 4 && make install && \
rm -rf /usr/local/nginx/html/* && \
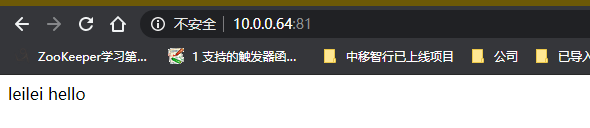
echo "leilei hello" >/usr/local/nginx/html/index.html && \
rm -rf nginx* && \
ln -sf /usr/share/zoneinfo/Asia/Shanghai /etc/localtime &&\
ln -sf /dev/stdout /var/log/nginx/access.log && \
ln -sf /dev/stderr /var/log/nginx/error.log
RUN chown -R www.www /var/log/nginx
ENV LOG_DIR /var/log/nginx
ENV PATH $PATH:/usr/local/nginx/sbin
#COPY nginx.conf /usr/local/nginx/conf/nginx.conf
EXPOSE 80
WORKDIR /usr/local/nginx
CMD ["nginx","-g","daemon off;"]
#运行镜像:
docker run --name ngix-test-001 -d -p 81:80 nginx-test-v001
访问测试:
推送镜像到harbor
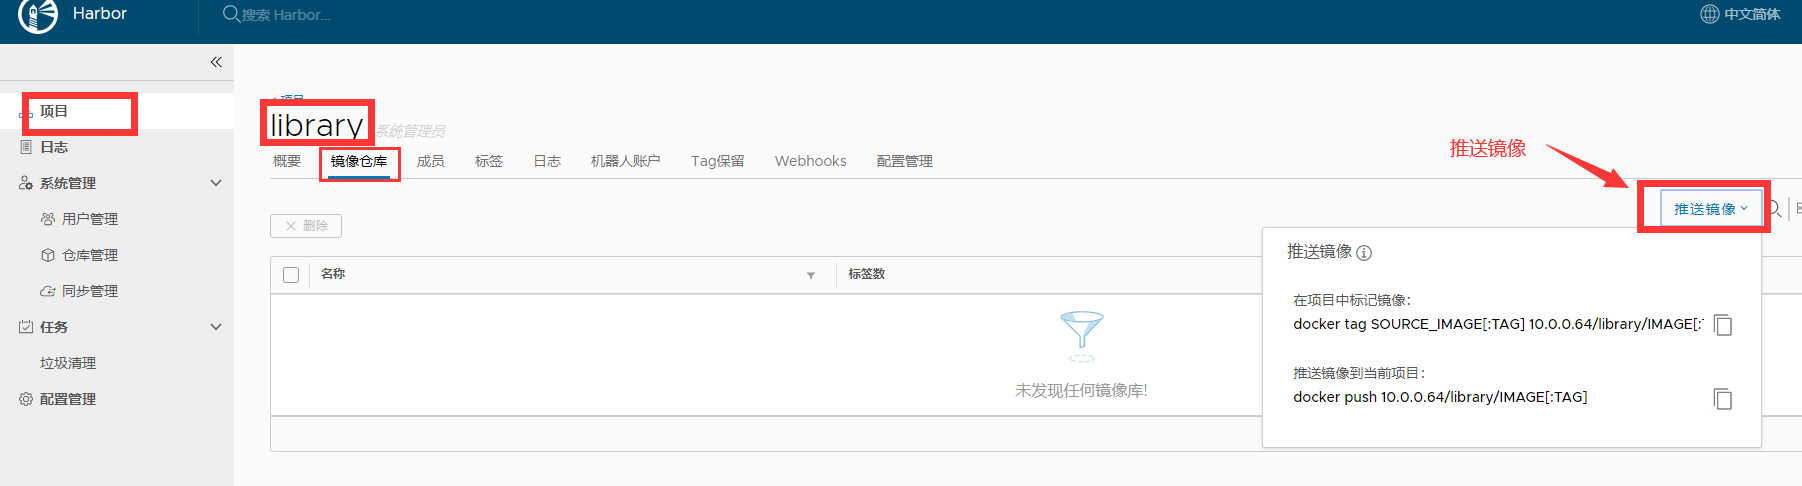
推送镜像:
1. 给镜像打 tag 标签
docker tag nginx:v1 192.168.3.250
harbor推送失败:
[root@k8s-master2 ~]# docker push 192.168.3.250/library/nginx-test-v001:v1
The push refers to repository [192.168.3.250/library/nginx-test-v001]
Get https://192.168.3.250/v2/: dial tcp 192.168.3.250:443: connect: connection refused
原因: harbor默认是https访问的,需要添加可信任,而我们通过 docker info查看到的信任IP段只有本地127.0.0.0网段
Insecure Registries:
127.0.0.0/8
为此,我们需要添加可信任的IP网段才行,那么如何添加呢?
解决harbor推送失败:
1. 修改 /etc/docker/daemon.json
添加如下行:
"Insecure-registries" :["192.168.3.250"]
这里的IP是harbor仓库地址.
修改结果:
[root@k8s-master2 ~]# cat /etc/docker/daemon.json
{
"registry-mirrors": ["https://ajvcw8qn.mirror.aliyuncs.com"],
"insecure-registries": ["192.168.3.250"]
}
2. 重启docker
systemctl restart docker
3. 重启docker-compose
[root@k8s-master2 ~]# cd /usr/local/harbor
[root@k8s-master2 harbor]# docker-compose up -d
harbor-log is up-to-date
Starting redis ... done
Starting registryctl ... done
Starting harbor-portal ... done
Starting harbor-db ... done
Starting registry ... done
Starting harbor-core ... done
Starting nginx ... done
Starting harbor-jobservice ... done
4. 访问测试:
[root@k8s-master2 harbor]# docker push 192.168.3.250/library/nginx-test-v001:v1
The push refers to repository [192.168.3.250/library/nginx-test-v001]
16993e70a899: Preparing
0421a59391fa: Preparing
f05ef613e381: Preparing
4ab7410d5afa: Preparing
b27e978348d3: Preparing
d22782d861b3: Waiting
0ce0bd1d9b33: Waiting
cf2a9408f4c6: Waiting
77b174a6a187: Waiting
denied: requested access to the resource is denied ## 访问拒绝,这里需要登录.
5. 登录docker harbor
默认账号密码:
admin
Harbor12345
[root@k8s-master2 harbor]# docker login 192.168.3.250
Username: admin
Password: Harbor12345
WARNING! Your password will be stored unencrypted in /root/.docker/config.json.
Configure a credential helper to remove this warning. See
https://docs.docker.com/engine/reference/commandline/login/#credentials-store
Login Succeeded <---- 登录成功
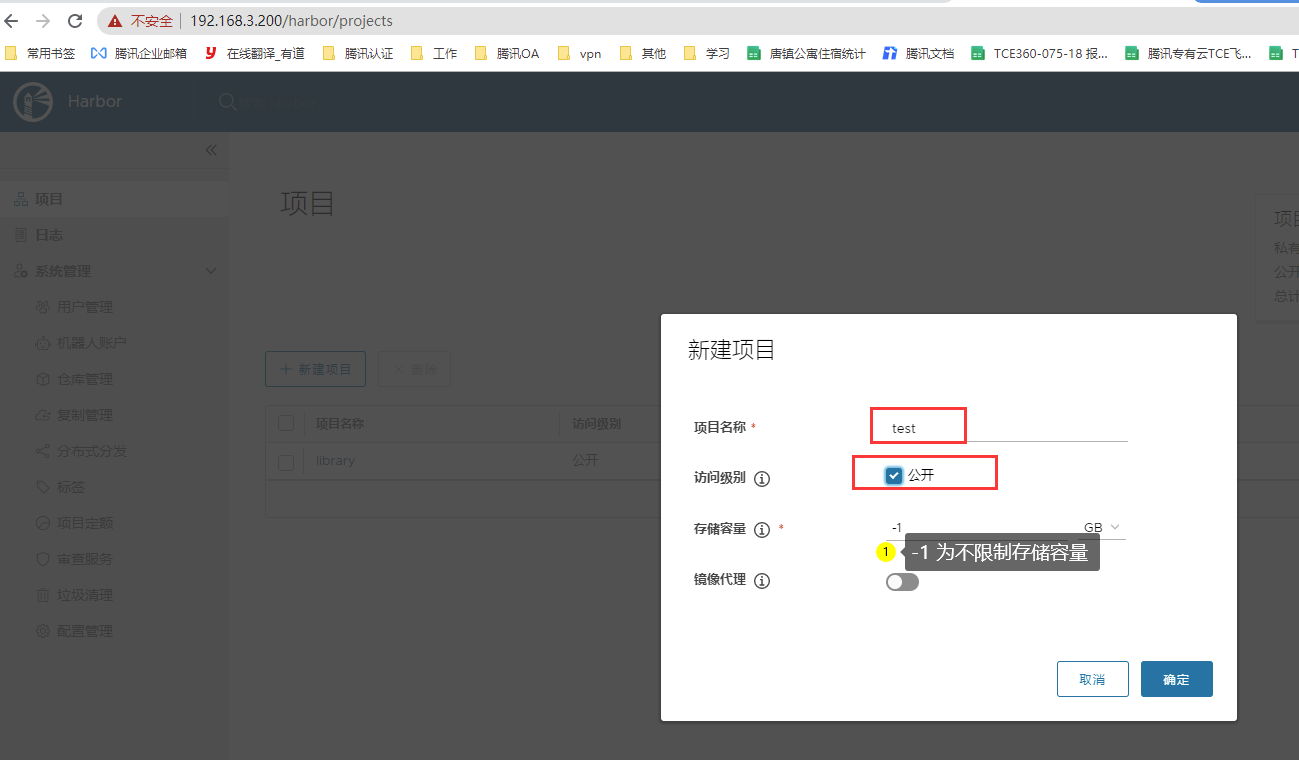
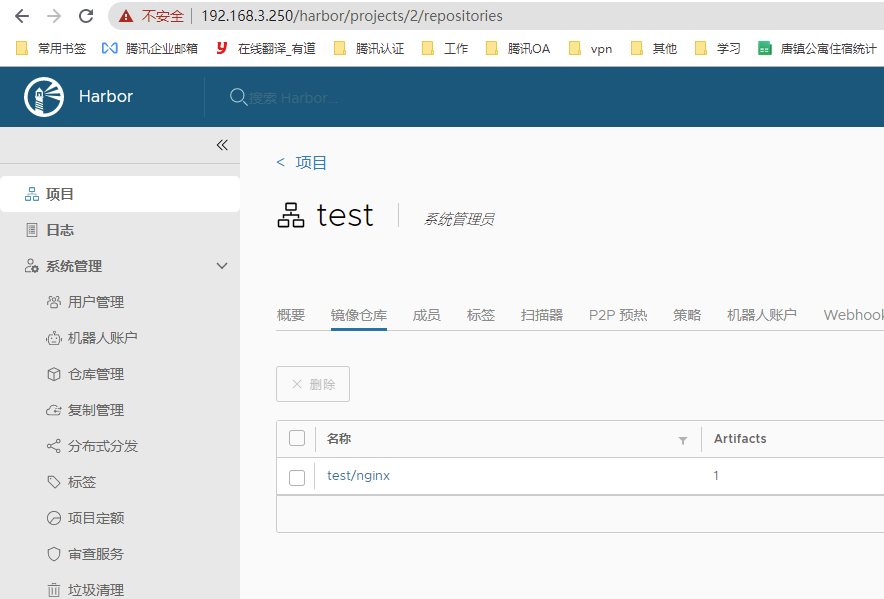
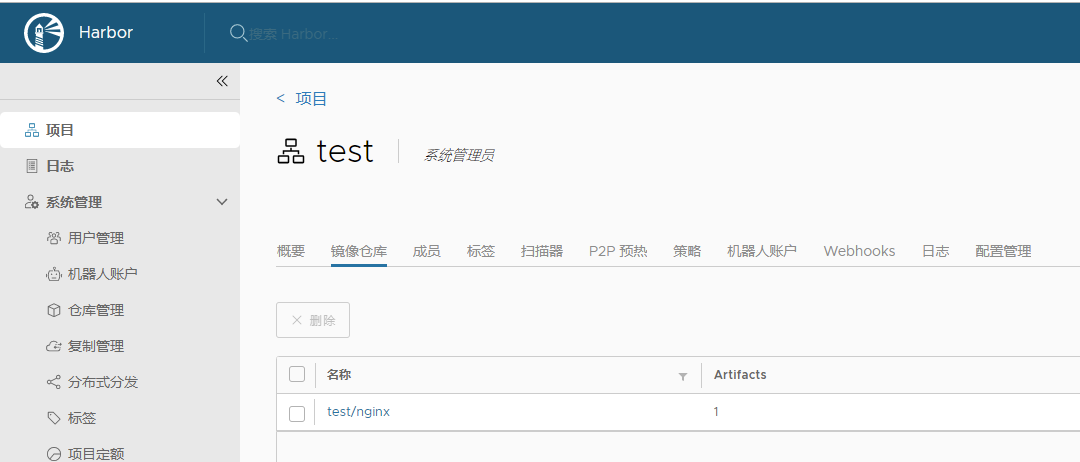
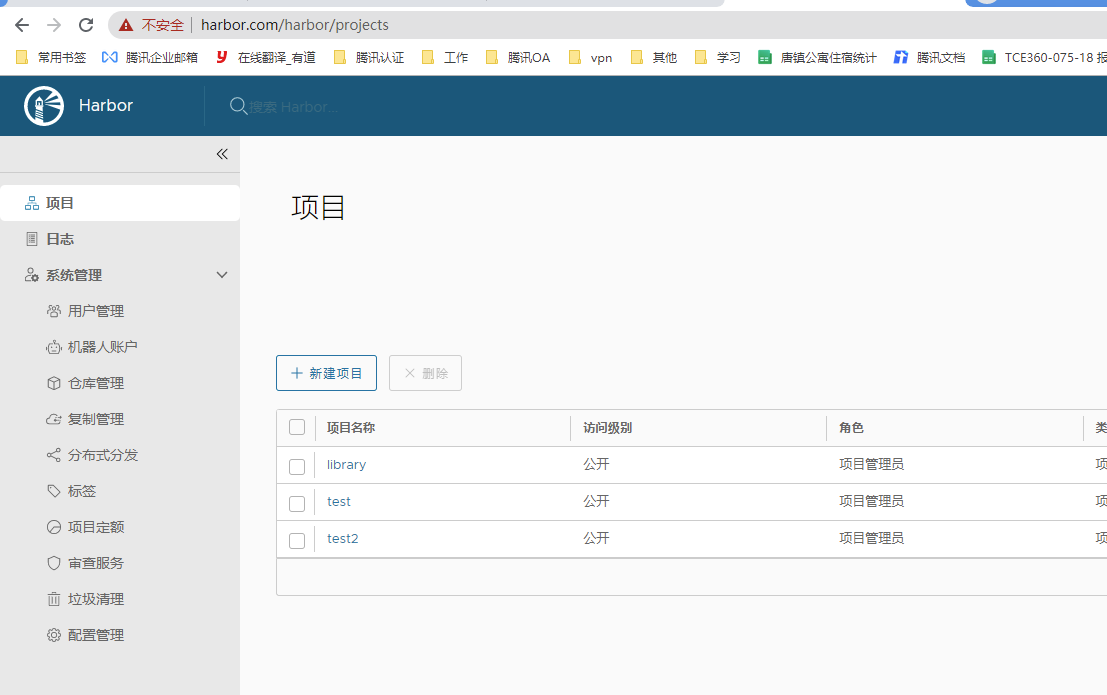
6. harbor的web页面创建 test项目
7. 推送镜像:
[root@k8s-master2 harbor]# docker tag nginx:1.20 192.168.3.250/test/nginx:1.20
[root@k8s-master2 harbor]# docker push 192.168.3.250/test/nginx:1.20
The push refers to repository [192.168.3.250/library/nginx-test-v001]
16993e70a899: Pushed
0421a59391fa: Pushed
f05ef613e381: Pushed
4ab7410d5afa: Pushed
b27e978348d3: Pushed
d22782d861b3: Pushed
0ce0bd1d9b33: Pushed
cf2a9408f4c6: Pushed
77b174a6a187: Pushed
v1: digest: sha256:6483a2324e2e0653d19df3f8fdc2aa46c77f83cd9f2d0ae7f3d5a6be8c42a74f size: 2206
检查镜像:
推送镜像步骤整理
1. 添加harbor信任  然后重启 docker

[root@harbor harbor]# cat /etc/docker/daemon.json

{

  "registry-mirrors": ["https://ajvcw8qn.mirror.aliyuncs.com"],

  "exec-opts": ["native.cgroupdriver=systemd"],

   "insecure-registries": ["192.168.3.250"],

   "insecure-registries": ["192.168.3.82"]

}

[root@harbor harbor]# systemctl restart docker

2. 给需要上传的镜像打tag标签  docker tag nginx:1.20 192.168.3.250/test/nginx:1.20

打标签注意 harbor 上的项目名,如果项目名不是test就应该重新打标签为正确的项目名

3. 登录到仓库   默认账号 admin  默认密码 Harbor12345

docker login 192.168.3.250

4. 推送到指定仓库.

docker push 192.168.3.250/test/nginx:1.20
查看镜像仓库:
其他服务器下载镜像
docker pull 192.168.3.250/library/nginx-test-v001:v1

下载镜像:

1. 添加镜像信任:

[root@k8s-node2 ~]# cat /etc/docker/daemon.json

{

  "registry-mirrors": ["https://ajvcw8qn.mirror.aliyuncs.com"],

  "insecure-registries": ["192.168.3.250"]    #<---------这里添加harbor镜像服务器地址,做复制最好两边都写

}

2. 重启docker

[root@k8s-node2 ~]# systemctl restart docker.service

3. 下载镜像:

[root@k8s-node02 ~]# docker pull  192.168.3.250/test/nginx:1.20

1.20: Pulling from test/nginx

33847f680f63: Pull complete

b89def51dd13: Pull complete

f3c07eca8dff: Pull complete

2f0bc188d92e: Pull complete

412cc00cedb9: Pull complete

b7768597b864: Pull complete

Digest: sha256:fcc42aef11edacef6408663bb3e8ebb0f83cf1d958a0cb97973106cb7f618e49

Status: Downloaded newer image for 192.168.3.250/test/nginx:1.20

192.168.3.250/test/nginx:1.20

4. 查看列表:

[root@k8s-node02 ~]# docker images

REPOSITORY                TAG       IMAGE ID       CREATED         SIZE

192.168.3.250/test/nginx  1.20      766b39f5021c   2 weeks ago     133MB

harbor复制[镜像复制]
1. 新服务器安装harbor

scp -r  root@192.168.3.250:/usr/local/harbor/docker-harbor-2-3-0.tar.gz  ./

scp -r  root@192.168.3.250:/root/harbor-offline-installer-v2.3.0-rc3.tgz ./

docker load -i docker-harbor-2-3-0.tar.gz

tar xf harbor-offline-installer-v2.3.0-rc3.tgz -C /usr/local

cd /usr/local/harbor

cp harbor.yml.tmpl harbor.yml

vi harbor.yml

   修改hostname为本机IP地址

#hostname: reg.mydomain.com

hostname: 192.168.3.82

   #配置https

https:

  # https port for harbor, default is 443

  port: 443

  # 这是生成的证书

  certificate: /data/ssl/harbor.pem

  private_key: /data/ssl/harbor.key

   修改完毕后保存.

#注意安装harbor需要依赖两个环境 一个是docker 一个是docker compose

docker已经安装完毕.现在安装docker compose

同时你直接安装也会提醒你 没有安装docke-compose:

  Note: docker version: 19.03.7

   Need to install docker-compose(1.18.0+) by yourself first and run this script again

0. 生成ca证书:

mkdir  /data/ssl -p

cd /data/ssl/

openssl genrsa -out ca.key 3072

#生成一个3072位的key,也就是私钥

openssl req -new -x509 -days 3650 -key ca.key -out ca.pem

[root@localhost ssl]# openssl req -new -x509 -days 3650 -key ca.key -out ca.pem

You are about to be asked to enter information that will be incorporated

into your certificate request.

What you are about to enter is what is called a Distinguished Name or a DN.

There are quite a few fields but you can leave some blank

For some fields there will be a default value,

If you enter '.', the field will be left blank.

-----

Country Name (2 letter code) [XX]:CN    #<---------写 CN

State or Province Name (full name) []:SH   #<---------- 写 SH

Locality Name (eg, city) [Default City]:SH  #<---------- 写 SH

Organization Name (eg, company) [Default Company Ltd]:  #<---------- 下面的全部回车

Organizational Unit Name (eg, section) []:

Common Name (eg, your name or your server's hostname) []:

Email Address []:

# 生成的证书目录: /data/ssl

[root@localhost ssl]# ll

total 8

-rw-r--r-- 1 root root 2459 Aug  8 23:39 ca.key

-rw-r--r-- 1 root root 1574 Aug  8 23:41 ca.pem

#生成一个数字证书ca.pem,3650表示证书的有效时间是3年,按箭头提示填写即可,没有箭头标注的为空:

# 再生成一个域名的证书:

openssl genrsa -out harbor.key  3072

[root@localhost ssl]# openssl req -new -key harbor.key -out harbor.csr

You are about to be asked to enter information that will be incorporated

into your certificate request.

What you are about to enter is what is called a Distinguished Name or a DN.

There are quite a few fields but you can leave some blank

For some fields there will be a default value,

If you enter '.', the field will be left blank.

-----

Country Name (2 letter code) [XX]:CN

State or Province Name (full name) []:SH

Locality Name (eg, city) [Default City]:SH

Organization Name (eg, company) [Default Company Ltd]:

Organizational Unit Name (eg, section) []:

Common Name (eg, your name or your server's hostname) []:harbor

Email Address []:

Please enter the following 'extra' attributes

to be sent with your certificate request

A challenge password []:

An optional company name []:

# 签发证书:

[root@localhost ssl]# openssl x509 -req -in harbor.csr -CA ca.pem -CAkey ca.key -CAcreateserial -out harbor.pem -days 3650

#提示:

Signature ok

subject=/C=CN/ST=SH/L=SH/O=Default Company Ltd/CN=harbor

Getting CA Private Key

[root@k8s-master02 ssl]# ll

total 24

-rw-r--r-- 1 root root 2459 Aug  9 18:30 ca.key

-rw-r--r-- 1 root root 1574 Aug  9 18:32 ca.pem

-rw-r--r-- 1 root root   17 Aug  9 18:39 ca.srl

-rw-r--r-- 1 root root 1305 Aug  9 18:36 harbor.csr

-rw-r--r-- 1 root root 2459 Aug  9 18:33 harbor.key

-rw-r--r-- 1 root root 1456 Aug  9 18:39 harbor.pem

1. 安装docker compose:

git clone https://github.com/docker/compose.git 或者上传 compose

https://www.chenleilei.net/soft/docker/docker-compose-Linux-x86_64.tar.gz

课件:第一阶段重新认识Docker课件.zip中也有,上传docker-compose

[root@master1 harbor]# tar xf docker-compose-Linux-x86_64.tar.gz

[root@master1 harbor]# mv docker-compose-Linux-x86_64.64 /usr/bin/docker-compose

[root@master1 harbor]# chmod +x /usr/bin/docker-compose

2. 安装harbor

   wget https://www.chenleilei.net/soft/k8s/harbor-offline-installer-v2.3.0-rc3.tgz

   [root@master1 ~]# tar -xf harbor-offline-installer-v2.3.0-rc3.tgz -C /usr/local/

   [root@master1 ~]# cd /usr/local/harbor

   [root@master1 ~]# vi harbor.yml

   1. 修改hostname为本机IP地址

    #hostname: reg.mydomain.com  这行注释,下面写本机IP:

    hostname: 192.168.3.250

3. 添加ssl证书

   #生成的证书位置:

   /data/ssl/harbor.pem

   /data/ssl/harbor.key

   #添加到harbor.yaml中

   找到以下内容:

   # https related config

   # https:

   # https port for harbor, default is 443

   # port: 443

   # The path of cert and key files for nginx

   # certificate: /your/certificate/path

   # private_key: /your/private/key/path

   改为:

   # https related config

   https:

     # https port for harbor, default is 443

     port: 443

     # The path of cert and key files for nginx

     certificate: /data/ssl/harbor.pem

     private_key: /data/ssl/harbor.key

   修改完毕后保存.

3. 初始化harbor:

   [root@master1 harbor]# ./prepare

   #出现报错: ERROR:root:Error: The protocol is https but attribute ssl_cert is not set

   # 注释 https    port: 443 然后再次执行

[root@master1 harbor]# ./install.sh     # 安装,之后如果要启动则使用: /harbor/start.sh 即可

正确输出:

Note: stopping existing Harbor instance ...

Stopping harbor-jobservice ... done

Stopping nginx             ... done

Stopping harbor-core       ... done

Stopping registryctl       ... done

Stopping harbor-portal     ... done

Stopping registry          ... done

Stopping harbor-db         ... done

Stopping redis             ... done

Stopping harbor-log        ... done

Removing harbor-jobservice ... done

Removing nginx             ... done

Removing harbor-core       ... done

Removing registryctl       ... done

Removing harbor-portal     ... done

Removing registry          ... done

Removing harbor-db         ... done

Removing redis             ... done

Removing harbor-log        ... done

Removing network harbor_harbor

[Step 5]: starting Harbor ...

Creating network "harbor_harbor" with the default driver

Creating harbor-log ... done

Creating harbor-db     ... done

Creating harbor-portal ... done

Creating redis         ... done

Creating registryctl   ... done

Creating registry      ... done

Creating harbor-core   ... done

Creating harbor-jobservice ... done

Creating nginx             ... done

 ----Harbor has been installed and started successfully.----

#看到这个就是安装成功了

4. 如果没有正常启动harbor,需要手动启动:

   [root@master1 harbor]# docker-compose up

   [root@master1 harbor]# docker-compose start

   Starting log         ... done

   Starting registry    ... done

   Starting registryctl ... done

   Starting postgresql  ... done

   Starting portal      ... done

   Starting redis       ... done

   Starting core        ... done

   Starting jobservice  ... done

   Starting proxy       ... done

启动成功后查看状态:

[root@k8s-master02 harbor]#  docker-compose ps

      Name                     Command                       State                                              Ports

---------------------------------------------------------------------------------------------------------------------------------------------------------

harbor-core         /harbor/entrypoint.sh            Up (health: starting)

harbor-db           /docker-entrypoint.sh 96 13      Up (health: starting)

harbor-jobservice   /harbor/entrypoint.sh            Up (health: starting)

harbor-log          /bin/sh -c /usr/local/bin/ ...   Up (health: starting)   127.0.0.1:1514->10514/tcp

harbor-portal       nginx -g daemon off;             Up (health: starting)

nginx               nginx -g daemon off;             Up (health: starting)   0.0.0.0:80->8080/tcp,:::80->8080/tcp, 0.0.0.0:443->8443/tcp,:::443->8443/tcp

redis               redis-server /etc/redis.conf     Up (health: starting)

registry            /home/harbor/entrypoint.sh       Up (health: starting)

registryctl         /home/harbor/start.sh            Up (health: starting)

#如果你看到的状态事这样:

  Can't find a suitable configuration file in this directory or any

  parent. Are you in the right directory?

  Supported filenames: docker-compose.yml, docker-compose.yaml

那么可能是 你不在harbor目录中或者命令没有配置..需要先进入harbor目录再次查看.

4. 检擦harbor启动状态:

   [root@k8s-master2 harbor]# ps -ef|grep harbor

root     101657 101620  0 16:18 ?        00:00:00 /bin/sh /harbor/start.sh

root     101934 101657  0 16:18 ?        00:00:00 sudo -E -u #10000 /harbor/harbor_registryctl -c /etc/registryctl/config.yml

10000    101939 101934  0 16:18 ?        00:00:00 /harbor/harbor_registryctl -c /etc/registryctl/config.yml

10000    101970 101952  0 16:18 ?        00:00:00 /harbor/harbor_core

10000    102052 102035  0 16:18 ?        00:00:00 /harbor/harbor_jobservice -c /etc/jobservice/config.yml

root     102587  45443  0 16:19 pts/1    00:00:00 grep --color=auto harbor

5. 访问harbor前配置:

   因为配置了https,则需要添加host解析[Windows上的hosts添加解析]:

   192.168.3.82 harbor.com

6. 登录harbor

   默认账号密码:

   admin

   Harbor12345
第一个harbor中添加从harbor 192.168.3.82
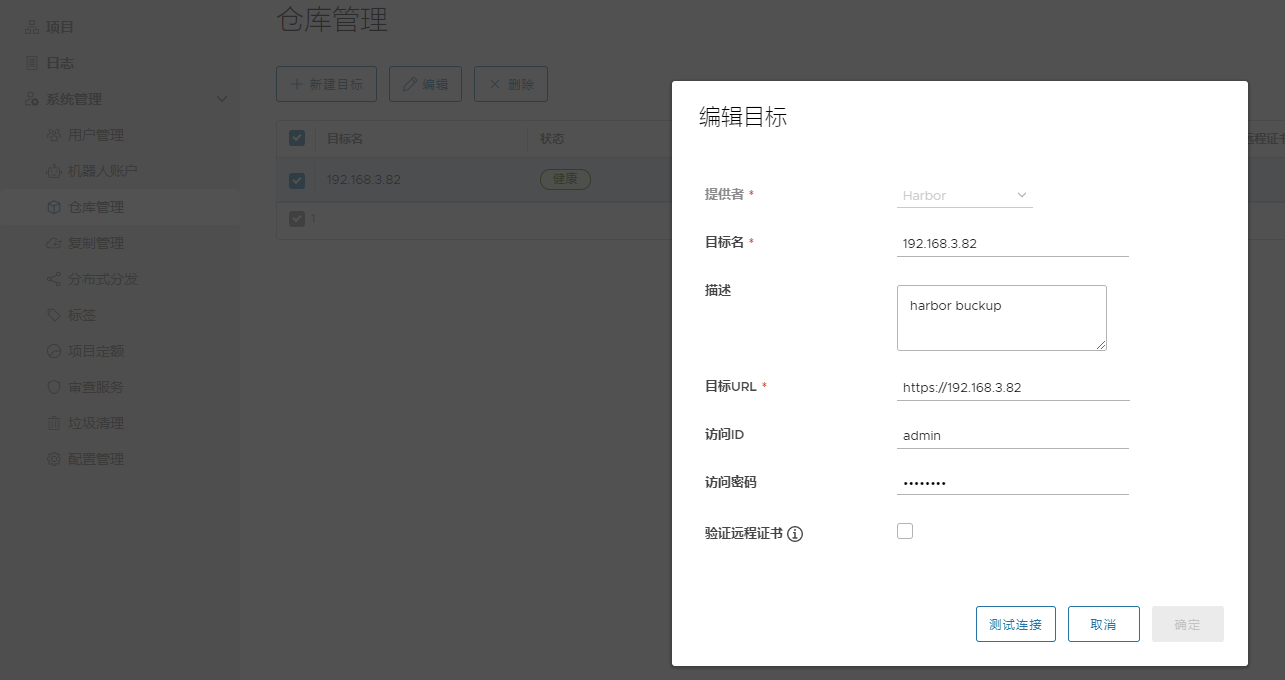
第二个harbor中添加从harbor1 192.168.3.250 复制
harbor2配置
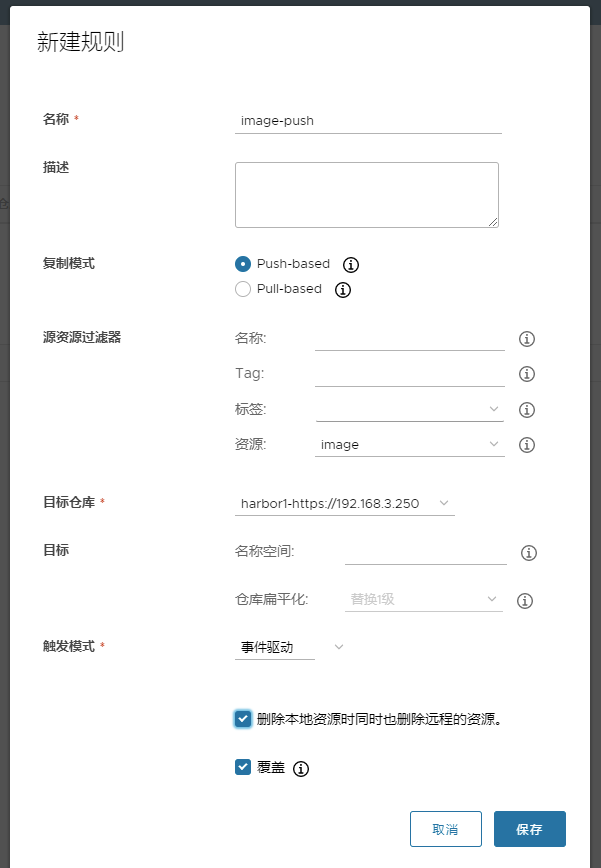
harbor1配置:
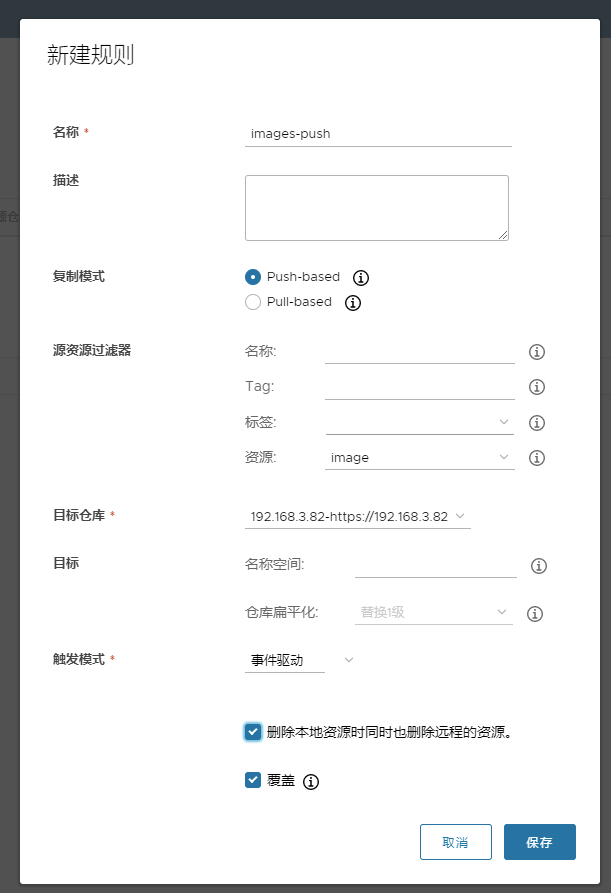
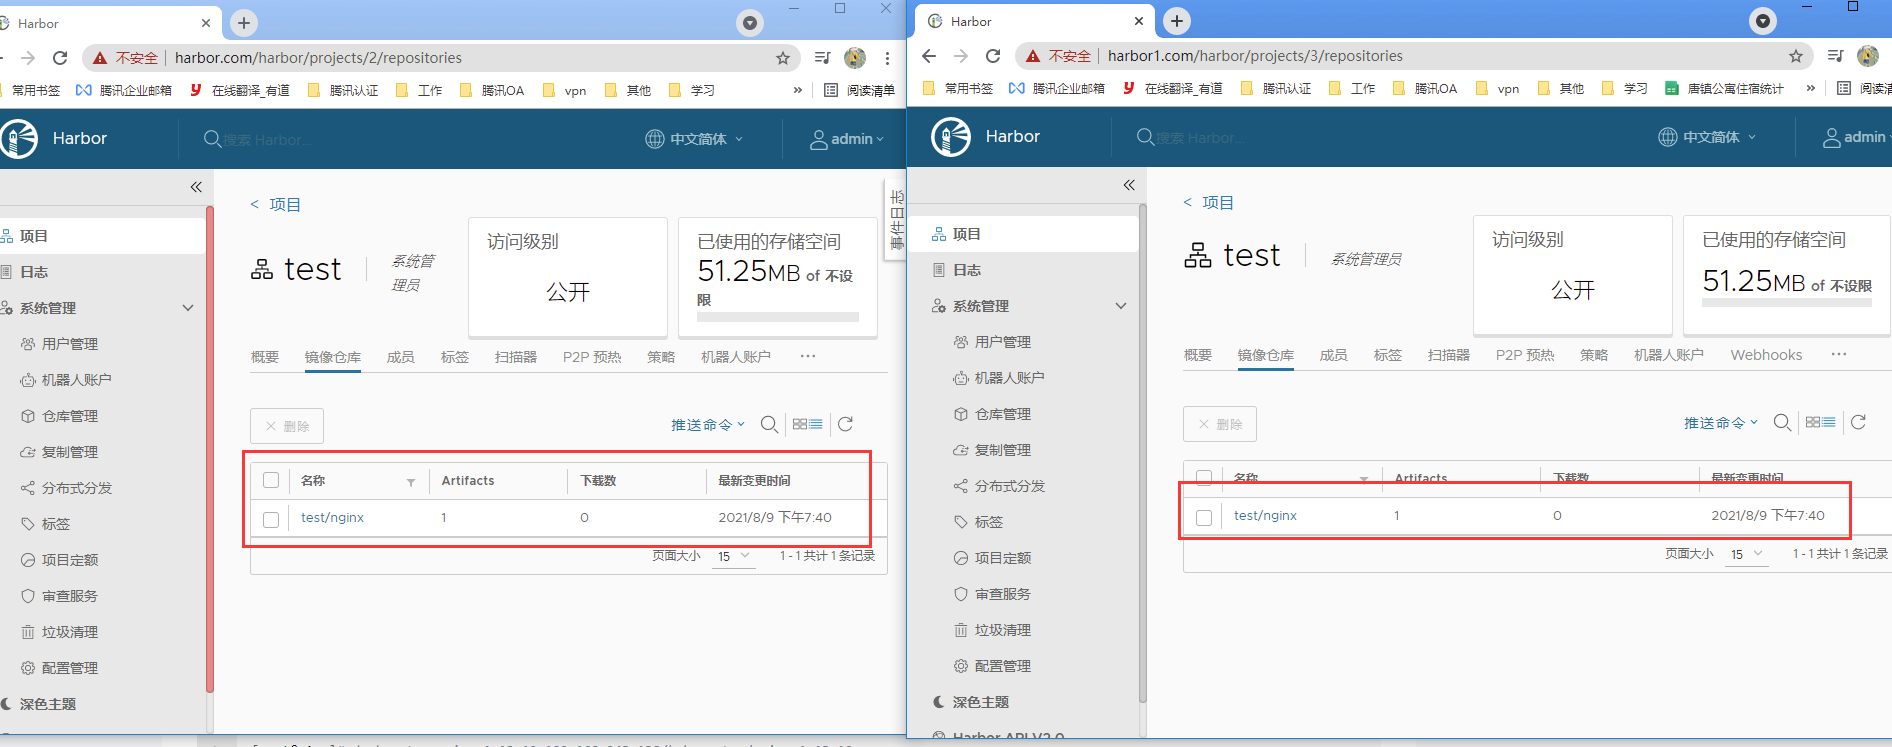
测试镜像复制
上传镜像到habor

harbor高可用配置
haproxy配置
master01配置:

[root@k8s-master01 etc]# yum install keepalived haproxy -y

[root@k8s-master01 etc]# mkdir /etc/haproxy

[root@k8s-master01 etc]# vim /etc/haproxy/haproxy.cfg

global

  maxconn  2000

  ulimit-n  16384

  log  127.0.0.1 local0 err

  stats timeout 30s

defaults

  log global

  mode  http

  option  httplog

  timeout connect 5000

  timeout client  50000

  timeout server  50000

  timeout http-request 15s

  timeout http-keep-alive 15s

frontend monitor-in

  bind *:33305

  mode http

  option httplog

  monitor-uri /monitor

frontend k8s-master

  bind 0.0.0.0:16443

  bind 127.0.0.1:16443

  mode tcp

  option tcplog

  tcp-request inspect-delay 5s

  default_backend k8s-master

backend k8s-master

  mode tcp

  option tcplog

  option tcp-check

  balance roundrobin

  default-server inter 10s downinter 5s rise 2 fall 2 slowstart 60s maxconn 250 maxqueue 256 weight 100

  server harbor         192.168.3.250:6443  check

  server k8s-master02   192.168.3.82:6443  check

#master02配置:

[root@k8s-master01 etc]# yum install keepalived haproxy -y

[root@k8s-master01 etc]# mkdir /etc/haproxy

[root@k8s-master01 etc]# vim /etc/haproxy/haproxy.cfg

global

  maxconn  2000

  ulimit-n  16384

  log  127.0.0.1 local0 err

  stats timeout 30s

defaults

  log global

  mode  http

  option  httplog

  timeout connect 5000

  timeout client  50000

  timeout server  50000

  timeout http-request 15s

  timeout http-keep-alive 15s

frontend monitor-in

  bind *:33305

  mode http

  option httplog

  monitor-uri /monitor

frontend k8s-master

  bind 0.0.0.0:16443

  bind 127.0.0.1:16443

  mode tcp

  option tcplog

  tcp-request inspect-delay 5s

  default_backend k8s-master

backend k8s-master

  mode tcp

  option tcplog

  option tcp-check

  balance roundrobin

  default-server inter 10s downinter 5s rise 2 fall 2 slowstart 60s maxconn 250 maxqueue 256 weight 100

  server harbor         192.168.3.250:6443  check

  server k8s-master02   192.168.3.82:6443  check
keepalived配置
192.168.3.82:

mkdir -p /etc/keepalived

vim /etc/keepalived/keepalived.conf

#--------------------------------------

! Configuration File for keepalived

global_defs {

    router_id LVS_DEVEL

script_user root

    enable_script_security

}

vrrp_script chk_apiserver {

    script "/etc/keepalived/check_apiserver.sh"

    interval 5

    weight -5

    fall 2

rise 1

}

vrrp_instance VI_1 {

    state MASTER

    interface eth0

    mcast_src_ip 192.168.3.82

    virtual_router_id 51

    priority 101

    advert_int 2

    authentication {

        auth_type PASS

        auth_pass K8SHA_KA_AUTH

    }

    virtual_ipaddress {

        192.168.3.200

    }

    track_script {

       chk_apiserver

    }

}

#--------------------------------------

192.168.3.250:

mkdir -p /etc/keepalived

vim /etc/keepalived/keepalived.conf

#--------------------------------------

! Configuration File for keepalived

global_defs {

    router_id LVS_DEVEL

script_user root

    enable_script_security

}

vrrp_script chk_apiserver {

    script "/etc/keepalived/check_apiserver.sh"

    interval 5

    weight -5

    fall 2

rise 1

}

vrrp_instance VI_1 {

    state MASTER

    interface eth0

    mcast_src_ip 192.168.3.250

    virtual_router_id 51

    priority 101

    advert_int 2

    authentication {

        auth_type PASS

        auth_pass K8SHA_KA_AUTH

    }

    virtual_ipaddress {

        192.168.3.120

    }

    track_script {

       chk_apiserver

    }

}

#--------------------------------------
健康检查:
两台服务器都配置健康检查脚本:

vim /etc/keepalived/check_apiserver.sh

#!/bin/bash

err=0

for k in $(seq 1 3)

do

    check_code=$(pgrep haproxy)

    if [[ $check_code == "" ]]; then

        err=$(expr $err + 1)

        sleep 1

        continue

    else

        err=0

        break

    fi

done

#加权启动

chmod +x /etc/keepalived/check_apiserver.sh

systemctl daemon-reload

systemctl enable --now haproxy

systemctl enable --now keepalived

#测试两台vip是否可用:

[root@harbor harbor]# ping 192.168.3.120

PING 192.168.3.120 (192.168.3.120) 56(84) bytes of data.

64 bytes from 192.168.3.120: icmp_seq=1 ttl=64 time=0.032 ms

[root@k8s-master02 harbor]# ping 192.168.3.120

PING 192.168.3.120 (192.168.3.120) 56(84) bytes of data.

64 bytes from 192.168.3.120: icmp_seq=1 ttl=64 time=0.392 ms

#添加 host 配置文件

192.168.3.120 harbor.com

#重启一次docker-compose

[root@harbor harbor]# docker-compose up -d

harbor-log is up-to-date

Starting registry ...

Starting registry      ... done

Starting harbor-portal ...

Starting registryctl       ... done

Starting redis         ... done

harbor-core is up-to-date

Starting harbor-jobservice ... done

Starting nginx             ... done

[root@harbor harbor]#  docker-compose start

Starting log         ... done

Starting registry    ... done

Starting registryctl ... done

Starting postgresql  ... done

Starting portal      ... done

Starting redis       ... done

Starting core        ... done

Starting jobservice  ... done

Starting proxy       ... done
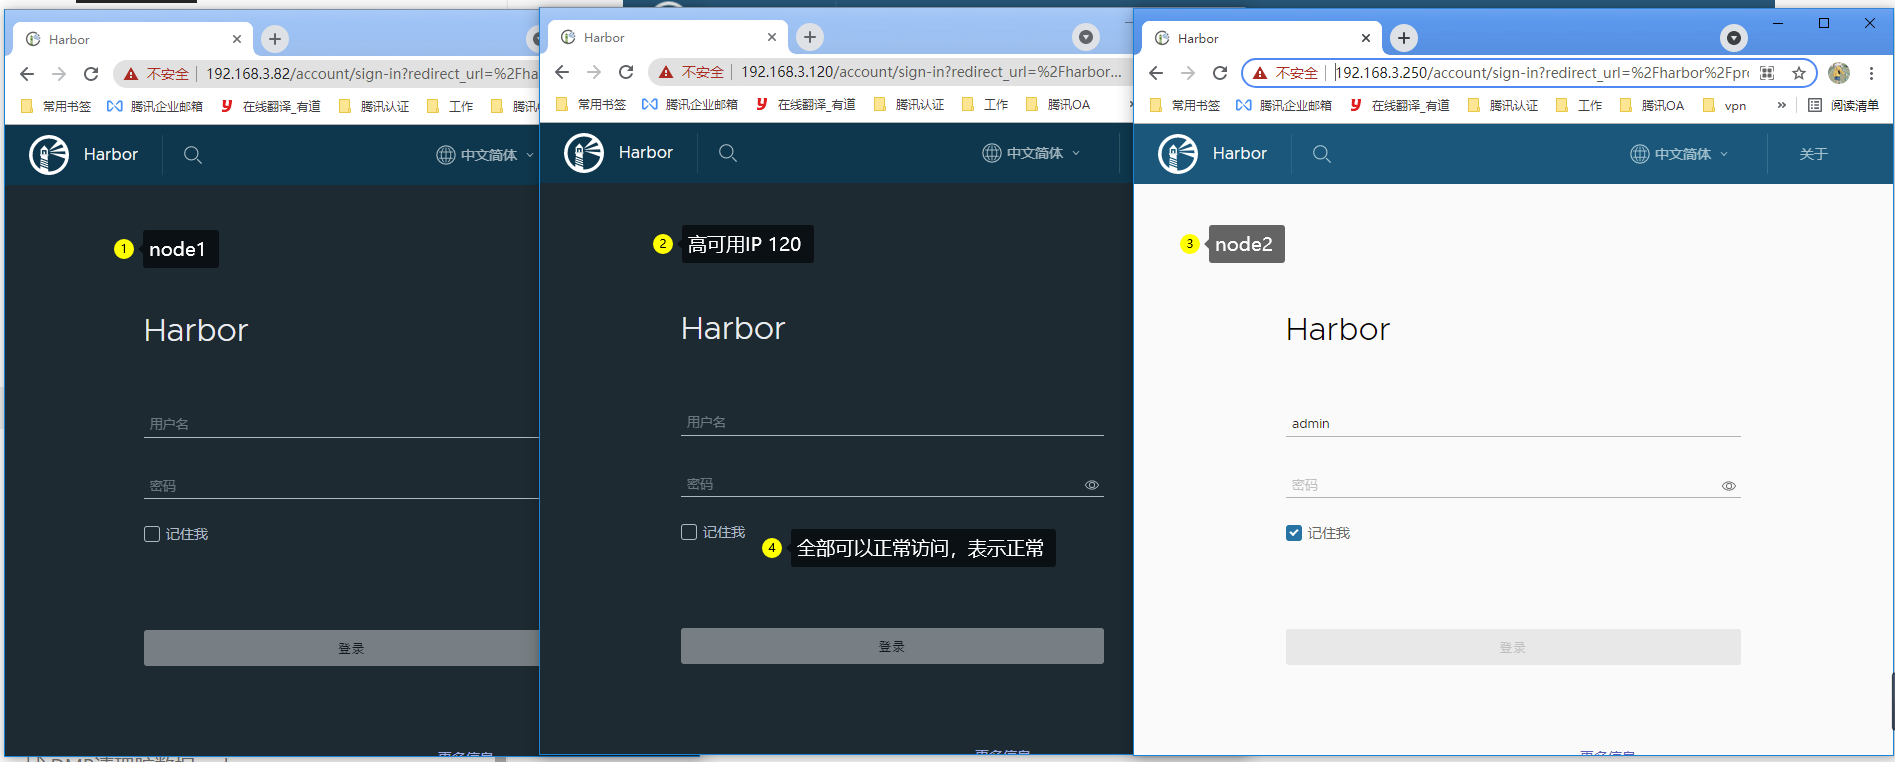
将高可用IP和自定义域名写入Windows中的 hosts文件中 访问域名测试
检查 各个IP是否访问正常

测试上传镜像
cat /etc/docker/daemon.json

#添加vip的IP 测试上传

{

  "registry-mirrors": ["https://ajvcw8qn.mirror.aliyuncs.com"],

  "exec-opts": ["native.cgroupdriver=systemd"],

   "insecure-registries": ["192.168.3.250"],

   "insecure-registries": ["192.168.3.82"],

   "insecure-registries": ["192.168.3.120"]

}

[root@k8s-master2 harbor]# docker login 192.168.3.120

   Username: admin

   Password: Harbor12345

 docker tag nginx:1.20 192.168.3.120/test2/nginx:1.20

 docker push 192.168.3.120/test2/nginx:1.20

[root@harbor harbor]# docker push 192.168.3.120/test2/nginx:1.20

The push refers to repository [192.168.3.120/test2/nginx]

5f92340f9e41: Mounted from test/nginx

3e3109b27d0e: Mounted from test/nginx

a12a454f6220: Mounted from test/nginx

ca79d24a4629: Mounted from test/nginx

ecaa06b10a88: Mounted from test/nginx

814bff734324: Mounted from test/nginx

1.20: digest: sha256:fcc42aef11edacef6408663bb3e8ebb0f83cf1d958a0cb97973106cb7f618e49 size: 1570
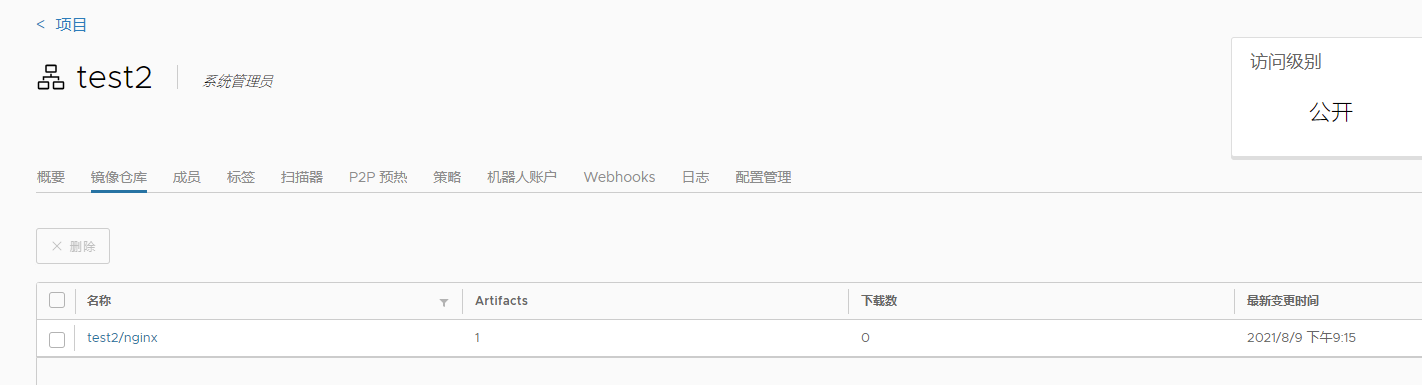
镜像已经上传,高可用habor配置完成
harbor 构建企业级镜像仓库的更多相关文章
- 微服务架构 - 基于Harbor构建本地镜像仓库
之前写过<搭建docker本地镜像仓库并提供权限校验及UI界面>文章,然后有同仁评论道这样做太复杂了,如果Harbor来搭建会更简单同时功能也更强大.于是抽时间研究了基于Harbor构建本 ...
- 企业级镜像仓库harbor搭建
企业级镜像仓库harbor搭建 一. Harbor概述 VMware公司最近开源了企业级Registry项目Harbor,其的目标是帮助用户迅速搭建一个企业级的Docker registry 服 ...
- 企业级镜像仓库 harbor
企业级镜像仓库 harbor 前言 a. 本文主要为 Docker的视频教程 笔记. b. 环境为 CentOS 7.0 云服务器 c. 上一篇:跨 Docker 宿主机网络 overlay 类型 h ...
- Harbor安装 -- 企业级Registry仓库
(一)Harbor安装 -- 企业级Registry仓库 以下文章转自http://www.jianshu.com/p/2ebadd9a323d 根据Harbor官方描述: Harbor是一个用于存储 ...
- [Docker]Harbor部署私有镜像仓库
Harbor部署私有镜像仓库 认识: Harbor 是一个用于存储和分发 Docker 镜像的企业级 Registry 服务器. 部署环境: CentOS7 Python2.7.5 Docker CE ...
- 搭建docker镜像仓库(二):使用harbor搭建本地镜像仓库
目录 一.系统环境 二.前言 三.Harbor 四.使用harbor搭建私有镜像仓库 4.1 环境介绍 4.2 k8smaster节点安装配置harbor 4.2.1 安装harbor离线包 4.2. ...
- docker进阶-搭建私有企业级镜像仓库Harbor
为什么要搭建私有镜像仓库 对于一个刚刚接触Docker的人来说,官方的Docker hub是用于管理公共镜像.既然官方提供了镜像仓库我们为什么还要去自己搭建私有仓库呢?虽然也可以托管私有镜像.我们 ...
- 使用docker搭建“企业级镜像仓库”Harbor
一.前沿 docker的官方镜像仓库registry,功能比较单一,不太好用,特别是删除镜像操作,不够友好. Harbor是一个用于存储和分发Docker镜像的企业级Registry服务器,通过添加一 ...
- 企业级镜像仓库Harbor
介绍: Habor是由VMWare公司开源的容器镜像仓库.事实上,Habor是在Docker Registry上进行了相应的企业级扩展,从而获得了更加广泛的应用,这些新的企业级特性包括:管理用户界面, ...
- 【Docker】企业级镜像仓库harbor的搭建(http/https)及使用
一:用途 Harbor是一个用于存储和分发Docker镜像的企业级Registry服务器. 二:安装docker-ce 环境:阿里云轻量应用服务器CentOS 7.3 这里通过yum Docker源仓 ...
随机推荐
- JDK 19新特性 & JDK 多版本安装切换配置
新的JDK 19包含如下7个新的特性: 转自:JDK19中比较重要的新特性-电子发烧友网 JEP 405: Record Patterns(Record模式) JEP 422: Linux/RISC- ...
- nginx重新整理——————http 模块中的请求过程[十一]
前言 简单介绍一下http的一些指令. 正文 一般http的嵌套规则是这样的: http{ upstream{} split_clients {} map{} gep{} server{ if(){} ...
- 抓包整理————tcp 协议[八]
前言 简单介绍一下tcp 协议. 正文 tcp历史: advanced research projects agency network: 1973年: tcp/ip 协议 tcpv4 协议分层后的网 ...
- NodeJs初探索
练习1:模块之间的引用 a.js // 引入b.js模块 var b = require("./b"); // 调用对象里的方法: 对象.属性名 对象.方法名() b.add(); ...
- WPF基础:在Canvas上绘制图形
Canvas介绍 Canvas是WPF(Windows Presentation Foundation)中的一种面板控件,用于在XAML中布置子元素.它提供了绝对定位的能力,允许元素在自由的二维空间中 ...
- Django3.0连接数据库注意点
需先在应用下的__Init__.py文件中配置 import pymysqlpymysql.version_info=(1, 3, 13, 'final', 0) # 3.0时需要pymysql.in ...
- 登录chatgpt的时候出现429的解决方法,亲测有效
登录chatgpt的时候出现429的解决方法 PS:在2023年3月14日晚还是可以用的,亲测有效 登录chatgpt的时候出现429的解决方法 很多时候在国内用代理进入chatgpt的时候会出现42 ...
- 力扣119(java)-杨辉三角Ⅱ(简单)
题目: 给定一个非负索引 rowIndex,返回「杨辉三角」的第 rowIndex 行. 在「杨辉三角」中,每个数是它左上方和右上方的数的和. 示例 1: 输入: rowIndex = 3输出: [1 ...
- 饿了么EMonitor演进史
简介: 可观测性作为技术体系的核心环节之一,跟随饿了么技术的飞速发展,不断自我革新. 序言 时间回到2008年,还在上海交通大学上学的张旭豪.康嘉等人在上海创办了饿了么,从校园外卖场景出发,饿了么一步 ...
- 基于 Scheduled SQL 对 VPC FlowLog 实现细粒度时间窗口分析
简介: 针对VPC FlowLog的五元组和捕获窗口信息,在分析时使用不同时间窗口精度,可能得到不一样的流量特征,本文介绍一种方法将原始采集日志的时间窗口做拆分,之后重新聚合为新的日志做分析,达到更细 ...