React-redux及异步获取数据20分钟快速入门
一, 写在前面
1. 前面我写过一个vuex10分钟入门 传送门
2. React-redux网上有好多文档,又臭又长,明明很简单的问题,硬是让新人更晕了~, 我写这个文章的目的是让新人在20分钟之内明白这是怎么回事.
3. 创建你的react环境, 推荐你使用creat-react-app,我已将代码放到gitHub,所以你可以直接clone下来,感觉不错可以给我一个star. https://github.com/yurizhang/react-reduc-webpack
二,开始
1.我们的项目目录:
.

├── src                 #开发目录

|   |

|   ├──action          #action的文件

|   |

|   ├──components       #展示组件

|   |

|   ├──containers       #容器组件,主页

|   |

|   ├──reducers         #reducer文件

|   |

|   |——routes           #路由文件,容器组件

|   |

|   |——static           #静态文件

|   |

|   ├──stores           #store配置文件

|   |

|   |

|   └──index.js          #入口文件

|

├── build                #发布目录

├── node_modules        #包文件夹

├── .gitignore

├── .jshintrc

├── package.json        #环境配置

└── README.md           #使用说明

依赖的package.json
....
三。代码文件:
// index.js 入口文件

import React from 'react'

import ReactDOM from 'react-dom'

import { createStore } from 'redux'

import { Provider } from 'react-redux'

//import { Button,Alert } from 'element-react';

import 'element-theme-default';

import App,{SubComponent} from './containers/app.js'; //容器组件

import counter_SubComponent from './reducers/index.js';  // reducers createStore(counter),counter_SubComponent

// 生成Store

const store = createStore(counter_SubComponent)

ReactDOM.render(

  <Provider store={store}>

    <div>

    <App />

    <SubComponent />

    </div>

  </Provider>,

  document.getElementById('root')

)

/*

* `store` 由 Redux 的 `createStore(reducer)` 生成

* `state` 通过 `store.getState()` 获取,本质上一般是一个存储着整个应用状态的**对象**

* `action` 本质上是一个包含 `type` 属性的普通**对象**,由 Action Creator (**函数**) 产生

* 改变 `state` 必须 `dispatch` 一个 `action`

* `reducer` 本质上是根据 `action.type` 来更新 `state` 并返回 `nextState` 的**函数**

* `reducer` 必须返回值,否则 `nextState` 即为 `undefined`

* 实际上,**`state` 就是所有 `reducer` 返回值的汇总**(本教程只有一个 `reducer`,主要是应用场景比较简单)

> Action Creator => `action` => `store.dispatch(action)` => `reducer(state, action)` => ~~`原 state`~~ `state = nextState`

 */
Action
/*

 * action cretae 这个在action\actions.js

 */

// Action

// export const increaseAction = { type: 'increase' }

// export const decreaseAction = { type: 'decrease' }

// export const subTest = { type: 'test' }

export const increaseAction = (text) => {

  return { type: 'increase', text }

}

export const decreaseAction = (text) => {

  return { type: 'decrease', text }

}

export const subTest = (text) => {

  return { type: 'test', text }

}

//返回一个action对象,用来关联对应的reducer,将data保存到store。

export const saveReducer = (data) => ({

    type: 'SAVE_REDUCER',

    data

})
2个显示组件
components\Counter.js 计数器组件
import React, { Component } from 'react'

import PropTypes from 'prop-types'

import { Button } from 'element-react';

// React component

class Counter extends Component {

  render() {

    ////从组件的props属性中导入2个方法和一个变量

    const { value, onIncreaseClick, onDecreaseClick } = this.props;

    console.log('主组件里this.props:');

    console.log(this.props);

    return (

      <div>

        <span>{value}</span>

        <Button type="primary" onClick={onIncreaseClick}>增加数据</Button>

        <Button type="primary" onClick={onDecreaseClick}>减少数据</Button>

      </div>

    )

  }

}

Counter.propTypes = {

  value: PropTypes.number.isRequired,

  onIncreaseClick: PropTypes.func.isRequired,

  onDecreaseClick: PropTypes.func.isRequired

}

export default Counter
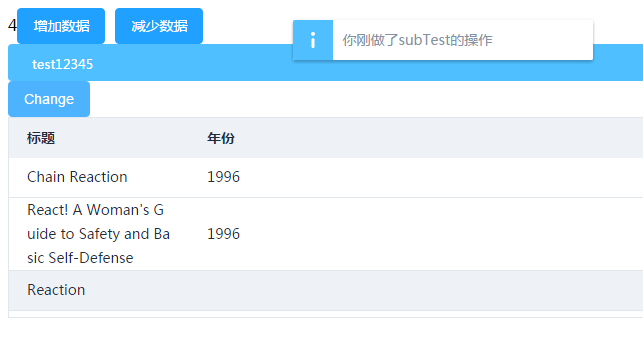
components\SubComponent.js 异步加载数据组件
import React, { Component } from 'react'

// import PropTypes from 'prop-types'

import { Alert, Button,Table } from 'element-react';

export default class SubComponent extends Component {

    constructor(){

        super();

        this.state ={

           title:''

        }

    }

    componentWillMount() {

        let id = 9999;

        this.props.getTest(id) //发送get请求,然后数据 自动写到state里

  }

  render() {

    console.log('另一个组件里的: this.props:');

    console.log(this.props);

    const { test="--", testData, onTest } = this.props;

    let columnName=[

      {

        label: "标题",

        prop: "title",

        width: 180

      },

      {

        label: "年份",

        prop: "year",

      }

    ];

    return (

        <div>

            <Alert title={test} type="info" />

            <Button type="primary" onClick={onTest}>Change</Button>

            <Table

                    style={{width: '100%'}}

                    columns={columnName}

                    maxHeight={200}

                    data={testData.movies}

            />

        </div>

    )

  }

}
容器组件 container\App.js
/*容器组件 */

/* mapStateToProps, mapDispatchToProps把这个各自放到Counter和subCounter各自的组件里会不会更好? */

import { getData} from '../plugs/fetchData'

import { Message } from 'element-react';

import { connect } from 'react-redux'

import {increaseAction, decreaseAction, subTest, saveReducer} from '../action/actions.js';

import Counter from '../components/Counter.js';  //UI组件

import subCounter from '../components/subCounter.js';

// Map Redux state to component props

function mapStateToProps(state) {

  console.log('主容器组件里app:state:');

  console.log(state);

  return {

    value: state.counter.count,

   // test: state.SubComponent.test,

    //testData: state.SubComponent.testData

  }

}

//mapStateToProps会订阅 Store,每当state更新的时候,就会自动执行,重新计算 UI 组件的参数,从而触发 UI 组件的重新渲染。

// Map Redux actions to component props

function mapDispatchToProps(dispatch) {

  return {

    onIncreaseClick: () => {

        dispatch(increaseAction());

        Message('你刚做了Add的操作');

    },  //调用Reducer

    onDecreaseClick: () => {

      dispatch(decreaseAction());

      Message('你刚做了减少的操作');

    }

  }

}

//如果mapDispatchToProps是一个函数,会得到dispatch和ownProps(容器组件的props对象)两个参数。

//这里建议的函数,组件可以通过 this.prop读取

// Map Redux state to component props

function mapSubStateToProps(state) {

  console.log('子容器组件里app:state:');

  console.log(state);

  return {

    //value: state.counter.count,

    test: state.SubComponent.test,

    testData: state.SubComponent.testData

  }

}

function mapSubCounterDispatchToProps(dispatch) {

  return {

    onTest: () => {

      dispatch(subTest());

      Message('你刚做了subTest的操作');

    },  //调用Reducer

    getTest:(id)=> {

        try {

            getData(`/facebook/react-native/master/docs/MoviesExample.json`,{id:id}).then(response=>{

             //axios返回的数据是用response.data包括的,和jquery不一样

              console.log(response.data);

              dispatch(saveReducer(response.data));

           })

            // let response = await getData(`/facebook/react-native/master/docs/MoviesExample.json?id=${id}`)

            // await dispatch(saveReducer(response.data))

        } catch (error) {

            console.log('error: ', error)

        }

    }

  }

}

// Connected Component

export const SubComponent= connect(

  mapSubStateToProps,

  mapSubCounterDispatchToProps

)(subCounter)

const App= connect(

  mapStateToProps,

  mapDispatchToProps

)(Counter)

export default App

//连接 UI组件Counter 生成一个容器组件App

//connect方法接受两个参数:mapStateToProps和mapDispatchToProps。

//它们定义了 UI 组件的业务逻辑。

//前者负责输入逻辑,即将state映射到 UI 组件的参数(props), mapStateToProps会订阅 Store,每当state更新的时候,就会自动执行,重新计算 UI 组件的参数,从而触发 UI 组件的重新渲染。

//后者负责输出逻辑,即将用户对 UI 组件的操作映射成 Action。
recuders recuders\index.js
import { combineReducers } from 'redux'

// Action

// const increaseAction = { type: 'increase' }

// const decreaseAction = { type: 'decrease' }

// Reducer

 function counter(state = { count: 0 }, action) {

  const count = state.count

  switch (action.type) {

    case 'increase':

      return { count: count + 1 }

    case 'decrease':

      return { count: count - 1 }

    default:

      return state

  }

}

let initState = {

    testData: [],

    test: 'default'

}

 function SubComponent(state = initState, action) {

  switch (action.type) {

    case 'test':

      return { ...state, test: 'test12345' }

    case 'SAVE_REDUCER':

      return {

          ...state,

          testData: action.data

      }

    default:

      return state

  }

}

//以后的业务里 这些reducers拆分成多个,这里分别导入进来

const counter_SubComponent = combineReducers({

  counter,

  SubComponent

})

export default counter_SubComponent;

//合并reducers让 const store = createStore(counter_SubComponent)生成一个状态
封装一些插件
plugs\fetchData.js
import axios from 'axios'

//BASE_URL是默认的url地址,如果你安装了webpack,可以在webpack配置全局变量

//axios.defaults.baseURL = BASE_URL;

//如果没有安装webpack,就使用下面这种写法

axios.defaults.baseURL = "https://raw.githubusercontent.com/"

export const getData = (url, param) => {

    return (

        axios.get(`${url}`, {params:param})

    );

}

export const postData = (url, param) => {

    return (

        axios.post(`${url}`, param)

    );

}
先RUN起来,后面我们来一个一个告诉这些代码是什么意思
这样的一片黑是什么东西?
React-redux及异步获取数据20分钟快速入门的更多相关文章
- 用redux-thunk异步获取数据
概述 最近学习redux,打算用redux-thunk给todo添加异步获取数据组件.记录下来,供以后开发时参考,相信对其他人也有用. 注意: 在todo下方,我异步获取我的react博客的标题,点击 ...
- nettyclient异步获取数据
源代码见,以下主要是做个重要代码记录 http://download.csdn.net/detail/json20080301/8180351 NETTYclient获取数据採用的方式是异步获取数据, ...
- IOS开发---菜鸟学习之路--(十二)-利用ASIHTTPRequest进行异步获取数据
想要实现异步获取的话我这边了解过来有两个非常简单的方式 一个是利用ASIHTTPRequest来实现异步获取数据 另一个则是利用MBProgressHUD来实现异步获取数据 本章就先来讲解如何利用AS ...
- ajax异步获取数据后动态向表格中添加数据(行)
因为某些原因,项目中突然需要做自己做个ajax异步获取数据后动态向表格中添加数据的页面,网上找了半天都没有 看到现成的,决定自己写个例子 1.HTML页面 <!doctype html> ...
- MVC—实现ajax+mvc异步获取数据
之前写过ajax和一般处理程序的结合实现前后台的数据交换的博客,如今做系统用到了MVC,同一时候也用到了异步获取数据. ajax+一般处理程序与MVC+ajax原理是一样的在"URL&quo ...
- node 创建静态web服务器(下)(处理异步获取数据的两种方式)
接上一章. 上一章我们说创建的静态web服务器只能识别html,css,js文件,功能较为单一,且图片格式为text/html,这是不合理的. 本章,我们将解决该问题. 这里,我们先准备好一个json ...
- datatables异步获取数据、简单实用
IKC项目总结 一.认证难题管理模块 1. 如何使用datatables进行获取数据内容 datatables简介:Datatables是一款jquery表格插件.它是一个高度灵活的工具,可以将任何H ...
- Vue Router路由守卫妙用:异步获取数据成功后再进行路由跳转并传递数据,失败则不进行跳转
问题引入 试想这样一个业务场景: 在用户输入数据,点击提交按钮后,这时发起了ajax请求,如果请求成功, 则跳转到详情页面并展示详情数据,失败则不跳转到详情页面,只是在当前页面给出错误消息. 难点所在 ...
- 一分钟快速入门openstack
一.它是什么,能干什么想认识一个事物,必须先弄明白它是什么,能干什么.首先说一下,openstack是一个搭建云平台的一个解决方案,说他不是个软件,但是我觉得说是一个软件,能够让大家认识更清晰些.op ...
随机推荐
- python sorted函数的小练习
前两天学习了一下socket编程,在向某大神请教问题时被嫌弃了,有一种还没学会走就想跑的感觉.大神说我现在的水平应该去做一些像是操作文件.序列号等的小练习来加深理解.下面是他给我出的小练习: 1.da ...
- 「LOJ#103」子串查找 (Hash
题目描述 这是一道模板题. 给定一个字符串 A A A 和一个字符串 B B B,求 B B B 在 A A A 中的出现次数.AAA 和 BBB 中的字符均为英语大写字母或小写字母. A A A 中 ...
- Java类加载器回顾
Java类加载采用了全盘委托机制,默认加载类时子类先会委托给父类加载,但父类加载不到时,子类才会自己尝试加载类.这种机制可以有效防止一个类被加载多次,同时也一定程度上防止重写JDK自身的类[Java自 ...
- 网卡流量检测.py
network_speed网卡流量检测 #!/usr/bin/env python #coding:utf-8 import sys import os import atexit import ti ...
- 三、mysql登录详解及版本号查询
1.用window+r,输入cmd,用mysql -uuser -ppassword登录时出现‘mysql’不是有效的内部命令? 答:这是因为没有配置MySQL的环境变量path所致. MySQL的环 ...
- 微软silverlight Analytics FrameWork
本文转自:http://kevinfan.blog.51cto.com/1037293/334622/ http://kevinfan.blog.51cto.com/1037293/334622 ...
- Unity4.0配置
关于Unity4.0的使用: 一 安装Unity 在程序包管理器控制台输入命令:Istall-Pckage unity.mvc安装后会在App_Start中生成UnityConfig.cs 和Unit ...
- Android开发—— 传递数据
一:使用静态变量传递数据 (1)静态变量传递数据,在目标Activity中声明静态变量,然后使用setText()方法将静态变量的值导出即可: (2)静态变量传递数据,在主Activity中对目标Ac ...
- Even Three is Odd
题意: 问题是对于所有的长度为n,且$1<=ai<=n$的整数序列求 $\prod_{i=1}^{n-2}{max \{w_i,w_{i+1},w_{i+2}}\}$ 之和. 解法: 首先 ...
- c++中编译链接总结
1 编译链接过程分为 预处理--->编译---->汇编---->链接.如下图所示 2 预处理都做了什么 (1)将所有的#define删除并展开所有的宏 (2)处理所有的条件预编译指令 ...