[Unity3D] 04 - Event Manager
message消息管理
脚本与GameObject的关系
被显式添加到 Hierarchy 中的 GameObject 会被最先实例化,GameObject 被实例化的顺序是从下往上。
GameObject 被实例化的同时,加载其组件 component 并实例化,
如果挂载了脚本组件,则实例化脚本组件时,将调用脚本的 Awake 方法,组件的实例化顺序是也是从下往上。
在所有显式的 GameObject 及其组件被实例化完成之前,游戏不会开始播放帧。
当 GameObject 实例化工作完成之后,将开始播放游戏帧。每个脚本的第一帧都是调用 Start 方法,其后每一帧调用 Update,而且每个脚本在每一帧中的调用顺序是从下往上。
总结:被挂载到 GameObject 下面的脚本会被实例化成 GameObject 的一个成员。
Unity 3种message消息管理使用
Ref: http://blog.csdn.net/u011484013/article/details/51487936
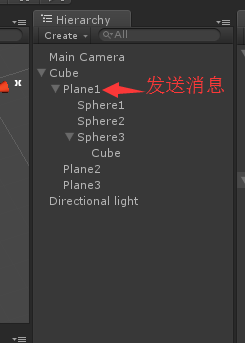
- BroadcastMessage(<接收函数名>) 广播消息
- SendMessage(<接收函数名>) 发送消息
- SendMessageUpwards(<接收函数名>) 向上发送消息
举个例子:
MonoBehaviour 是 Unity 中所有脚本的基类,
- 如果你使用JS的话,脚本会自动继承MonoBehaviour。
- 如果使用C#的话,你需要显式继承MonoBehaviour。
- 示范:
- 发送消息
using UnityEngine;

using System.Collections;

public class xx1 : MonoBehaviour

{

    void OnGUI()

    {

        if (GUI.Button(new Rect(, , , ), "发送1"))

        {

            SendMessage("myTest");      # <-- button  向当前对象挂载的所有脚本上面发送消息

     }

     if (GUI.Button(new Rect(, , , ), "发送2"))

        {

            BroadcastMessage("myTest");    # <-- button  朝物体和所有子物体发送消息

        }

        if (GUI.Button(new Rect(, , , ), "发送3"))

        {

            SendMessageUpwards("myTest");  # <-- button  朝物体和上级父物体发送信息

        }

    }

}
- 接收消息
using UnityEngine;

using System.Collections;

public class XXX : MonoBehaviour {

    // Use this for initialization

    void Start () {

    }

    // Update is called once per frame

    void Update () {

    }

    void OnDrag(Vector2 delta)

    {

        Debug.Log("-------OnDrag--------");

    }

    public void myTest() {

        Debug.Log("this is a methord:" + gameObject.name);

    }

}
EventManager的两种简单实现方式
From: http://blog.csdn.net/u010989951/article/details/79051299
第一种、调用Unity的事件系统来进行封装,
另一种、使用C#的事件与委托机制实现。
这里讲解第一种,即采用Unity事件系统API来实现;第二种详见原链接。
- EventManager 定义
using System.Collections;

using System.Collections.Generic;

using UnityEngine;

using UnityEngine.Events;

public class EventManager

{

    private Dictionary<string, UnityEvent> eventDictionary=new Dictionary<string, UnityEvent>();

    private static EventManager eventManager = new EventManager();

    private EventManager()

    {

    }

    public static EventManager GetInstance

    {

        get

        {

            return eventManager;

        }

    }

    public void StartListening(string eventName, UnityAction listener)

    {

        UnityEvent thisEvent = null;

        if (eventManager.eventDictionary.TryGetValue(eventName, out thisEvent))

        {

            thisEvent.AddListener(listener);  // 给event [UnityEvent]附上listener

        }

        else

        {

            thisEvent = new UnityEvent();

            thisEvent.AddListener(listener);

            eventManager.eventDictionary.Add(eventName, thisEvent);

        }

    }

    public void StopListening(string eventName, UnityAction listener)

    {

        if (eventManager == null) return;

        UnityEvent thisEvent = null;

        if (eventManager.eventDictionary.TryGetValue(eventName, out thisEvent))

        {

            thisEvent.RemoveListener(listener);

        }

    }

    public void TriggerEvent(string eventName)

    {

        UnityEvent thisEvent = null;

        if (eventManager.eventDictionary.TryGetValue(eventName, out thisEvent))

        {

            thisEvent.Invoke();

        }

    }

}
- Event 注册
using UnityEngine;

using UnityEngine.Events;

using System.Collections;

using System;

public class EventTest : MonoBehaviour

{

    private Event_CallBack someListener;

    void Awake()

    {

        someListener = new Event_CallBack(SomeFunction);

    }

    void OnEnable()

    {

        EventManager.GetInstance.StartListening("test",    someListener);

        EventManager.GetInstance.StartListening("Spawn",   SomeOtherFunction);

        EventManager.GetInstance.StartListening("Destroy", SomeThirdFunction);

    }

    void OnDisable()

    {

        EventManager.GetInstance.StopListening("test",    someListener);

        EventManager.GetInstance.StopListening("Spawn",   SomeOtherFunction);

        EventManager.GetInstance.StopListening("Destroy", SomeThirdFunction);

    }

    void SomeFunction(object sender)

    {

        Debug.Log("Some Function was called!");

    }

    void SomeOtherFunction(object sender)

    {

        Debug.Log("Some Other Function was called!");

    }

    void SomeThirdFunction(object sender)

    {

        Debug.Log("Some Third Function was called!");

    }

}
- Event 触发
using UnityEngine;

using System.Collections;

public class EventTriggerTest : MonoBehaviour

{

    void Update()

    {

        if (Input.GetKeyDown("q"))

        {

            EventManager.GetInstance.TriggerEvent("test");

        }

        if (Input.GetKeyDown("o"))

        {

            EventManager.GetInstance.TriggerEvent("Spawn");

        }

        if (Input.GetKeyDown("p"))

        {

            EventManager.GetInstance.TriggerEvent("Destroy");

        }

        if (Input.GetKeyDown("x"))

        {

            EventManager.GetInstance.TriggerEvent("Junk");

        }

    }

}
- UnityAction和UnityEvent的用法详解
Ref: http://blog.csdn.net/inlet511/article/details/46822907
UnityAction本质上是delegate,且有数个泛型版本(参数最多是4个),一个UnityAction可以添加多个函数 (多播委托)。
UnityEvent本质上是继承自UnityEventBase的类,它的AddListener()方法能够注册UnityAction,RemoveListener能够取消注册UnityAction,还有Invoke()方法能够一次性调用所有注册了的UnityAction。UnityEvent也有数个泛型版本(参数最多也是4个),但要注意的一点是,UnityAction的所有带参数的泛型版本都是抽象类(abstract),所以如果要使用的话,需要自己声明一个类继承之,然后再实例化该类才可以使用。
不使用带参数的UnityEvent:
using UnityEngine;

using System.Collections;

using UnityEngine.Events;

public class UnityActionAndEvent : MonoBehaviour {

    public UnityAction action;

    public UnityEvent myEvent = new UnityEvent();

    void Start()

    {

        action  = new UnityAction(MyFunction);

        action += MyFunction2;

        myEvent.AddListener(action);

    }

    void Update()

    {

        if(Input.GetKeyDown(KeyCode.P))

        {

            myEvent.Invoke();

        }

    }

    public void MyFunction()

    {

        print ("Hello: ");

    }

    public void MyFunction2()

    {

        print ("Hello2: ");

    }

}
使用带参数的UnityEvent:
using UnityEngine;

using System.Collections;

using UnityEngine.Events;

//因为UnityEvent<T0>是抽象类,所以需要声明一个类来继承它

public class MyEvent:UnityEvent<int>{}

public class UnityActionWithParameter : MonoBehaviour {

    public MyEvent myEvent = new MyEvent();

    public UnityAction<int> action;

    void Start () {

        action  = new UnityAction<int>(MyFunction);

        action += MyFunction2;

        myEvent.AddListener(action);

    }

    void Update () {

        if(Input.GetKeyDown(KeyCode.A))

        {

            myEvent.Invoke();

        }

    }

    public void MyFunction(int i)

    {

        print (i);

    }

    public void MyFunction2(int i)

    {

        print(i*);

    }

}
Unity中通过面板中添加的Listener和通过脚本添加的Listener实际上是两种不同类型的Listener:
- 在脚本中通过AddListener()添加的是一个0个参数的delegate(UnityAction)回调。是不可序列化的,在Inspector中是无法看到的。这种Listener是常规Listener。
- 在Inspector中添加的则是永久性的Listener(persistent listener)。他们需要指定GameObject、方法以及方法需要的参数。他们是序列化的,用脚本是无法访问到的。
添加任意多个参数的函数
另外在脚本中使用lamda表达式来添加listener是非常方便的。
using UnityEngine;

using System.Collections;

using UnityEngine.EventSystems;

using UnityEngine.UI;

public class EventAndLamda : MonoBehaviour {

    void Start () {

        //lamda方式可以添加包含任意参数的函数,非常方便

        GetComponent<Button>().onClick.AddListener( ()=>{

            //此处其实可以直接写Myfuction(.....),因为是同一个脚本里的函数

            //这样写是为了说明调用其他组件中的函数也是可以的。如果有其他组件的引用,可以直接写:

            //someReference.theMethod(arguments);

            this.GetComponent<EventAndLamda>().MyFunction(,20.0f,new Vector3(,,));

        } );

    }

    public void MyFunction(int i, float f, Vector3 v)

    {

        print (i.ToString()+"\n" + f.ToString() + "\n" + v.ToString());

    }

}
Package: UnityEditor.Events
Class: UnityEventTools
Description: Editor tools for working with persistent UnityEvents.
| AddBoolPersistentListener | Adds a persistent, preset call to the listener. |
| AddFloatPersistentListener | Adds a persistent, preset call to the listener. |
| AddIntPersistentListener | Adds a persistent, preset call to the listener. |
| AddObjectPersistentListener | Adds a persistent, preset call to the listener. |
| AddPersistentListener | Adds a persistent, call to the listener. Will be invoked with the arguments as defined by the Event and sent from the call location. |
| AddStringPersistentListener | Adds a persistent, preset call to the listener. |
| AddVoidPersistentListener | Adds a persistent, preset call to the listener. |
| RegisterBoolPersistentListener | Modifies the event at the given index. |
| RegisterFloatPersistentListener | Modifies the event at the given index. |
| RegisterIntPersistentListener | Modifies the event at the given index. |
| RegisterObjectPersistentListener | Modifies the event at the given index. |
| RegisterPersistentListener | Modifies the event at the given index. |
| RegisterStringPersistentListener | Modifies the event at the given index. |
| RegisterVoidPersistentListener | Modifies the event at the given index. |
| RemovePersistentListener | Removes the given function from the event. |
| UnregisterPersistentListener | Unregisters the given listener at the specified index. |
[Unity3D] 04 - Event Manager的更多相关文章
- ubuntu14.04, Cloudera Manager 5.11.1, cdh5.11.1 postgresql离线部署
最近一段时间团队接到的项目需要处理的数据量非常大,之前的处理方式难以满足现有需求.最近两周前前后后折腾了不少,在搭建了hadoop+hbase+hive+spark的一个集群后,由于感觉管理和监控太麻 ...
- zepto源码学习-04 event
之前说完$(XXX),然后还有很多零零碎碎的东西需要去分析,结果一看代码,发现zepto的实现都相对简单,没有太多可分析的.直接略过了一些实现,直接研究Event模块,相比JQuery的事件系统,ze ...
- [Node.js] 04 - Event and Callback
回调函数 回调函数在完成任务后就会被调用,Node 使用了大量的回调函数,Node 所有 API 都支持回调函数. 异步读取文件的回调函数: var fs = require("fs&quo ...
- 本人AI知识体系导航 - AI menu
Relevant Readable Links Name Interesting topic Comment Edwin Chen 非参贝叶斯 徐亦达老板 Dirichlet Process 学习 ...
- Magic Quadrant for Security Information and Event Management
https://www.gartner.com/doc/reprints?id=1-4LC8PAW&ct=171130&st=sb Summary Security and risk ...
- 理解Mac和iOS中的 Event 处理
根据现在的理解,我把event处理分为5部分,第一是,Event处理的Architecture:第二是,Event的Dispatch到first responder之前: 第三是,Event从firs ...
- Weak Event Patterns
https://msdn.microsoft.com/en-US/library/aa970850(v=vs.100).aspx In applications, it is possible tha ...
- Event Managers
Some PLF-based controls expose a convenient facility for temporarily disabling their events and for ...
- The .NET weak event pattern in C#
Introduction As you may know event handlers are a common source of memory leaks caused by the persis ...
随机推荐
- fixed、absolute
<!DOCTYPE html><html> <head> <meta charset="utf-8"> <meta name= ...
- IE6的3像素bug
IE6的3像素bug3像素bug是IE6的一个著名的bug,当浮动元素与非浮动元素相邻时,这个3像素的Bug就会出现.看下面这个左列固定,右列液态的例子,css代码如下: body { margin: ...
- JSP_tomcat_mysql_注冊验证用户;
本文出自:http://blog.csdn.net/svitter 资源下载: github: git clone https://github.com/Svtter/JSP-tomcat-mysql ...
- 初识zookeeper(1)之zookeeper的安装及配置
初识zookeeper(一)之zookeeper的安装及配置 1.简要介绍 zookeeper是一个分布式的应用程序协调服务,是Hadoop和Hbase的重要组件,是一个树型的目录服务,支持变更推送. ...
- iOS-获取当前时间的年、月、日、时、分、秒
//获取当前时间02 NSDate *now = [NSDate date];03 NSLog(@”now date is: %@”, now);0405 NSCalendar *c ...
- R12.2.7 开启预置用户账号
[root@apps scripts]# cd /u01/install/APPS/scripts [root@apps scripts]# ll total 244 -rwxr-xr-x 1 ora ...
- Xcode 安装ClangFormat 插件
sudo gem install -n /usr/local/bin update_xcode_plugins 安装ClangFormat git clone https://github.com/t ...
- WebSocket——为Web应用带来桌面应用般的灵活性【转载+整理】
原文地址 本文内容 WebSocket 简介 浏览器端的 JavaScript 实现 Java 端的 WebSocket 实现 对 Web 应用的重新思考 使用WebSocket时所需注意的要点 We ...
- TCMalloc小记(转)
一. 原理 tcmalloc就是一个内存分配器,管理堆内存,主要影响malloc和free,用于降低频繁分配.释放内存造成的性能损耗,并且有效地控制内存碎片.glibc中的内存分配器是ptmalloc ...
- 预防 app crash 之 unrecognized selector
处理unrecognized selector异常原因 假如封装一个方法,在其他模块调用该方法时,传入参数不匹配则crash.比如下面的方法:本应该传入的参数类型为NSMutableArray,如果传 ...