spring整合ActiveMq
spring整合ActiveMq:
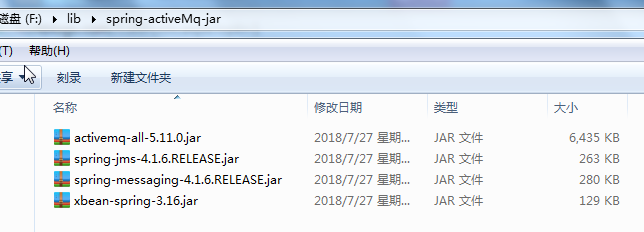
1:依赖的jar包:
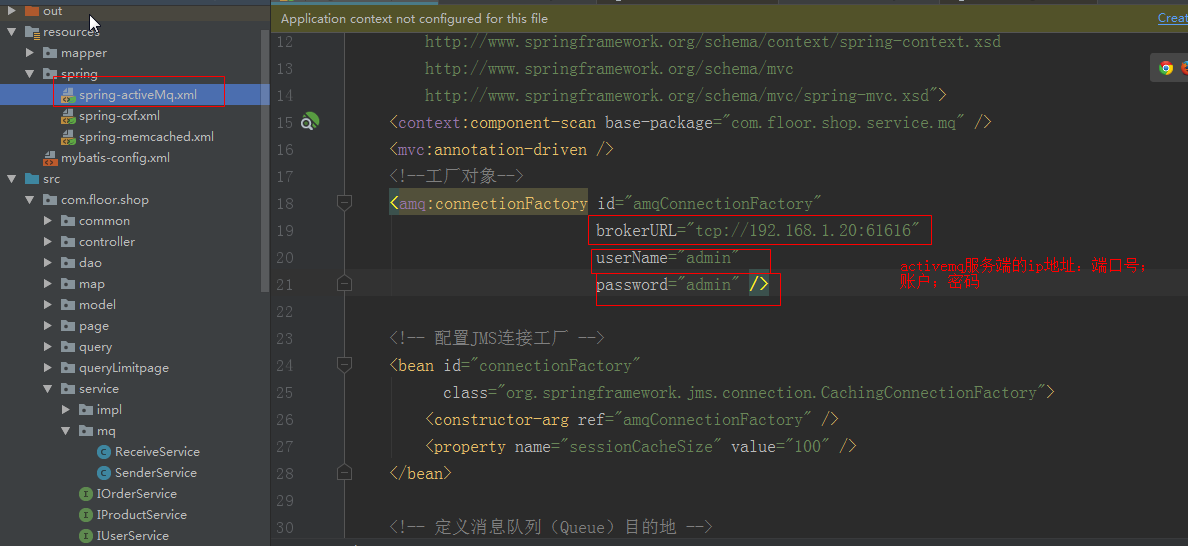
2:spring-activemq.xml 的配置:
代码:
<?xml version="1.0" encoding="UTF-8"?>
<beans xmlns="http://www.springframework.org/schema/beans"
xmlns:xsi="http://www.w3.org/2001/XMLSchema-instance"
xmlns:amq="http://activemq.apache.org/schema/core"
xmlns:context="http://www.springframework.org/schema/context"
xmlns:mvc="http://www.springframework.org/schema/mvc"
xsi:schemaLocation="http://www.springframework.org/schema/beans
http://www.springframework.org/schema/beans/spring-beans.xsd
http://activemq.apache.org/schema/core
http://activemq.apache.org/schema/core/activemq-core.xsd
http://www.springframework.org/schema/context
http://www.springframework.org/schema/context/spring-context.xsd
http://www.springframework.org/schema/mvc
http://www.springframework.org/schema/mvc/spring-mvc.xsd">
<context:component-scan base-package="com.floor.shop.service.mq" />
<mvc:annotation-driven />
<!--工厂对象-->
<amq:connectionFactory id="amqConnectionFactory"
brokerURL="tcp://192.168.1.20:61616"
userName="admin"
password="admin" /> <!-- 配置JMS连接工厂 -->
<bean id="connectionFactory"
class="org.springframework.jms.connection.CachingConnectionFactory">
<constructor-arg ref="amqConnectionFactory" />
<property name="sessionCacheSize" value="100" />
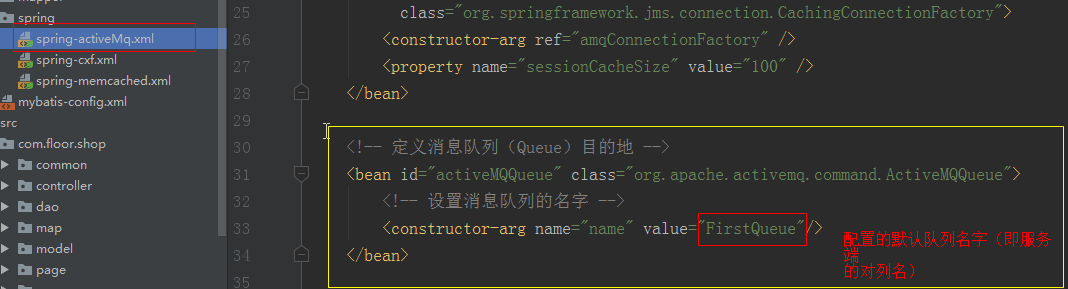
</bean> <!-- 定义消息队列(Queue)目的地 -->
<bean id="activeMQQueue" class="org.apache.activemq.command.ActiveMQQueue">
<!-- 设置消息队列的名字 -->
<constructor-arg name="name" value="FirstQueue"/>
</bean> <!-- 配置JMS模板(Queue),Spring提供的JMS工具类,它发送、接收消息。 -->
<bean id="jmsTemplate" class="org.springframework.jms.core.JmsTemplate">
<property name="connectionFactory" ref="connectionFactory" />
<property name="defaultDestination" ref="activeMQQueue" />
<property name="receiveTimeout" value="10000" />
<!-- true是topic,false是queue,默认是false,此处显示写出false -->
<property name="pubSubDomain" value="false" />
</bean> </beans>
3:mq发送消息和接受消息的API封装:
3-1SendMsg:
3-1代码:
package com.floor.shop.service.mq; import org.apache.activemq.command.ActiveMQQueue;
import org.springframework.beans.factory.annotation.Autowired;
import org.springframework.jms.core.JmsTemplate;
import org.springframework.jms.core.MessageCreator;
import org.springframework.stereotype.Service;
import javax.jms.JMSException;
import javax.jms.Message;
import javax.jms.Session;
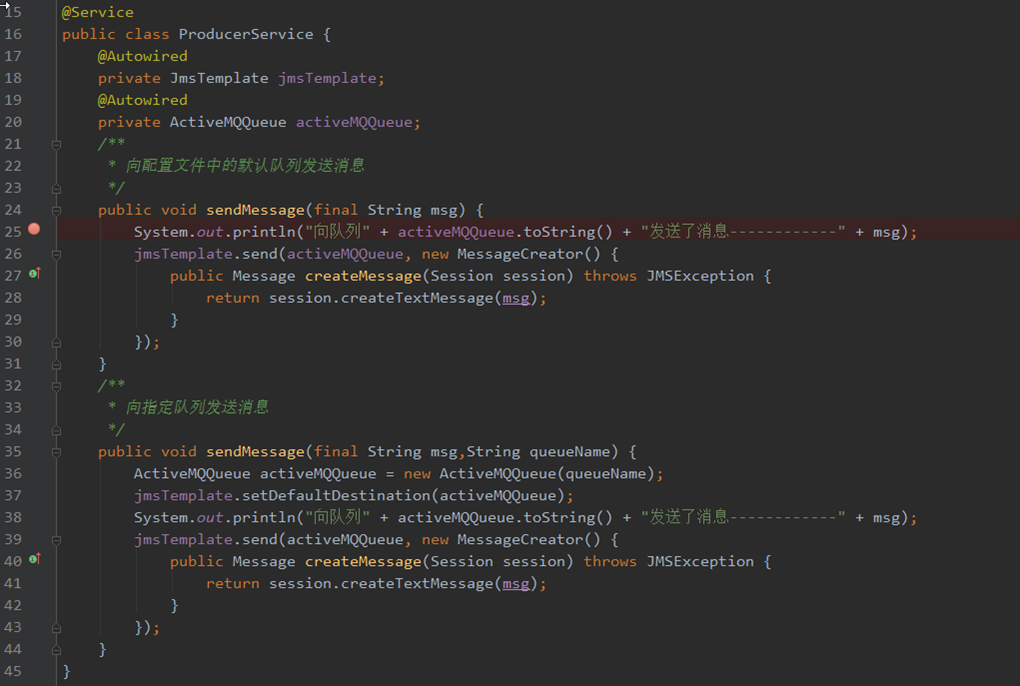
@Service
public class SenderService {
/**
* Created by ause on 2017-09-26.
*/
@Autowired
private JmsTemplate jmsTemplate;
@Autowired
private ActiveMQQueue activeMQQueue;
/**
* 向配置文件中的默认队列发送消息
*/
public void sendMessage(final String msg) {
System.out.println("向队列" + activeMQQueue.toString() + "发送了消息------------" + msg);
jmsTemplate.send(activeMQQueue, new MessageCreator() {
public Message createMessage(Session session) throws JMSException {
return session.createTextMessage(msg);
}
});
}
/**
* 向指定队列发送消息
*/
public void sendMessage(final String msg,String queueName) {
ActiveMQQueue activeMQQueue = new ActiveMQQueue(queueName);
jmsTemplate.setDefaultDestination(activeMQQueue);
System.out.println("向队列" + activeMQQueue.toString() + "发送了消息------------" + msg);
jmsTemplate.send(activeMQQueue, new MessageCreator() {
public Message createMessage(Session session) throws JMSException {
return session.createTextMessage(msg);
}
});
}
}
3-2:receiveMsg:
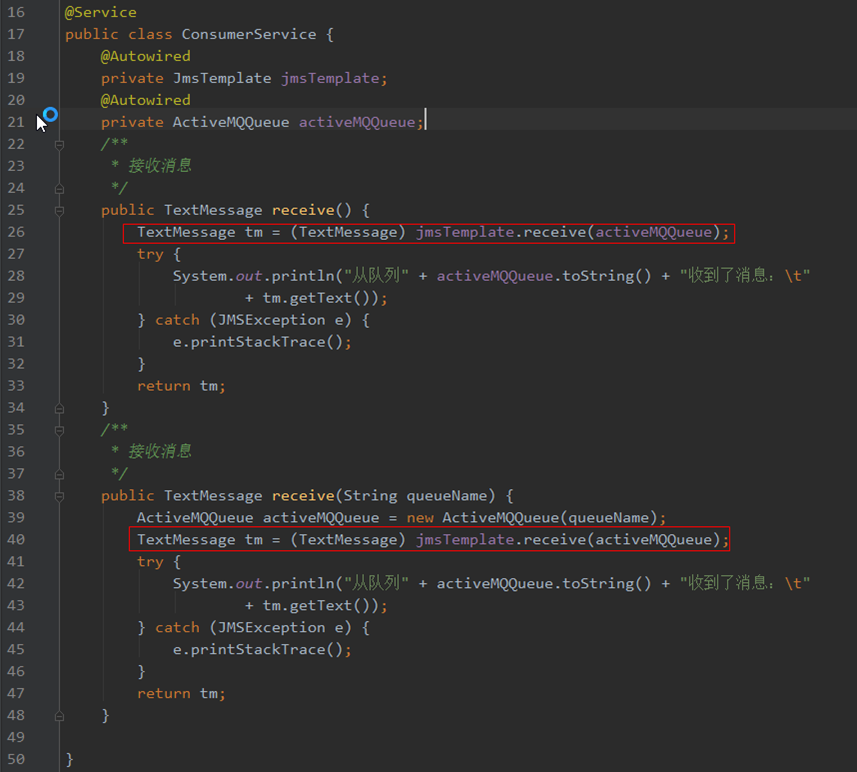
3-2:代码:
 package com.floor.shop.service.mq;

 /**

  * Created by ause on 2017-09-26.

  */

 import org.apache.activemq.command.ActiveMQQueue;

 import org.springframework.beans.factory.annotation.Autowired;

 import org.springframework.jms.core.JmsTemplate;

 import org.springframework.stereotype.Service;

 import javax.jms.JMSException;

 import javax.jms.TextMessage;

 @Service

 public class ReceiveService {

         @Autowired

         private JmsTemplate jmsTemplate;

         @Autowired

         private ActiveMQQueue activeMQQueue;

         /**

          * 接收消息

          */

         public TextMessage receive() {

                 TextMessage tm = (TextMessage) jmsTemplate.receive(activeMQQueue);

             try {

                 if(tm!=null){

                     System.out.println("从队列" + activeMQQueue.toString() + "收到了消息:\t"

                             + tm.getText());

                 }else {

                     System.out.println("队列为空!");

                 }

             } catch (JMSException e) {

                 e.printStackTrace();

             }

             return tm;

         }

         /**

          * 接收消息

          */

         public TextMessage receive(String queueName) {

             ActiveMQQueue activeMQQueue = new ActiveMQQueue(queueName);

             TextMessage tm = (TextMessage) jmsTemplate.receive(activeMQQueue);

             try {

                 if(tm!=null){

                     System.out.println("从队列" + activeMQQueue.toString() + "收到了消息:\t"

                             + tm.getText());

                 }else {

                     System.out.println("队列为空!!");

                 }

             } catch (JMSException e) {

                 e.printStackTrace();

             }

             return tm;

         }

     }
4:测试:
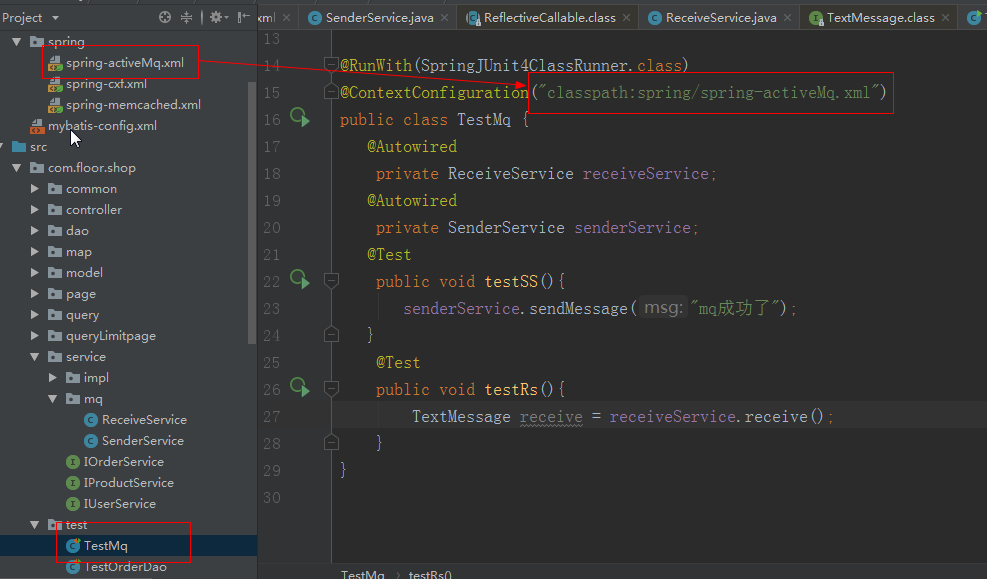
代码:
 package com.floor.shop.test;

 import com.floor.shop.service.mq.ReceiveService;

 import com.floor.shop.service.mq.SenderService;

 import org.junit.Test;

 import org.junit.runner.RunWith;

 import org.springframework.beans.factory.annotation.Autowired;

 import org.springframework.test.context.ContextConfiguration;

 import org.springframework.test.context.junit4.SpringJUnit4ClassRunner;

 import javax.jms.JMSException;

 import javax.jms.TextMessage;

 @RunWith(SpringJUnit4ClassRunner.class)

 @ContextConfiguration("classpath:spring/spring-activeMq.xml")

 public class TestMq {

    @Autowired

     private ReceiveService receiveService;

    @Autowired

     private SenderService senderService;

    @Test

     public void testSS(){

        senderService.sendMessage("mq成功了");

    }

     @Test

     public void testRs(){

         TextMessage receive = receiveService.receive();

     }

 }
5:编写监听类:
在实际项目中,我们很少会自己手动去获取消息,如果需要手动去获取消息,那就没有必要使用到ActiveMq了,可以用一个Redis 就足够了。
不能手动去获取消息,那么我们就可以选择使用一个监听器来监听是否有消息到达,这样子可以很快的完成对消息的处理。相当于开启了事物一样,会
自动获取队列里面的消息。
首先我们需要创建一个类实现 MessageListener 接口:
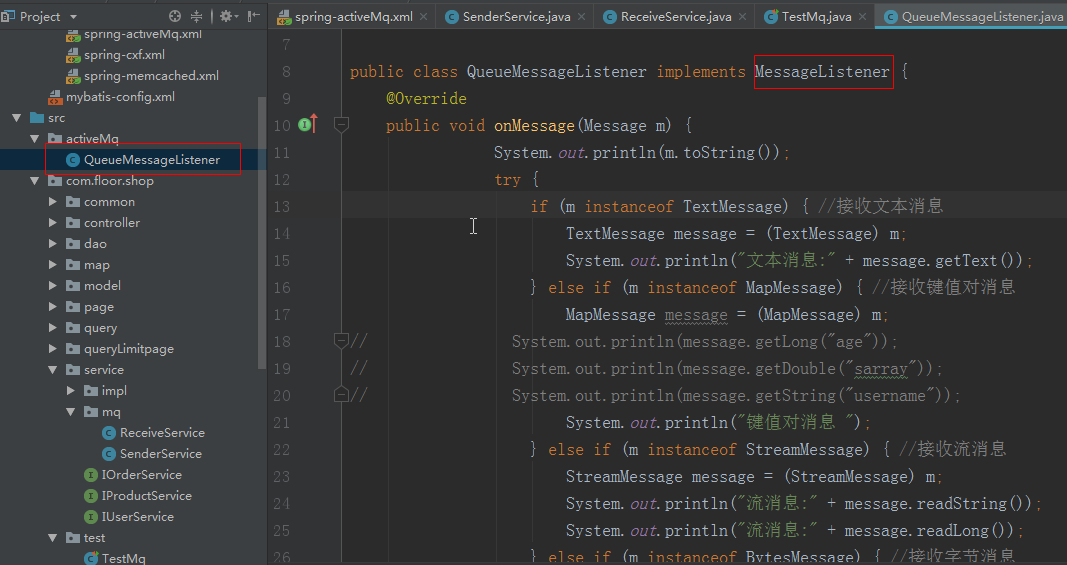
代码:
 package activeMq;

 import com.alibaba.fastjson.JSON;

 import com.alibaba.fastjson.JSONObject;

 import javax.jms.*;

 public class QueueMessageListener implements MessageListener {

     @Override

     public void onMessage(Message m) {

                 System.out.println(m.toString());

                 try {

                     if (m instanceof TextMessage) { //接收文本消息

                         TextMessage message = (TextMessage) m;

                         System.out.println("文本消息:" + message.getText());

                     } else if (m instanceof MapMessage) { //接收键值对消息

                         MapMessage message = (MapMessage) m;

 //                System.out.println(message.getLong("age"));

 //                System.out.println(message.getDouble("sarray"));

 //                System.out.println(message.getString("username"));

                         System.out.println("键值对消息 ");

                     } else if (m instanceof StreamMessage) { //接收流消息

                         StreamMessage message = (StreamMessage) m;

                         System.out.println("流消息:" + message.readString());

                         System.out.println("流消息:" + message.readLong());

                     } else if (m instanceof BytesMessage) { //接收字节消息

                         byte[] b = new byte[1024];

                         int len = -1;

                         BytesMessage message = (BytesMessage) m;

                         while ((len = message.readBytes(b)) != -1) {

                             System.out.println("字节消息:" + new String(b, 0, len));

                             String jsonstr = new String(b, 0, len);

                             JSONObject jsonObject = JSON.parseObject(jsonstr);

                             System.out.println("接收成功");

                         }

                     } else if (m instanceof ObjectMessage) { //接收对象消息

                         ObjectMessage message = (ObjectMessage) m;

 //                User user = (User)message.getObject();

                         System.out.println("对象消息");

                     } else {

                         System.out.println(m);

                     }

                 } catch (JMSException e) {

                     e.printStackTrace();

                 }

             }

         }
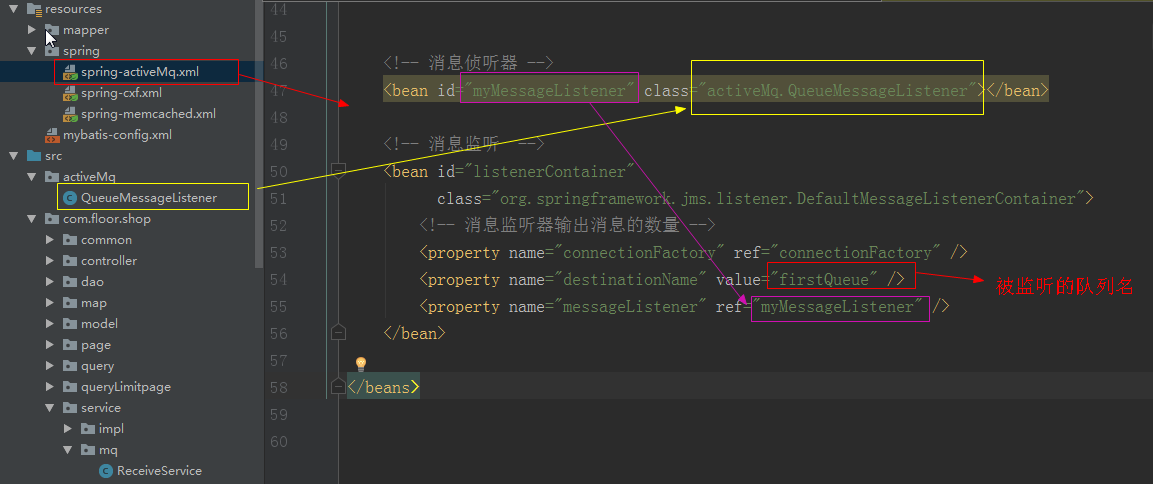
然后在 spring-activemq.xml 中配置:
   <!-- 消息侦听器 -->

     <bean id="myMessageListener" class="activeMq.QueueMessageListener"></bean>

     <!-- 消息监听  -->

     <bean id="listenerContainer"

           class="org.springframework.jms.listener.DefaultMessageListenerContainer">

         <!-- 消息监听器输出消息的数量 -->

         <property name="connectionFactory" ref="connectionFactory" />

         <property name="destinationName" value="firstQueue" />

         <property name="messageListener" ref="myMessageListener" />

     </bean>
就这么简单咯,快去试试吧!!!!!
也可以参考博客:https://www.cnblogs.com/jaycekon/p/ActiveMq.html
spring整合ActiveMq的更多相关文章
- Spring整合ActiveMQ及多个Queue消息监听的配置
消息队列(MQ)越来越火,在java开发的项目也属于比较常见的技术,MQ的相关使用也成java开发人员必备的技能.笔者公司采用的MQ是ActiveMQ,且消息都是用的点对点的模式.本文记录了实 ...
- 【报错】spring整合activeMQ,pom.xml文件缺架包,启动报错:Caused by: java.lang.ClassNotFoundException: org.apache.xbean.spring.context.v2.XBeanNamespaceHandler
spring版本:4.3.13 ActiveMq版本:5.15 ======================================================== spring整合act ...
- Spring整合ActiveMQ实现消息延迟投递和定时投递
linux(centos)系统安装activemq参考:https://www.cnblogs.com/pxblog/p/12222231.html 首先在ActiveMQ的安装路径 /conf/ac ...
- spring 整合 ActiveMQ
1.1 JMS简介 JMS的全称是Java Message Service,即Java消息服务.它主要用于在生产者和消费者之间进行消息传递,生产者负责产生消息,而消费者负责接收消息.把它应用到 ...
- Java消息队列-Spring整合ActiveMq
1.概述 首先和大家一起回顾一下Java 消息服务,在我之前的博客<Java消息队列-JMS概述>中,我为大家分析了: 消息服务:一个中间件,用于解决两个活多个程序之间的耦合,底层由Jav ...
- ActiveMQ学习总结------Spring整合ActiveMQ 04
通过前几篇的学习,相信大家已经对我们的ActiveMQ的原生操作已经有了个深刻的概念, 那么这篇文章就来带领大家一步一步学习下ActiveMQ结合Spring的实战操作 注:本文将省略一部分与Acti ...
- ActiveMQ学习总结(3)——spring整合ActiveMQ
1.参考文献 Spring集成ActiveMQ配置 Spring JMS异步发收消息 ActiveMQ 2.环境 在前面的一篇ActiveMQ入门实例中我们实现了消息的异步传送,这篇博文将如何在spr ...
- Spring整合ActiveMq消息队列
ActiveMQ 是Apache出品,最流行的,能力强劲的开源消息总线.ActiveMQ 是一个完全支持JMS1.1和J2EE 1.4规范的 JMS Provider实现,尽管JMS规范出台已经是很久 ...
- spring整合activemq发送MQ消息[Topic模式]实例
Topic模式消息发送实例 1.pom引入 <dependency> <groupId>junit</groupId> <artifactId>juni ...
随机推荐
- 多IP加强SSH的安全性
本文针对一台服务器有多个网卡及IP地址的情况,可以限制某些IP不监听SSH,只允许通过某些IP来登陆 以下配置项在/etc/ssh/sshd_config文件中修改 比如你有4个网卡: eth0 – ...
- Android 性能优化提示
原文 http://developer.android.com/guide/practices/design/performance.html 性能优化 Android应用程序运行的移动设备受限于其运 ...
- 【BZOJ5416】【NOI2018】冒泡排序(动态规划)
[BZOJ5416][NOI2018]冒泡排序(动态规划) 题面 BZOJ 洛谷 UOJ 题解 考场推出了就是两个上升子序列,并且最长下降子序列长度不超过\(2\)...然后大力暴力状压\(dp\)混 ...
- <Android基础>(二) Activity Part 2
1.活动生命周期 1)返回栈 2)活动状态 3)活动的生存期 2.活动的启动模式 1)standard 2)singleTop 3)singleTask 4)singleInstance 3.活动的优 ...
- logback 设置按天,文件切割大小,总共日志文件大小。
设置按天,文件切割大小,总共日志文件大小. <?xml version="1.0" encoding="UTF-8"?> <configura ...
- HDU/HDOJ 4864 Task
贪心题. 贪心方法很是naive...... 首先我们就能注意到一个性质:优先选择时间(x)长的,然后才是等级(y). 所以我们把机器和任务排好序,从大到小枚举任务.对于每一个x满足的机器,x也一定满 ...
- vue2.0项目实战(4)生命周期和钩子函数详解
最近的项目都使用vue2.0来开发,不得不说,vue真的非常好用,大大减少了项目的开发周期.在踩坑的过程中,因为对vue的生命周期不是特别了解,所以有时候会在几个钩子函数里做一些事情,什么时候做,在哪 ...
- RAND_MAX
RAND_MAX 指的是 C 语言标准库 <stdlib.h> 中定义的一个宏.经预编译阶段处理后, 它展开为一个整数类型的常量表达式.RAND_MAX 是 <stdlib.h> ...
- Oracle 在JDBC中使用 存储过程,包
前提: 在Oracle中已经定义 存储过程 和 存储函数 和 包 导入了Oracle的JDBC jar 包 package demo; import java.sql.Connect ...
- ElasticSearch6.1.1集群搭建
其实早就想研究ES了,因为之前用solr,资料较少(这倒不是问题,有问题去官网读文档),貌似用的人比较少?(别打我)前几天去京东面试,我觉得有必要了解一下es,昨天晚上简单了解了官方文档,今天居然鼓捣 ...