
IdentityServer4 (1) 客户端授权模式(Client Credentials)
写在前面
1、源码(.Net Core 2.2)
git地址:https://github.com/yizhaoxian/CoreIdentityServer4Demo.git
2、相关章节
2.1、《IdentityServer4 (1) 客户端授权模式(Client Credentials)》
2.2、《IdentityServer4 (2) 密码授权(Resource Owner Password)》
2.3、《IdentityServer4 (3) 授权码模式(Authorization Code)》
2.4、《IdentityServer4 (4) 静默刷新(Implicit)》
2.5、《IdentityServer4 (5) 混合模式(Hybrid)》
3、参考资料
IdentityServer4 中文文档 http://www.identityserver.com.cn/
IdentityServer4 英文文档 https://identityserver4.readthedocs.io/en/latest/
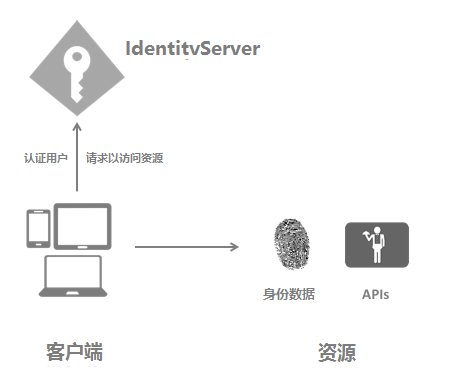
4、流程图
客户端授权模式是最基本的使用场景,我们需要做一个API(受保护的资源),一个客户端(访问的应用),一个IdentityServer(用来授权)
一、创建IdentityServer
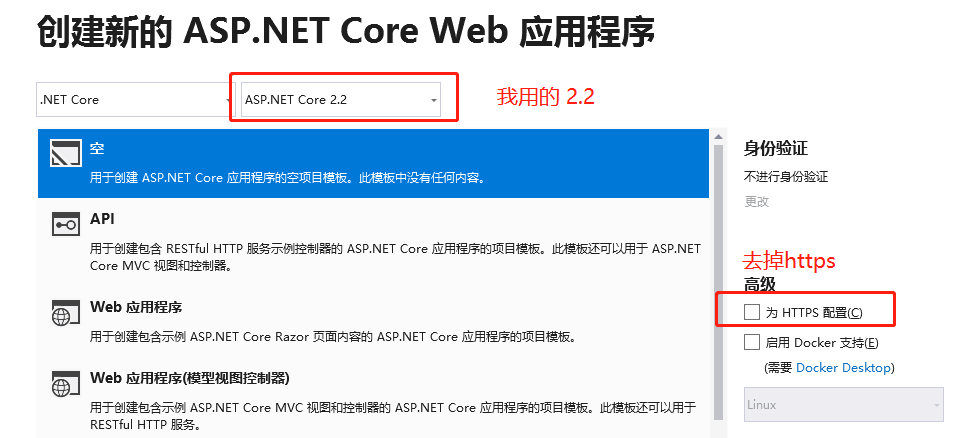
1、用VS创建一个Web 项目
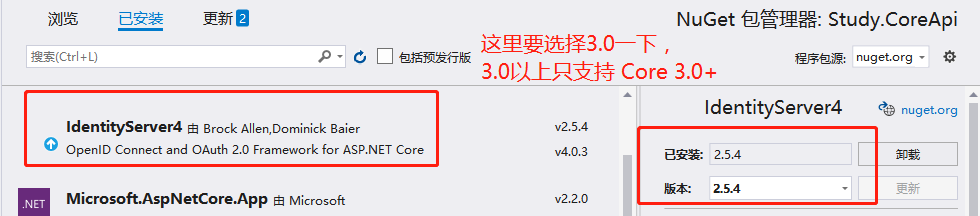
2、添加引用 IdentityServer4 包,下图是我已经安装好了的截图
3、添加一个配置文件(这里也可以使用json文件)
    public class IdpConfig

    {

        /// <summary>

        /// 用户认证信息

        /// </summary>

        /// <returns></returns>

        public static IEnumerable<IdentityResource> GetApiResources()

        {

            return new List<IdentityResource>

            {

                new IdentityResources.OpenId(),

                new IdentityResources.Profile(),

                new IdentityResources.Address(),

                new IdentityResources.Email(),

                new IdentityResources.Phone()

            };

        }

        /// <summary>

        /// API 资源

        /// </summary>

        /// <returns></returns>

        public static IEnumerable<ApiResource> GetApis()

        {

            return new List<ApiResource>

            {

                new ApiResource("api1", "My API")

            };

        }

        /// <summary>

        /// 客户端应用

        /// </summary>

        /// <returns></returns>

        public static IEnumerable<Client> GetClients()

        {

            return new List<Client>

            {

                new Client

                {

                    // 客户端ID 这个很重要

                    ClientId = "client",

                    //AccessToken 过期时间,默认3600秒,注意这里直接设置5秒过期是不管用的,解决方案继续看下面 API资源添加JWT

                    //AccessTokenLifetime=5,

                    // 没有交互性用户,使用 clientid/secret 实现认证。

                    AllowedGrantTypes = GrantTypes.ClientCredentials,

                    // 用于认证的密码

                    ClientSecrets =

                    {

                        new Secret("secret".Sha256())

                    },

                    // 客户端有权访问的范围(Scopes)

                    AllowedScopes = { "api1" }

                }

            };

        }

    }
4、在StartUp.cs 里注册 IdentityServer4
ConfigureServices()
    services.AddIdentityServer(options =>

    {

        options.Events.RaiseErrorEvents = true;

        options.Events.RaiseInformationEvents = true;

        options.Events.RaiseFailureEvents = true;

        options.Events.RaiseSuccessEvents = true;

    })

      .AddDeveloperSigningCredential()//解决Keyset is missing 错误

      //.AddTestUsers(TestUsers.Users)

      //.AddInMemoryIdentityResources(IdpConfig.GetApiResources())

      .AddInMemoryApiResources(IdpConfig.GetApis())

      .AddInMemoryClients(IdpConfig.GetClients());
Configure()方法添加使用 IdentityServer4 中间件
app.UseIdentityServer();
5、配置完成
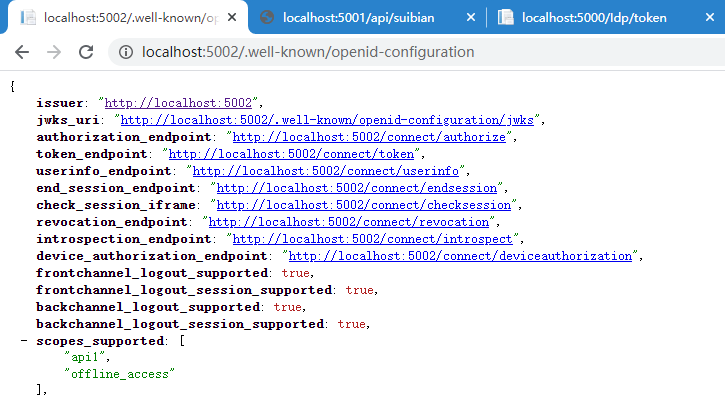
启动项目,访问 http://localhost:5002/.well-known/openid-configuration (我的端口号是5002) ,可以浏览 发现文档,参考下图,说明已经配置成功。
后面客户端会使用里面的数据进行请求toke
项目第一次启动根目录也会生成一个文件 tempkey.rsa
二、客户端
1、新建一个.Net Core Web 项目
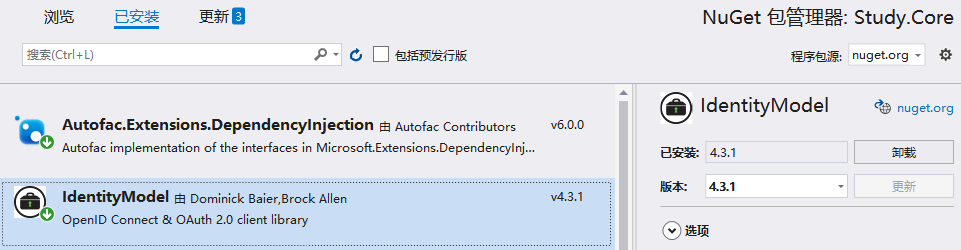
这里可以使用其他建立客户端 。例如:控制台程序、wpf 等等。需要添加 NuGet 包 IdentityModel
2、新建一个 Controller 用来测试访问上面的IdentityServer
获取token,访问 http://localhost:5003/Idp/token ,提示访问成功
    public class IdpController : Controller

    {

        private static readonly string _idpBaseUrl = "http://localhost:5002";

        public async Task<IActionResult> Token()

        {

            var client = new HttpClient();

            var disco = await client.GetDiscoveryDocumentAsync(_idpBaseUrl);

            if (disco.IsError)

            {

                return Content("获取发现文档失败。error:" + disco.Error);

            }

            var token = await client.RequestClientCredentialsTokenAsync(new ClientCredentialsTokenRequest()

            {

                Address = disco.TokenEndpoint,

                //ClientId、ClientSecret、Scope 这里要和 API 里定义的Client一模一样

                ClientId = "client",

                ClientSecret = "secret",

                Scope = "api1"

            });

            if (token.IsError)

            {

                return Content("获取 AccessToken 失败。error:" + disco.Error);

            }

            return Content("获取 AccessToken 成功。Token:" + token.AccessToken);

        }

    }

三、添加API资源
1、新建一个API项目
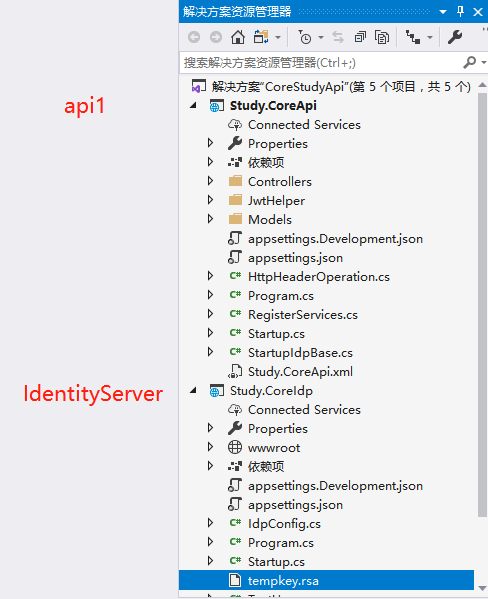
我把API项目和IdentityServer 放到同一个解决方案,这个自己定,无所谓的
API资源指的是IdentityServer IdpConfig.GetApis() 里面添加的 api1(这个api1名称随便起,但是要注意一定要保持一致)
添加认证之后就可以测试用 AccessToken 请求资源了
2、添加JWT 认证
StartUp.ConfigureServices()
       services.AddAuthentication(JwtBearerDefaults.AuthenticationScheme)

       .AddJwtBearer(JwtBearerDefaults.AuthenticationScheme, options =>

       {

           // IdentityServer 地址

           options.Authority = "http://localhost:5002";

           //不需要https

           options.RequireHttpsMetadata = false;

           //这里要和 IdentityServer 定义的 api1 保持一致

           options.Audience = "api1";

           //token 默认容忍5分钟过期时间偏移,这里设置为0,

           //这里就是为什么定义客户端设置了过期时间为5秒,过期后仍可以访问数据

           options.TokenValidationParameters.ClockSkew = TimeSpan.Zero;

           options.Events = new JwtBearerEvents

           {

               //AccessToken 验证失败

               OnChallenge = op =>

               {

                   //跳过所有默认操作

                   op.HandleResponse();

                   //下面是自定义返回消息

                   //op.Response.Headers.Add("token", "401");

                   op.Response.ContentType = "application/json";

                   op.Response.StatusCode = StatusCodes.Status401Unauthorized;

                   op.Response.WriteAsync(JsonConvert.SerializeObject(new

                   {

                       status = StatusCodes.Status401Unauthorized,

                       msg = "token无效"

                   }));

                   return Task.CompletedTask;

               }

           };

       });
3、添加认证中间件
//这里注意 一定要在 UseMvc前面,顺序不可改变

app.UseAuthentication();
4、Controller 添加特性认证 [Authorize]
    [Route("api/[controller]")]

    [Authorize]

    public class SuiBianController : Controller

    {

        [HttpGet]

        public string Get()

        {

            var roles = User.Claims.Where(l => l.Type == ClaimTypes.Role);

            return "访问成功,当前用户角色 " + string.Join(',', roles.Select(l => l.Value));

        }

    }
5、测试
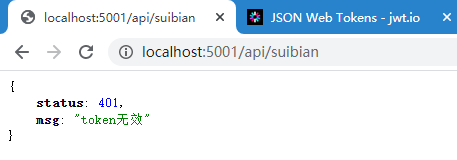
访问 http://localhost:5001/api/suibian ,提示 token 无效,证明我们增加认证成功
四、客户端测试
1、修改 IdpController, 添加一个action 访问 API资源 /api/suibian
    public class IdpController : Controller

    {

        //内存缓存 需要提前注册  services.AddMemoryCache();

        private IMemoryCache _memoryCache;

        private static readonly string _idpBaseUrl = "http://localhost:5002";

        private static readonly string _apiBaseUrl = "http://localhost:5001";

        public IdpController(IMemoryCache memoryCache)

        {

            _memoryCache = memoryCache;

        }

        public async Task<IActionResult> Token()

        {

            var client = new HttpClient();

            var disco = await client.GetDiscoveryDocumentAsync(_idpBaseUrl);

            if (disco.IsError)

            {

                return Content("获取发现文档失败。error:" + disco.Error);

            }

            var token = await client.RequestClientCredentialsTokenAsync(new ClientCredentialsTokenRequest()

            {

                Address = disco.TokenEndpoint,

                ClientId = "client",

                ClientSecret = "secret",

                Scope = "api1"

            });

            if (token.IsError)

            {

                return Content("获取 AccessToken 失败。error:" + disco.Error);

            }

            //将token 临时存储到 缓存中

            _memoryCache.Set("AccessToken", token.AccessToken);

            return Content("获取 AccessToken 成功。Token:" + token.AccessToken);

        }

        public async Task<IActionResult> SuiBian()

        {

            string token, apiurl = GetApiUrl("suibian");

            _memoryCache.TryGetValue("AccessToken", out token);

            if (string.IsNullOrEmpty(token))

            {

                return Content("token is null");

            }

            var client = new HttpClient();

            client.SetBearerToken(token);

            var response = await client.GetAsync(apiurl);

            var result = await response.Content.ReadAsStringAsync();

            if (!response.IsSuccessStatusCode)

            {

                _memoryCache.Remove("AccessToken");

                return Content($"获取 {apiurl} 失败。StatusCode:{response.StatusCode} \r\n Token:{token} \r\n result:{result}");

            }

            return Json(new

            {

                code = response.StatusCode,

                data = result

            });

        }

        private string GetApiUrl(string address)

        {

            return _apiBaseUrl + "/api/" + address;

        }

    }
2、请求 AccessToken
http://localhost:5003/Idp/token ,请求成功后会将 token 存储到 cache 中
3、请求 API 资源
http://localhost:5003/Idp/suibian ,token是直接在缓存里面取出来的

五、项目目录
IdentityServer4 (1) 客户端授权模式(Client Credentials)的更多相关文章
- (转)基于OWIN WebAPI 使用OAuth授权服务【客户端模式(Client Credentials Grant)】
适应范围 采用Client Credentials方式,即应用公钥.密钥方式获取Access Token,适用于任何类型应用,但通过它所获取的Access Token只能用于访问与用户无关的Open ...
- 基于OWIN WebAPI 使用OAuth授权服务【客户端模式(Client Credentials Grant)】
适应范围 采用Client Credentials方式,即应用公钥.密钥方式获取Access Token,适用于任何类型应用,但通过它所获取的Access Token只能用于访问与用户无关的Open ...
- IdentityServer4(客户端授权模式)
1.新建三个项目 IdentityServer:端口5000 IdentityAPI:端口5001 IdentityClient: 2.在IdentityServer项目中添加IdentityServ ...
- IdentityServer4[3]:使用客户端认证控制API访问(客户端授权模式)
使用客户端认证控制API访问(客户端授权模式) 场景描述 使用IdentityServer保护API的最基本场景. 我们定义一个API和要访问API的客户端.客户端从IdentityServer请求A ...
- IdentityServer(二)客户端授权模式
前言 客户端授权模,客户端直接向Identity Server申请token并访问资源.客户端授权模式比较适用于服务之间的通信. 搭建Identity服务 新建名为 IdentityServer 的W ...
- 基于 IdentityServer3 实现 OAuth 2.0 授权服务【客户端模式(Client Credentials Grant)】
github:https://github.com/IdentityServer/IdentityServer3/ documentation:https://identityserver.githu ...
- IdentityServer4系列 | 客户端凭证模式
一.前言 从上一篇关于 快速搭建简易项目中,通过手动或者官方模板的方式简易的实现了我们的IdentityServer授权服务器搭建,并做了相应的配置和UI配置,实现了获取Token方式. 而其中我们也 ...
- IdentityServer4(7)- 使用客户端认证控制API访问(客户端授权模式)
一.前言 本文已更新到 .NET Core 2.2 本文包括后续的Demo都会放在github:https://github.com/stulzq/IdentityServer4.Samples (Q ...
- OAuth2:客户端证书授权(Client Credentials)类型的开放授权
适应范围 认证服务器不提供像用户数据这样的重要资源,仅仅是有限的只读资源或者一些开放的API.例如使用了第三方的静态文件服务,如Google Storage或Amazon S3.这样,你的应用需要通过 ...
随机推荐
- React-redux使用
为什么要使用react-redux 由于redux的store与组件的耦合度太高所以,我们用react官方提供的react-redux可以使两者耦合度降低,更好的实现模块化开发. react-redu ...
- JVM 专题二十二:垃圾回收(六)垃圾回收器 (三)
4. GC日志分析 4.1 日志分析 通过阅读GC日志,我们可以了解Java虚拟机内存分配与回收策略. 内存分配与垃圾回收的参数列表-XX:+PrintGC:输出GC日志.类似-verbose: gc ...
- selenium:selenium.common.exceptions.WebDriverException: Message: 'geckodriver' executable needs to be in PATH.
可用链接: 1.http://blog.csdn.net/heatdeath/article/details/71136174 2.https://www.cnblogs.com/yousuosiys ...
- java 面向对象(三十三):泛型二 泛型在集合中的使用
1. 在集合中使用泛型之前的例子 @Test public void test1(){ ArrayList list = new ArrayList(); //需求:存放学生的成绩 list.add( ...
- Python之常用模块学习(二)
模块,用一砣代码实现了某个功能的代码集合. 类似于函数式编程和面向过程编程,函数式编程则完成一个功能,其他代码用来调用即可,提供了代码的重用性和代码间的耦合.而对于一个复杂的功能来,可能需要多个函数才 ...
- Python 之 Restful API设计规范
理解RESTful架构 Restful API设计指南 理解RESTful架构 越来越多的人开始意识到,网站即软件,而且是一种新型的软件. 这种"互联网软件"采用客户端/服务器模式 ...
- python面向对象07/异常处理
python面向对象07/异常处理 目录 python面向对象07/异常处理 1. 异常错误分类 2. 什么是异常? 3. 异常处理 4. 为什么要有异常处理 5. 异常处理的两种方式 1.if判断 ...
- CUDA C++ Extensions
敲代码的时候总是会去CUDA官方文档中找找思路,感觉每次看英文文档都要耗费一点时间来翻译,干脆自己翻译一下便于以后查阅.官方文档:cuda-c-language-extensions 目录 函数修饰符 ...
- Windows搭建Redis集群-详细教程
一.集群知识 1.集群的概念 所谓的集群,就是通过添加服务器的数量,提供相同的服务,从而让服务器达到一个稳定.高效的状态. 2.使用redis集群的必要性 问题:我们已经部署好了redis,并且能启动 ...
- 高效C++:序
C++的语法全而复杂,如何简洁高效的使用C++的各种语法,是一个值得研究的问题,特别是对于刚入门或是有小几年开发经历的同学,了解或是熟悉这个问题,所得到的提升无疑是巨大的.向前人学习,站在巨人的肩膀上 ...