配置hibernate访问mysql
在之前搭建spring mvc项目这篇的基础上继续集成,引入hibernate支持
一、添加jar包引用
修改pom.xml文件,加入:
<dependency>

    <groupId>org.springframework</groupId>

    <artifactId>spring-orm</artifactId>

    <version>${spring.version}</version>

</dependency>

<dependency>

    <groupId>org.springframework</groupId>

    <artifactId>spring-jdbc</artifactId>

    <version>${spring.version}</version>

</dependency>

<!-- hibernate -->

<dependency>

    <groupId>org.hibernate</groupId>

    <artifactId>hibernate-core</artifactId>

    <version>4.2.21.Final</version>

</dependency>

<!-- jdbc driver -->

<dependency>

    <groupId>mysql</groupId>

    <artifactId>mysql-connector-java</artifactId>

    <version>5.1.38</version>

    <scope>runtime</scope>

</dependency>
二、添加配置文件
1、在"src/main/resources"代码文件夹中新建文件"demo.properties",内容为:
#mysql database setting

jdbc.type=mysql

jdbc.driver=com.mysql.jdbc.Driver

jdbc.url=jdbc:mysql://localhost:3306/springmvc?useUnicode=true&characterEncoding=utf-8

jdbc.username=root

jdbc.password=123456

#hibernate settings

hibernate.show_sql=true
2、在"src/main/resources"代码文件夹中新建文件"spring-context-hibernate.xml",内容为:
<?xml version="1.0" encoding="UTF-8"?>

<beans xmlns="http://www.springframework.org/schema/beans"

    xmlns:util="http://www.springframework.org/schema/util"

    xmlns:aop="http://www.springframework.org/schema/aop"

    xmlns:tx="http://www.springframework.org/schema/tx"

    xmlns:context="http://www.springframework.org/schema/context"

    xmlns:xsi="http://www.w3.org/2001/XMLSchema-instance"

    xsi:schemaLocation="http://www.springframework.org/schema/beans

    http://www.springframework.org/schema/beans/spring-beans-3.2.xsd

    http://www.springframework.org/schema/util

    http://www.springframework.org/schema/util/spring-util-3.2.xsd

    http://www.springframework.org/schema/aop

    http://www.springframework.org/schema/aop/spring-aop-3.2.xsd

    http://www.springframework.org/schema/context

    http://www.springframework.org/schema/context/spring-context-3.2.xsd

    http://www.springframework.org/schema/tx

    http://www.springframework.org/schema/tx/spring-tx-3.2.xsd ">

    <description>Hibernate Configuration</description>

    <!-- 使用Annotation自动注册Bean -->

    <context:component-scan base-package="org.xs.demo1" use-default-filters="false">

        <!-- 在父上下文中注册Repository -->

        <context:include-filter type="annotation" expression="org.springframework.stereotype.Repository" />

    </context:component-scan>

    <!-- 加载配置属性文件 -->

    <context:property-placeholder ignore-unresolvable="true" location="classpath*:/demo.properties" />

    <!-- 配置数据源 -->

    <bean id="dataSource" class="org.springframework.jdbc.datasource.DriverManagerDataSource">

        <property name="driverClassName" value="${jdbc.driver}"></property>

        <property name="url" value="${jdbc.url}"></property>

        <property name="username" value="${jdbc.username}"></property>

        <property name="password" value="${jdbc.password}"></property>

    </bean>

    <!-- 配置SessionFactory -->

    <bean id="sessionFactory" class="org.springframework.orm.hibernate4.LocalSessionFactoryBean">

        <property name="dataSource" ref="dataSource" />

        <property name="hibernateProperties">

            <props>

                <prop key="hibernate.dialect">org.hibernate.dialect.MySQLDialect</prop>

                <prop key="hibernate.hbm2ddl.auto">none</prop>

                <prop key="hibernate.show_sql">${hibernate.show_sql}</prop>

                <prop key="hibernate.format_sql">true</prop>

            </props>

        </property>

        <!-- 动态映射字段 -->

        <property name="namingStrategy">

            <bean class="org.hibernate.cfg.ImprovedNamingStrategy" />

        </property>

        <!-- 注解扫描的包 -->

        <property name="packagesToScan" value="org.xs.demo1" />

    </bean>

</beans>
动态映射字段ImprovedNamingStrategy配置以后,Entity实体类里的属性就不需要一个个加@Column注解了,只要命名和表里的一致
三、添加hibernate session过滤器
修改web.xml文件,加入:
<!-- hibernate session过滤器 -->

<filter>

    <filter-name>openSessionInViewFilter</filter-name>

    <filter-class>org.springframework.orm.hibernate4.support.OpenSessionInViewFilter</filter-class>

</filter>

<filter-mapping>

    <filter-name>openSessionInViewFilter</filter-name>

    <url-pattern>/*</url-pattern>

</filter-mapping>
默认情况下server中的方法调用完成后,session就会关闭,等到显示层调用的时候会报错,OpenSessionInViewFilter的效果就是把session的关闭延迟到显示层
四、运行测试
1、建数据库表
CREATE TABLE `test` (

  `id` int(11) NOT NULL AUTO_INCREMENT,

  `name` varchar(255) DEFAULT NULL,

  PRIMARY KEY (`id`)

);

INSERT INTO `test` VALUES ('1', '233');

INSERT INTO `test` VALUES ('2', '666');
2、增加Entity类
package org.xs.demo1;

import javax.persistence.Entity;

import javax.persistence.Id;

import javax.persistence.Table;

@Entity

@Table(name="test")

public class testInfo {

    @Id

    private String id;

    private String name;

    public String getId() {

        return id;

    }

    public void setId(String id) {

        this.id = id;

    }

    public String getName() {

        return name;

    }

    public void setName(String name) {

        this.name = name;

    }

}
在"src/main/java"代码文件夹的"org.xs.demo1"的包下新建"testInfo.java"类
3、增加Repository类
package org.xs.demo1;

import java.util.List;

import org.hibernate.Query;

import org.hibernate.SessionFactory;

import org.springframework.beans.factory.annotation.Autowired;

import org.springframework.stereotype.Repository;

@Repository

public class testDao {

    @Autowired

    private SessionFactory sessionFactory;

    @SuppressWarnings("unchecked")

    public List<testInfo> getList() {

        String hql = "from testInfo";

        Query query = sessionFactory.getCurrentSession().createQuery(hql);

        return query.list();

    }

}
在"src/main/java"代码文件夹的"org.xs.demo1"的包下新建"testDao.java"类
4、添加Controller方法
@Autowired

private testDao testDao;

@RequestMapping("mysql")

public String mysql(HttpServletRequest request) {

    List<testInfo> list = testDao.getList();

    request.setAttribute("testList", list);

    request.setAttribute("say", "Hello Mysql!");

    return "index3";

}
在HelloController.java中增加"testDao"属性和"mysql"方法
5、增加jsp页面
<%@ page language="java" contentType="text/html; charset=UTF-8" pageEncoding="UTF-8"%>

<!DOCTYPE html PUBLIC "-//W3C//DTD HTML 4.01 Transitional//EN"

    "http://www.w3.org/TR/html4/loose.dtd">

<html>

    <head>

        <meta http-equiv="Content-Type" content="text/html;charset=utf-8" />

        <title>Insert title here</title>

    </head>

    <body>

        <p>${say}</p>

        <table border="1" width="100px">

            <tr>

                <th>列1</th>

                <th>列2</th>

            </tr>

            <tr>

                <td>${testList[0].id}</td>

                <td>${testList[0].name}</td>

            </tr>

            <tr>

                <td>${testList[1].id}</td>

                <td>${testList[1].name}</td>

            </tr>

        </table>

    </body>

</html>
在WEB-INF的views文件夹中新建"index3.jsp"页面
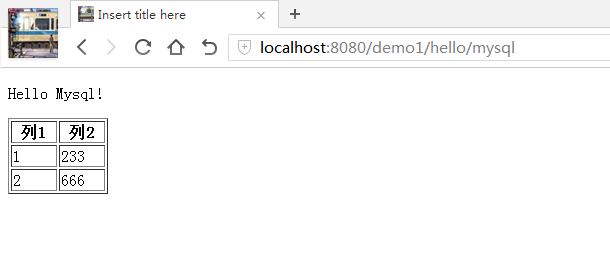
6、运行测试
实例代码地址:https://github.com/ctxsdhy/cnblogs-example
配置hibernate访问mysql的更多相关文章
- PHP16 PHP访问MySQL
学习要点 PHP访问MySQL配置 PHP访问MySQL函数介绍 足球赛程信息管理 PHP访问MySQL配置 PHP.ini配置文件确认以下配置已经打开 extension=php_mysql.dll ...
- 在Eclipse中使用JDBC访问MySQL数据库的配置方法
在Eclipse中使用JDBC访问MySQL数据库的配置方法 分类: DATABASE 数据结构与算法2009-10-10 16:37 5313人阅读 评论(10) 收藏 举报 jdbcmysql数据 ...
- MyBatis学习(一)、MyBatis简介与配置MyBatis+Spring+MySql
一.MyBatis简介与配置MyBatis+Spring+MySql 1.1MyBatis简介 MyBatis 是一个可以自定义SQL.存储过程和高级映射的持久层框架.MyBatis 摒除了大部分的J ...
- Maven+Spring+Hibernate+Shiro+Mysql简单的demo框架(二)
然后是项目下的文件:完整的项目请看 上一篇 Maven+Spring+Hibernate+Shiro+Mysql简单的demo框架(一) 项目下的springmvc-servlet.xml配置文件: ...
- MyBatis学习 之 一、MyBatis简介与配置MyBatis+Spring+MySql
目录(?)[-] 一MyBatis简介与配置MyBatisSpringMySql MyBatis简介 MyBatisSpringMySql简单配置 搭建Spring环境 建立MySql数据库 搭建My ...
- Spring boot通过JPA访问MySQL数据库
本文展示如何通过JPA访问MySQL数据库. JPA全称Java Persistence API,即Java持久化API,它为Java开发人员提供了一种对象/关系映射工具来管理Java应用中的关系数据 ...
- SpringBoot 整合 hibernate 连接 Mysql 数据库
前一篇搭建了一个简易的 SpringBoot Web 项目,最重要的一步连接数据库执行增删改查命令! 经过了一天的摸爬滚打,终于成功返回数据! 因为原来项目使用的 SpringMVC + Hibern ...
- 【译】Spring 4 + Hibernate 4 + Mysql + Maven集成例子(注解 + XML)
前言 译文链接:http://websystique.com/spring/spring4-hibernate4-mysql-maven-integration-example-using-annot ...
- java文件来演示如何访问MySQL数据库
java文件来演示如何访问MySQL数据库. 注:在命令行或用一个SQL的前端软件创建Database. 先创建数据库: CREATE DATABASE SCUTCS; 接着,创建表: CREATE ...
随机推荐
- Windows Server 2008在网络环境配置打印机
下面学习在Windows Server2008在网络环境搭建打印机服务器,打印机服务器也是很常用的,特别是在中大型企业里面,打印机数量比较多为方便管理,可以搭建一个打印机服务,这里介绍一下,本地打印机 ...
- springmvc集成swaggerui
这里先写下需要的pom.xml配置(我引用的2.4.0,相对稳定) 在集成springfox-swagger2之前,我也尝试着集成了swagger-springmvc,方式差不多,但是swagger- ...
- mybatis多表查询之多对多关系查询的实现-xml方式
Mybatis对于多对多关系下的查询提供了集合(collection)的概念来解决,collection属性是resultMap高级结果映射的子集,首先,在本例中我们使用的是集合元素来解决多对多的查询 ...
- 八皇后非递归(仅使用一个数组且可扩展为N皇后问题)
</pre><pre name="code" class="cpp">/* Theme:八皇后(非递归) Coder:秒针的声音 Tim ...
- Spring学习之旅(十)--MockMvc
在之前的 Spring学习之旅(八)--SpringMVC请求参数 我们是通过在控制台输出来验证参数是否正确,但是这样做实在是太耗时间了,我们今天来学习下 MockMvc,它可以让我们不需要启动项目就 ...
- [目录] ASP.Net Core 搭建微服务网站
本项目采用ASP.Net Core微服务技术,搭建博客和Saas平台. 全文将围绕(1)设计模式 (2)敏捷开发 目的: 结构足够合理,代码足够优美,扩展性.可读性.易维护性做到最优. 以下目录仅为 ...
- spring boot环境配置
Eclipse+Maven创建webapp项目<一> 1.开启eclipse,右键new——>other,如下图找到maven project 2.选择maven project,显 ...
- Spring源码解析之ConfigurableApplicationContext
UML图 接口的作用 从上面的UML图中,可以看到 ConfigurableApplicationContext 直接继承了 ApplicationContext, Lifecycle, Closea ...
- 背包形动态规划 fjutoj2347 采药
采药 TimeLimit:1000MS MemoryLimit:128MB 64-bit integer IO format:%lld Problem Description 辰辰是个天资聪颖的 ...
- DataReader转换
public static partial class Extension { private static ConcurrentDictionary<Type, ConcurrentDicti ...