Spring学习笔记3——使用注解的方式完成注入对象中的效果
第一步:修改applicationContext.xml
添加<context:annotation-config/>表示告诉Spring要用注解的方式进行配置
 <?xml version="1.0" encoding="UTF-8"?>

 <beans xmlns="http://www.springframework.org/schema/beans"

     xmlns:xsi="http://www.w3.org/2001/XMLSchema-instance"

     xmlns:aop="http://www.springframework.org/schema/aop"

     xmlns:tx="http://www.springframework.org/schema/tx"

     xmlns:context="http://www.springframework.org/schema/context"

     xsi:schemaLocation="

    http://www.springframework.org/schema/beans

    http://www.springframework.org/schema/beans/spring-beans-3.0.xsd

    http://www.springframework.org/schema/aop

    http://www.springframework.org/schema/aop/spring-aop-3.0.xsd

    http://www.springframework.org/schema/tx

    http://www.springframework.org/schema/tx/spring-tx-3.0.xsd

    http://www.springframework.org/schema/context

    http://www.springframework.org/schema/context/spring-context-3.0.xsd">

   <context:annotation-config/>

     <bean name="category" class="com.spring.cate.Category">

         <property name="name" value="category 3333" />

     </bean>

     <bean name="product" class="com.spring.cate.Product">

         <property name="name" value="product 3333" />

     </bean>

 </beans>
第二步:在Product.java的category属性前加上@Autowired注解
 package com.spring.cate;

 import org.springframework.beans.factory.annotation.Autowired;

 public class Product {

     private int id;

     private String name;

     @Autowired

     private Category category;

     public int getId() {

         return id;

     }

     public void setId(int id) {

         this.id = id;

     }

     public String getName() {

         return name;

     }

     public void setName(String name) {

         this.name = name;

     }

     public Category getCategory() {

         return category;

     }

     public void setCategory(Category category) {

         this.category = category;

     }

 }
第三步:测试
package com.spring.test; import org.springframework.context.ApplicationContext;
import org.springframework.context.support.ClassPathXmlApplicationContext; import com.spring.cate.Product; public class TestSpring { public static void main(String[] args) {
// TODO Auto-generated method stub
ApplicationContext context = new ClassPathXmlApplicationContext(new String[] { "applicationContext.xml" });
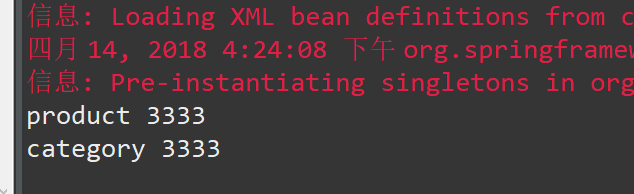
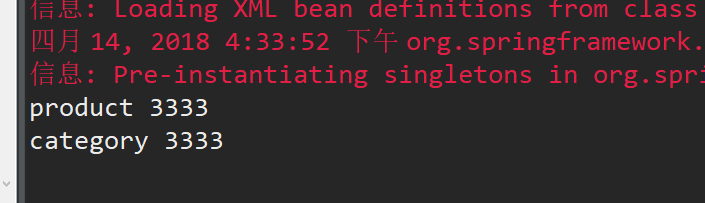
Product p = (Product) context.getBean("product");
System.out.println(p.getName());
System.out.println(p.getCategory().getName());
} }
第四步:除了前面的在属性前加@Autowired这种方式外,也可以在setCategory方法前加上@Autowired,这样来达到相同的效果
第五步:除了@Autowired之外,@Resource也是常用的手段
 package com.spring.cate;

 import javax.annotation.Resource;

 //@Component("product")

 public class Product {

     private int id;

     // private String name = "product1";

     private String name;

     @Resource(name = "category")

     private Category category;

     public int getId() {

         return id;

     }

     public void setId(int id) {

         this.id = id;

     }

     public String getName() {

         return name;

     }

     public void setName(String name) {

         this.name = name;

     }

     public Category getCategory() {

         return category;

     }

     public void setCategory(Category category) {

         this.category = category;

     }

 }
第六步:对Bean的注解
上述例子是对注入对象行为的注解,那么bean对象本身,比如Category,Product可不可以移出applicationContext.xml配置文件,也通过注解进行呢?
接下来就讲解如何对Bean进行注解配置
第七步:修改applicationContext.xml
修改applicationContext.xml,什么都去掉,只新增: <context:component-scan base-package="com.spring.cate"/>
其作用是告诉Spring,bean都放在com.spring.cate这个包下
第八步:@Component
为Product类加上@Component注解,即表明此类是bean
为Category 类加上@Component注解,即表明此类是bean
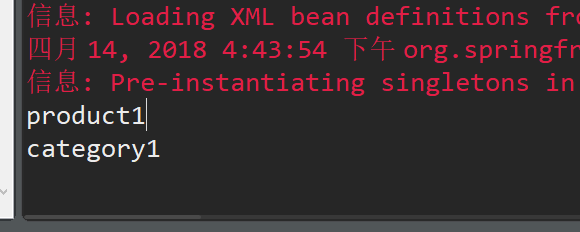
另外,因为配置从applicationContext.xml中移出来了,所以属性初始化放在属性声明上进行了。
Product.java
 package com.spring.cate;

 import org.springframework.beans.factory.annotation.Autowired;

 import org.springframework.stereotype.Component;

 @Component("product")

 public class Product {

     private int id;

     private String name = "product1";

     @Autowired

     private Category category;

     public int getId() {

         return id;

     }

     public void setId(int id) {

         this.id = id;

     }

     public String getName() {

         return name;

     }

     public void setName(String name) {

         this.name = name;

     }

     public Category getCategory() {

         return category;

     }

     public void setCategory(Category category) {

         this.category = category;

     }

 }
Category.java
 package com.spring.cate;

 import org.springframework.stereotype.Component;

 @Component("category")

 public class Category {

     private int id;

     private String name = "category1";

     public int getId() {

         return id;

     }

     public void setId(int id) {

         this.id = id;

     }

     public String getName() {

         return name;

     }

     public void setName(String name) {

         this.name = name;

     }

 }
结果:
Spring学习笔记3——使用注解的方式完成注入对象中的效果的更多相关文章
- Spring 学习笔记(四)—— XML配置依赖注入
依赖注入(DI)与控制反转(IoC)是同一个概念,都是为了处理对象间的依赖关系. 通过DI/IoC容器,相互依赖的对象由容器负责创建和装配,而不是在代码中完成. Spring支持通过setter方法和 ...
- spring学习笔记 星球日one - xml方式配置bean
ide: idea lib包的导入:http://webcache.googleusercontent.com/search?q=cache:http://zyjustin9.iteye.com/bl ...
- spring学习笔记三:Component注解(把POJO类实例化到spring的IOC容器中)
Component注解:把普通的POJO 类实例化到spring的IOC容器中,就是定义成<bean id="" class=""> 项目目录树: ...
- Java框架spring 学习笔记(九):Spring的bean管理(@Required、@Component、@Autowired、@Resource注解)
注解:代码里面特殊的标记,使用注解可以完成相关功能 注解写法:@注解名称(属性名.属性值) @Required 用在set方法上,一旦用了这个注解,那么容器在初始化bean的时候必须要进行set,也就 ...
- 不错的Spring学习笔记(转)
Spring学习笔记(1)----简单的实例 --------------------------------- 首先需要准备Spring包,可从官方网站上下载. 下载解压后,必须的两个包是s ...
- 【Spring学习笔记-MVC-3.1】SpringMVC返回Json数据-方式1-扩展
<Spring学习笔记-MVC>系列文章,讲解返回json数据的文章共有3篇,分别为: [Spring学习笔记-MVC-3]SpringMVC返回Json数据-方式1:http://www ...
- 【Spring学习笔记-MVC-4】SpringMVC返回Json数据-方式2
<Spring学习笔记-MVC>系列文章,讲解返回json数据的文章共有3篇,分别为: [Spring学习笔记-MVC-3]SpringMVC返回Json数据-方式1:http://www ...
- 【Spring学习笔记-MVC-3】SpringMVC返回Json数据-方式1
<Spring学习笔记-MVC>系列文章,讲解返回json数据的文章共有3篇,分别为: [Spring学习笔记-MVC-3]SpringMVC返回Json数据-方式1:http://www ...
- Spring学习笔记之依赖的注解(2)
Spring学习笔记之依赖的注解(2) 1.0 注解,不能单独存在,是Java中的一种类型 1.1 写注解 1.2 注解反射 2.0 spring的注解 spring的 @Controller@Com ...
随机推荐
- 使用JavaScript实现一个俄罗斯方块
清明假期期间,闲的无聊,就做了一个小游戏玩玩,目前游戏逻辑上暂未发现bug,只不过样子稍微丑了一些-.-项目地址:https://github.com/Jiasm/tetris在线Demo:http: ...
- 大数据学习总结(5)参考elk技术架构
- zuul入门(2)zuul的过滤器分类和加载
一.Groovy编写的Filter 1.可以放到指定目录加载 创建一个pre类型的filter,在run方法中获取HttpServletRequest 然后答应header信息 在代码中加入groov ...
- ssh整合之二hibernate单独搭建
1.首先我们需要去拷贝我们的hibernate所需的jar包 这里还需要加入我们C3P0的jar包,因为我们hibernate中使用的C3P0连接池 2. 编写我们的关系映射文件Customer.c ...
- python JavaScript
JavaScript 一. JavaScript Javascript 在开发中绝大多数情况是基于对象的.也是面向对象的. a. JavaScript的引入方式 1 2 3 4 5 6 7 #直接编写 ...
- Python生成随机验证码
Python生成随机验证码,需要使用PIL模块. 安装: pip3 install pillow 基本使用 1.创建图片 from PIL import Image img = Image.new(m ...
- JVM 掌握要点
重读JVM jvm系列:jvm知识点总览 1. 认识Java虚拟机 默认Hotspot实现 2. 类加载机制 知道双亲委派模型 编译为class javac → 装载 class ClassLoade ...
- 使用生成器把Kafka写入速度提高1000倍
title: 使用生成器把Kafka写入速度提高1000倍 toc: true comment: true date: 2018-04-13 21:35:09 tags: ['Python', '经验 ...
- 调用Kubernetes API操作Kubernetes
准备工作 首先要准备一个1.5+版本的Kubernetes,并且开放了API Server的http访问端口8080.本文使用的是1.10的版本,没有环境的可以参考我上一篇文章<在CentOS ...
- mysql索引类型和索引方法
索引类型 mysql索引类型normal,unique,full text的区别是什么? normal:表示普通索引 unique:表示唯一的,不允许重复的索引,如果该字段信息保证不会重复例如身份证号 ...