cc 细分 网格细分
简介
pixel的大佬,就是cc细分论文的作者。
wiki的步骤是我见过的比较清晰的版本
Recursive evaluation
Catmull–Clark surfaces are defined recursively, using the following refinement scheme:[1]
Start with a mesh of an arbitrary polyhedron. All the vertices in this mesh shall be called original points.
For each face, add a face point
Set each face point to be the average of all original points for the respective face.
For each edge, add an edge point.
Set each edge point to be the average of the two neighbouring face points and its two original endpoints.
For each face point, add an edge for every edge of the face, connecting the face point to each edge point for the face.
For each original point P, take the average F of all n (recently created) face points for faces touching P, and take the average R of all n edge midpoints for (original) edges touching P, where each edge midpoint is the average of its two endpoint vertices (not to be confused with new "edge points" above). (Note that from the perspective of a vertex P, the number of edges neighboring P is also the number of adjacent faces, hence n). Move each original point to the point
\({\displaystyle {\frac {F+2R+(n-3)P}{n}}}{\displaystyle {\frac {F+2R+(n-3)P}{n}}}\)
This is the barycenter of P, R and F with respective weights (n − 3), 2 and 1.
Connect each new face point to the new edge points of all original edges defining the original face.
Connect each new vertex point to the new edge points of all original edges incident on the original vertex.
Define new faces as enclosed by edges.
The new mesh will consist only of quadrilaterals, which in general will not be planar. The new mesh will generally look smoother than the old mesh.
Repeated subdivision results in smoother meshes. It can be shown that the limit surface obtained by this refinement process is at least \({\displaystyle {\mathcal {C}}^{1}}\mathcal{C}^1\) at extraordinary vertices and \({\displaystyle {\mathcal {C}}^{2}}{\mathcal {C}}^{2}\) everywhere else (when n indicates how many derivatives are continuous, we speak of \({\displaystyle {\mathcal {C}}^{n}}\mathcal{C}^n\) continuity). After one iteration, the number of extraordinary points on the surface remains constant.
The arbitrary-looking barycenter formula was chosen by Catmull and Clark based on the aesthetic appearance of the resulting surfaces rather than on a mathematical derivation, although Catmull and Clark do go to great lengths to rigorously show that the method converges to bicubic B-spline surfaces.[1]
参考
链接代码
http://rosettacode.org/wiki/Catmull–Clark_subdivision_surface#Python
https://blog.csdn.net/McQueen_LT/article/details/106102609
code
虽然 rosettacode 提供了 各种类型的细分代码,但是 个人觉得 都不是特别让人容易懂,使用openmesh重写了部分代码,结果很舒适。暂时有点缺憾,不能处理不封闭的网格。
#ifndef __CC_HPP__

#define __CC_HPP__

#include <OpenMesh/Core/Mesh/PolyMesh_ArrayKernelT.hh>

#include <OpenMesh/Core/IO/MeshIO.hh>

#include <map>

typedef OpenMesh::PolyMesh_ArrayKernelT<> MyMesh;

typedef struct FFACE{

    int faceId;

    int edgeId1;

    int vertexId;

    int edgeId2;

}FFACE;

class CC{

private:

    MyMesh mesh;

    std::map<int, OpenMesh::Vec3d> facePoints;

    std::map<int, OpenMesh::Vec3d> edgePoints;

    std::map<int, OpenMesh::Vec3d> vertexPoints;

    int times;

public:

    CC(int _times);

    ~CC();

    void genCube();

    void genFacePoint();

    void genEdgePoint();

    void genVertexPoint();

    void connectPoints();

    void genMesh(std::string name);

    int pipeLine();

};

#endif
/*

 * @Author: your name

 * @Date: 2020-09-02 13:49:22

 * @LastEditTime: 2020-09-03 14:35:38

 * @LastEditors: Please set LastEditors

 * @Description: In User Settings Edit

 * @FilePath: /cc/cc.cc

 */

#include "cc.hpp"

#include <iostream>

#include <unordered_map>

/**

 * @description: 构造函数

 * @param {type}

 * @return {type}

 */

CC::CC(int _times):times(_times){

    genCube();

}

/**

 * @description: 析构函数

 * @param {type}

 * @return {type}

 */

CC::~CC() {}

/**

 * @description: 一整套流程

 * @param {type}

 * @return {int} 管线运行是否成功

 */

int CC::pipeLine(){

    for(int i=0; i<times; i++){

        genFacePoint();

        genEdgePoint();

        genVertexPoint();

        connectPoints();

        char a[20];

        sprintf(a, "output%d.off", i);

        genMesh(a);

        // 清空变量

        std::cout << "[DEBUG] 迭代了第 " << i << " 次。" << std::endl;

    }

    return 0;

}

/**

 * @description: 生成一个立方体(四边形网格)

 * @param {type}

 * @return {type}

 */

void CC::genCube()

{

    MyMesh::VertexHandle vhandle[9];

    vhandle[0] = mesh.add_vertex(MyMesh::Point(-1, -1, 1));

    vhandle[1] = mesh.add_vertex(MyMesh::Point(1, -1, 1));

    vhandle[2] = mesh.add_vertex(MyMesh::Point(1, 1, 1));

    vhandle[3] = mesh.add_vertex(MyMesh::Point(-1, 1, 1));

    vhandle[4] = mesh.add_vertex(MyMesh::Point(-1, -1, -1));

    vhandle[5] = mesh.add_vertex(MyMesh::Point(1, -1, -1));

    vhandle[6] = mesh.add_vertex(MyMesh::Point(1, 1, -1));

    vhandle[7] = mesh.add_vertex(MyMesh::Point(-1, 1, -1));

    std::vector<MyMesh::VertexHandle> face_vhandles;

    face_vhandles.push_back(vhandle[0]);

    face_vhandles.push_back(vhandle[1]);

    face_vhandles.push_back(vhandle[2]);

    face_vhandles.push_back(vhandle[3]);

    mesh.add_face(face_vhandles);

    face_vhandles.clear();

    face_vhandles.push_back(vhandle[7]);

    face_vhandles.push_back(vhandle[6]);

    face_vhandles.push_back(vhandle[5]);

    face_vhandles.push_back(vhandle[4]);

    mesh.add_face(face_vhandles);

    face_vhandles.clear();

    face_vhandles.push_back(vhandle[1]);

    face_vhandles.push_back(vhandle[0]);

    face_vhandles.push_back(vhandle[4]);

    face_vhandles.push_back(vhandle[5]);

    mesh.add_face(face_vhandles);

    face_vhandles.clear();

    face_vhandles.push_back(vhandle[2]);

    face_vhandles.push_back(vhandle[1]);

    face_vhandles.push_back(vhandle[5]);

    face_vhandles.push_back(vhandle[6]);

    mesh.add_face(face_vhandles);

    face_vhandles.clear();

    face_vhandles.push_back(vhandle[3]);

    face_vhandles.push_back(vhandle[2]);

    face_vhandles.push_back(vhandle[6]);

    face_vhandles.push_back(vhandle[7]);

    mesh.add_face(face_vhandles);

    face_vhandles.clear();

    face_vhandles.push_back(vhandle[0]);

    face_vhandles.push_back(vhandle[3]);

    face_vhandles.push_back(vhandle[7]);

    face_vhandles.push_back(vhandle[4]);

    mesh.add_face(face_vhandles);

}

/**

 * @description: 生成所有面点

 * @param {type}

 * @return {type}

 */

void CC::genFacePoint()

{

    facePoints.clear();

    for (const auto &fh : mesh.faces())

    {

        OpenMesh::Vec3d facePoint(0, 0, 0);

        int facePointsNumber = 0;

        for (const auto &fvh : mesh.fv_range(fh))

        {

            OpenMesh::DefaultTraits::Point point = mesh.point(fvh);

            facePoint += point;

            facePointsNumber++;

        }

        facePoint /= facePointsNumber;

        facePoints[fh.idx()] = facePoint;

    }

}

/**

 * @description: 生成所有的边点暂时不考虑hole 就是全是日子结构的

 * @param {type}

 * @return {type}

 */

void CC::genEdgePoint()

{

    edgePoints.clear();

    for (auto e_it = mesh.edges_begin(); e_it != mesh.edges_end(); ++e_it)

    {

        // 得到边所代表的半边

        OpenMesh::HalfedgeHandle heh1 = mesh.halfedge_handle(*e_it, 0); // 默认一个方向的半边

        OpenMesh::Vec3d edgePoint(0, 0, 0);

        int edgePointsNumber = 0;

        OpenMesh::DefaultTraits::Point pointV = mesh.point(mesh.from_vertex_handle(heh1)); // 这条(半)边的起点

        OpenMesh::DefaultTraits::Point pointW = mesh.point(mesh.to_vertex_handle(heh1));   // 这条(半)边的终点

        OpenMesh::FaceHandle fh1 = mesh.face_handle(heh1);

        OpenMesh::Vec3d fh1p = facePoints[fh1.idx()];                 // 得到面点

        OpenMesh::HalfedgeHandle heh = mesh.opposite_halfedge_handle(heh1); // 逆半边

        OpenMesh::FaceHandle fh2 = mesh.face_handle(heh);

        OpenMesh::Vec3d fh2p = facePoints[fh2.idx()]; // 得到面点

        edgePoints[heh1.idx()] = (fh1p + fh2p + pointV + pointW) / 4.0;

    }

}

/**

 * @description: 生成新的顶点

 * For each original point P, take the average F of all n (recently created) face points for faces touching P,

 * and take the average R of all n edge midpoints for (original) edges touching P,

 * where each edge midpoint is the average of its two endpoint vertices (not to be confused with new "edge points" above).

 * (Note that from the perspective of a vertex P, the number of edges neighboring P is also the number of adjacent faces, hence n).

 * Move each original point to the point

 * @param {type}

 * @return {type}

 */

void CC::genVertexPoint()

{

    vertexPoints.clear();

    // 原始点接触的面的所有的面点的均值

    for (auto v_it = mesh.vertices_begin(); v_it != mesh.vertices_end(); v_it++)

    {

        OpenMesh::Vec3d originPoint = (OpenMesh::Vec3d)mesh.point(*v_it);

        OpenMesh::Vec3d facePoint(0, 0, 0);

        int faceNumber = 0;

        for (auto vf_it = mesh.vf_iter(*v_it); vf_it.is_valid(); ++vf_it)

        { //这个顶点所带有的面迭代器

            facePoint += facePoints[(*vf_it).idx()];

            faceNumber++;

        }

        facePoint /= faceNumber;

        // 原始点接触的边的中间点的值的均值 * 2

        OpenMesh::Vec3d edgePoint(0, 0, 0);

        int edgeNumber = 0;

        for(auto vv_it = mesh.vv_begin(*v_it); vv_it != mesh.vv_end(*v_it); vv_it++){ // 为啥还有孤立点?

            OpenMesh::Vec3d point =(OpenMesh::Vec3d)mesh.point(*vv_it);

            edgePoint += (point + originPoint) / 2;

            edgeNumber++;

        }

        if(faceNumber != edgeNumber){

            std::cout << "[debug] is not equal f " << faceNumber << " e " << edgeNumber << std::endl;

        }

        std::cout << "[DEBUG] n " << edgeNumber << std::endl;

        edgePoint /= edgeNumber;

        OpenMesh::Vec3d newPoint = (edgeNumber - 3.0) / (edgeNumber) * originPoint + facePoint * 1.0 / edgeNumber + 2.0 * edgePoint / edgeNumber;

        std::cout << "[DEBUG] oldPoint " << originPoint << " newPoint " << newPoint << std::endl;

        vertexPoints[(*v_it).idx()] = newPoint;

    }

}

/**

 * @description: 连接面点和边点   (要严格的封闭的四边形)

 * @param {type}

 * @return {type}

 */

void CC::connectPoints(){

    if (!mesh.has_vertex_status())  mesh.request_vertex_status();

	if (!mesh.has_face_status())    mesh.request_face_status();

	if (!mesh.has_edge_status())    mesh.request_edge_status();

    // 先将旧顶点移动到新顶点

    std::unordered_map<int, OpenMesh::VertexHandle> vertexHandle;

    for (auto v_it = mesh.vertices_begin(); v_it != mesh.vertices_end(); v_it++){

        mesh.set_point(*v_it, (OpenMesh::DefaultTraits::Point)vertexPoints[(*v_it).idx()]);

        vertexHandle[(*v_it).idx()] = *v_it;

    }

    std::vector<MyMesh::VertexHandle> facePointsHandle;

    std::vector<MyMesh::FaceHandle> faceHandle;

    // 再加入所有的要加入的面点

    for (const auto &fh : mesh.faces()) {

        facePointsHandle.push_back(mesh.add_vertex(MyMesh::Point(facePoints[fh.idx()])));

        faceHandle.push_back(fh);

    }

    std::unordered_map<int, MyMesh::VertexHandle> edgesHandle;

    // 再加入所有的要加入的边点

    for (const auto &eh : mesh.edges()){

        edgesHandle[mesh.halfedge_handle(eh, 0).idx()] = mesh.add_vertex(MyMesh::Point(edgePoints[mesh.halfedge_handle(eh, 0).idx()]));

    }

    std::vector<std::vector<MyMesh::VertexHandle>> v;

    int i = 0;

    for (const auto &fh : mesh.faces()){

        std::vector<MyMesh::VertexHandle> handlerVector(9);

        handlerVector[0] = facePointsHandle[i];

        i++;

        int pointsNumber = 1;

        for (const auto &feh : mesh.fe_range(fh)){

            auto fehh = mesh.halfedge_handle(feh, 0);

            handlerVector[pointsNumber] = edgesHandle[fehh.idx()];

            pointsNumber++;

        }

        for (const auto &fvh : mesh.fv_range(fh)){

            handlerVector[pointsNumber] = vertexHandle[fvh.idx()];

            pointsNumber++;

        }

        v.push_back(handlerVector);

    }

    // 开始删除面

    // for(int i=0; i<faceHandle.size(); i++){

    //     mesh.delete_face(faceHandle[i], false);

    // }

    for(int i=0; i<v.size(); i++){

        mesh.delete_face(faceHandle[i], true);

        std::vector<MyMesh::VertexHandle> handlerVector;

        for(int j=0; j<v[i].size(); j++){

            handlerVector.push_back(v[i][j]);

        }

        std::vector<MyMesh::VertexHandle> face_vhandles;

        face_vhandles.push_back(handlerVector[0]);

        face_vhandles.push_back(handlerVector[1]);

        face_vhandles.push_back(handlerVector[5]);

        face_vhandles.push_back(handlerVector[2]);

        mesh.add_face(face_vhandles);

        face_vhandles.clear();

        face_vhandles.push_back(handlerVector[0]);

        face_vhandles.push_back(handlerVector[2]);

        face_vhandles.push_back(handlerVector[6]);

        face_vhandles.push_back(handlerVector[3]);

        mesh.add_face(face_vhandles);

        face_vhandles.clear();

        face_vhandles.push_back(handlerVector[0]);

        face_vhandles.push_back(handlerVector[3]);

        face_vhandles.push_back(handlerVector[7]);

        face_vhandles.push_back(handlerVector[4]);

        mesh.add_face(face_vhandles);

        face_vhandles.clear();

        face_vhandles.push_back(handlerVector[0]);

        face_vhandles.push_back(handlerVector[4]);

        face_vhandles.push_back(handlerVector[8]);

        face_vhandles.push_back(handlerVector[1]);

        mesh.add_face(face_vhandles);

        face_vhandles.clear();

    }

	mesh.garbage_collection();

	if (mesh.has_vertex_status())  mesh.release_vertex_status();

	if (mesh.has_face_status())    mesh.release_face_status();

	if (mesh.has_edge_status())    mesh.release_edge_status();

}

/**

 * @description: 输出新网格

 * @param {string} name 文件名称 默认 output.obj

 * @return {type}

 */

void CC::genMesh(std::string name){

    if(name == ""){

        name = "output.off";

    }

    try{

        if( !OpenMesh::IO::write_mesh(mesh, name) ){

            std::cerr << "Cannot write mesh to file 'output.off'" << std::endl;

            return;

        }

    }

    catch(std::exception &e){

        std::cerr << e.what() << std::endl;

        return;

    }

}
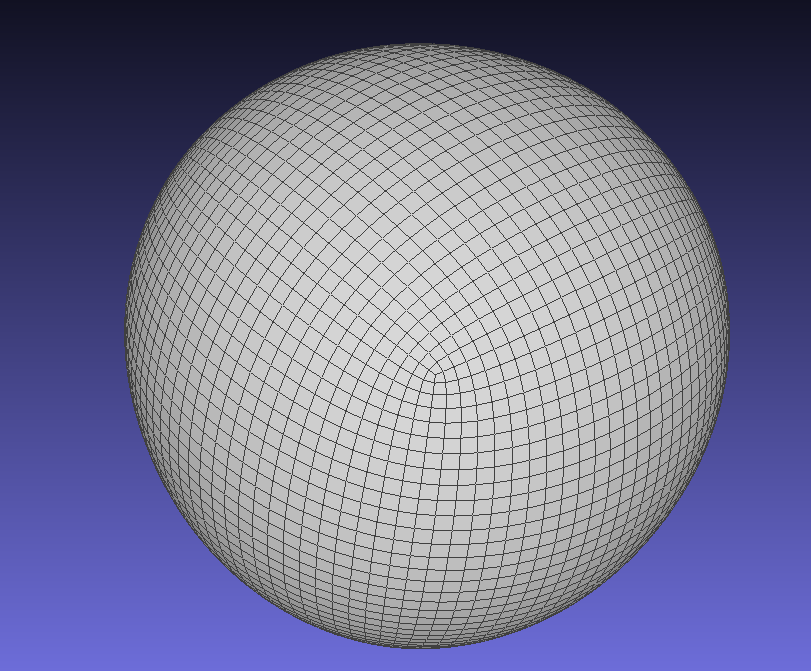
image
附赠Makefile
LOCAL_LIBRARY +=  -L/home/ling/lee/lib/openmesh/static

LOCAL_LDFLAGS += -lm -lpthread -ldl -lOpenMeshCore -lOpenMeshTools

LOCAL_CFLAGS += -I/home/ling/lee/include -I./include -D OM_STATIC_BUILD

CC := g++ -g

TARGETS1 = genCube

SRCS1 = mian1.cc cc.cc

OBJS1 = $(patsubst %.cc, %.o, $(SRCS1))

CFLAGS += $(LOCAL_CFLAGS)

LDFLAGS += $(LOCAL_LIBRARY) $(LOCAL_LDFLAGS)

$(info $(OBJS))

$(info $(TARGETS))

all: $(TARGETS1)

$(TARGETS1):$(OBJS1)

	$(CC)  -o $@ $^  $(LDFLAGS) $(CFLAGS)

$(OBJS1): %.o:%.cc

	$(CC) -c $< -o $@ $(CFLAGS)

clean :

	@rm -rf $(TARGETS1) $(OBJS1)

#.SUFFIXES:

.PHONY : all clean
附赠 main.cc
/*

 * @Author: your name

 * @Date: 2020-09-02 09:25:40

 * @LastEditTime: 2020-09-03 11:09:19

 * @LastEditors: Please set LastEditors

 * @Description: In User Settings Edit

 * @FilePath: /cc/mian1.cc

 */

#include <iostream>

#include <OpenMesh/Core/IO/MeshIO.hh>

#include <OpenMesh/Core/Mesh/PolyMesh_ArrayKernelT.hh>

#include "cc.hpp"

int main(){

    CC c(5);

    c.pipeLine();

    return 0;

}
cc 细分 网格细分的更多相关文章
- 关于3DSMAX中opensubdiv细分功能的笔记
说到建模和细分,估计用过3dsmax的同学就会心有余悸,每次添加"涡轮平滑"或者"网格平滑"之前,都会下意识的进行保存,没有为啥,就是因为太容易使软件挂掉了. ...
- 三维网格细分算法(Catmull-Clark subdivision & Loop subdivision)附源码
下图描述了细分的基本思想,每次细分都是在每条边上插入一个新的顶点,可以看到随着细分次数的增加,折线逐渐变成一条光滑的曲线.曲面细分需要有几何规则和拓扑规则,几何规则用于计算新顶点的位置,拓扑规则用于确 ...
- Unity3d 使用DX11的曲面细分
Unity3d surface Shaderswith DX11 Tessellation Unity3d surface shader 在DX11上的曲面细分 I write this articl ...
- 三维网格细分算法(Catmull-Clark subdivision & Loop subdivision)附源码(转载)
转载: https://www.cnblogs.com/shushen/p/5251070.html 下图描述了细分的基本思想,每次细分都是在每条边上插入一个新的顶点,可以看到随着细分次数的增加,折 ...
- Introduction to 3D Game Programming with DirectX 12 学习笔记之 --- 第十四章:曲面细分阶段
原文:Introduction to 3D Game Programming with DirectX 12 学习笔记之 --- 第十四章:曲面细分阶段 代码工程地址: https://github. ...
- DirectX11 With Windows SDK--33 曲面细分阶段(Tessellation)
前言 曲面细分是Direct3D 11带来的其中一项重要的新功能.它引入了两个可编程着色器阶段以及一个固定的镶嵌处理过程.简单来说,曲面细分技术可以将几何体细分为更小的三角形,并以某种方式把这些新生成 ...
- C++实现网格水印之调试笔记(二)
整理了一下要实现的论文Watermarking 3D Polygonal Meshes in the Mesh Spectral Domain,步骤如下: 嵌入水印 à 提取水印 à 优化(网格细分) ...
- CloudCompare 的简单的使用说明
来自:https://blog.csdn.net/datase/article/details/79797795 File open:打开 save:保存 Global Shift settings: ...
- [转载]John Burkardt搜集的FORTRAN源代码
Over the years, I have collected, modified, adapted, adopted or created a number of software package ...
- Unity3D 引擎基础 C# (数据结构入门) Unity3D 界面 UI(NGUI)(动画系统,导航系统)(委托与事件,常用设计模式)
Geomagic Sculpt 2016.2 Windows Software 11个月前 (01-17) 0评论 Geomagic Sculpt 触觉式三维设计 触碰您的设计使用三维工具做三维设计. ...
随机推荐
- MySQL 的查询优化器如何选择执行计划?
MySQL 的查询优化器负责决定如何执行 SQL 查询,它会根据多个因素选择最优的执行计划.查询优化器的目标是选择一个成本最低.性能最优的执行计划,以便高效地处理查询.执行计划的选择是基于 MySQL ...
- MySQL 的索引类型有哪些?
MySQL 的索引类型 MySQL 提供多种索引类型,用于优化数据查询性能.每种索引类型在存储结构.适用场景和性能特性方面各不相同. 1. 常见的索引类型 (1)B+树索引 结构:基于 B+ 树实现, ...
- adb常见命令及日志
一.adb介绍 1.adb(Android Debug Bridge)是android sdk的一个工具 2.adb是用来连接安卓设备和PC端的桥梁,用户可以通过adb在电脑上对手机进行一系列操作 3 ...
- 打造企业级AI文案助手:GPT-J+Flask全栈开发实战
一.智能文案革命的序幕:为什么需要AI文案助手? 在数字化营销时代,内容生产效率成为企业核心竞争力.据统计,营销人员平均每天需要撰写3.2篇文案,而传统人工创作存在三大痛点: 效率瓶颈:创意构思到成文 ...
- PyQt6安装与配置(附带Vscode配置)
1. 安装PyQt6和PyQt-tools pip install PyQt6 pip install PyQt6-tools 2. Vscode配置QtDesigner 安装PyQt Integra ...
- Java编程--单例(Singleton)设计模式
单例设计模式 一个类只有一个实例,根据创建的时机又分为懒汉式和饿汉式,它们的区别主要体现在实例的创建时机和线程安全性上. 饿汉式(Eager Initialization): 特点: 在类加载时就创建 ...
- 『Plotly实战指南』--在金融数据可视化中的应用(下)
在金融市场的复杂博弈中,可视化技术如同精密的导航仪. 传统静态图表正在被交互式可视化取代--据Gartner研究,采用动态可视化的投资机构决策效率提升达47%. 本文的目标是探讨如何利用 Plotly ...
- div中文本超过指定宽度自动换行
一.场景 因为想要一个页面显示完所有的文本,所以要进行文本处理 二.代码 宽度超过1800px就自动换行 <div style="word-break: break-all; word ...
- Python基础 - 微线程
也是多任务系列哦, 进程, 线程, 微线程, 这样一来, 对于多任务这个话题, 应该算是有所涉猎了吧. 我也不怎用其实. 微线程, 就是在 单线程的前提下, 完成多任务, 多任务按照一定顺序交替执行. ...
- C++ 容器(STL容器)
容器(container)用于存放数据的类模板.可变长数组.链表.平衡二叉树等数据结构在STL中都被实现为容器. 在使用容器时,即将容器类模型实例化为容器类,会指明容器中存放的元素是什么类型. 容器可 ...