How To Install and Enable SSH Server on Debian 10
https://devconnected.com/how-to-install-and-enable-ssh-server-on-debian-10/
How To Install and Enable SSH Server on Debian 10
This tutorial focuses on setting up and configuring a SSH server on a Debian 10 minimal server
SSH, for Secure Shell, is a network protocol that is used in order to operate remote logins to distant machines within a local network or over Internet. SSH architectures typically includes a SSH server that is used by SSH clients to connect to the remote machine.
As a system administrator, it is very likely that you are using SSH on a daily basis to connect to remote machines across your network.
As a consequence, when new hosts are onboarded to your infrastructure, you may have to configure them to install and enable SSH on them.
In this tutorial, we are going to see how you can install and enable SSH, via OpenSSH, on a Debian 10 distributions.
Table of Contents
Prerequisites
In order to install a SSH server on Debian 10, you will need to have sudo privileges on your host.
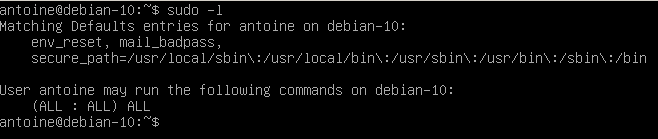
To check whether you have sudo privileges or not, run the following command
$ sudo -lIf you are seeing the following entries on your terminal, it means that you have elevated privileges
By default, the ssh utility should be installed on your host, even on minimal configurations.
In order to check the version of your SSH utility, you can run the following command
$ ssh -V
As you can see, I am running OpenSSH v7.9 with OpenSSL v1.1.1.
Note that it does not mean that SSH servers are installed on my host, it just means that I may able to connect to remote machines as a client using the SSH utility.
It also mean that specific utilities related the SSH protocol (such as scp for example) or related to FTP servers (such as sftp) will be available on my host.
Installing OpenSSH Server on Debian 10
First of all, make sure that your packages are up to date by running an update command
$ sudo apt-get update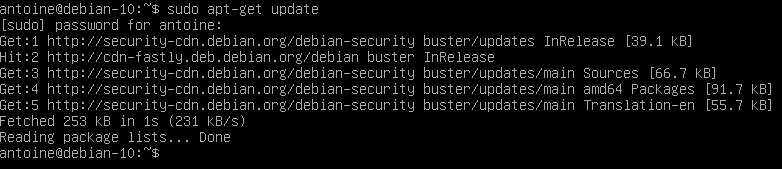
In order to install a SSH server on Debian 10, run the following command
$ sudo apt-get install openssh-serverThe command should run a complete installation process and it should set up all the necessary files for your SSH server.
If the installation was successful, you should now have a sshd service installed on your host.
To check your newly installed service, run the following command
$ sudo systemctl status sshd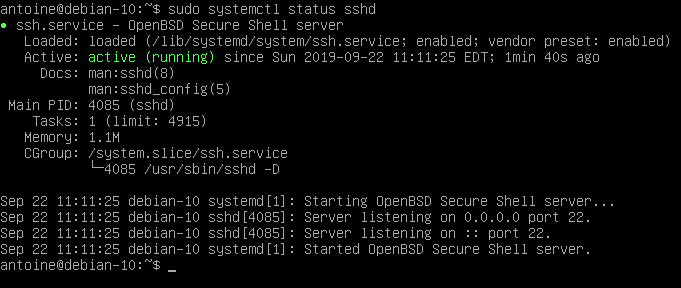
By default, your SSH server is going to run on port 22.
This is the default port assigned for SSH communications. You can check if this is the case on your host by running the following netstat command
$ netstat -tulpn | grep 22
Great! Your SSH server is now up and running on your Debian 10 host.
Enabling SSH traffic on your firewall settings
If you are using UFW as a default firewall on your Debian 10 system, it is likely that you need to allow SSH connections on your host.
To enable SSH connections on your host, run the following command
$ sudo ufw allow ssh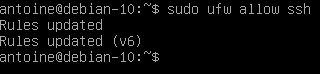
Enable SSH server on system boot
As you probably saw, your SSH server is now running as a service on your host.
It is also very likely that it is instructed to start at boot time.
To check whether your service is enable or not, you can run the following command
$ sudo systemctl list-unit-files | grep enabled | grep sshIf no results are shown on your terminal, enable the service and run the command again
$ sudo systemctl enable ssh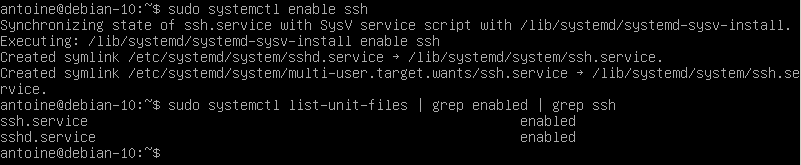
Configuring your SSH server on Debian
Before giving access to users through SSH, it is important to have a set of secure settings to avoid being attacked, especially if your server is running as an online VPS.
As we already saw in the past, SSH attacks are pretty common but they can be avoided if we change default settings available.
By default, your SSH configuration files are located at /etc/ssh/
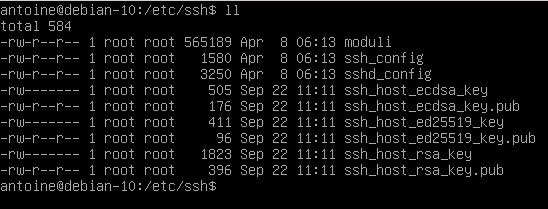
In this directory, you are going to find many different configuration files, but the most important ones are :
- ssh_config: defines SSH rules for clients. It means that it defines rules that are applied everytime you use SSH to connect to a remote host or to transfer files between hosts;
- sshd_config: defines SSH rules for your SSH server. It is used for example to define the reachable SSH port or to deny specific users from communicating with your server.
We are obviously going to modify the server-wide part of our SSH setup as we are interested in configuring and securing our OpenSSH server.
Changing SSH default port
The first step towards running a secure SSH server is to change the default assigned by the OpenSSH server.
Edit your sshd_config configuration file and look for the following line.
#Port 22Make sure to change your port to one that is not reserved for other protocols. I will choose 2222 in this case.

When connecting to your host, if it not running on the default port, you are going to specify the SSH port yourself.
Please refer to the ‘Connecting to your SSH server’ section for further information.
Disabling Root Login on your SSH server
By default, root login is available on your SSH server.
It should obviously not be the case as it would be a complete disaster if hackers were to login as root on your server.
If by chance you disabled the root account in your Debian 10 installation, you can still configure your SSH server to refuse root login, in case you choose to re-enable your root login one day.
To disable root login on your SSH server, modify the following line
#PermitRootLogin

PermitRootLogin no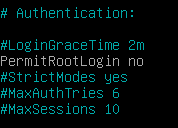
Configuring key-based SSH authentication
In SSH, there are two ways of connecting to your host : by using password authentication (what we are doing here), or having a set of SSH keys.
If you are curious about key-based SSH authentication on Debian 10, there is a tutorial available on the subject here.
Restarting your SSH server to apply changes
In order for the changes to be applied, restart your SSH service and make sure that it is correctly restarted
$ sudo systemctl restart sshd

$ sudo systemctl status sshd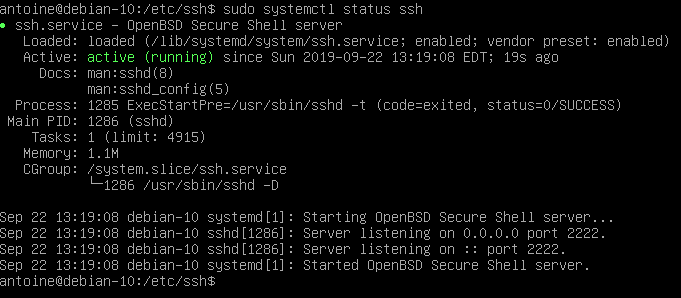
Also, if you change the default port, make sure that the changes were correctly applied by running a simple netstat command
$ netstat -tulpn | grep 2222
Connecting to your SSH server
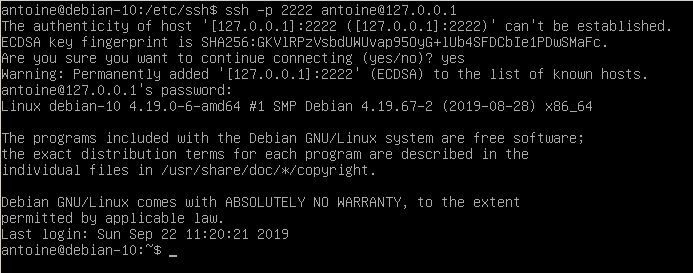
In order to connect to your SSH server, you are going to use the ssh command with the following syntax
$ ssh -p <port> <username>@<ip_address>If you are connecting over a LAN network, make sure to get the local IP address of your machine with the following command
$ sudo ifconfig
For example, in order to connect to my own instance located at 127.0.0.1, I would run the following command
$ ssh -p 2222 <user>@127.0.0.1You will be asked to provide your password and to certify that the authenticity of the server is correct.
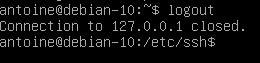
Exiting your SSH server
In order to exit from your SSH server on Debian 10, you can hit Ctrl + D or type ‘logout’ and your connection will be terminated.
Disabling your SSH server
In order to disable your SSH server on Debian 10, run the following command
$ sudo systemctl stop sshd

$ sudo systemctl status sshd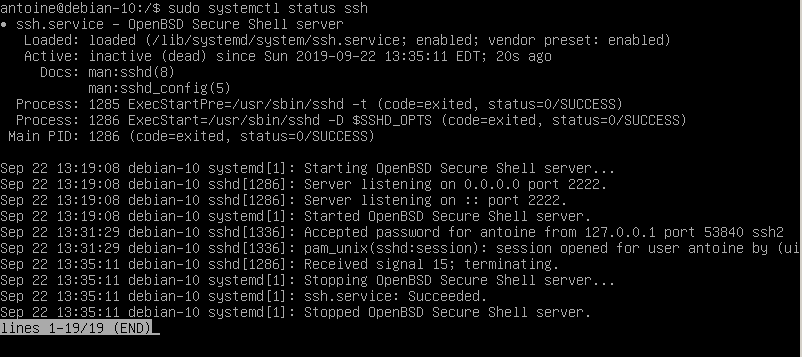
From there, your SSH server won’t be accessible anymore.

Troubleshooting
In some cases, you may run into many error messages when trying to setup a SSH server on Debian 10.
Here is the list of the common errors you might get during the setup.
Debian : SSH connection refused
Usually, you are getting this error because your firewall is not properly configured on Debian.
To solve “SSH connection refused” you have to double check your UFW firewall settings.
By default, Debian uses UFW as a default firewall, so you might want to check your firewall rules and see if SSH is correctly allowed.
$ sudo ufw status

Status: active

To                         Action      From

--                         ------      ----

22/tcp                     ALLOW       Anywhere
If you are using iptables, you can also have a check at your current IP rules with the iptables command.
$ sudo iptables -L -n

Chain INPUT (policy ACCEPT)

target     prot opt source               destination

ACCEPT     tcp  --  anywhere             anywhere            tcp dpt:ssh
If the rule is not set for SSH, you can set by running the iptables command again.
$ sudo iptables -I INPUT -p tcp -m tcp --dport 22 -j ACCEPTDebian : SSH access denied
Sometimes, you may be denied the access to your SSH server with this error message “SSH access denied” on Debian.
To solve this issue, it depends on the authentication method you are using.
SSH password access denied
If you are using the password method, double check your password and make sure you are entering it correctly.
Also, it is possible to configure SSH servers to allow only a specific subset of users : if this is the case, make sure you belong to that list.
Finally, if you want to log-in as root, make sure that you modified the “PermitRootLogin” option in your “sshd_config” file.
#PermitRootLogin

PermitRootLogin yes
SSH key access denied
If you are using SSH keys for your SSH authentication, you may need to double check that the key is correctly located in the “authorized_keys” file.
If you are not sure about how to do it, follow our guide about SSH key authentication on Debian 10.
Debian : Unable to locate package openssh-server
For this one, you have to make sure that you have set correctly your APT repositories.
Add the following entry to your sources.list file and update your packages.
$ sudo nano /etc/apt/sources.list

deb http://ftp.us.debian.org/debian wheezy main

$ sudo apt-get update
Conclusion
In this tutorial, you learnt how you can install and configure a SSH server on Debian 10 hosts.
You also learnt about basic configuration options that need to be applied in order to run a secure and robust SSH server over a LAN or over Internet.
If you are curious about Linux system administration, we have a ton of tutorials on the subject in a dedicated category.
How To Install and Enable SSH Server on Debian 10的更多相关文章
- Install and Enable Telnet server in Ubuntu Linux
转:http://ubuntuguide.net/install-and-enable-telnet-server-in-ubuntu-linux 参考:http://auxnet.org/index ...
- How to Set Up a NFS Server on Debian 10 Buster
How to Set Up a NFS Server on Debian 10 Buster Nick Congleton Debian 24 May 2019 Contents 1. Softw ...
- [openssh-server]install and enable ssh in debian9 / 在debian9上安装并启用ssh
新安装的debian9.8 with XFCE 发现没有ssh,下载debian-9.8.0-amd64-DVD-1.iso并挂在到ESXi虚拟机/media/cdrom0. 清空或保存/etc/ap ...
- 转-How to install an SSH Server in Windows Server 2008
window也可以通过ssh客户端连接,具体方式参考下面 1 How to install an SSH Server in Windows Server 2008 2 freeSSHd and fr ...
- 在fedora 20下使用ssh server
在红帽和centos下,一般安装完后会自带ssh,然后可以通过/etc/init.d/sshd start的方式运行,但是在Fedora 20下,系统改用了另外一套服务开启机制. 首先安装ssh se ...
- Xshell 连接虚拟机出现 "The remote SSH server rejected X11 forwarding request"
1. 描述 虚拟机:VirtualBox Linux: centOS7 解决了 centOS7在VirtualBox中装好后的网络连接问题 后,用 Xshell 连接服务器时出现下面情况: 2. ss ...
- Kali Linux安装SSH Server
Kali Linux默认并没有安装SSH服务,为了实现远程登录Kali Linux,我们需要安装SSH服务. 安装 OpenSSH Server # apt-get install openssh-s ...
- The remote SSH server rejected X11 forwarding request
两台相同的虚拟机,一台没有错误,一个经常出现警告,内容如下所示: The remote SSH server rejected X11 forwarding request 找了很多方法,最后发现是安 ...
- Ubuntu配置ssh server
SSH-Server配置指南 一.SSH简介 SSH (Secure Shell)是一个应用程序中提供安全通信的协议,通过SSH协议可以安全地访问服务器,因为SSH 具有成熟的公钥加密体系,在数据进行 ...
- Centos更换yum源,安装ssh server
先连上网,然后更换yum源 1. 新建的用户没有sudo权限,所以首先切换到root用户su -输入密码 2. 备份之前的yum源mv /etc/yum.repos.d/CentOS-Base.rep ...
随机推荐
- eUSB是什么/可以干什么?
eUSB总结 1.什么是eUSB 1.1 eUSB概念 eUSB是原USB物理层上的补充,为了解决USB_phy低压需求的问题而出现的,eUSB可以将信号电平降至1.2V甚至更低,与此同时可以优化电源 ...
- USB设备类型代码、详细说明、查询方式
以下是相关类型的详细说明: 地址:https://www.usb.org/documents 搜索device class 以下是USB所有支持的设备类型代码 地址:http://www.usb.or ...
- 数据库周刊60丨3月国产数据库排行榜出炉;日本银行数据迁移失败致使业务宕机;阿里云RDS PG13发布;亚健康Oracle数据库故障定位;Redis最佳实践;MySQL查询优化……
热门资讯 1.2021年3月国产数据库排行榜:雏凤声清阿里三连 绝代双骄华为合璧 [摘要]2021年3月国产数据库流行度排行榜已出炉,在本月排行的前十名中,TiDB 仍然以领先第二名135分 的优势稳 ...
- JDBC后端实现查询功能逻辑
// 包名 package com.zhulx.JDBC; // 导入实例类 import com.zhulx.pojo.Account; import java.sql.*; import java ...
- 常见函数 ,过滤函数 直接导入使用 ,filters.js 文件 批量注册过滤器
// import parseTime, formatTime and set to filter /** * Show plural label if time is plural number * ...
- 21 如何写出一篇高质量的sci水文
博客配套视频链接: https://www.bilibili.com/video/BV1fW4y1W7dS/ b 站直接看 模型确定, 结果正在跑(或已结束), 目标期刊已定,一般可以定顶刊 从目标期 ...
- 0606-nn.functional
0606-nn.functional 目录 一.nn.functional 和 nn.Module 的区别 二.nn.functional 和 nn.Module 结合使用 pytorch完整教程目录 ...
- Android复习(六)核心组件—>Activity 简介、生命周期、状态变更
1. 可以在activity上声明权限,来保证只在进入某个activity是否有某种权限 <manifest> <activity android:name="....&q ...
- C# 并发控制框架:单线程环境下实现每秒百万级调度
前言 在工业自动化和机器视觉领域,对实时性.可靠性和效率的要求越来越高.为了满足这些需求,我们开发了一款专为工业自动化运动控制和机器视觉流程开发设计的 C# 并发流程控制框架. 该框架不仅适用于各种工 ...
- tmux从入门到装x
原文: https://blog.csdn.net/CSSDCC/article/details/121231906 安装方法: # Ubuntu 或 Debian $ sudo apt-get in ...