转:python cgi编程
转:http://www.runoob.com/Python/python-cgi.html
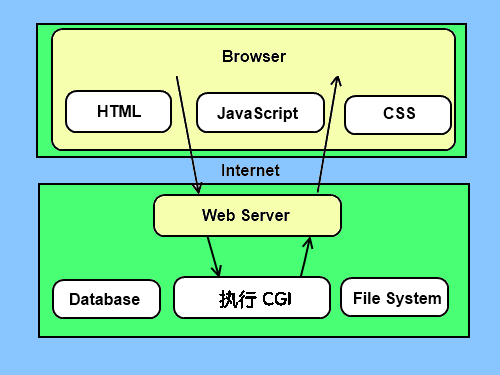
什么是CGI
CGI 目前由NCSA维护,NCSA定义CGI如下:
CGI(Common Gateway Interface),通用网关接口,它是一段程序,运行在服务器上如:HTTP服务器,提供同客户端HTML页面的接口。
网页浏览
为了更好的了解CGI是如何工作的,我们可以从在网页上点击一个链接或URL的流程:
- 1、使用你的浏览器访问URL并连接到HTTP web 服务器。
- 2、Web服务器接收到请求信息后会解析URL,并查找访问的文件在服务器上是否存在,如果存在返回文件的内容,否则返回错误信息。
- 3、浏览器从服务器上接收信息,并显示接收的文件或者错误信息。
CGI程序可以是Python脚本,PERL脚本,SHELL脚本,C或者C++程序等。
CGI架构图
Web服务器支持及配置
在你进行CGI编程前,确保您的Web服务器支持CGI及已经配置了CGI的处理程序。
Apache 支持CGI 配置:
设置好CGI目录:
ScriptAlias /cgi-bin/ /var/www/cgi-bin/
所有的HTTP服务器执行CGI程序都保存在一个预先配置的目录。这个目录被称为CGI目录,并按照惯例,它被命名为/var/www/cgi-bin目录。
CGI文件的扩展名为.cgi,python也可以使用.py扩展名。
默认情况下,Linux服务器配置运行的cgi-bin目录中为/var/www。
如果你想指定其他运行CGI脚本的目录,可以修改httpd.conf配置文件,如下所示:
<Directory "/var/www/cgi-bin">

   AllowOverride None

   Options +ExecCGI

   Order allow,deny

   Allow from all

</Directory>
在 AddHandler 中添加 .py 后缀,这样我们就可以访问 .py 结尾的 python 脚本文件:
AddHandler cgi-script .cgi .pl .py
第一个CGI程序
我们使用Python创建第一个CGI程序,文件名为hello.py,文件位于/var/www/cgi-bin目录中,内容如下:
#!/usr/bin/python

# -*- coding: UTF-8 -*-

print "Content-type:text/html"

print                               # 空行,告诉服务器结束头部

print '<html>'

print '<head>'

print '<meta charset="utf-8">'

print '<title>Hello Word - 我的第一个 CGI 程序!</title>'

print '</head>'

print '<body>'

print '<h2>Hello Word! 我是来自菜鸟教程的第一CGI程序</h2>'

print '</body>'

print '</html>'
文件保存后修改 hello.py,修改文件权限为 755:
chmod 755 hello.py
以上程序在浏览器访问显示结果如下:
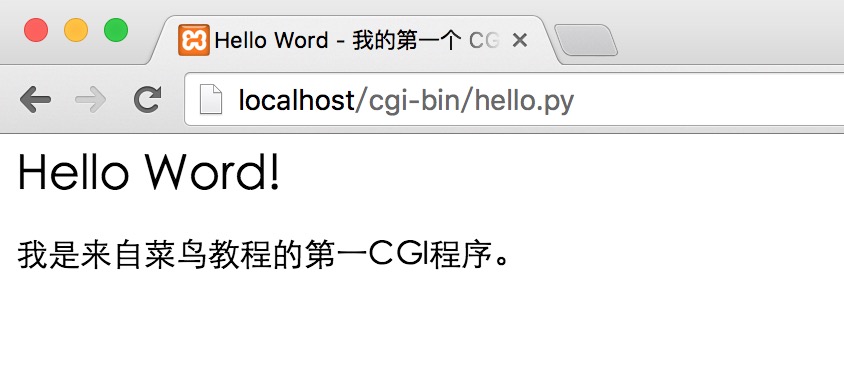
这个的hello.py脚本是一个简单的Python脚本,脚本第一行的输出内容"Content-type:text/html"发送到浏览器并告知浏览器显示的内容类型为"text/html"。
用 print 输出一个空行用于告诉服务器结束头部信息。
HTTP头部
hello.py文件内容中的" Content-type:text/html"即为HTTP头部的一部分,它会发送给浏览器告诉浏览器文件的内容类型。
HTTP头部的格式如下:
HTTP 字段名: 字段内容
例如:
Content-type: text/html
以下表格介绍了CGI程序中HTTP头部经常使用的信息:
| 头 | 描述 |
|---|---|
| Content-type: | 请求的与实体对应的MIME信息。例如: Content-type:text/html |
| Expires: Date | 响应过期的日期和时间 |
| Location: URL | 用来重定向接收方到非请求URL的位置来完成请求或标识新的资源 |
| Last-modified: Date | 请求资源的最后修改时间 |
| Content-length: N | 请求的内容长度 |
| Set-Cookie: String | 设置Http Cookie |
CGI环境变量
所有的CGI程序都接收以下的环境变量,这些变量在CGI程序中发挥了重要的作用:
| 变量名 | 描述 |
|---|---|
| CONTENT_TYPE | 这个环境变量的值指示所传递来的信息的MIME类型。目前,环境变量CONTENT_TYPE一般都是:application/x-www-form-urlencoded,他表示数据来自于HTML表单。 |
| CONTENT_LENGTH | 如果服务器与CGI程序信息的传递方式是POST,这个环境变量即使从标准输入STDIN中可以读到的有效数据的字节数。这个环境变量在读取所输入的数据时必须使用。 |
| HTTP_COOKIE | 客户机内的 COOKIE 内容。 |
| HTTP_USER_AGENT | 提供包含了版本数或其他专有数据的客户浏览器信息。 |
| PATH_INFO | 这个环境变量的值表示紧接在CGI程序名之后的其他路径信息。它常常作为CGI程序的参数出现。 |
| QUERY_STRING | 如果服务器与CGI程序信息的传递方式是GET,这个环境变量的值即使所传递的信息。这个信息经跟在CGI程序名的后面,两者中间用一个问号'?'分隔。 |
| REMOTE_ADDR | 这个环境变量的值是发送请求的客户机的IP地址,例如上面的192.168.1.67。这个值总是存在的。而且它是Web客户机需要提供给Web服务器的唯一标识,可以在CGI程序中用它来区分不同的Web客户机。 |
| REMOTE_HOST | 这个环境变量的值包含发送CGI请求的客户机的主机名。如果不支持你想查询,则无需定义此环境变量。 |
| REQUEST_METHOD | 提供脚本被调用的方法。对于使用 HTTP/1.0 协议的脚本,仅 GET 和 POST 有意义。 |
| SCRIPT_FILENAME | CGI脚本的完整路径 |
| SCRIPT_NAME | CGI脚本的的名称 |
| SERVER_NAME | 这是你的 WEB 服务器的主机名、别名或IP地址。 |
| SERVER_SOFTWARE | 这个环境变量的值包含了调用CGI程序的HTTP服务器的名称和版本号。例如,上面的值为Apache/2.2.14(Unix) |
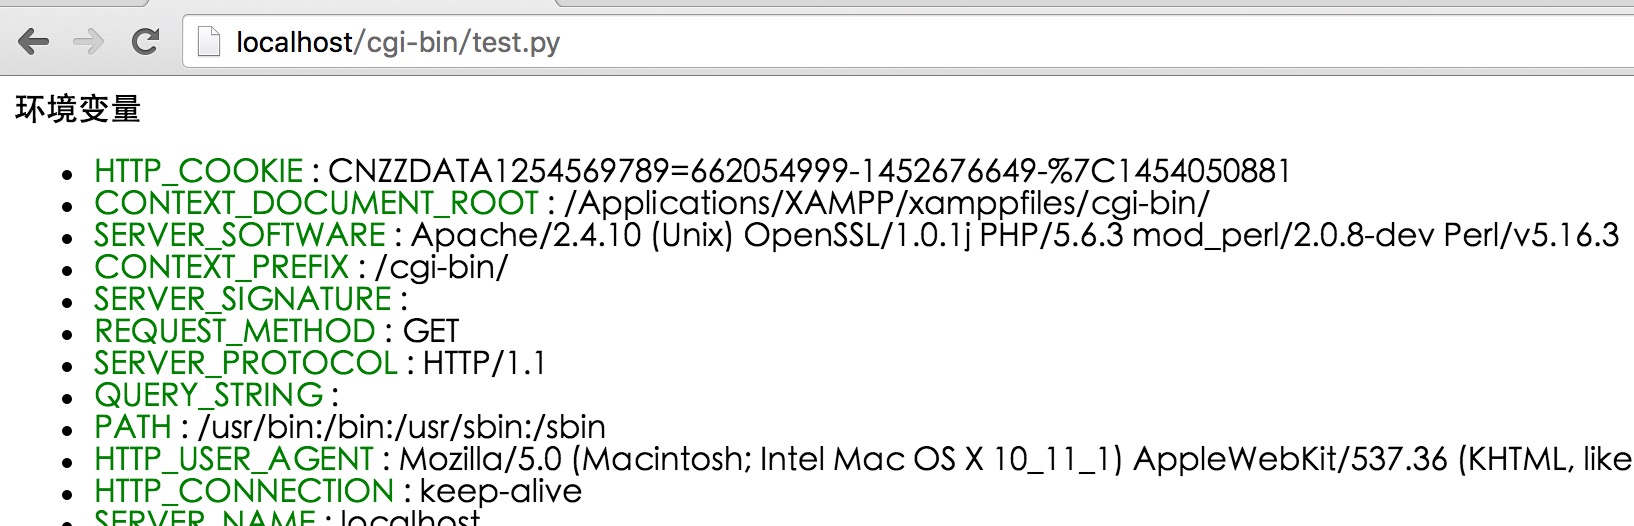
以下是一个简单的CGI脚本输出CGI的环境变量:
#!/usr/bin/python
# -*- coding: UTF-8 -*-
# filename:test.py import os print "Content-type: text/html"
print "<meta charset=\"utf-8\">"
print "<b>环境变量</b><br>";
print "<ul>"
for key in os.environ.keys():
print "<li><span style='color:green'>%30s </span> : %s </li>" % (key,os.environ[key])
print "</ul>"
将以上点保存为 test.py ,并修改文件权限为 755,执行结果如下:
GET和POST方法
浏览器客户端通过两种方法向服务器传递信息,这两种方法就是 GET 方法和 POST 方法。
使用GET方法传输数据
GET方法发送编码后的用户信息到服务端,数据信息包含在请求页面的URL上,以"?"号分割, 如下所示:
http://www.test.com/cgi-bin/hello.py?key1=value1&key2=value2
有关 GET 请求的其他一些注释:
- GET 请求可被缓存
- GET 请求保留在浏览器历史记录中
- GET 请求可被收藏为书签
- GET 请求不应在处理敏感数据时使用
- GET 请求有长度限制
- GET 请求只应当用于取回数据
简单的url实例:GET方法
以下是一个简单的URL,使用GET方法向hello_get.py程序发送两个参数:
/cgi-bin/test.py?name=菜鸟教程&url=http://www.runoob.com
以下为hello_get.py文件的代码:
#!/usr/bin/python
# -*- coding: UTF-8 -*- # filename:test.py # CGI处理模块
import cgi, cgitb # 创建 FieldStorage 的实例化
form = cgi.FieldStorage() # 获取数据
site_name = form.getvalue('name')
site_url = form.getvalue('url') print "Content-type:text/html"
print "<html>"
print "<head>"
print "<meta charset=\"utf-8\">"
print "<title>菜鸟教程 CGI 测试实例</title>"
print "</head>"
print "<body>"
print "<h2>%s官网:%s</h2>" % (site_name, site_url)
print "</body>"
print "</html>"
文件保存后修改 hello_get.py,修改文件权限为 755:
chmod 755 hello_get.py
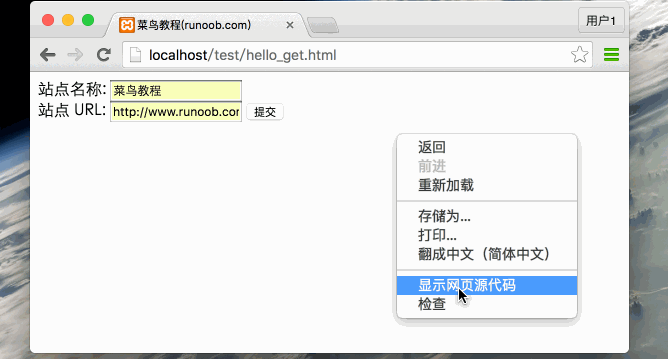
浏览器请求输出结果:

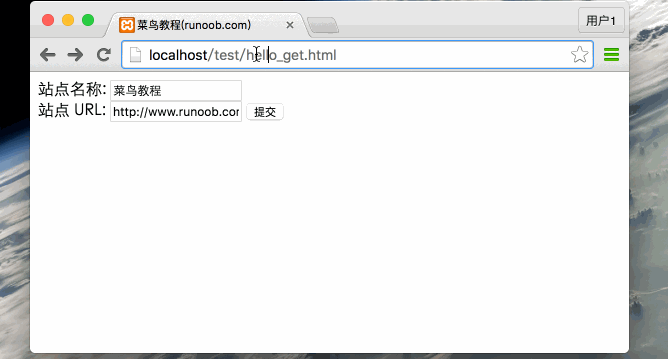
简单的表单实例:GET方法
以下是一个通过HTML的表单使用GET方法向服务器发送两个数据,提交的服务器脚本同样是hello_get.py文件,hello_get.html 代码如下:
<!DOCTYPE html>

<html>

<head>

<meta charset="utf-8">

<title>菜鸟教程(runoob.com)</title>

</head>

<body>

<form action="/cgi-bin/hello_get.py" method="get">

站点名称: <input type="text" name="name">  <br />

站点 URL: <input type="text" name="url" />

<input type="submit" value="提交" />

</form>

</body>

</html>
默认情况下 cgi-bin 目录只能存放脚本文件,我们将 hello_get.html 存储在 test 目录下,修改文件权限为 755:
chmod 755 hello_get.html
Gif 演示如下所示:
使用POST方法传递数据
使用POST方法向服务器传递数据是更安全可靠的,像一些敏感信息如用户密码等需要使用POST传输数据。
以下同样是hello_get.py ,它也可以处理浏览器提交的POST表单数据:
#!/usr/bin/python
# -*- coding: UTF-8 -*- # CGI处理模块
import cgi, cgitb # 创建 FieldStorage 的实例化
form = cgi.FieldStorage() # 获取数据
site_name = form.getvalue('name')
site_url = form.getvalue('url') print "Content-type:text/html"
print "<html>"
print "<head>"
print "<meta charset=\"utf-8\">"
print "<title>菜鸟教程 CGI 测试实例</title>"
print "</head>"
print "<body>"
print "<h2>%s官网:%s</h2>" % (site_name, site_url)
print "</body>"
print "</html>"
以下为表单通过POST方法(method="post")向服务器脚本 hello_get.py 提交数据:
<!DOCTYPE html>

<html>

<head>

<meta charset="utf-8">

<title>菜鸟教程(runoob.com)</title>

</head>

<body>

<form action="/cgi-bin/hello_get.py" method="post">

站点名称: <input type="text" name="name">  <br />

站点 URL: <input type="text" name="url" />

<input type="submit" value="提交" />

</form>

</body>

</html>
Gif 演示如下所示:
通过CGI程序传递checkbox数据
checkbox用于提交一个或者多个选项数据,HTML代码如下:
<!DOCTYPE html>

<html>

<head>

<meta charset="utf-8">

<title>菜鸟教程(runoob.com)</title>

</head>

<body>

<form action="/cgi-bin/checkbox.py" method="POST" target="_blank">

<input type="checkbox" name="runoob" value="on" /> 菜鸟教程

<input type="checkbox" name="google" value="on" /> Google

<input type="submit" value="选择站点" />

</form>

</body>

</html>
以下为 checkbox.py 文件的代码:
#!/usr/bin/python
# -*- coding: UTF-8 -*- # 引入 CGI 处理模块
import cgi, cgitb # 创建 FieldStorage的实例
form = cgi.FieldStorage() # 接收字段数据
if form.getvalue('google'):
google_flag = "是"
else:
google_flag = "否" if form.getvalue('runoob'):
runoob_flag = "是"
else:
runoob_flag = "否" print "Content-type:text/html"
print "<html>"
print "<head>"
print "<meta charset=\"utf-8\">"
print "<title>菜鸟教程 CGI 测试实例</title>"
print "</head>"
print "<body>"
print "<h2> 菜鸟教程是否选择了 : %s</h2>" % runoob_flag
print "<h2> Google 是否选择了 : %s</h2>" % google_flag
print "</body>"
print "</html>"
修改 checkbox.py 权限:
chmod 755 checkbox.py
浏览器访问 Gif 演示图:

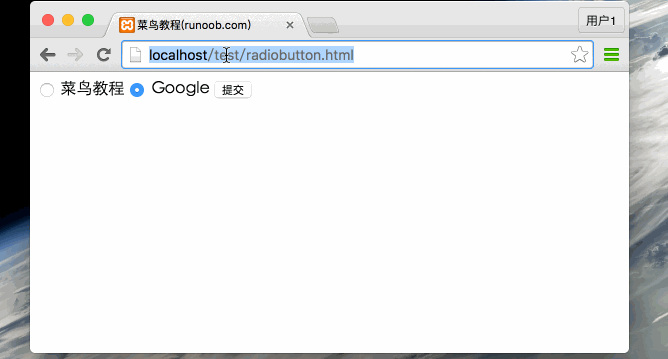
通过CGI程序传递Radio数据
Radio 只向服务器传递一个数据,HTML代码如下:
<!DOCTYPE html>

<html>

<head>

<meta charset="utf-8">

<title>菜鸟教程(runoob.com)</title>

</head>

<body>

<form action="/cgi-bin/radiobutton.py" method="post" target="_blank">

<input type="radio" name="site" value="runoob" /> 菜鸟教程

<input type="radio" name="site" value="google" /> Google

<input type="submit" value="提交" />

</form>

</body>

</html>
radiobutton.py 脚本代码如下:
#!/usr/bin/python
# -*- coding: UTF-8 -*- # 引入 CGI 处理模块
import cgi, cgitb # 创建 FieldStorage的实例
form = cgi.FieldStorage() # 接收字段数据
if form.getvalue('site'):
site = form.getvalue('site')
else:
site = "提交数据为空" print "Content-type:text/html"
print "<html>"
print "<head>"
print "<meta charset=\"utf-8\">"
print "<title>菜鸟教程 CGI 测试实例</title>"
print "</head>"
print "<body>"
print "<h2> 选中的网站是 %s</h2>" % site
print "</body>"
print "</html>"
修改 radiobutton.py 权限:
chmod 755 radiobutton.py
浏览器访问 Gif 演示图:
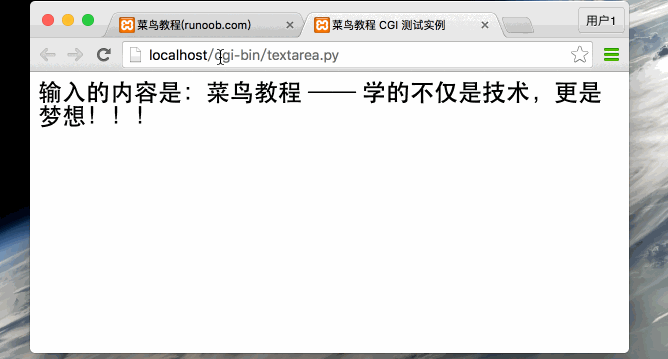
通过CGI程序传递 Textarea 数据
Textarea 向服务器传递多行数据,HTML代码如下:
<!DOCTYPE html>

<html>

<head>

<meta charset="utf-8">

<title>菜鸟教程(runoob.com)</title>

</head>

<body>

<form action="/cgi-bin/textarea.py" method="post" target="_blank">

<textarea name="textcontent" cols="40" rows="4">

在这里输入内容...

</textarea>

<input type="submit" value="提交" />

</form>

</body>

</html>
textarea.py 脚本代码如下:
#!/usr/bin/python
# -*- coding: UTF-8 -*- # 引入 CGI 处理模块
import cgi, cgitb # 创建 FieldStorage的实例
form = cgi.FieldStorage() # 接收字段数据
if form.getvalue('textcontent'):
text_content = form.getvalue('textcontent')
else:
text_content = "没有内容" print "Content-type:text/html"
print "<html>"
print "<head>";
print "<meta charset=\"utf-8\">"
print "<title>菜鸟教程 CGI 测试实例</title>"
print "</head>"
print "<body>"
print "<h2> 输入的内容是:%s</h2>" % text_content
print "</body>"
print "</html>"
修改 textarea.py 权限:
chmod 755 textarea.py
浏览器访问 Gif 演示图:
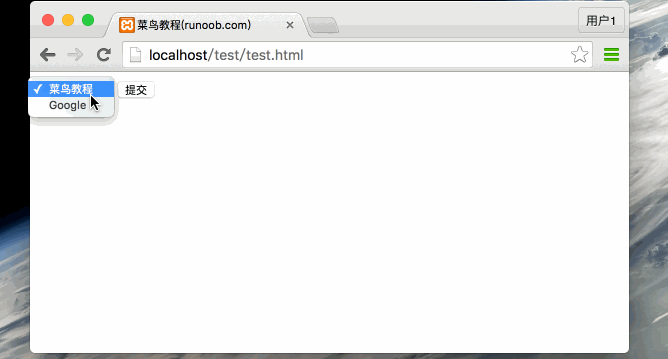
通过CGI程序传递下拉数据。
HTML 下拉框代码如下:
<!DOCTYPE html>

<html>

<head>

<meta charset="utf-8">

<title>菜鸟教程(runoob.com)</title>

</head>

<body>

<form action="/cgi-bin/dropdown.py" method="post" target="_blank">

<select name="dropdown">

<option value="runoob" selected>菜鸟教程</option>

<option value="google">Google</option>

</select>

<input type="submit" value="提交"/>

</form>

</body>

</html>
dropdown.py 脚本代码如下所示:
#!/usr/bin/python
# -*- coding: UTF-8 -*- # 引入 CGI 处理模块
import cgi, cgitb # 创建 FieldStorage的实例
form = cgi.FieldStorage() # 接收字段数据
if form.getvalue('dropdown'):
dropdown_value = form.getvalue('dropdown')
else:
dropdown_value = "没有内容" print "Content-type:text/html"
print "<html>"
print "<head>"
print "<meta charset=\"utf-8\">"
print "<title>菜鸟教程 CGI 测试实例</title>"
print "</head>"
print "<body>"
print "<h2> 选中的选项是:%s</h2>" % dropdown_value
print "</body>"
print "</html>"
修改 dropdown.py 权限:
chmod 755 dropdown.py
浏览器访问 Gif 演示图:
CGI中使用Cookie
在 http 协议一个很大的缺点就是不对用户身份的进行判断,这样给编程人员带来很大的不便, 而 cookie 功能的出现弥补了这个不足。
cookie 就是在客户访问脚本的同时,通过客户的浏览器,在客户硬盘上写入纪录数据 ,当下次客户访问脚本时取回数据信息,从而达到身份判别的功能,cookie 常用在身份校验中。
cookie的语法
http cookie的发送是通过http头部来实现的,他早于文件的传递,头部set-cookie的语法如下:
Set-cookie:name=name;expires=date;path=path;domain=domain;secure
- name=name: 需要设置cookie的值(name不能使用";"和","号),有多个name值时用 ";" 分隔,例如:name1=name1;name2=name2;name3=name3。
- expires=date: cookie的有效期限,格式: expires="Wdy,DD-Mon-YYYY HH:MM:SS"
- path=path: 设置cookie支持的路径,如果path是一个路径,则cookie对这个目录下的所有文件及子目录生效,例如: path="/cgi-bin/",如果path是一个文件,则cookie指对这个文件生效,例如:path="/cgi-bin/cookie.cgi"。
- domain=domain: 对cookie生效的域名,例如:domain="www.runoob.com"
- secure: 如果给出此标志,表示cookie只能通过SSL协议的https服务器来传递。
- cookie的接收是通过设置环境变量HTTP_COOKIE来实现的,CGI程序可以通过检索该变量获取cookie信息。
Cookie设置
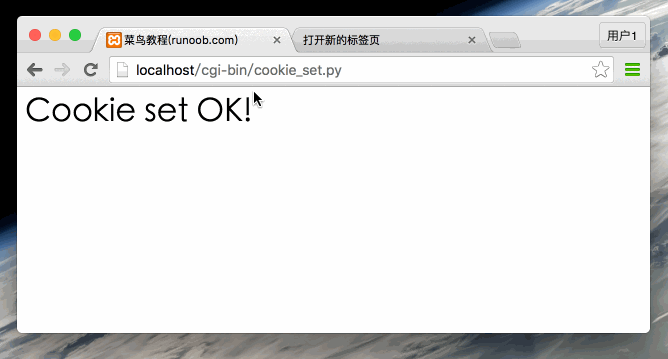
Cookie的设置非常简单,cookie会在http头部单独发送。以下实例在cookie中设置了name 和 expires:
#!/usr/bin/python
# -*- coding: UTF-8 -*-
#
print 'Content-Type: text/html'
print 'Set-Cookie: name="菜鸟教程";expires=Wed, 28 Aug 2016 18:30:00 GMT'
print """
<html>
<head>
<meta charset="utf-8">
<title>菜鸟教程(runoob.com)</title>
</head>
<body>
<h1>Cookie set OK!</h1>
</body>
</html>
"""
将以上代码保存到 cookie_set.py,并修改 cookie_set.py 权限:
chmod 755 cookie_set.py
以上实例使用了 Set-Cookie 头信息来设置Cookie信息,可选项中设置了Cookie的其他属性,如过期时间Expires,域名Domain,路径Path。这些信息设置在 "Content-type:text/html"之前。
检索Cookie信息
Cookie信息检索页非常简单,Cookie信息存储在CGI的环境变量HTTP_COOKIE中,存储格式如下:
key1=value1;key2=value2;key3=value3....
以下是一个简单的CGI检索cookie信息的程序:
#!/usr/bin/python

# -*- coding: UTF-8 -*-

# 导入模块

import os

import Cookie

print "Content-type: text/html"

print

print """

<html>

<head>

<meta charset="utf-8">

<title>菜鸟教程(runoob.com)</title>

</head>

<body>

<h1>读取cookie信息</h1>

"""

if 'HTTP_COOKIE' in os.environ:

    cookie_string=os.environ.get('HTTP_COOKIE')

    c=Cookie.SimpleCookie()

    c.load(cookie_string)

    try:

        data=c['name'].value

        print "cookie data: "+data+"<br>"

    except KeyError:

        print "cookie 没有设置或者已过去<br>"

print """

</body>

</html>

"""
将以上代码保存到 cookie_get.py,并修改 cookie_get.py 权限:
chmod 755 cookie_get.py
以上 cookie 设置颜色 Gif 如下所示:
文件上传实例
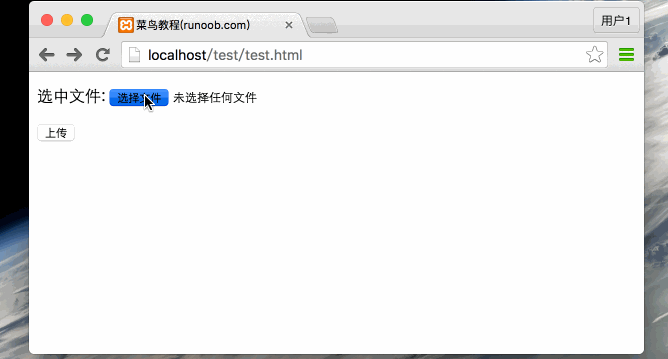
HTML设置上传文件的表单需要设置 enctype 属性为 multipart/form-data,代码如下所示:
<!DOCTYPE html>

<html>

<head>

<meta charset="utf-8">

<title>菜鸟教程(runoob.com)</title>

</head>

<body>

 <form enctype="multipart/form-data"

                     action="/cgi-bin/save_file.py" method="post">

   <p>选中文件: <input type="file" name="filename" /></p>

   <p><input type="submit" value="上传" /></p>

   </form>

</body>

</html>
save_file.py脚本文件代码如下:
#!/usr/bin/python

# -*- coding: UTF-8 -*-

import cgi, os

import cgitb; cgitb.enable()

form = cgi.FieldStorage()

# 获取文件名

fileitem = form['filename']

# 检测文件是否上传

if fileitem.filename:

   # 设置文件路径

   fn = os.path.basename(fileitem.filename)

   open('/tmp/' + fn, 'wb').write(fileitem.file.read())

   message = '文件 "' + fn + '" 上传成功'

else:

   message = '文件没有上传'

print """\

Content-Type: text/html\n

<html>

<head>

<meta charset="utf-8">

<title>菜鸟教程(runoob.com)</title>

</head>

<body>

   <p>%s</p>

</body>

</html>

""" % (message,)
将以上代码保存到 save_file.py,并修改 save_file.py 权限:
chmod 755 save_file.py
以上 cookie 设置颜色 Gif 如下所示:
如果你使用的系统是Unix/Linux,你必须替换文件分隔符,在window下只需要使用open()语句即可:
fn = os.path.basename(fileitem.filename.replace("\\", "/" ))
文件下载对话框
我们先在当前目录下创建 foo.txt 文件,用于程序的下载。
文件下载通过设置HTTP头信息来实现,功能代码如下:
#!/usr/bin/python
# -*- coding: UTF-8 -*- # HTTP 头部
print "Content-Disposition: attachment; filename=\"foo.txt\"";
# 打开文件
fo = open("foo.txt", "rb") str = fo.read();
print str # 关闭文件
fo.close()
转:python cgi编程的更多相关文章
- Python CGI编程(转自易百)
Python CGI编程 Python的CGI编程,公共网关接口或CGI,Web服务器和一个自定义的脚本之间交换信息是一组定义的标准. 什么是CGI ? 公共网关接口或CGI,Web服务器和一 ...
- python CGI编程-----简单的本地使用(1)
本章节需要安装python开发工具,window平台安装地址:https://www.python.org/downloads/windows/,linux安装地址:https://www.pytho ...
- 吴裕雄--天生自然python学习笔记:Python CGI编程
什么是CGI CGI 目前由NCSA维护,NCSA定义CGI如下: CGI(Common Gateway Interface),通用网关接口,它是一段程序,运行在服务器上如:HTTP服务器,提供同客户 ...
- python CGI 编程实践
文章更新于:2020-03-05 注1:安装 python 参见: python 的安装使用和基本语法 注2:配置 web 环境参见: Windows&linux使用集成环境搭建 web 服务 ...
- Python CGI编程和CGIHTTPServer
Python2.7 的CGIHTTPServer 可以作为一个简单的HTTP服务器,能够调用cgi脚本 1 在任意目录下创建一个特殊的目录 cgi-bin ,用于存放自己写的脚本(.py或.cgi) ...
- python CGI编程Apache配置
1. 编辑http.conf,添加两行,路径可以自定义 <Directory "C:/AppServ/www/cgi-bin"> AllowOverride None ...
- Python CGI编程
CGI(Common Gateway Interface)通用网关接口,它是一段程序,运行在服务器上.如:HTTP服务器,提供同客户端HTML页面的接口. CGI程序可以是python脚本,PERL脚 ...
- Common Gateway Interface Python CGI编程
https://en.wikipedia.org/wiki/Gateway_(telecommunications) In telecommunications, the term gateway r ...
- 彻底解决python cgi 编程出现的编码问题
Answering this for late-comers because I don't think that the posted answers get to the root of the ...
随机推荐
- 【Codeforces711E】ZS and The Birthday Paradox [数论]
ZS and The Birthday Paradox Time Limit: 20 Sec Memory Limit: 512 MB Description Input Output Sample ...
- CodeForces527D. Fuzzy Search
time limit per test:3 seconds memory limit per test:256 megabytes input:standard input output:standa ...
- Linux系统网络基础知识及配置
一:DNS(domain name system)简介 DNS(Domain Name System,域名系统),因特网上作为域名和IP地址相互映射的一个分布式数据库,能够使用户更方便的访问互联网,而 ...
- 将文件内容导入到MySQL中
1.作用 把文件系统的内容导入到数据库中 2.语法 load data infile "文件名" into table 表名 fields terminated by " ...
- Java案例之随机验证码功能实现
实现的功能比较简单,就是随机产生了四个字符然后输出.效果图如下,下面我会详细说一下实现这个功能用到了那些知识点,并且会把 这些知识点详细的介绍出来.哈哈 ,大神勿喷,对于初学Java的人帮助应该蛮大的 ...
- Python基础===使用virtualenv创建一个新的运行环境
virtualenv简直是一个神器,以ubuntu环境为例, 先安装virtualenv 然后执行如下命令: 多版本创建env的方式: virtualenv 虚拟环境文件目录名 python=pyth ...
- 学习 Linux,101: 自定义或编写简单脚本【转】
转自:http://www.ibm.com/developerworks/cn/linux/l-lpic1-105-2/index.html 学习如何使用标准的 shell 语法.循环和控制结构,以及 ...
- 【NOIP2016】组合数问题
写着玩玩…… 反正超级sb题. #include<bits/stdc++.h> typedef long long ll; using namespace std; ll c[][],h[ ...
- Python-生成器/你不知道的点
1.什么是生成器 通过列表生成式,我们可以直接创建一个列表.但是,受到内存限制,列表容量肯定是有限的.而且,创建一个包含100万个元素的列表,不仅占用很大的存储空间,如果我们仅仅需要访问前面几个元素, ...
- Jmeter接口测试示例
如果是Web,需要使用badboy进行录制,今天讲的是接口,因此可以不用录制. (1)新建测试计划 (2)添加http请求默认值 (3)添加http信息头管理器 (4)添加token的正则表达式:&q ...