Cesium之DrawCommand与绘制三角形
1. 引言
Cesium中的Command对象包含执行的指令参数和执行方法,Command对象主要有三类:
- ClearCommand
- DrawCommand
- ComputeCommand
DrawCommand是最常用的指令,它是绘制的主角
DrawCommand封装如下,几乎包含了绘制所需要的全部内容:
function DrawCommand(options) {

  options = defaultValue(options, defaultValue.EMPTY_OBJECT);

  this._boundingVolume = options.boundingVolume;

  this._orientedBoundingBox = options.orientedBoundingBox;

  this._modelMatrix = options.modelMatrix;

  this._primitiveType = defaultValue(

    options.primitiveType,

    PrimitiveType.TRIANGLES

  );

  this._vertexArray = options.vertexArray;

  this._count = options.count;

  this._offset = defaultValue(options.offset, 0);

  this._instanceCount = defaultValue(options.instanceCount, 0);

  this._shaderProgram = options.shaderProgram;

  this._uniformMap = options.uniformMap;

  this._renderState = options.renderState;

  this._framebuffer = options.framebuffer;

  this._pass = options.pass;

  this._owner = options.owner;

  this._debugOverlappingFrustums = 0;

  this._pickId = options.pickId;

  // ...

}

DrawCommand.prototype.execute = function (context, passState) {

  context.draw(this, passState);

};
DrawCommand包含了绘制所需的VAO、ShaderProgram等参数以及execute()方法
DrawCommand是Cesium对WebGL 底层的封装 ,可以说操作DrawCommand就是在操作底层WebGL
本文描述Cesium中的DrawCommand并绘制一个自定义的三角形
2. Scene中的DrawCommand
Scene是Cesium中是一个很上层的概念,描述一个场景情况,DrawCommand在Scene中的调用过程大致如下:
初始化Scene时初始化PrimitiveCollection
function Scene(options) {

  // ...

  this._primitives = new PrimitiveCollection();

  this._groundPrimitives = new PrimitiveCollection();

  // ...

}
执行更新时调用DrawCommand的primitives.update(frameState)()方法
Scene.prototype.updateAndExecuteCommands = function (passState, backgroundColor) {

    // ...

    executeCommandsInViewport(true, this, passState, backgroundColor);

    // ...

};

function executeCommandsInViewport(firstViewport, scene, passState, backgroundColor) {

  // ...

  updateAndRenderPrimitives(scene);

  // ...

}

function updateAndRenderPrimitives(scene) {

  // ...

  scene._groundPrimitives.update(frameState);

  scene._primitives.update(frameState);

  // ...

}
再来看看primitives.update(frameState)方法:
PrimitiveCollection.prototype.update = function (frameState) {

  const primitives = this._primitives;

  for (let i = 0; i < primitives.length; ++i) {

    primitives[i].update(frameState);

  }

};

Primitive.prototype.update = function (frameState) {

  // ...

  const updateAndQueueCommandsFunc = updateAndQueueCommands

  updateAndQueueCommandsFunc(...);

};

function updateAndQueueCommands(...) {

  // ...

  const commandList = frameState.commandList;

  const passes = frameState.passes;

  if (passes.render || passes.pick) {

    const colorLength = colorCommands.length;

    for (let j = 0; j < colorLength; ++j) {

      const colorCommand = colorCommands[j];

      // ...

      commandList.push(colorCommand);

    }

  }

}
primitives.update(frameState)方法会将Command推入CommandList,然后在Scene中执行execute()方法:
function executeCommands(scene, passState) {

    // ...

    // Draw terrain classification

    executeCommand(commands[j], scene, context, passState);

    // Draw 3D Tiles

    executeCommand(commands[j], scene, context, passState)

    // Draw classifications. Modifies 3D Tiles color.

    executeCommand(commands[j], scene, context, passState);

    // ...

}

function executeCommand(command, scene, context, passState, debugFramebuffer) {

  // ...

  command.execute(context, passState);

  // ...

}
综上,在Scene中会调用primitives[i].update(frameState)实现primitive绘制与更新
3. 绘制一个三角形
综上,要绘制一个自定义的三角形,需要构建一个primitive添加到Scene中,并且需要设置primitive的update(frameState)方法,实现自定义三角形的绘制与更新
primitive的update(frameState)方法,实质上就是构建DrawCommand,并将其推入commandList,然后执行execute()方法实现绘制与更新
总结一下步骤就是:
- 构建DrawCommand
- 构建primitive并设置
update(frameState)方法 - 将primitive添加到Scene中
3.1 构建DrawCommand
从引言处的DrawCommand构造函数可以得出,构建一个DrawCommand需要:
- modelMatrix
- vertexArray
- shaderProgram
- uniformMap
- renderState
- pass
- ......
3.1.1 vertexArray
参考源码VertexArray.js中创建一个VAO和VBO的例子:
// Example 1. Create a vertex array with vertices made up of three floating point

// values, e.g., a position, from a single vertex buffer.  No index buffer is used.

const positionBuffer = Buffer.createVertexBuffer({

    context : context,

    sizeInBytes : 12,

    usage : BufferUsage.STATIC_DRAW

});

const attributes = [

    {

        index                  : 0,

        enabled                : true,

        vertexBuffer           : positionBuffer,

        componentsPerAttribute : 3,

        componentDatatype      : ComponentDatatype.FLOAT,

        normalize              : false,

        offsetInBytes          : 0,

        strideInBytes          : 0 // tightly packed

        instanceDivisor        : 0 // not instanced

    }

];

const va = new VertexArray({

    context : context,

    attributes : attributes

});
以及Buffer.js中创建一个指定顶点的例子:
// Example 2. Create a dynamic vertex buffer from three floating-point values.

// The data copied to the vertex buffer is considered raw bytes until it is

// interpreted as vertices using a vertex array.

const positionBuffer = buffer.createVertexBuffer({

    context : context,

    typedArray : new Float32Array([0, 0, 0]),

    usage : BufferUsage.STATIC_DRAW

});
综上,创建一个自定义三角形的vertexArray代码如下:
const positionBuffer = buffer.createVertexBuffer({

    context : context,

    typedArray : new Float32Array([0, 0, 0]),

    usage : BufferUsage.STATIC_DRAW

});

const attributes = [

    {

        index                  : 0,

        enabled                : true,

        vertexBuffer           : positionBuffer,

        componentsPerAttribute : 3,

        componentDatatype      : ComponentDatatype.FLOAT,

        normalize              : false,

        offsetInBytes          : 0,

        strideInBytes          : 0, // tightly packed

        instanceDivisor        : 0  // not instanced

    }

];

const va = new VertexArray({

    context : context,

    attributes : attributes

});
其中,context是frameState.context,而frameState是Scene中保存的帧状态
3.1.2 shaderProgram
ShaderProgram包含GLSL、Shader、Shader Program等一系列参数
更为具体的ShaderProgram描述可以参考:Cesium渲染模块之Shader - 当时明月在曾照彩云归 - 博客园 (cnblogs.com)
在Cesium源码中PolylineCollection.js中创建一个ShaderProgram的例子:
this.shaderProgram = ShaderProgram.fromCache({

    context: context,

    vertexShaderSource: vs,

    fragmentShaderSource: fs,

    attributeLocations: attributeLocations,

});
其中,vertexShaderSource和fragmentShaderSource支持直接编写GLSL代码,因为在ShaderCache.js中做了处理:
if (typeof vertexShaderSource === "string") {

    vertexShaderSource = new ShaderSource({

        sources: [vertexShaderSource],

    });

}

if (typeof fragmentShaderSource === "string") {

    fragmentShaderSource = new ShaderSource({

        sources: [fragmentShaderSource],

    });

}
综上,创建一个自定义三角形的shaderProgram代码如下:
const vertexShaderSource = `

    attribute vec3 position;

    void main() {

      gl_Position = czm_projection * czm_view * czm_model * vec4(position, 1.0);

    }

`

const fragmentShaderSource = `

    void main(){

      gl_FragColor = vec4(1.0, 1.0, 1.0, 1.0);

    }

`

const attributeLocations = {

    "position": 0,

}

const shaderProgram = ShaderProgram.fromCache({

    context: context,

    vertexShaderSource: vs,

    fragmentShaderSource: fs,

    attributeLocations: attributeLocations,

});
3.1.3 modelMatrix
在Cesium源码DrawCommand.js中描述modelMatrix:The transformation from the geometry in model space to world space
在Primitive.js中,可以看到DrawCommand的modelMatrix通常来自于Primitive的modelMatrix:
// ...

colorCommand.modelMatrix = modelMatrix;
3.2 构建Primitive
此处构建Primitive倒也不复杂,因为并不设置什么参数,只需指定modelMatrix和update(frameState)方法即可
3.2.1 modelMatrix
在Cesium源码DrawCommand.js中描述modelMatrix:
The 4x4 transformation matrix that transforms the primitive (all geometry instances) from model to world coordinates. When this is the identity matrix, the primitive is drawn in world coordinates, i.e., Earth's WGS84 coordinates. Local reference frames can be used by providing a different transformation matrix, like that returned by Transforms.eastNorthUpToFixedFrame
并且给出示例:
const origin = Cesium.Cartesian3.fromDegrees(-95.0, 40.0, 200000.0);

p.modelMatrix = Cesium.Transforms.eastNorthUpToFixedFrame(origin);
综上,设置一个自定义的modelMatrix:
const modelCenter = Cesium.Cartesian3.fromDegrees(121.474509, 31.233368, 0)

const modelMatrix = Cesium.Transforms.eastNorthUpToFixedFrame(modelCenter)
- (121.474509, 31.233368)在上海附近
3.2.2 update方法
在Cesium源码Primitive.js中,可以看到Primitive.update()方法就是在创建command并推入commandList:
Primitive.prototype.update = function (frameState) {

  // ...

  const updateAndQueueCommandsFunc = updateAndQueueCommands

  updateAndQueueCommandsFunc(...);

};

function updateAndQueueCommands(...) {

  // ...

  const commandList = frameState.commandList;

  const passes = frameState.passes;

  if (passes.render || passes.pick) {

    const colorLength = colorCommands.length;

    for (let j = 0; j < colorLength; ++j) {

      const colorCommand = colorCommands[j];

      // ...

      commandList.push(colorCommand);

    }

  }

}
所以,创建自定义的update()函数也是要完成创建command并推入commandList:
function update(frameState) {

    const command = createCommand(frameState, this._modelMatrix)

    frameState.commandList.push(command)

}
3.2.3 完整代码
综上,绘制一个自定义的三角形的Primitive代码如下:
class CustomPrimitive extends Cesium.Primitive {

    constructor(options) {

        super(options)

        const modelCenter = Cesium.Cartesian3.fromDegrees(121.474509, 31.233368, 0)

        const modelMatrix = Cesium.Transforms.eastNorthUpToFixedFrame(modelCenter)

        this._modelMatrix = modelMatrix

    }

    createCommand = (frameState, modelMatrix) => {

        const context = frameState.context

        const positionBuffer = Cesium.Buffer.createVertexBuffer({

            context: context,

            typedArray: new Float32Array([

                100000, 500000, 50000,

                -200000, -100000, 50000,

                500000, -300000, 50000,

            ]),

            usage: Cesium.BufferUsage.STATIC_DRAW

        });

        const attributes = [

            {

                index: 0,

                enabled: true,

                vertexBuffer: positionBuffer,

                componentsPerAttribute: 3,

                componentDatatype: Cesium.ComponentDatatype.FLOAT,

                normalize: false,

                offsetInBytes: 0,

                strideInBytes: 0,  // tightly packed

                instanceDivisor: 0 // not instanced

            }

        ];

        const vertexArray = new Cesium.VertexArray({

            context: context,

            attributes: attributes

        });

        const vertexShaderSource = `

          attribute vec3 position;

          void main() {

            gl_Position = czm_projection * czm_view * czm_model * vec4(position, 1.0);

          }

      `

        const fragmentShaderSource = `

          void main(){

            gl_FragColor = vec4(1.0, 1.0, 1.0, 1.0);

          }

      `

        const attributeLocations = {

            "position": 0,

        }

        const shaderProgram = Cesium.ShaderProgram.fromCache({

            context: context,

            vertexShaderSource: vertexShaderSource,

            fragmentShaderSource: fragmentShaderSource,

            attributeLocations: attributeLocations,

        });

        const renderState = Cesium.RenderState.fromCache({

            depthTest: {

                enabled: true

            }

        });

        return new Cesium.DrawCommand({

            modelMatrix: modelMatrix,

            vertexArray: vertexArray,

            shaderProgram: shaderProgram,

            renderState: renderState,

            pass: Cesium.Pass.OPAQUE,

        })

    }

    update = (frameState) => {

        const command = this.createCommand(frameState, this._modelMatrix)

        frameState.commandList.push(command)

    }

}
3.3 添加到Scene中
创建一个Primitive,然后添加到Scene中:
const viewer = new Cesium.Viewer('cesiumContainer');

const customPrimitive = new CustomPrimitive()

viewer.scene.primitives.add(customPrimitive)
完整代码:
<body>

  <div id="cesiumContainer"></div>

  <script>

    Cesium.Ion.defaultAccessToken = 'eyJhbGciOiJIUzI1NiIsInR5cCI6IkpXVCJ9.eyJqdGkiOiJlMTk4ZTYyNy00MjkxLTRmZWYtOTg1MS0wOThjM2YzMzIzYzEiLCJpZCI6NzEyMSwic2NvcGVzIjpbImFzciIsImdjIl0sImlhdCI6MTU0ODMxNzI5OX0.rKV8Ldl_bgR3lVvNsbHhTX62j8JH8ADCIWAwk7tXpr8';

    class CustomPrimitive extends Cesium.Primitive {

      constructor(options) {

        super(options)

        const modelCenter = Cesium.Cartesian3.fromDegrees(121.474509, 31.233368, 0)

        const modelMatrix = Cesium.Transforms.eastNorthUpToFixedFrame(modelCenter)

        this._modelMatrix = modelMatrix

      }

      createCommand = (frameState, modelMatrix) => {

        const context = frameState.context

        const positionBuffer = Cesium.Buffer.createVertexBuffer({

          context: context,

          typedArray: new Float32Array([

            100000, 500000, 50000,

            -200000, -100000, 50000,

            500000, -300000, 50000,

          ]),

          usage: Cesium.BufferUsage.STATIC_DRAW

        });

        const attributes = [

          {

            index: 0,

            enabled: true,

            vertexBuffer: positionBuffer,

            componentsPerAttribute: 3,

            componentDatatype: Cesium.ComponentDatatype.FLOAT,

            normalize: false,

            offsetInBytes: 0,

            strideInBytes: 0,  // tightly packed

            instanceDivisor: 0 // not instanced

          }

        ];

        const vertexArray = new Cesium.VertexArray({

          context: context,

          attributes: attributes

        });

        const vertexShaderSource = `

          attribute vec3 position;

          void main() {

            gl_Position = czm_projection * czm_view * czm_model * vec4(position, 1.0);

          }

      `

        const fragmentShaderSource = `

          void main(){

            gl_FragColor = vec4(1.0, 1.0, 1.0, 1.0);

          }

      `

        const attributeLocations = {

          "position": 0,

        }

        const shaderProgram = Cesium.ShaderProgram.fromCache({

          context: context,

          vertexShaderSource: vertexShaderSource,

          fragmentShaderSource: fragmentShaderSource,

          attributeLocations: attributeLocations,

        });

        const renderState = Cesium.RenderState.fromCache({

          depthTest: {

            enabled: true

          }

        });

        return new Cesium.DrawCommand({

          modelMatrix: modelMatrix,

          vertexArray: vertexArray,

          shaderProgram: shaderProgram,

          renderState: renderState,

          pass: Cesium.Pass.OPAQUE,

        })

      }

      update = (frameState) => {

        const command = this.createCommand(frameState, this._modelMatrix)

        frameState.commandList.push(command)

      }

    }

    const viewer = new Cesium.Viewer('cesiumContainer');

    const customPrimitive = new CustomPrimitive()

    viewer.scene.primitives.add(customPrimitive)

  </script>

</body>
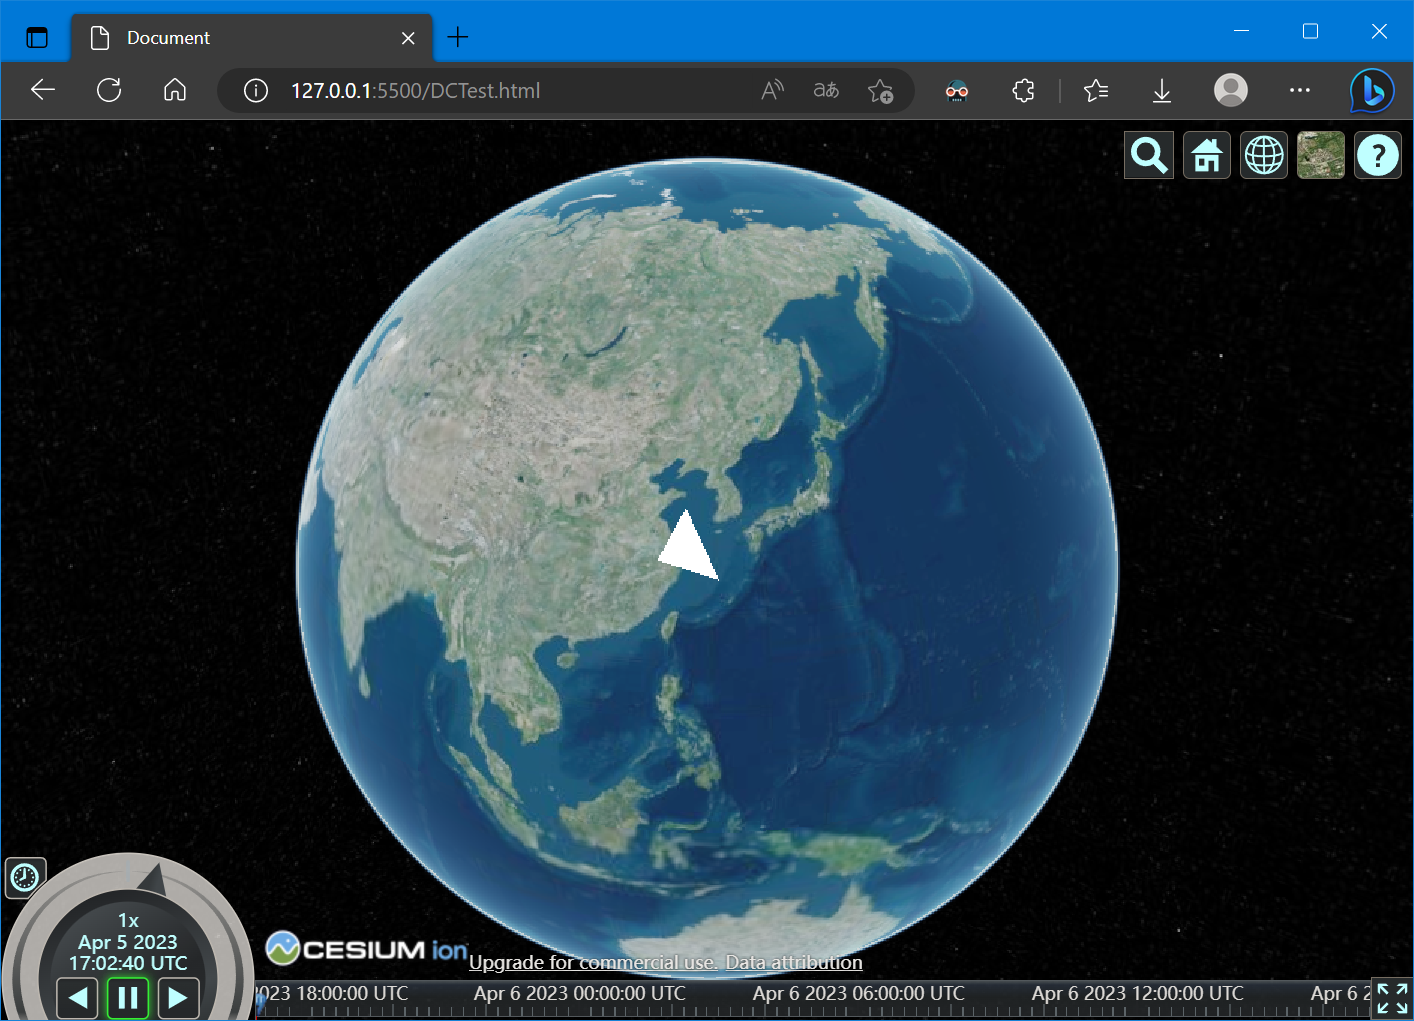
实现的结果:
3. 参考资料
[1] Cesium DrawCommand [1] 不谈地球 画个三角形 - 岭南灯火 - 博客园 (cnblogs.com)
[2] Cesium渲染模块之Command - 当时明月在曾照彩云归 - 博客园 (cnblogs.com)
[3] Cesium渲染模块之Shader - 当时明月在曾照彩云归 - 博客园 (cnblogs.com)
Cesium之DrawCommand与绘制三角形的更多相关文章
- 纯CCS绘制三角形箭头图案
用CSS绘制三角形箭头.使用纯CSS,你只需要很少的代码就可以创作出各种浏览器都兼容的三角形箭头! CSS代码: /* create an arrow that points up */ div.ar ...
- unity 绘制三角形
哎 该学的还是要学 参考:http://www.narkii.com/club/thread-369573-1.html unity 顶点绘制三角形 脚本绘制; 其实filter和render就是进行 ...
- CSS 魔法系列:纯 CSS 绘制三角形(各种角度)
我们的网页因为 CSS 而呈现千变万化的风格.这一看似简单的样式语言在使用中非常灵活,只要你发挥创意就能实现很多比人想象不到的效果.特别是随着 CSS3 的广泛使用,更多新奇的 CSS 作品涌现出来. ...
- css绘制三角形原理
1.新建一个元素,将它的宽高都设置为0:然后通过设置border属性来实现三角形效果,下面是css绘制三角形的原理: <!DOCTYPE html> <html> <he ...
- 【转载】理解GL_TRIANGLE_STRIP等绘制三角形序列的三种方式
GL_TRIANGLE_STRIP绘制三角形方式很多时候令人疑惑,在这里对其运作机理进行解释. 一般情况下有三种绘制一系列三角形的方式,分别是GL_TRIANGLES.GL_TRIANGLE_STRI ...
- CSS - Tooltip-arrow 绘制三角形
问题:纯CSS实现bubble的三角形部分 方法:使用border来绘制三角形:例如 .trangle { ; border-color: transparent; border-style: sol ...
- CSS用border绘制三角形
使用border绘制三角形的思路,就是border尺寸设置一个较大的值,元素自身的宽高设置为0,全部由边线占据,这样每边就会显示为四分之一块的三角形.这样不借助图片,可以直接绘制出三角形了. 一个栗子 ...
- Android OpenGL ES(十)绘制三角形Triangle .
三角形为OpenGL ES支持的面,同样创建一个DrawTriangle Activity,定义6个顶点使用三种不同模式来绘制三角形: float vertexArray[] = { -0.8f, - ...
- Android OpenGL 入门示例----绘制三角形和正方形
Android上对OpenGl的支持是无缝的,所以才有众多3D效果如此逼真的游戏,在Camera的一些流程中也有用到GLSurfaceView的情况.本文记录OpenGL在Android上的入门级示例 ...
- 纯Css绘制三角形箭头三种方法
在制作网页的过程中少不了绘制类似图片的三角形箭头效果,虽然工程量不大,但是确实麻烦.在学习的过程中,总结了以下三种方法,以及相关的例子. 一.三种绘制三角形箭头方法 1.方法一:利用overflow: ...
随机推荐
- 西门子SIMATIC LPMLV30 库的模式和状态管理器
从基于S7-1200 / S7-1500的OMAC PackML V3.0获取到的文章内容,用于记录查看 基本信息 根据PackML_V3.0,该库包含了用于机械模式和状态管理器的功能模块. • 机械 ...
- Linux进程通信 | 共享内存
一.共享内存是什么 在Linux系统中,共享内存是一种IPC(进程间通信)方式,它可以让多个进程在物理内存中共享一段内存区域. 这种共享内存区域被映射到多个进程的虚拟地址空间中,使得多个进程可以直接访 ...
- renren-fast-vue@1.2.2 项目编译报错: build `gulp`
问题呈现: PS D:\Code\Java\ideaWorkspace\renren-fast-vue> npm run build > renren-fast-vue@1.2.2 bui ...
- Vue中$refs的理解
Vue中$refs的理解 $refs是一个对象,持有注册过ref attribute的所有DOM元素和组件实例. 描述 ref被用来给元素或子组件注册引用信息,引用信息将会注册在父组件的$refs对象 ...
- C++ 析构函数的调用顺序
如果指针指向基类,但是指针在运行时指向派生类,则该基类必须具有虚拟析构函数,以便破坏派生类.如果没有虚拟析构函数,则只会运行基类的析构函数. 比如: Base* basePtr; basePtr = ...
- 【Android逆向】破解看雪9月算法破解第二题
1. apk安装到手机,一样的界面,随便输入一样的报错 2. apk拖入到jadx重看看 public native String sha1(String str); static { System. ...
- macOS使用CodeRunner快速配置fortran环境
个人网站:xzajyjs.cn 由于一些项目的缘故,需要有fortran的需求,但由于是M1 mac的缘故,不能像windows那样直接使用vs+ivf这种经典配置.搜了一下网上主流的跨平台方案,主要 ...
- 项目实战:C#上位机+arduino下位机+控制点亮LED灯
前言 当前比较流行的arduino开发,联动做一个Demo. 应用构架 上位机:C#上位机通过串口发送接收控制协议,来控制下位机: 下位机:arduino下位机主控,接受上位机串口协议控 ...
- 【Azure 应用服务】Azure App Service(Windows)环境中如何让.NET应用调用SAP NetWeaver RFC函数
问题描述 在Azure App Service for Windows的环境中,部署.NET应用,其中使用了 SAP NetWeaver RFC函数 (需要加载 sapnwrfc.dll).详细的错误 ...
- 【Azure 应用服务】Azure Function Python函数部署到Azure后遇见 Value cannot be null. (Parameter 'receiverConnectionString') 错误
问题描述 使用VS Code创建Python Function,处理Event Hub中的数据.当部署到Azure Function App后,函数无法执行,查看 Function 日志出现 Valu ...