iOS自定义从底部弹上来的View
概述
详细
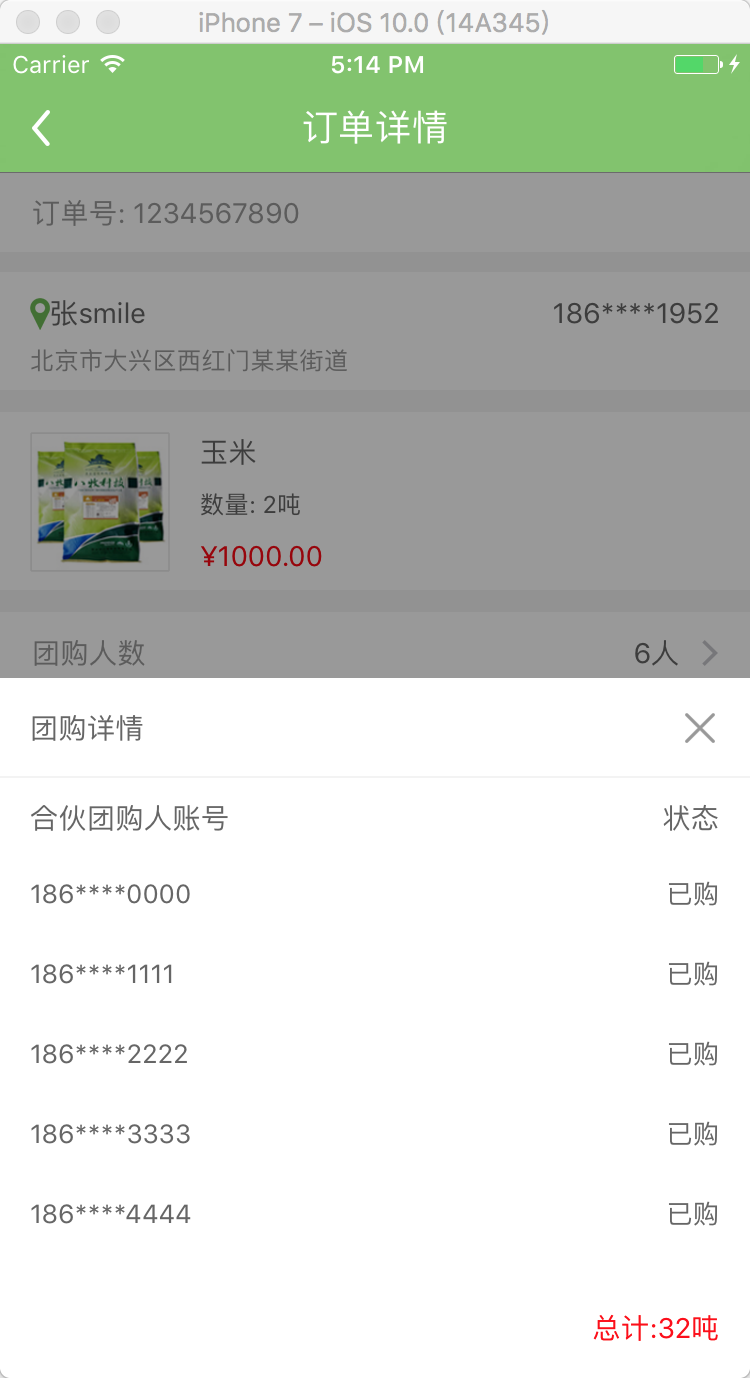
在一些少数据没必要跳转下个界面,我们的产品大大就设计了在当前界面的底部弹上来一个View!
看下项目里截图:
一、主要思路
1、首先封装这个自定义蒙层弹起View: ZLBounceView
2、在ZLTuanNumView里添加你需要的视图 View
3、使用代理和模型传值
二、程序实现
Step1. 首先封装这个自定义蒙层弹起View: ZLBounceView
设置界面相关:
- (void)setupContent {

    self.frame = CGRectMake(0, 0, UI_View_Width, ZLBounceViewHight);

    //alpha 0.0  白色   alpha 1 :黑色   alpha 0~1 :遮罩颜色,逐渐

    self.backgroundColor = [UIColor colorWithRed:0 green:0 blue:0 alpha:0.4];

    self.userInteractionEnabled = YES;

    [self addGestureRecognizer:[[UITapGestureRecognizer alloc] initWithTarget:self action:@selector(disMissView)]];

    if (_contentView == nil) {

        _contentView = [[UIView alloc]initWithFrame:CGRectMake(0, UI_View_Height - ZLTuanNumViewHight, UI_View_Width, ZLBounceViewHight)];

        _contentView.backgroundColor = [UIColor whiteColor];

        [self addSubview:_contentView];

        // 右上角关闭按钮

        UIButton *closeBtn = [UIButton buttonWithType:UIButtonTypeCustom];

        closeBtn.frame = CGRectMake(_contentView.width - 20 - 15, 15, 20, 20);

        [closeBtn setImage:[UIImage imageNamed:@"guanbi"] forState:UIControlStateNormal];

        [closeBtn addTarget:self action:@selector(disMissView) forControlEvents:UIControlEventTouchUpInside];

        [_contentView addSubview:closeBtn];

    }

}
展示从底部向上弹出的UIView(包含遮罩):
- (void)showInView:(UIView *)view {

    if (!view) {

        return;

    }

    [view addSubview:self];

    [view addSubview:_contentView];

    [_contentView setFrame:CGRectMake(0, UI_View_Height, UI_View_Width, ZLBounceViewHight)];

    [UIView animateWithDuration:0.3 animations:^{

        self.alpha = 1.0;

        [_contentView setFrame:CGRectMake(0, UI_View_Height - ZLBounceViewHight, UI_View_Width, ZLBounceViewHight)];

    } completion:nil];

}
移除从上向底部弹下去的UIView(包含遮罩):
- (void)disMissView {

    [_contentView setFrame:CGRectMake(0, UI_View_Height - ZLBounceViewHight, UI_View_Width, ZLBounceViewHight)];

    [UIView animateWithDuration:0.3f

                     animations:^{

                         self.alpha = 0.0;

                         [_contentView setFrame:CGRectMake(0, UI_View_Height, UI_View_Width, ZLBounceViewHight)];

                     }

                     completion:^(BOOL finished){

                         [self removeFromSuperview];

                         [_contentView removeFromSuperview];

                     }];

}
.h 文件里露出方法:
//展示从底部向上弹出的UIView(包含遮罩)

- (void)showInView:(UIView *)view;
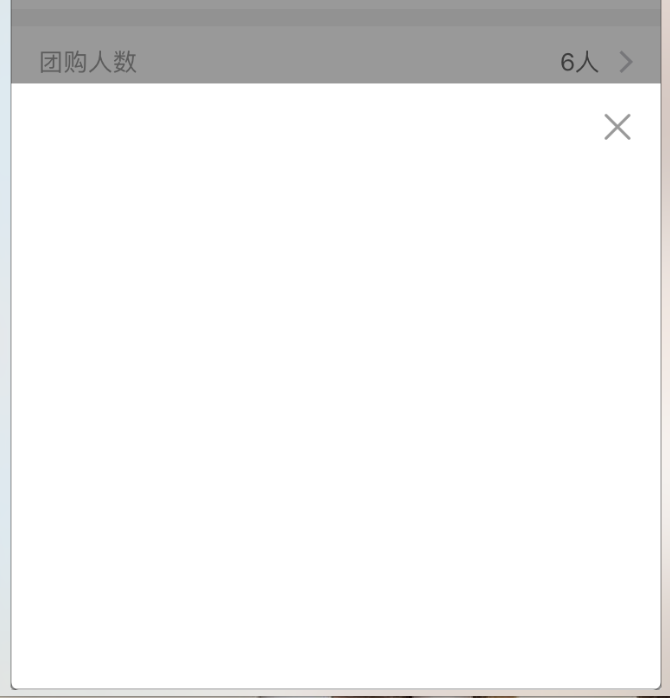
现在的效果图:
Step2. 在ZLBounceView里添加你需要的视图 View, 这里以我的 tableView 为例
<UITableViewDelegate, UITableViewDataSource>
自定义ZLBounceView:
        UITableView *detailTableView = [[UITableView alloc] init];

        detailTableView.backgroundColor = [UIColor clearColor];

        detailTableView.frame = CGRectMake(0, CGRectGetMaxY(partner.frame), UI_View_Width, ZLBounceViewHight - tuan.frame.size.height - partner.frame.size.height - 50 - 20);

        [_contentView addSubview:detailTableView];

        detailTableView.delegate = self;

        detailTableView.dataSource = self;

        self.detailTableView = detailTableView;

        self.detailTableView.separatorStyle = UITableViewCellSeparatorStyleNone;
UITableViewDelegate: 这里用假数据测试
- (UITableViewCell *)tableView:(UITableView *)tableView cellForRowAtIndexPath:(NSIndexPath *)indexPath {

    static NSString *ID = @"cell";

    UITableViewCell *cell = [tableView dequeueReusableCellWithIdentifier:ID];

    if (cell == nil) {

        cell = [[UITableViewCell alloc] initWithStyle:UITableViewCellStyleValue1 reuseIdentifier:ID];

        cell.backgroundColor = [UIColor clearColor];

        cell.textLabel.font = [UIFont systemFontOfSize:13];

        cell.textLabel.textColor = ZLColor(102, 102, 102);

        cell.detailTextLabel.font = [UIFont systemFontOfSize:13];

        cell.detailTextLabel.textColor = ZLColor(102, 102, 102);

    }

    cell.selectionStyle = UITableViewCellSelectionStyleNone;

    // 假数据

    cell.textLabel.text = [NSString stringWithFormat:@"%ld", (long)indexPath.row];

    cell.detailTextLabel.text = @"已购";

    self.total.text = [NSString stringWithFormat:@"总计:%@吨", @"100"];

    return cell;

}
Step3. 使用代理和模型传值
3.1 在当前ViewController中的所需按钮,添加点击事件
[testBtn addTarget:self action:@selector(testBtnClicked) forControlEvents:UIControlEventTouchUpInside];
3.2 添加点击事件则为创建当前弹起View
// 详情展开view

@property (nonatomic, strong) ZLBounceView *tuanNumView;
- (void)testBtnClicked {

    _tuanNumView = [[ZLBounceView alloc]init];

    [_tuanNumView showInView:self.view];

}
3.3 我这里使用假数据,正常情况则是请求数据或者上个界面的数据用 Model 传过来
_tuanNumView.tuanModel = self.orderModel;
Step4. 加载从底部向上弹起的UIView; 点击一下遮罩或界面上关闭按钮,页面会自动下去(从上向下)
运行效果图如下:
三、其他补充
压缩文件截图:
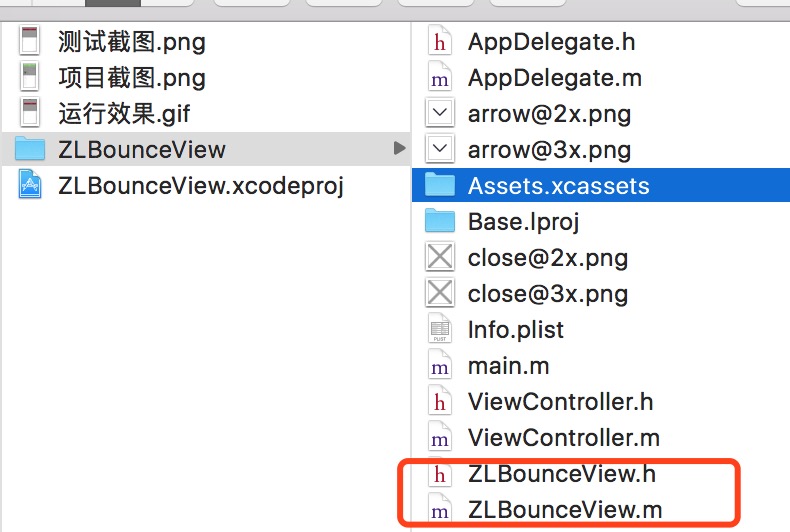
目前是项目中直接操作, 界面性问题可以根据自己项目需求调整即可, 具体可参考代码, 项目能够直接运行!
注:本文著作权归作者,由demo大师发表,拒绝转载,转载需要作者授权
iOS自定义从底部弹上来的View的更多相关文章
- iOS 可高度自定义的底部弹框
技术: iOS Objective-C 概述 一个可以让开发者通过编写 tableView 的内容随心所欲的定制自己想要的底部弹框 详细 代码下载:http://www.demodashi.com ...
- MUI 自定义从底部弹出的弹出框
1)效果: 点击“点击就送”那个按钮之后,弹窗从底部弹出并自带蒙层,然后点击弹窗之外的灰色部分就从底部消失: 第一步:引入 mui.css或者mui.min.css 引入 mui.min.js或者mu ...
- MUI 自定义从底部弹出的弹出框内容
最近做的项目都是在使用mui做手机网页,大致是下面的这种弹出效果 首先,引入 mui.css或者mui.min.css 引入 mui.min.js或者mui.js 第二步:<a href=&qu ...
- iOS - (简单平移动画/弹出View的使用)
在iOS 开发中,使用平移动画的频率越来越高,给人的感觉就是很炫酷很流畅,起到增强用户体验的作用.在APP开发中实现动画效果有很多种方式,但我目前是使用较多的是平移动画,顺便也在此做一些小小的总结,大 ...
- 仿iOS底部弹出popUpWindow
上面为弹出来的效果 popUpWindow布局: <?xml version="1.0" encoding="utf-8"?> <Linear ...
- UIPresentationController - iOS自定义模态弹出框
参考: https://developer.apple.com/library/archive/featuredarticles/ViewControllerPGforiPhoneOS/Definin ...
- 转 android 从底部弹出一个popuwindow,渐入渐出效果。我这里是用在购物车需要选择购买选项的操作。
最近要改客户端,需要实现一个从底部弹出的popuwindow,像我这种渣渣android技术,能整出popuwindow但是整不出动画,百度之,记录一下. 从下面这个地址转的 http://blog. ...
- iOS自定义转场动画的实现
iOS中熟悉的是导航栏中的push和pop这两种动画效果,在这里我们可以自己实现自己想要的一些转场动画 下面是我自己创建转场动画的过程 1.新建一个文件继承自NSObject ,遵循协议UIViewC ...
- 微信小程序之底部弹框预约插件
代码地址如下:http://www.demodashi.com/demo/13982.html 一.前期准备工作: 软件环境:微信开发者工具 官方下载地址:https://mp.weixin.qq.c ...
随机推荐
- Android实例剖析笔记(二)
摘要:用实例讲解Andriod的开发过程,以NotesList为实例介绍Android的菜单机制 简介 android提供了三种菜单类型,分别为options menu,context menu,su ...
- 解决eclipse安装maven的问题:Unable to update index for central|http://repo1.maven.org/maven2
问题产生如下:因为单位使用了过滤,访问Internet时,超过10M的内容就拒绝.因为maven插件在初始时,需要下载Maven的index文件,这个文件比较大,有38M多,下载不成功.所以造成使用M ...
- Using platform encoding (GBK actually) to copy filtered resources, i.e. build is platform dependent!
执行Maven Install打包的时候,提示以下警告信息: [WARNING] Using platform encoding (GBK actually) to copy filtered res ...
- json-lib包笔记
json-lib.jar开发包使用: 依赖包:commons-beanutils.jar;commons-httpclient.jar;commons-lang.jar;ezmorph.jar;不少人 ...
- 关于 json 单引号和双引号区别--请使用双引号
双引号才是json 的标准,单引号是不规范的(虽然在js 中是行的通的)! 由于某些原因,在将js json数据传到as 中处理的时候出现了“无效的json解析输入” ,于是查找了一下js参数是否有问 ...
- php的初步了解
刚刚学习PHP,在学校中没有接触过这个语言,但是身边的人都说php好,经过这几天的学习,我对它的基础有了一定的认知和了解,php是“PHP Hypertext Preprocessor”的首字母缩写, ...
- C语言条件编译
使用与平台有关的C语言函数,可能会使得程序不具有可移植性.比如Socket编程.多线程编程等是与平台有关的. 若想将程序做成平台无关的就需要用到与平台相关的条件编译. 下面转自:http://blog ...
- 网上收集:跟着 8 张思维导图学习 Javascript【转】
学习的道路就是要不断的总结归纳,好记性不如烂笔头,so,下面将po出8张javascript相关的思维导图. 思维导图小tips:思维导图又叫心智图,是表达发射性思维的有效的图形思维工具 ,它简单却又 ...
- 超酷的响应式dribbble设计作品瀑布流布局效果
相信做设计的朋友肯定都知道dribbble.com,它是一个非常棒的设计师分享作品的网站,全世界数以万计的设计高手和行家都在这个网站上分享自己的作品,当然,如果你常在上面闲逛的话,经常得到一些免费的好 ...
- 【Python】Django数据模型、级联删除、级联更新、ER图导出等
在本文中,我们将向读者详细介绍如何在更新和删除父表数据的同时,触发有关子表数据的级联更新和删除操作.您将看到当使用InnoDB表的时候,借助于外键约束就可以轻松搞定这一过程. 一.利用外键约束更新并删 ...